2.10 Flowing LEDs
The kit is equipped with a WS2812 RGB LED Strip, which can display colorful colors, and each LED can be independently controlled.
Here we try to use the tilt switch to control the flow direction of the LEDs on the WS2812 RGB LED Strip.
Required Components
In this project, we need the following components.
It’s definitely convenient to buy a whole kit, here’s the link:
Name |
ITEMS IN THIS KIT |
LINK |
|---|---|---|
Kepler Kit |
450+ |
You can also buy them separately from the links below.
SN |
COMPONENT |
QUANTITY |
LINK |
|---|---|---|---|
1 |
1 |
||
2 |
Micro USB Cable |
1 |
|
3 |
1 |
||
4 |
Several |
||
5 |
1(10KΩ) |
||
6 |
1 |
||
7 |
1 |
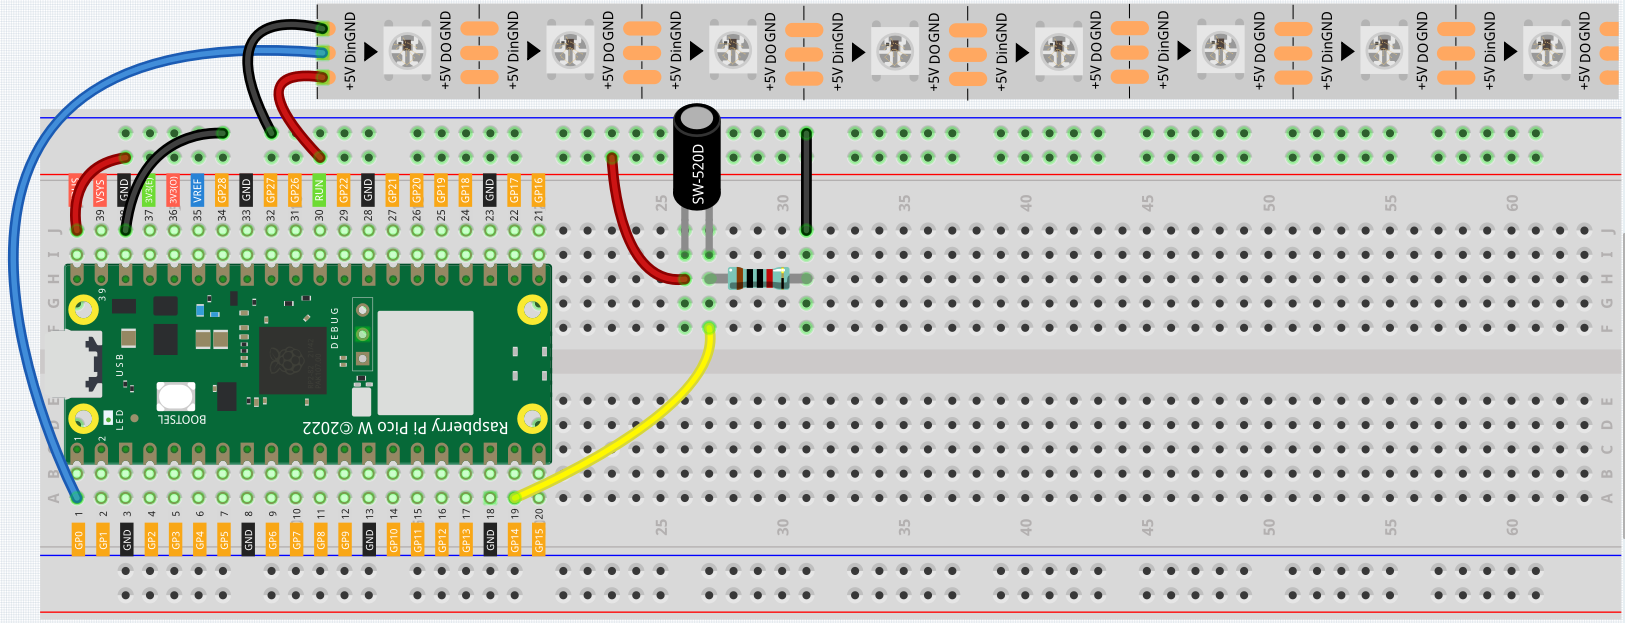
Wiring
Code
Note
You can refer to the image below to write code by dragging and dropping.
Import
2.10_flowing_led.pngfrom the path ofkepler-kit-main\piper. For detailed tutorials, please refer to Import the Code.
After connecting Pico W, click the Start button and the code starts to run.
When the tilt switch is placed vertically, it makes the LEDs on the WS2812 RGB LED Strip light up one by one in green, and when the tilt switch is placed horizontally, the LEDs light up one by one in the opposite direction in green.
Programming
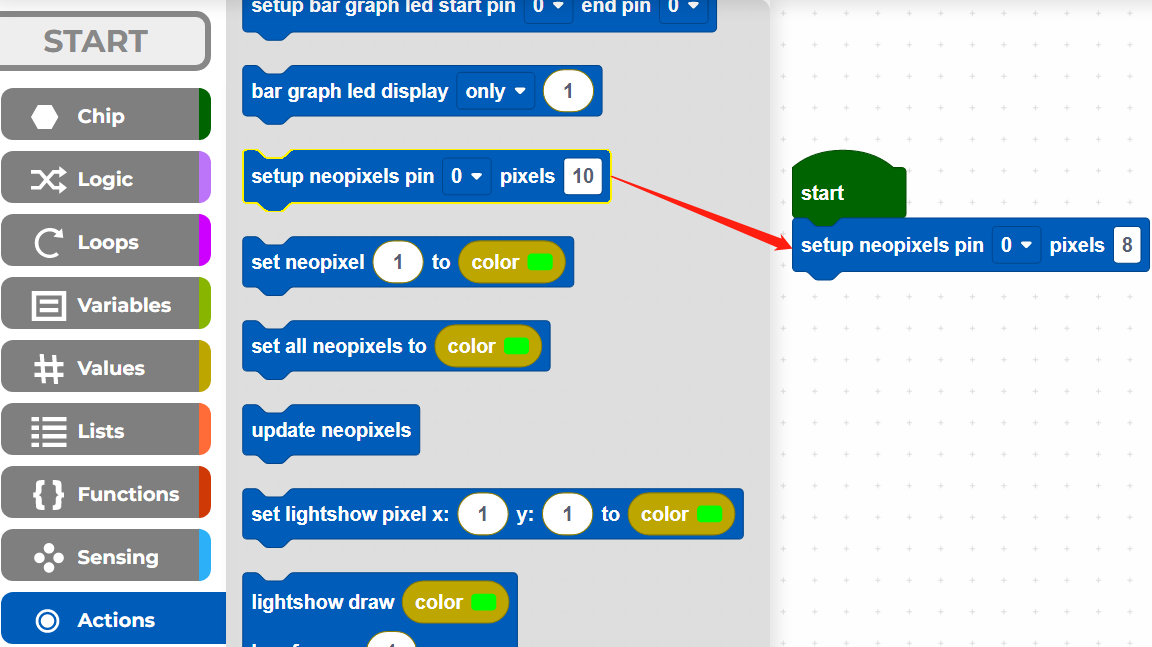
Step 1: Use the [setup neopixel pin() pixels()] block in the Actions palette to initialize the WS2812 RGB LED Strip. 0 means the connected pin is GP0 and 8 means there are 8 RGB LEDs on the WS2812 RGB LED Strip.
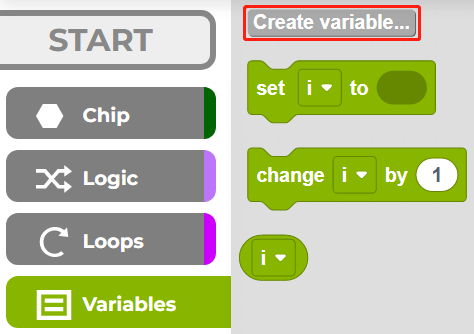
Step 2: In the Variables palette, click the Create variable button to create a variable called i to represent the LEDs on the WS2812 RGB LED Strip.
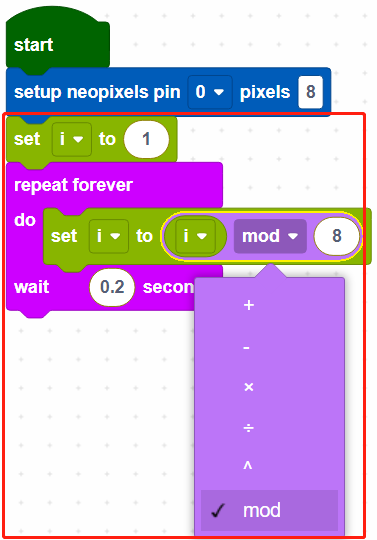
Step 3: Set the initial value of variable i to 1 (the LED near the wires), then in [repeat forever] block, use [() mod ()] to set the value of i from 0 to 7. e.g. 1 mod 8 = 1… 8 mod 8 =0, 9 mod 8 =1, etc.
[() mod ()]: This is the modulo operator block, from the Loops palette, drop down [() = ()] to select mod.
Step 4: Set all neopixels to black to make all LEDs go off, then use [updates neopixels] to make this effect update to the WS2812 RGB LED Strip.
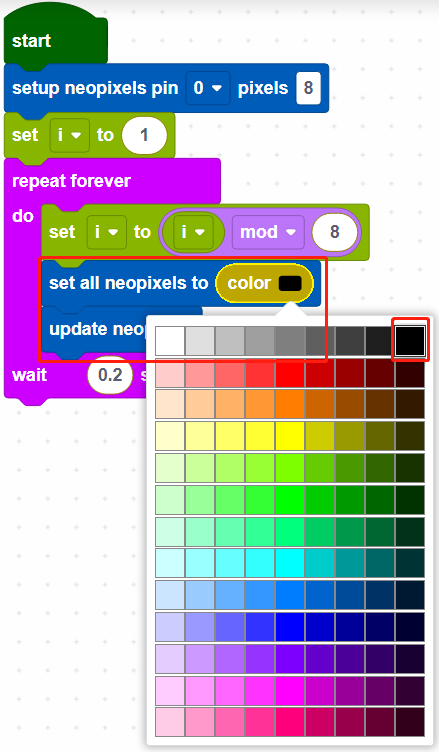
[set all neopixels to ()]: Use to set a color for all LEDs, there are 13*9 colors, the top right color is black to make LEDs to go off.
[updates neopixels]: Update the effect to the WS2812 RGB LED Strip.
Step 5: If pin14 is read high, let the LEDs on the WS2812 RGB LED Strip light up one by one in green, otherwise light up green one by one in the opposite direction.
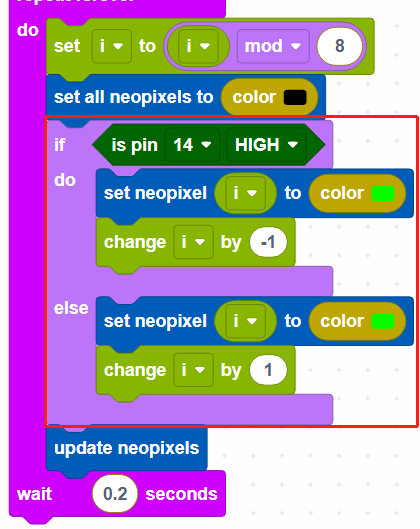
[change () by ()]: Used to increase (positive) or decrease (negative) the value of a variable by a specific step.
