2.3 Service Bell
For this project we used a microswitch and an active buzzer to create a service bell. Tap the switch and the buzzer makes a sound.
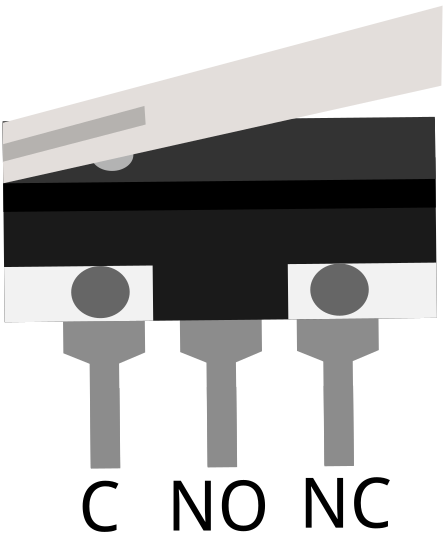
Micro Switch is also a 3-pin device, the sequence of the 3 pins are C (common pin), NO (normally open) and NC (normally closed).
When the micro switch is not pressed, 1 (C) and 3 (NC) are connected together, when pressed 1 (C) and 2 (NO) are connected together.
Required Components
In this project, we need the following components.
It’s definitely convenient to buy a whole kit, here’s the link:
Name |
ITEMS IN THIS KIT |
LINK |
|---|---|---|
Kepler Kit |
450+ |
You can also buy them separately from the links below.
SN |
COMPONENT |
QUANTITY |
LINK |
|---|---|---|---|
1 |
1 |
||
2 |
Micro USB Cable |
1 |
|
3 |
1 |
||
4 |
Several |
||
5 |
2(1KΩ, 10KΩ) |
||
6 |
1(104) |
||
7 |
1 |
||
8 |
1(S8050) |
||
9 |
Active Buzzer |
1 |
Wiring
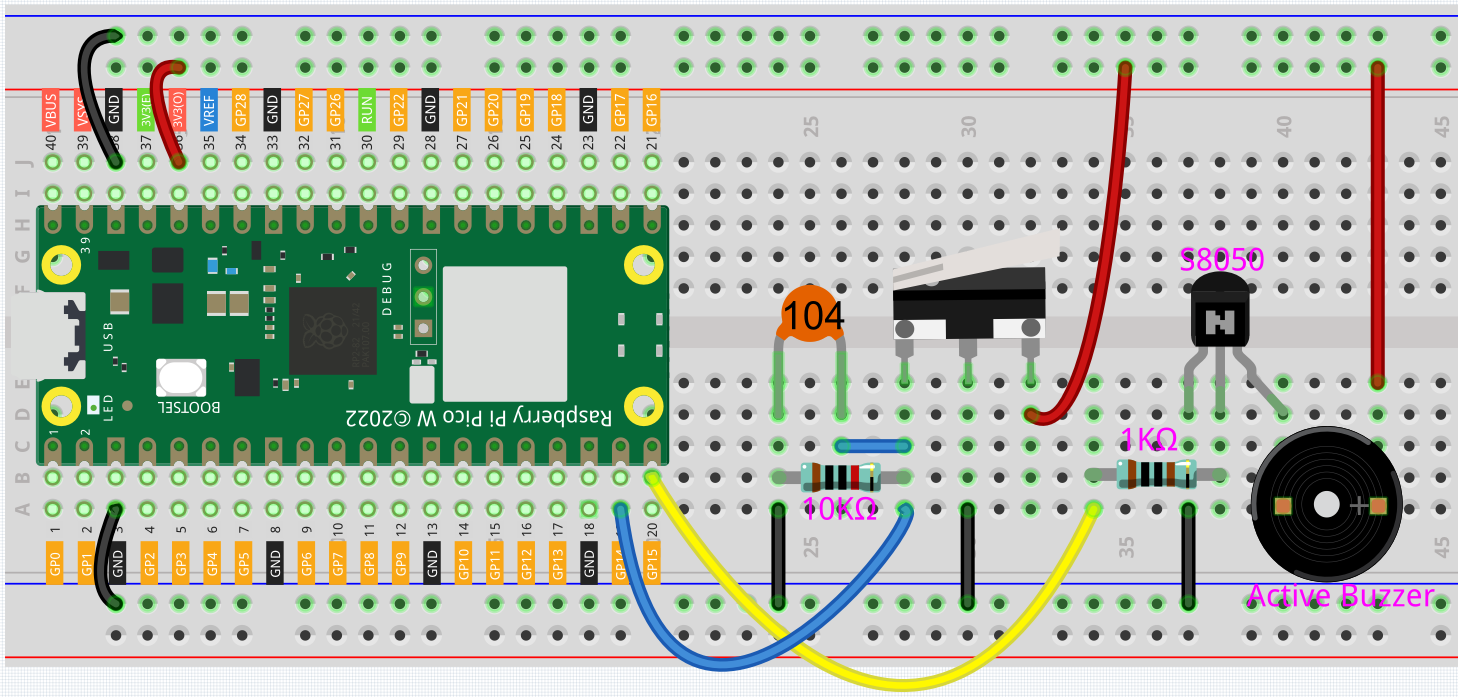
By default, pins 1 and 3 of the Micro Switch are connected together and GP14 is low. When the Micro Switch is pressed, GP14 is high.
GP15 outputs high to make the buzzer sound.
Code
Note
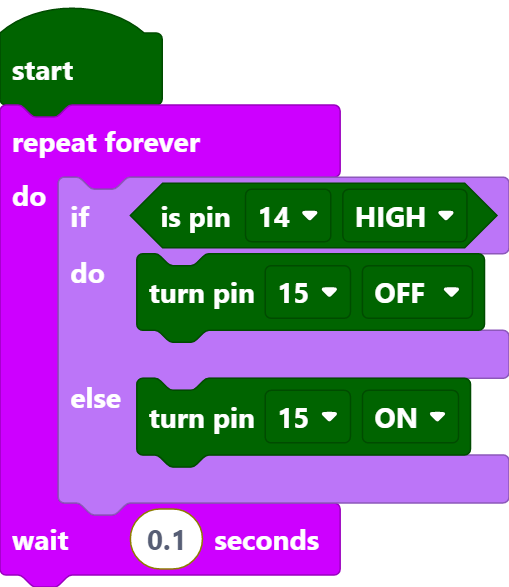
You can refer to the image below to write code by dragging and dropping.
Import
2.3_service_bell.pngfrom the path ofkepler-kit-main\piper. For detailed tutorials, please refer to Import the Code.
After connecting Pico W, click the Start button and the code starts to run. Tap the switch and the buzzer makes a sound.
Note
This project code is exactly the same as the previous project 2.2 Button.


