Note
Hello, welcome to the SunFounder Raspberry Pi & Arduino & ESP32 Enthusiasts Community on Facebook! Dive deeper into Raspberry Pi, Arduino, and ESP32 with fellow enthusiasts.
Why Join?
Expert Support: Solve post-sale issues and technical challenges with help from our community and team.
Learn & Share: Exchange tips and tutorials to enhance your skills.
Exclusive Previews: Get early access to new product announcements and sneak peeks.
Special Discounts: Enjoy exclusive discounts on our newest products.
Festive Promotions and Giveaways: Take part in giveaways and holiday promotions.
👉 Ready to explore and create with us? Click [here] and join today!
5.11.2 IR Receiver
In this project, you will learn to use IR Receiver.
An infrared-receiver is a component which receives infrared signals and can independently receive infrared rays and output signals compatible with TTL level. It is similar with a normal plastic-packaged transistor in size and is suitable for all kinds of infrared remote control and infrared transmission.
Required Components
In this project, we need the following components.
It’s definitely convenient to buy a whole kit, here’s the link:
Name |
ITEMS IN THIS KIT |
LINK |
|---|---|---|
3 in 1 Starter Kit |
380+ |
You can also buy them separately from the links below.
COMPONENT INTRODUCTION |
PURCHASE LINK |
|---|---|
- |
Schematic

Wiring
In this example, we wire up the left pin of IR Receiver to pin 11, the middle pin to GND, and the right pin to 5V.

Code
Note
Open the
5.11.ir_receiver.inofile under the path of3in1-kit\basic_project\5.11.ir_receiver.Or copy this code into Arduino IDE.
The
IRremotelibrary is used here, you can install it from the Library Manager.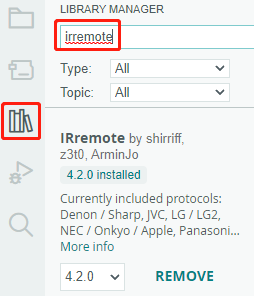
After uploading the codes to the R3 board, you can see that the current value of the pressed button of IR Remote Controller displays on the serial monitor.
How it works?
This code is designed to work with an infrared (IR) remote control using the IRremote library. Here’s the breakdown:
Include Libraries: This includes the
IRremotelibrary, which provides functions to work with IR remote controls.#include <IRremote.h>
Defines the Arduino pin to which the IR sensor’s signal pin is connected.
const int IR_RECEIVE_PIN = 11; // Define the pin number for the IR Sensor
Initializes serial communication at a baud rate of 9600. Initializes the IR receiver on the specified pin (
IR_RECEIVE_PIN) and enables LED feedback (if applicable).void setup() { Serial.begin(9600); // Start serial communication at 9600 baud rate IrReceiver.begin(IR_RECEIVE_PIN, ENABLE_LED_FEEDBACK); // Start the IR receiver }
The loop runs continuously to process incoming IR remote signals.
void loop() {
    if (IrReceiver.decode()) {
        String decodedValue = decodeKeyValue(IrReceiver.decodedIRData.command);
        if (decodedValue != "ERROR") {
            Serial.println(decodedValue);
            delay(100);
        }
        IrReceiver.resume();  // Enable receiving of the next value
    }
}
Checks if an IR signal is received and successfully decoded.
Decodes the IR command and stores it in
decodedValueusing a customdecodeKeyValue()function.Checks if the decoded value is not an error.
Prints the decoded IR value to the serial monitor.
Resumes IR signal reception for the next signal.