Note
Hello, welcome to the SunFounder Raspberry Pi & Arduino & ESP32 Enthusiasts Community on Facebook! Dive deeper into Raspberry Pi, Arduino, and ESP32 with fellow enthusiasts.
Why Join?
Expert Support: Solve post-sale issues and technical challenges with help from our community and team.
Learn & Share: Exchange tips and tutorials to enhance your skills.
Exclusive Previews: Get early access to new product announcements and sneak peeks.
Special Discounts: Enjoy exclusive discounts on our newest products.
Festive Promotions and Giveaways: Take part in giveaways and holiday promotions.
👉 Ready to explore and create with us? Click [here] and join today!
5.12 Serial Read
You may have noticed this when using the Serial.print() function.
Since there is printing, is there reading? What is the text box on the Serial Monitor used for?
Yes, you guessed it, there are ways to control programs and circuits by entering information through the text box on the Serial Monitor.
In this project, we will use the I2C LCD1602 to display the text entered in the Serial Monitor in order to experience the usage of Serial.read().
Required Components
In this project, we need the following components.
It’s definitely convenient to buy a whole kit, here’s the link:
Name |
ITEMS IN THIS KIT |
LINK |
|---|---|---|
3 in 1 Starter Kit |
380+ |
You can also buy them separately from the links below.
COMPONENT INTRODUCTION |
PURCHASE LINK |
|---|---|
Schematic

Wiring

Code
Note
Open the
5.12.serial_read.inofile under the path of3in1-kit\basic_project\5.12.serial_read.Or copy this code into Arduino IDE.
The
LiquidCrystal I2Clibrary is used here, you can install it from the Library Manager.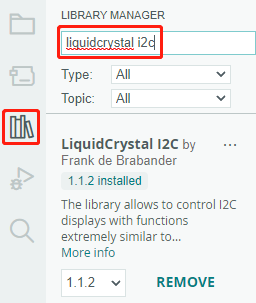
After the code is uploaded successfully, you can enter text in the text box on the serial monitor, and the LCD will display the information.
How it works?
void loop()
{
// when characters arrive over the serial port...
    if (Serial.available()) {
        // wait a bit for the entire message to arrive
        delay(100);
        // clear the screen
        lcd.clear();
        // read all the available characters
        while (Serial.available() > 0) {
            // display each character to the LCD
            lcd.write(Serial.read());
        }
    }
}
Serial.available()can get the number of characters available in the incoming stream when you type something from the textbox. Since there are two terminators in the input, you actually have 3 characters when you typeA, and 4 characters when you typeAB.Serial.read()will take the first character from the incoming stream. For example, if you typedAB, callingSerial.read()only once, will get the characterA; The second call, you will getB; the third and fourth call, you will get two end symbols; calling this function when the input stream has no characters available will result in an error.
To sum up, it is common to combine the above two, using a while loop to read all characters entered each time.
while (Serial.available() > 0) {
    Serial.print(Serial.read());
}
By the way, if you don’t use Serial.read() to get characters from the incoming stream, the characters from the incoming stream will be stacked together.
For example, if you type A followed by AB, the incoming stream will accumulate 7 characters.