Note
Hello, welcome to the SunFounder Raspberry Pi & Arduino & ESP32 Enthusiasts Community on Facebook! Dive deeper into Raspberry Pi, Arduino, and ESP32 with fellow enthusiasts.
Why Join?
Expert Support: Solve post-sale issues and technical challenges with help from our community and team.
Learn & Share: Exchange tips and tutorials to enhance your skills.
Exclusive Previews: Get early access to new product announcements and sneak peeks.
Special Discounts: Enjoy exclusive discounts on our newest products.
Festive Promotions and Giveaways: Take part in giveaways and holiday promotions.
👉 Ready to explore and create with us? Click [here] and join today!
Lesson 2 Flowing LED Lights
Introduction
In this lesson, we will conduct a simple yet interesting experiment - using LEDs to create flowing LED lights. As the name suggests, these eight LEDs in a row successively light up and dim one after another, just like flowing water.
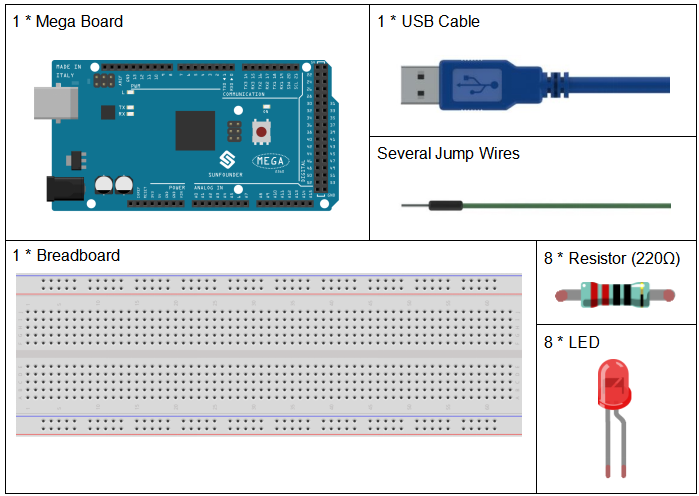
Components
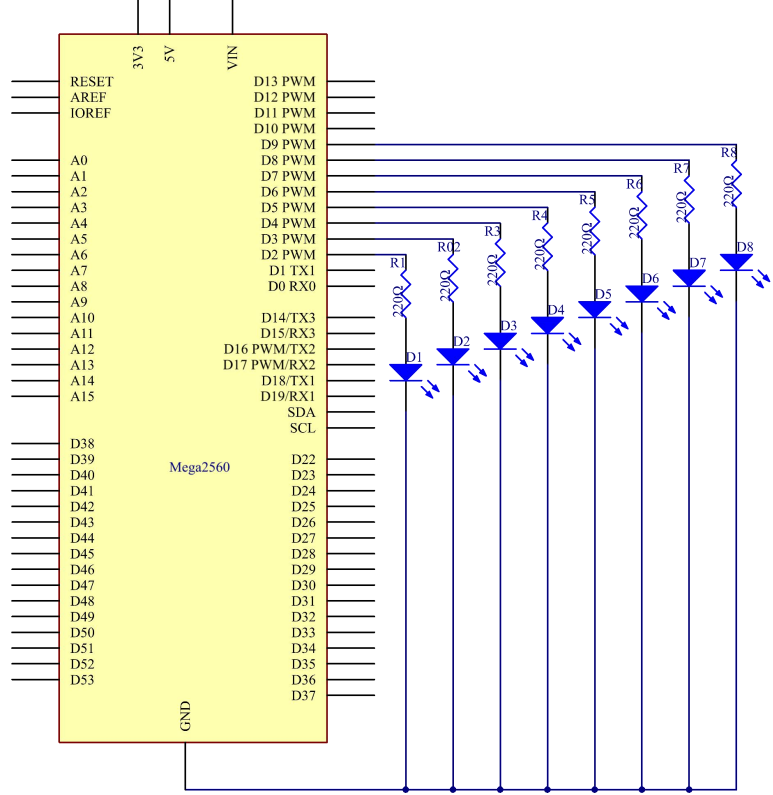
Schematic Diagram
The principle of this experiment is simply to turn on eight LEDs in turn. The eight LEDs are connected to pin 2-pin 9 respectively. Set them as High level and the corresponding LED at the pins will light up. Control the time of each LED brightening and you will see flowing LED lights.
The schematic diagram:
Experimental Procedures
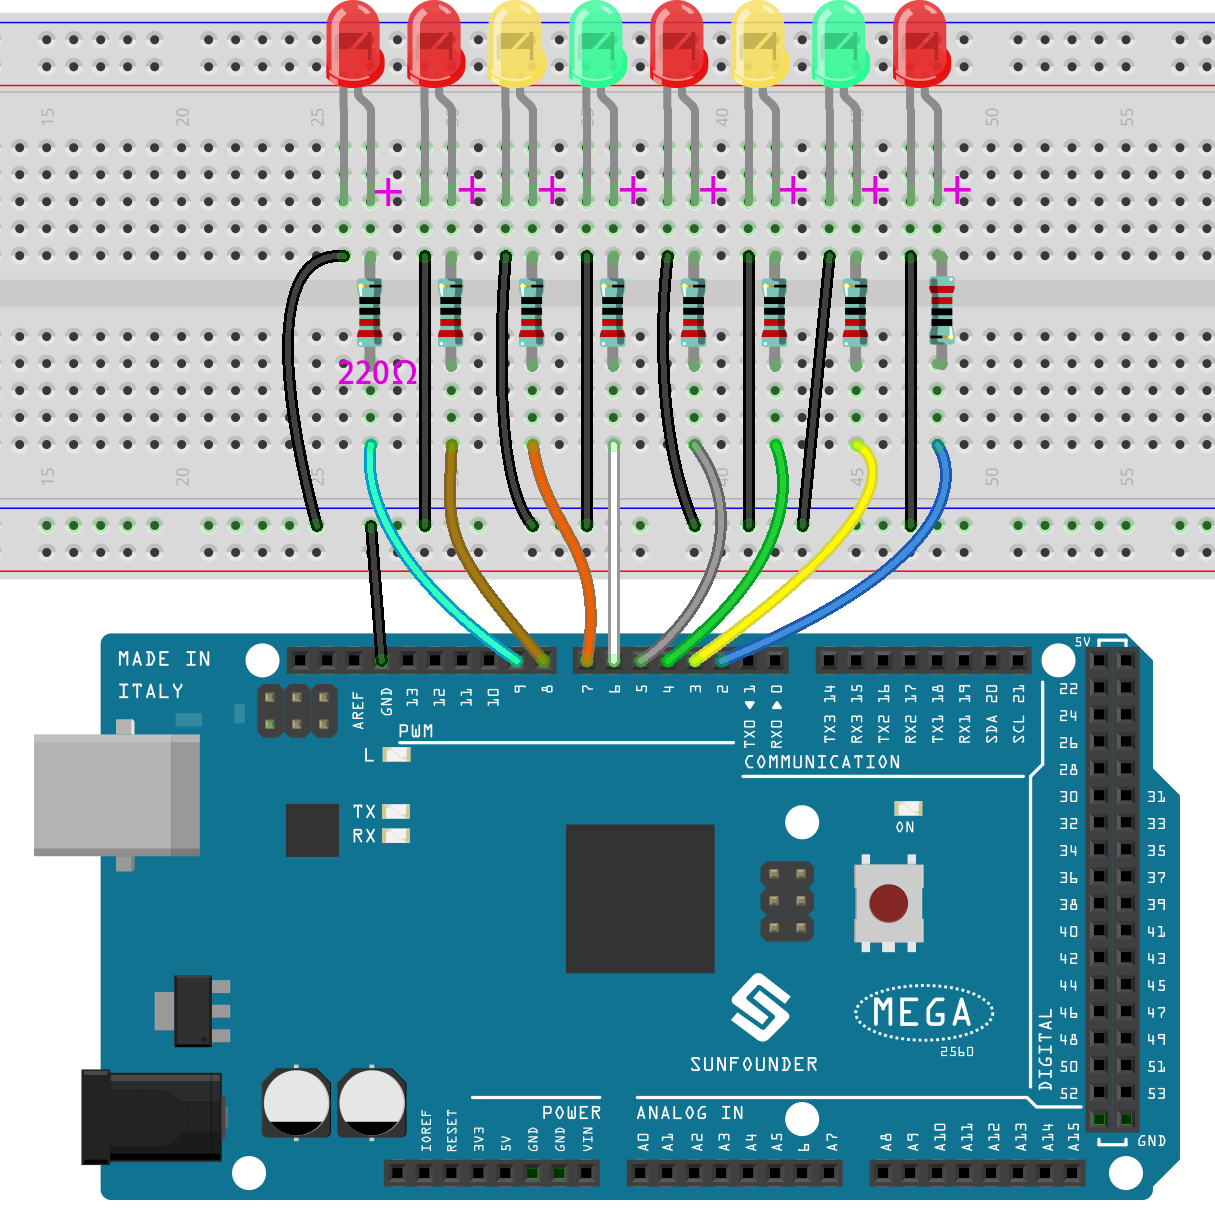
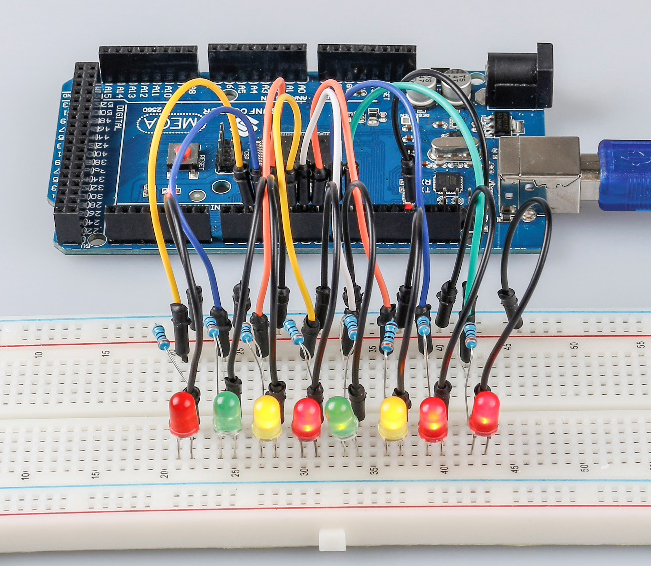
Step 1: Build the circuit
Step 2: Open the code file.
Step 3: Select the Board and Port.
Step 4: Upload the sketch to the board.
Now, you should see eight LEDs brighten one by one from the LED connected to pin 2 to that to pin 9, and then dim in turn from the LED at pin 9 to the one at pin 2. After that, the LEDs will light up from the LED at pin 9 to that at pin 2 and dim from the LED at pin 2 to that at pin 9. This whole process will repeat until the circuit is power off.
Code
Code Analysis
for() statement
for (int i = 2; i <= 9; i++)
/*8 LEDs are connect to pin2-pin9, When i=2,
which accords with the condition i<=9,
then run the code in the curly braces, set the pin2 to OUTPUT.
After that run i++(here in i = i + 1, the two "i"s are not the same,
but i\ :sub:`now` = i\ :sub:`before` + 1).
Use the for() statement to set pin 2-pin 9 as output respectively.*/

{

    pinMode(i, OUTPUT); //initialize a as an output

}
for (initialization; condition; increment) { //statement(s); }: The
for statement is used to repeat a block of statements enclosed in curly
braces.The initialization happens first and exactly once. Each time
through the loop, the condition is tested; if it’s true, the
statement block, and the increment is executed, then the
condition is tested again. When the condition becomes false, the
loop ends.
Set flowing led lights
Use the for() statement to set pin2-pin9 to a high level inturn.
for (int a = 2; a <= 9; a++)

{

    digitalWrite(a, HIGH); //turn this led on

    delay(100); //wait for 100 ms

}
Then let the 8 LEDs go out from pin9 to pin2 in turn.
for (int a = 9; a <= 2; a--)
{
    digitalWrite(a, LOW); //turn this led on
    delay(100); //wait for 100 ms
}
Finally, use the same way to turn on the 8 LEDs from pin9 to pin2 in turn and let them go out in turn.
for (int a = 9; a <= 2; a--)
{
    digitalWrite(a, HIGH); //turn this led on
    delay(100); //wait for 100 ms
}
for (int a = 2; a <= 9; a++)
{
    digitalWrite(a, LOW); //turn this led on
    delay(100); //wait for 100 ms
}
Experiment Summary
Through this experiment, you have learned how to use for() statement which is a very useful statement when you want to short the code.