Note
Hello, welcome to the SunFounder Raspberry Pi & Arduino & ESP32 Enthusiasts Community on Facebook! Dive deeper into Raspberry Pi, Arduino, and ESP32 with fellow enthusiasts.
Why Join?
Expert Support: Solve post-sale issues and technical challenges with help from our community and team.
Learn & Share: Exchange tips and tutorials to enhance your skills.
Exclusive Previews: Get early access to new product announcements and sneak peeks.
Special Discounts: Enjoy exclusive discounts on our newest products.
Festive Promotions and Giveaways: Take part in giveaways and holiday promotions.
👉 Ready to explore and create with us? Click [here] and join today!
Lesson 22 Simple Creation-Small Fan
Introduction
In this experiment, we will learn how to control the direction and speed of a small-sized DC motor by a driver chip L293D. Making simple experiments, we will just make the motor rotate left and right, and accelerate or decelerate automatically.
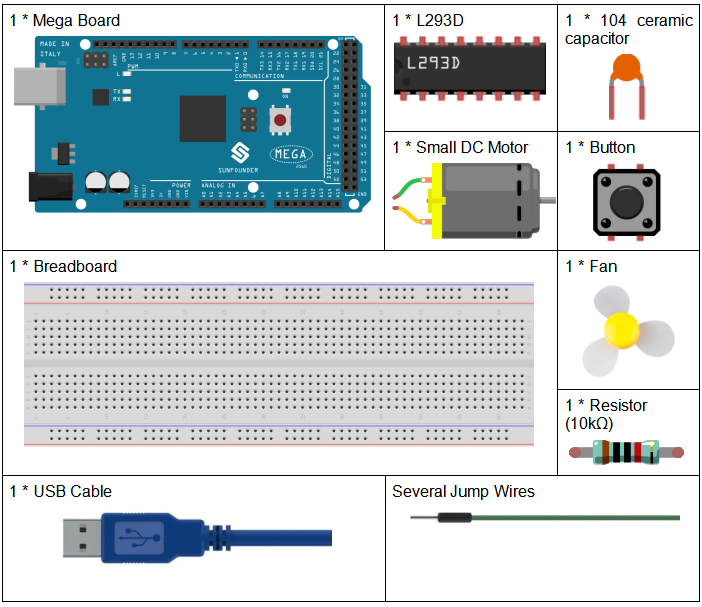
Components
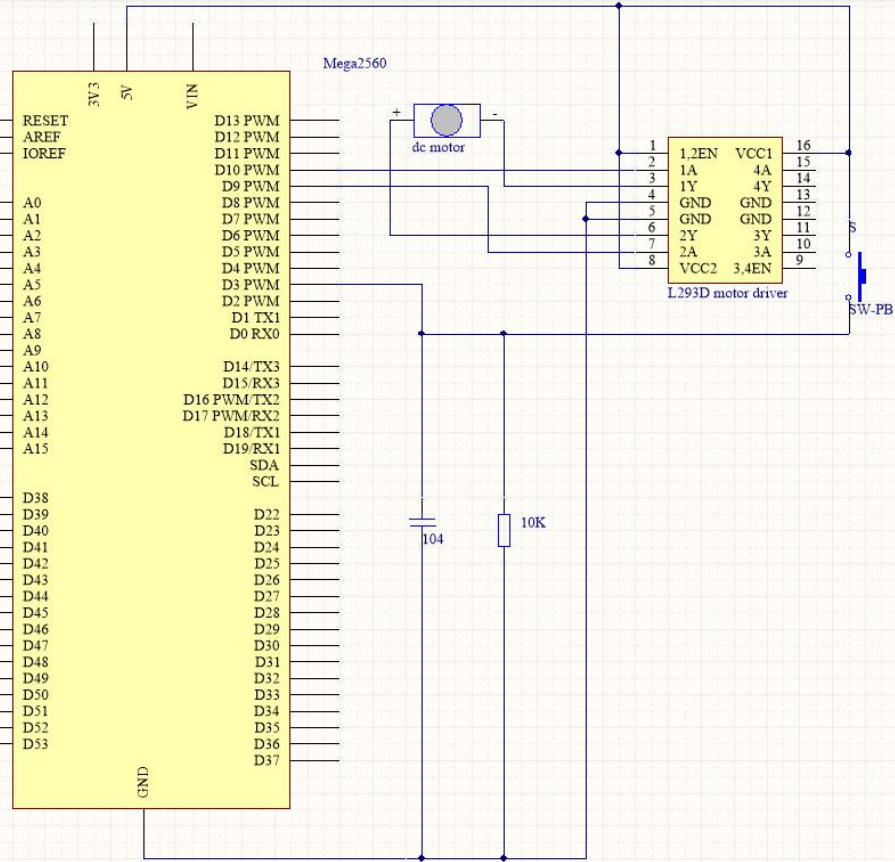
Schematic Diagram
The maximum current of an Arduino I/O port is 20mA but the drive current of a motor is at least 70mA. Therefore, we cannot directly use the I/O port to drive the current; instead, we can use an L293D to drive the motor.
The Enable pin 1,2EN of the L293D are connected to 5V already, so L293D is always in the working state. Connect pin 1A and 2A to pin 9 and 10 of the control board respectively. The two pins of the motor are connected to pin 1Y and 2Y respectively. When pin 10 is set as High level and pin 9 as Low, the motor will start to rotate towards one direction. When the pin 10 is Low and pin 9 is High, it rotates in the opposite direction.
The schematic diagram:
Experimental Procedures
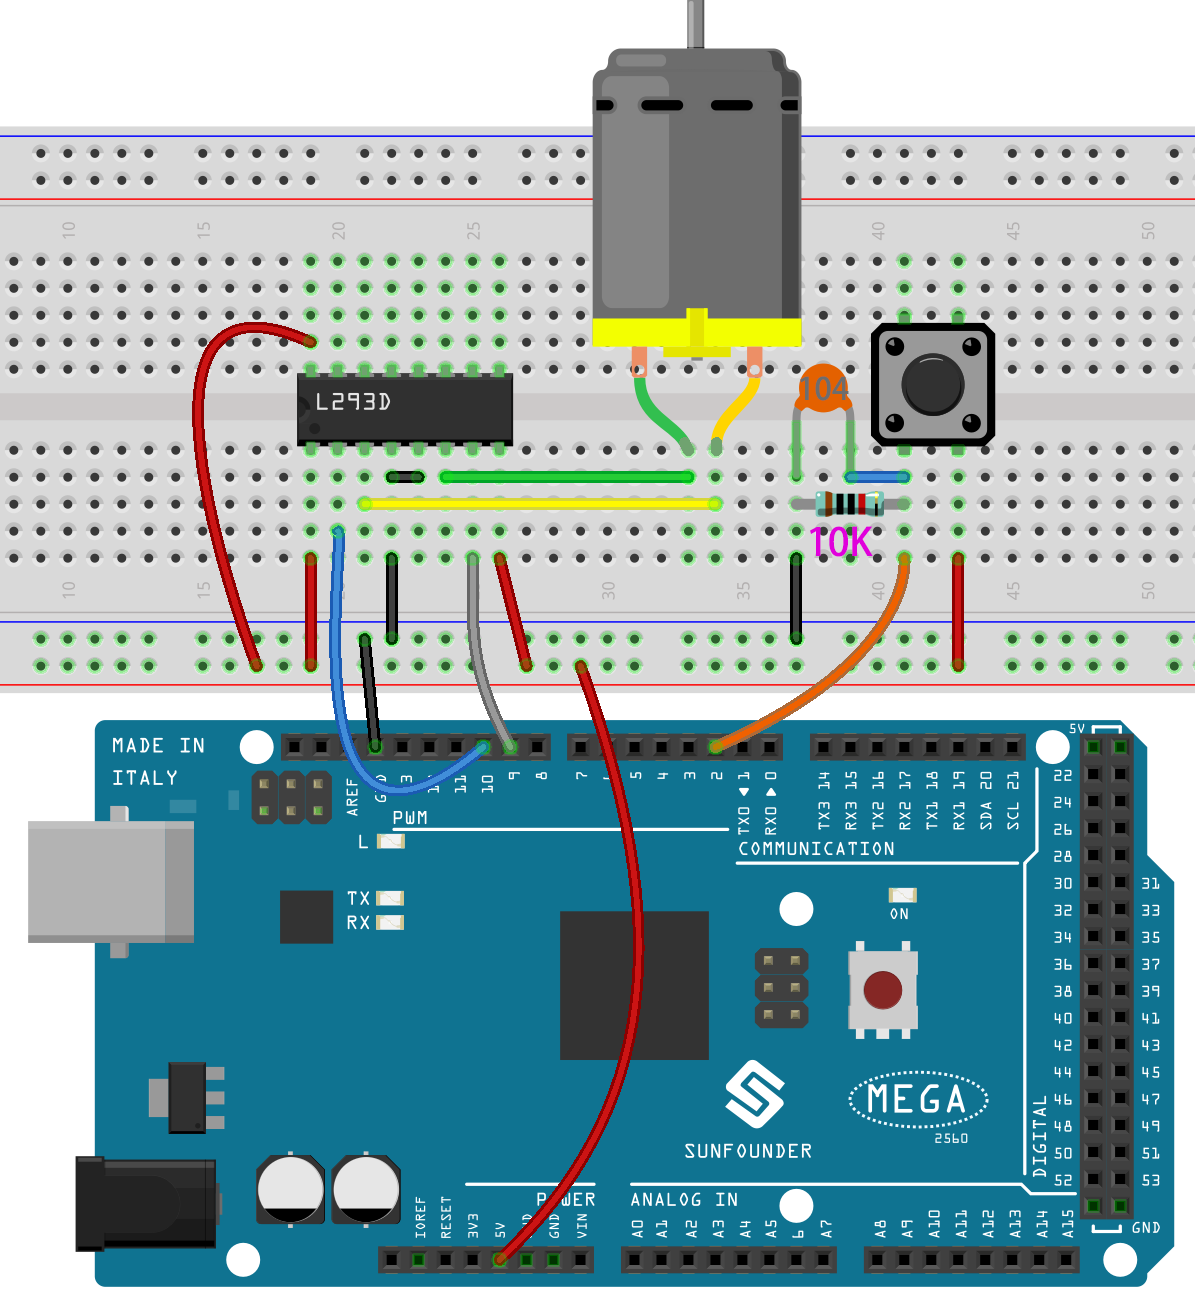
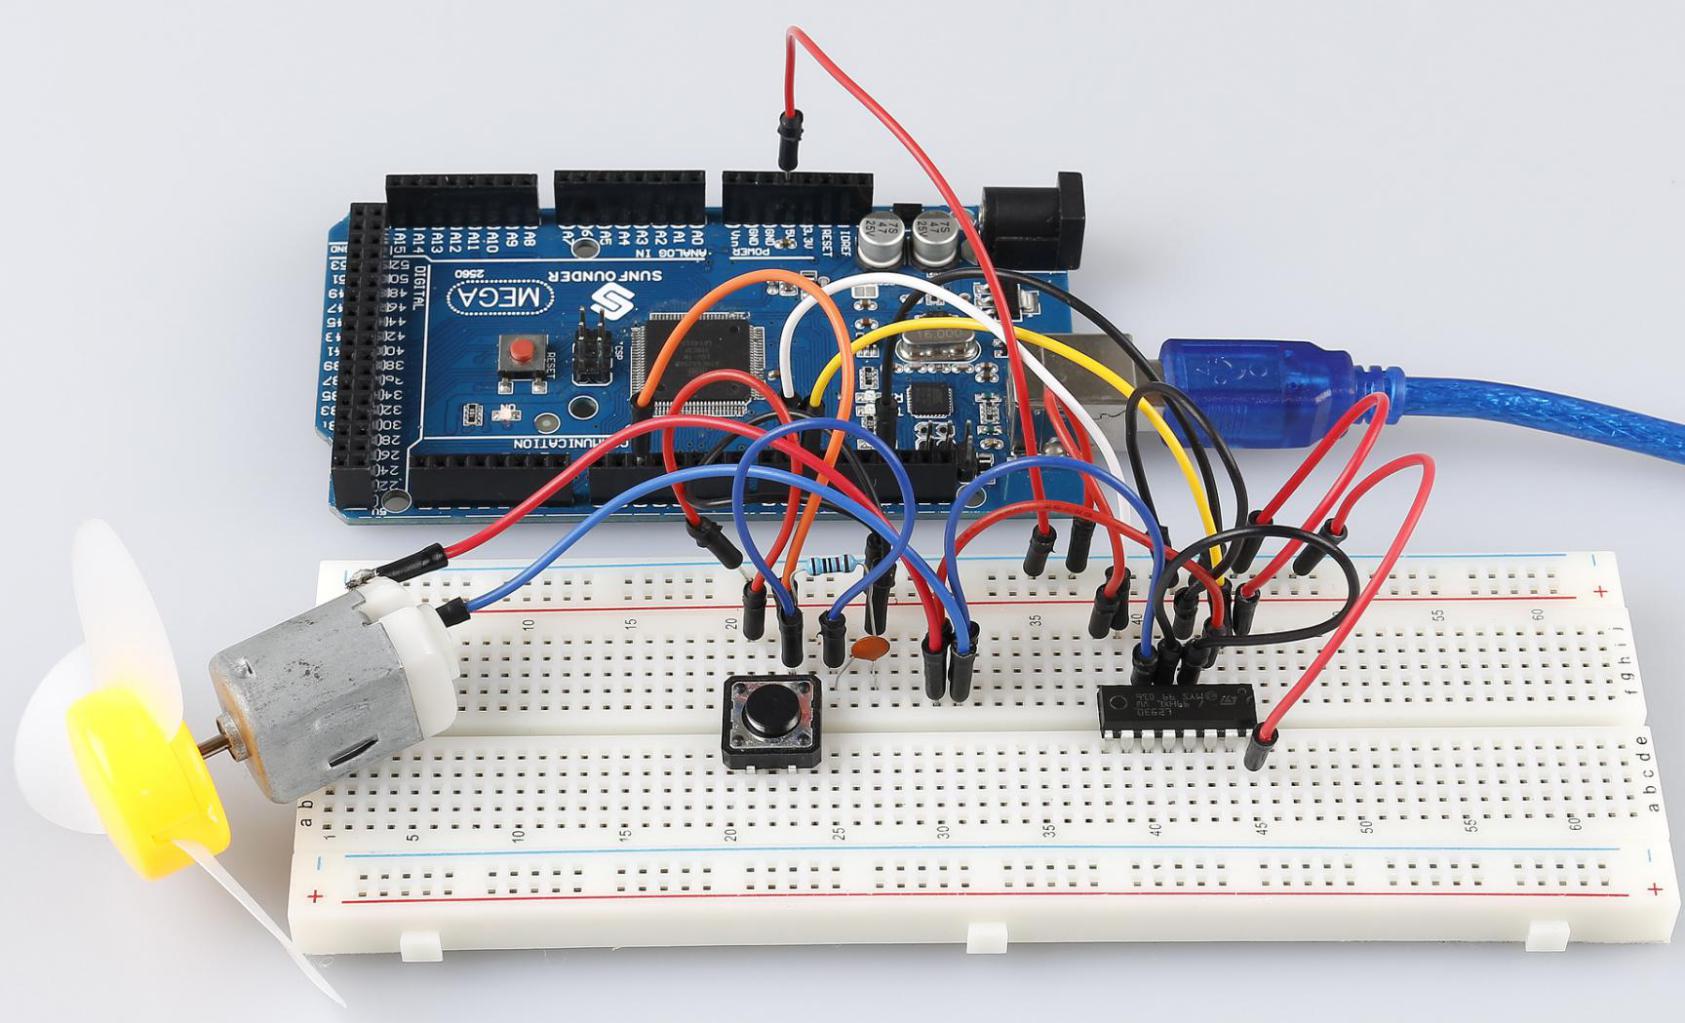
Step 1: Build the circuit
Step 2: Open the code file.
Step 3: Select the Board and Port.
Step 4: Upload the sketch to the board.
The blade of the DC motor will begin rotating left and right, in a speed that varies accordingly.
Code
Code Analysis
This code nests five if statements to determine the button press status.
The first if statement is used to determine if the button is pressed.
The second if statement is used to determine if 50ms has elapsed.
The third if statement is used to determine if the button has been pressed after 50ms, so as to avoid false touches.
The fourth if statement is used to record the number of button presses, adding 1 to
statfor each press.The fifth if statement is used to determine if the number of button presses is greater than 4. If so,
statis cleared to zero.
switch() statement
switch(stat)
{
case 1:
    clockwise(rank1);// When stat=1, set the rotate speed of the motor as rank1=150
    break;
case 2:
    clockwise(rank2);// When stat=2, set the rotate speed of the motor as rank1=200
    break;
case 3:
    clockwise(rank3);// When stat=3, set the rotate speed of the motor as rank1=250
    break;
default:
    clockwise(0);
}
The switch statement, like the if statement, switch case allows the programmer to control the flow of the program with different code executed under various conditions. In particular, the switch statement compares the value of a variable with the value specified in the case statement. When a case statement is found whose value matches the value of a variable, the code in that case statement is run.
If there is no break statement, the switch statement will continue to execute the following expression until break or until it reaches the end of the switch statement.
In this part of the code.
If stat = 1, let the fan rotate at speed rank1(150).
If stat = 1, let the fan rotate at speed rank2(200).
If stat = 1, let the fan rotate at speed rank3(250).
If stat = 0, let the fan rotate at speed 0.
clockwise() function
void clockwise(int Speed)//
{
    analogWrite(motorIn1,0);
    analogWrite(motorIn2,Speed);
}
This function sets the speed of the motor: write Speed to pin 9 and 0 to pin 10. The motor rotates in a certain direction with the value of Speed.
Experiment Summary
In this experiment, you can also control the motor to rotate or not. Just connect pin 1, 2EN of the L293D to an I/O port of the control board. Set 1, 2EN as High level, and the motor will start rotating; set it as Low level, it will stop the rotating.