22. Using OpenClaw to Control PiCar-X
What is OpenClaw?
Think of it as an upgraded version of ChatGPT. While traditional chatbots can only talk (generate text), OpenClaw can take action. It understands your natural language instructions and can actually perform operations on your computer, such as running commands, managing files, and calling various tools.
Here are some fantastic application scenarios:
Personal All-around Assistant: Let it help you manage your schedule, set reminders, and track tasks. You just need to tell it in a chat app (like Telegram, WhatsApp), and it will remember and execute.
Automation “Glue”: It can act as a binder for your various services. For example, you can have it monitor a website for price changes. Once a price drop is detected, it can automatically trigger an n8n automation workflow to send you an email notification.
Dedicated Development Assistant: Have it help you manage servers, run scripts, and check logs. You can simply say, “Check the system load for me,” and it can SSH into your server, execute the command, and return the results.
Hardware “Playmate”: This is a very interesting use case. You can have OpenClaw control hardware connected to a Raspberry Pi. For example, a developer used it to control a robotic vacuum cleaner with a mechanical arm, or even had it help analyze racing simulator data and display it on an LED screen. The official Raspberry Pi team even used it to build an automatic photo booth for a wedding, just through conversation, without writing a single line of code!
Important
The Raspberry Pi Zero 2W has only 512MB of RAM, while OpenClaw requires a minimum of 1GB. Therefore, it cannot run properly. A Raspberry Pi 4/5 or higher is recommended.
Quick Start OpenClaw
If you want to experience the power of OpenClaw as quickly as possible, use this method. It will automatically install and launch an interactive setup wizard.
Open the terminal on your Raspberry Pi and run the following command directly. This command downloads the installation script from the official website and executes it:
curl -fsSL https://openclaw.ai/install.sh | bash
Note
Because new versions are updated rapidly, it’s normal if your installation steps differ slightly.
The script will automatically download and install OpenClaw.
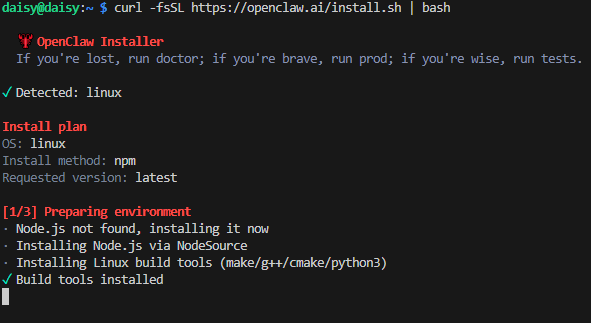
You will then see a security prompt asking if you trust OpenClaw. Once you are sure it is safe and reliable, use the arrow keys to navigate to “Yes” and press Enter.

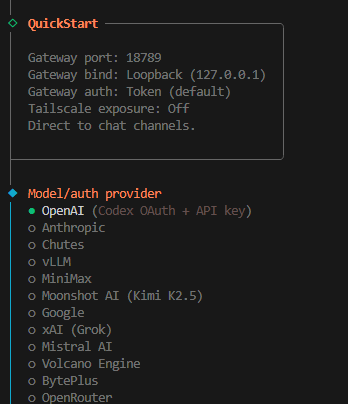
Select Quick Start, and then press Enter.

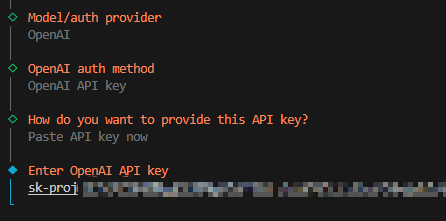
Select your Model, and then press Enter. Here we use OpenAI as an example.
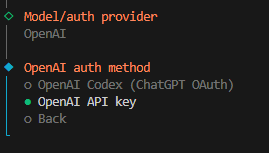
Select OpenAI API Key.
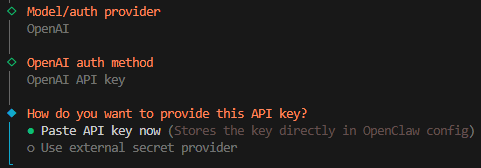
Paste API key now.
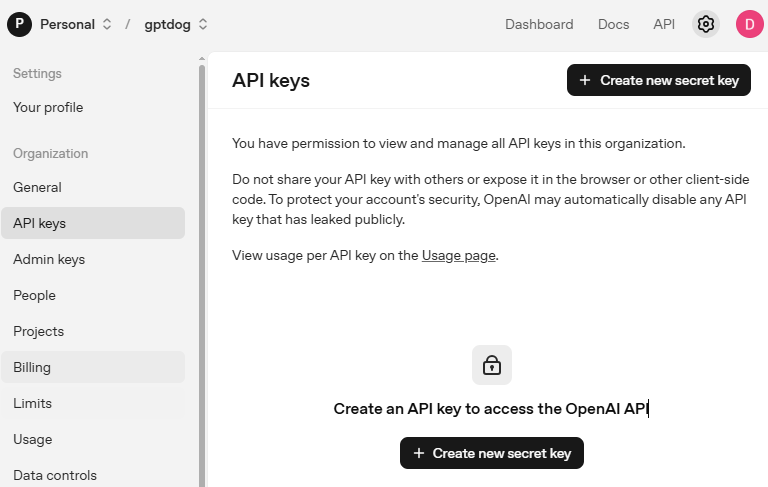
Go to OpenAI Platform and log in. On the API keys page, click Create new secret key.
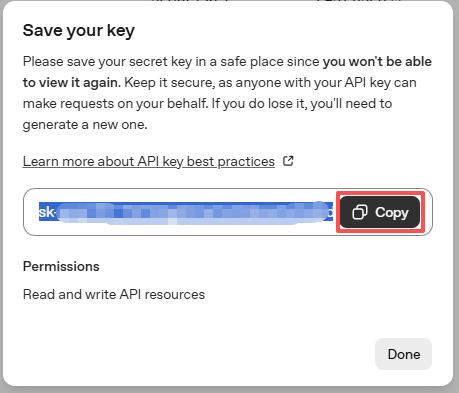
Fill in the details (Owner, Name, Project, and permissions if needed), then click Create secret key.

Once the key is created, copy it right away — you won’t be able to see it again. If you lose it, you’ll need to generate a new one.
Paste the key into the OpenClaw configuration.
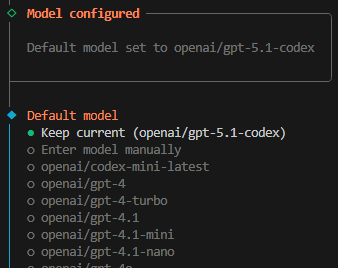
Select the Model you want to use. In this example, we will use Keep current.
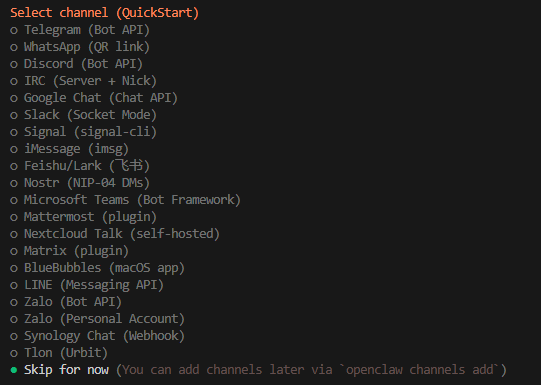
Next is the channel selection. Channels refer to the communication services supported by OpenClaw, such as Telegram, WhatsApp, Discord, and more. Use the down arrow key to select the “Skip for now” option, then press Enter.
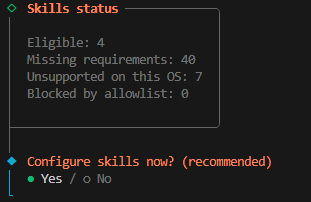
Next, you will be prompted to configure skills immediately. Select “Yes” and press Enter.
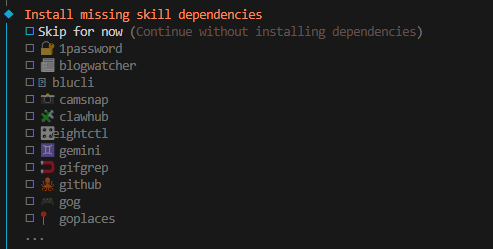
Install the skills you need. In the following example, we select the “Skip for now” option (press the spacebar to select), then press Enter.
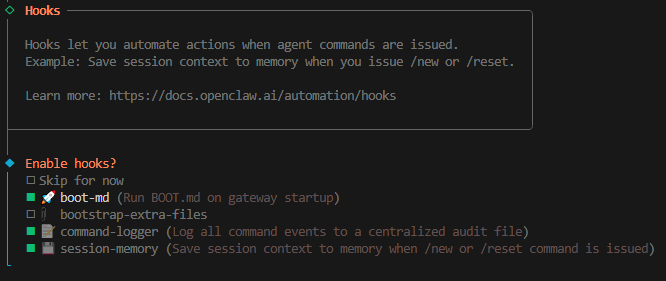
Next are Hooks; we will check “command-logger” and “session-memory”.
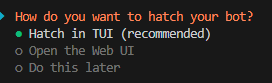
The installation is now complete. You can start OpenClaw by Selecting “Hatch in TUI” and pressing Enter.
Note
You can start OpenClaw by entering the following command:
openclaw tui
And You can press ctrl+c twice to exit the tui interface.
Making OpenClaw Operate the PiCar-X
What is PiCar-X Skill?
PiCar-X Skill is an extension for OpenClaw that allows you to control your SunFounder PiCar-X robot car through natural language. Instead of writing Python scripts or remembering servo angles, you can simply tell OpenClaw what you want PiCar-X to do — like “drive forward”, “check what’s ahead”, or “turn left” — and OpenClaw will execute the appropriate Python code automatically.
Here are some things you can do with PiCar-X Skill:
Driving: Drive forward, backward, turn left/right with steering servo control
Camera Gimbal: Pan left/right, tilt up/down via the 2-axis camera gimbal
Sensors: Read ultrasonic distance, grayscale sensor data for line tracking and cliff detection
Sound: Play sound effects and music through the car’s speaker
Camera Vision: Take photos, detect faces, track colors, recognize QR codes, gestures, and traffic signs
Prerequisites
Before you can use PiCar-X Skill with OpenClaw, make sure you have:
PiCar-X properly assembled and connected to your Raspberry Pi
OpenClaw installed and running
The following Python libraries installed:
picarxrobot_hatvilib
You can verify the installation by running:
python3 -c "import picarx"
If this command runs without errors, you’re ready to proceed.
Installing PiCar-X Skill
Follow these steps to install the PiCar-X Skill for OpenClaw:
Copy the PiCar-X skill files to the OpenClaw skills directory:
cp -r ~/picar-x/picarx-control ~/.openclaw/workspace/skills/
Verify the installation by checking the skill files:
ls ~/.openclaw/workspace/skills/picarx-control/You should see
SKILL.md,install.sh,scripts/, andreferences/in the output.
The skill’s SKILL.md file contains all the instructions OpenClaw needs — safety rules, code templates for each capability, and a mapping from natural language requests to Python code. OpenClaw reads this file and uses it to decide what code to execute on your PiCar-X.
Testing PiCar-X Skill from the CLI
Before using the skill with OpenClaw, you may want to test basic functionality directly from the terminal using the included CLI tool.
Check ultrasonic distance:
python3 ~/.openclaw/workspace/skills/picarx-control/scripts/pc.py sensor distance
Drive forward:
python3 ~/.openclaw/workspace/skills/picarx-control/scripts/pc.py move forward --speed 60
Drive backward:
python3 ~/.openclaw/workspace/skills/picarx-control/scripts/pc.py move backward --speed 60
Turn left:
python3 ~/.openclaw/workspace/skills/picarx-control/scripts/pc.py turn left --angle 30
Turn right:
python3 ~/.openclaw/workspace/skills/picarx-control/scripts/pc.py turn right --angle 30
Set camera pan angle:
python3 ~/.openclaw/workspace/skills/picarx-control/scripts/pc.py cam pan --angle 30
Set camera tilt angle:
python3 ~/.openclaw/workspace/skills/picarx-control/scripts/pc.py cam tilt --angle 20
Play a sound effect:
python3 ~/.openclaw/workspace/skills/picarx-control/scripts/pc.py sound play /path/to/sound.wav --volume 80
Read grayscale sensor data (line tracking):
python3 ~/.openclaw/workspace/skills/picarx-control/scripts/pc.py sensor grayscale
Run servo calibration:
python3 ~/.openclaw/workspace/skills/picarx-control/scripts/pc.py calibrate
Using PiCar-X Skill in OpenClaw
Once you’ve verified that PiCar-X Skill works from the command line, you can start using it within OpenClaw.
Launch OpenClaw TUI:
openclaw tuiSend natural language commands to control PiCar-X. Here are some examples:
“Drive forward”
“Go backward”
“Turn left”
“Turn right”
“Check if there’s something ahead”
“Look to the left”
“Look up”
“Look down”
“Take a photo”
“Detect faces”
“Find the color red”
“Follow the line”
“Check if there’s a cliff ahead”
OpenClaw will automatically translate your request into the appropriate Python code and execute it on PiCar-X.
Available Actions and Commands
Here is the complete list of capabilities supported by PiCar-X Skill:
Driving (pc.py move)
Action |
Description |
|---|---|
|
Drive forward |
|
Drive backward |
Turning (pc.py turn)
Action |
Description |
|---|---|
|
Turn left by adjusting steering angle |
|
Turn right by adjusting steering angle |
Camera Gimbal (pc.py cam)
Capability |
Description |
|---|---|
Pan camera |
Rotate camera horizontally (-90° to 90°) |
Tilt camera |
Tilt camera vertically (-35° to 65°) |
Sensors
Command |
Description |
|---|---|
|
Read ultrasonic distance sensor (returns cm) |
|
Read 3-channel grayscale module values (for line tracking & cliff detection) |
Sound (pc.py sound)
Command |
Description |
|---|---|
|
Play a sound effect file |
|
Play background music |
|
Set speaker volume |
|
Stop playback |
Note
The sound files can be any .wav format audio file accessible on your Raspberry Pi. You can also use sound music to play background music files.
Camera & Vision (via natural language / exec)
Capability |
Description |
|---|---|
Take photo |
Capture and save a photo to |
Face detection |
Detect human faces and report position |
Color detection |
Locate objects by color (red, blue, green, etc.) |
Gesture recognition |
Recognize rock/paper/scissor gestures |
Traffic sign detection |
Recognize stop/left/right/forward signs |
QR code scanning |
Read QR code data and position |
Line Tracking & Cliff Detection
Capability |
Description |
|---|---|
Line tracking |
Follow a black line on a light surface using 3-channel grayscale |
Cliff detection |
Detect edges/drops using grayscale threshold values |
Troubleshooting
OpenClaw Issues
During installation, I get the error
Error: systemctl is-enabled unavailable: Command failed: systemctl --user is-enabled openclaw-gateway.service. What should I do?You can ignore this for now, but you might encounter issues in the next steps. Please refer to them one by one at that time.
When I run
openclaw tui, I get the error-bash: openclaw: command not found. What should I do?Execute the following command:
echo 'export PATH="$HOME/.npm-global/bin:$PATH"' >> ~/.bashrc
source ~/.bashrc
You should now be able to start the tui interface with
openclaw tui.
In
openclaw tui, I encounternot connected to gateway — message not sentor the messagegateway disconnected: closed.This is because your OpenClaw Gateway service is not started. Open another terminal and execute the following command to start the OpenClaw Gateway:
openclaw gatewayThen restart
openclaw tui, and you can use it directly.
I want to set the OpenClaw Gateway service to run in the background / start automatically on boot. How do I do that?
Normally, your OpenClaw Gateway service should start automatically on boot. If it doesn’t, you can manually start it with the following command.
Create the
~/.config/systemd/userdirectory:
mkdir -p ~/.config/systemd/user
Create the
openclaw-gateway.servicefile:
cat > ~/.config/systemd/user/openclaw-gateway.service << EOF
[Unit]
Description=OpenClaw Gateway
After=network.target

[Service]
Type=simple
ExecStart=$HOME/.npm-global/bin/openclaw gateway run
Restart=on-failure
RestartSec=10
Environment="PATH=$HOME/.npm-global/bin:/usr/local/bin:/usr/bin:/bin:/usr/sbin"
Environment="NODE_ENV=production"

[Install]
WantedBy=default.target
EOF
Then reload the systemd configuration:
systemctl --user daemon-reload
Start the service:
systemctl --user start openclaw-gateway
At this point, restart
openclaw tui, and you can use it directly.Enable it to start on boot:
systemctl --user enable openclaw-gateway
My OpenClaw can not operate the system, what should I do?
A newly installed OpenClaw may not have permission to operate your Raspberry Pi system by default; it can only chat. We need to manually configure the permissions.
Open the OpenClaw configuration file:
nano ~/.openclaw/openclaw.jsonFind the
toolsoption and change theprofileandexecas shown.
"tools": {
    "profile": "coding",
    "exec": {
        "secrity": "full"
    }
},
Save and exit.
Enter the following command in the terminal to restart the OpenClaw Gateway:
openclaw gateway restart
Now, OpenClaw should have read and write permissions and be able to operate your Raspberry Pi system.
PiCar-X Issues
PiCar-X doesn’t respond to commands. What should I do?
First, verify that PiCar-X is properly connected and powered on. Then test basic functionality:
python3 ~/.openclaw/workspace/skills/picarx-control/scripts/pc.py sensor distance
If this fails, ensure the required Python libraries are installed:
python3 -c "import picarx; import robot_hat; import vilib"
The
import picarxtest fails.This means the PiCar-X Python library is not properly installed. Please refer to the PiCar-X official installation guide to install the necessary libraries. You can also run the included install script:
bash ~/.openclaw/workspace/skills/picarx-control/install.sh
OpenClaw doesn’t recognize the PiCar-X skill.
Remind OpenClaw to sync the skills by saying in the TUI: “Please rsync my skills” or restart OpenClaw gateway:
openclaw gateway restart
PiCar-X movements seem jerky or the steering is off-center.
This is usually caused by servo calibration values being incorrect. Run the calibration script to adjust the steering servo and camera gimbal:
python3 ~/.openclaw/workspace/skills/picarx-control/scripts/pc.py calibrate
You can also adjust the speed parameter (e.g., use
--speed 40) for smoother movement, or add short delays between consecutive commands.
The grayscale or line tracking doesn’t work properly.
Make sure the grayscale module is properly calibrated for your surface. You can set the line reference values using the configuration. Refer to the main PiCar-X documentation for grayscale calibration procedures.