7.2 Room Temperature Meter
Using a thermistor and an I2C LCD1602, we can create a room temperature meter.
This project is very simple, it is based on 2.13 Thermometer with I2C LCD1602 to display the temperature.
Required Components
In this project, we need the following components.
It’s definitely convenient to buy a whole kit, here’s the link:
Name |
ITEMS IN THIS KIT |
LINK |
|---|---|---|
Kepler Kit |
450+ |
You can also buy them separately from the links below.
SN |
COMPONENT |
QUANTITY |
LINK |
|---|---|---|---|
1 |
1 |
||
2 |
Micro USB Cable |
1 |
|
3 |
1 |
||
4 |
Several |
||
5 |
1(10KΩ) |
||
6 |
1 |
||
7 |
1 |
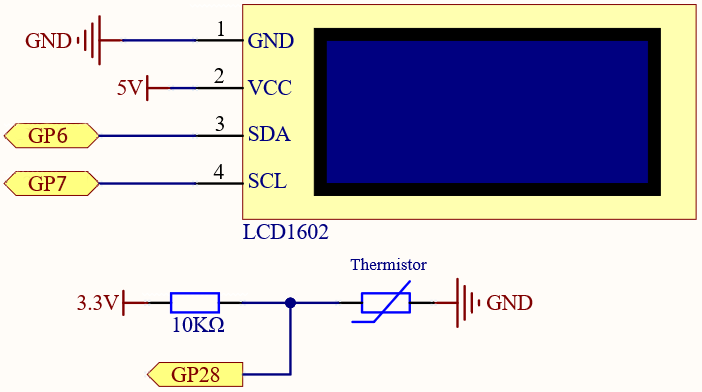
Schematic

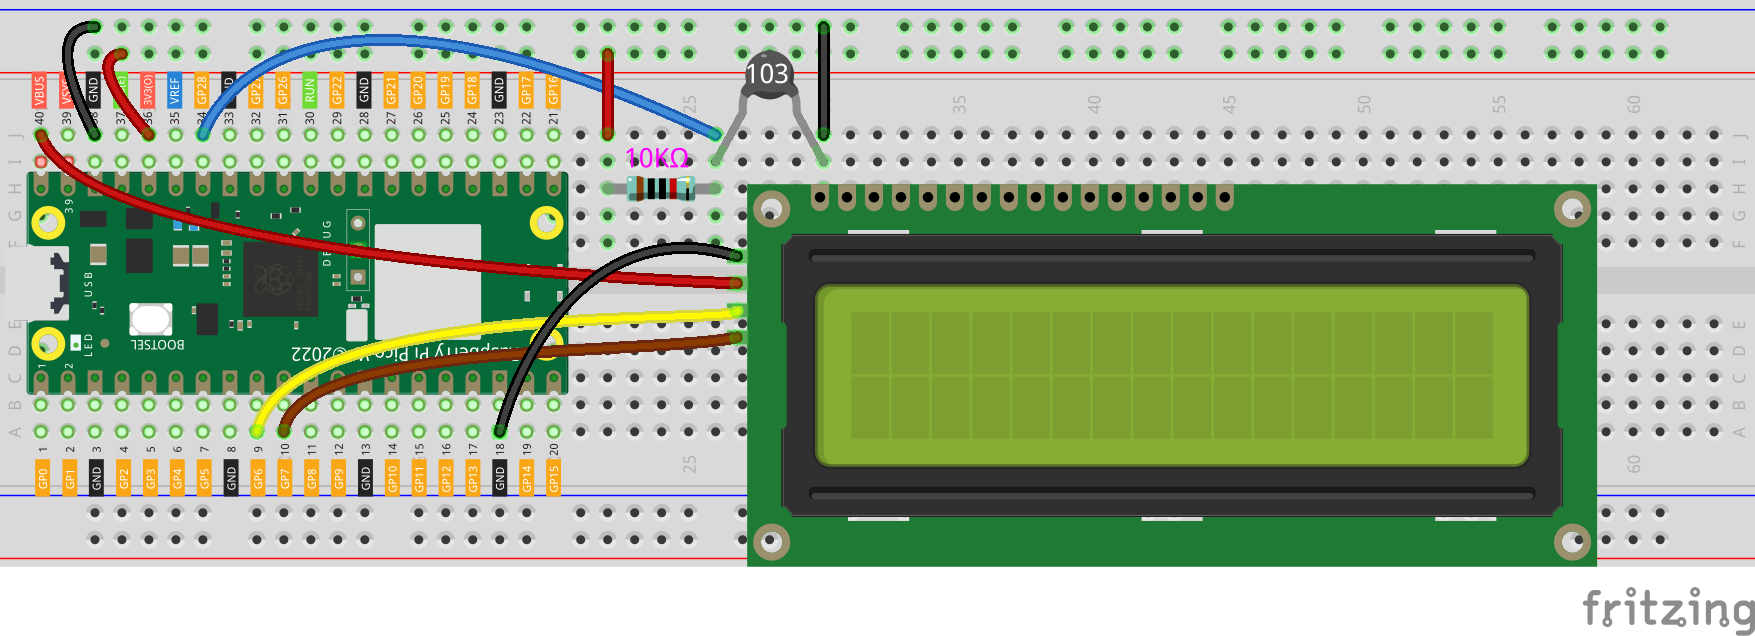
Wiring

Code
Note
Open the
7.2_room_temperature_meter.pyfile under the path ofkepler-kit-main/micropythonor copy this code into Thonny, then click “Run Current Script” or simply press F5 to run it.Don’t forget to click on the “MicroPython (Raspberry Pi Pico)” interpreter in the bottom right corner.
For detailed tutorials, please refer to Open and Run Code Directly.
from lcd1602 import LCD
import machine
import utime
import math

thermistor = machine.ADC(28)
lcd = LCD()

while True:
    temperature_value = thermistor.read_u16()
    Vr = 3.3 * float(temperature_value) / 65535
    Rt = 10000 * Vr / (3.3 - Vr)
    temp = 1/(((math.log(Rt / 10000)) / 3950) + (1 / (273.15+25)))
    Cel = temp - 273.15
    #Fah = Cel * 1.8 + 32
    #print ('Celsius: %.2f C  Fahrenheit: %.2f F' % (Cel, Fah))
    #utime.sleep_ms(200)

    string = " Temperature is \n    " + str('{:.2f}'.format(Cel))+ " C"
    lcd.message(string)
    utime.sleep(1)
    lcd.clear()
The LCD will display the temperature value in the current environment after the program runs.
Note
If the code and wiring are fine, but the LCD still does not display content, you can turn the potentiometer on the back to increase the contrast.