Note
Hello, welcome to the SunFounder Raspberry Pi & Arduino & ESP32 Enthusiasts Community on Facebook! Dive deeper into Raspberry Pi, Arduino, and ESP32 with fellow enthusiasts.
Why Join?
Expert Support: Solve post-sale issues and technical challenges with help from our community and team.
Learn & Share: Exchange tips and tutorials to enhance your skills.
Exclusive Previews: Get early access to new product announcements and sneak peeks.
Special Discounts: Enjoy exclusive discounts on our newest products.
Festive Promotions and Giveaways: Take part in giveaways and holiday promotions.
👉 Ready to explore and create with us? Click [here] and join today!
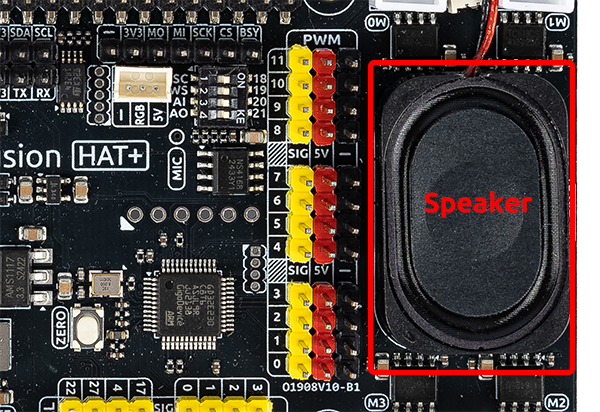
Fusion HAT+ Speaker
Introduction
The Fusion HAT+ includes a built-in speaker, making it ideal for voice prompts, alarms, and other AI/IoT audio applications. This lesson shows you how to enable, test, and use the speaker with text-to-speech.
Note
This guide assumes Raspberry Pi OS is installed and the Fusion HAT+ drivers are properly set up.
Speaker Setup
1. Check if the Speaker Is Recognized
Run the following command:
aplay -l
You should see a sound device similar to:
card 0: sndrpigooglevoi [... voicehat-hifi-0 ...]
If a device appears under card 0 or another card number, the Fusion HAT+ audio hardware is detected.
2. Testing the Speaker
Play a stereo test sound:
speaker-test -t wav -c 2
You should hear “Front Left / Front Right”. Press Ctrl+C to stop.
Troubleshooting
No sound output
Check audio volume with:
alsamixer
Confirm your Pi sees the audio device:
aplay -l
Speaker not recognized
Reseat the Fusion HAT+
Reboot the Raspberry Pi
Ensure drivers are installed
Or rerun:
sudo /opt/setup_fusion_hat_audio.sh