Note
Hello, welcome to the SunFounder Raspberry Pi & Arduino & ESP32 Enthusiasts Community on Facebook! Dive deeper into Raspberry Pi, Arduino, and ESP32 with fellow enthusiasts.
Why Join?
Expert Support: Solve post-sale issues and technical challenges with help from our community and team.
Learn & Share: Exchange tips and tutorials to enhance your skills.
Exclusive Previews: Get early access to new product announcements and sneak peeks.
Special Discounts: Enjoy exclusive discounts on our newest products.
Festive Promotions and Giveaways: Take part in giveaways and holiday promotions.
👉 Ready to explore and create with us? Click [here] and join today!
Motor
Introduction
In this project, we will learn how to use the Fusion HAT+ to control a DC motor, making it rotate clockwise and counterclockwise.
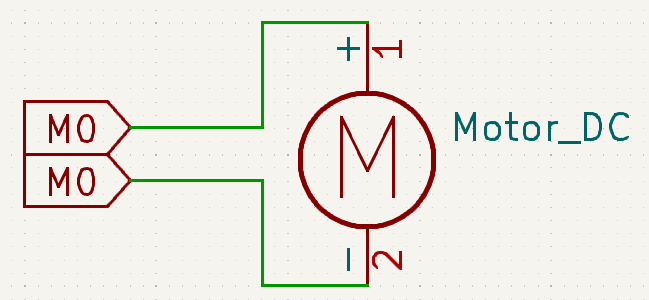
Circuit Diagram
The circuit diagram below shows the connections required to control the motor.
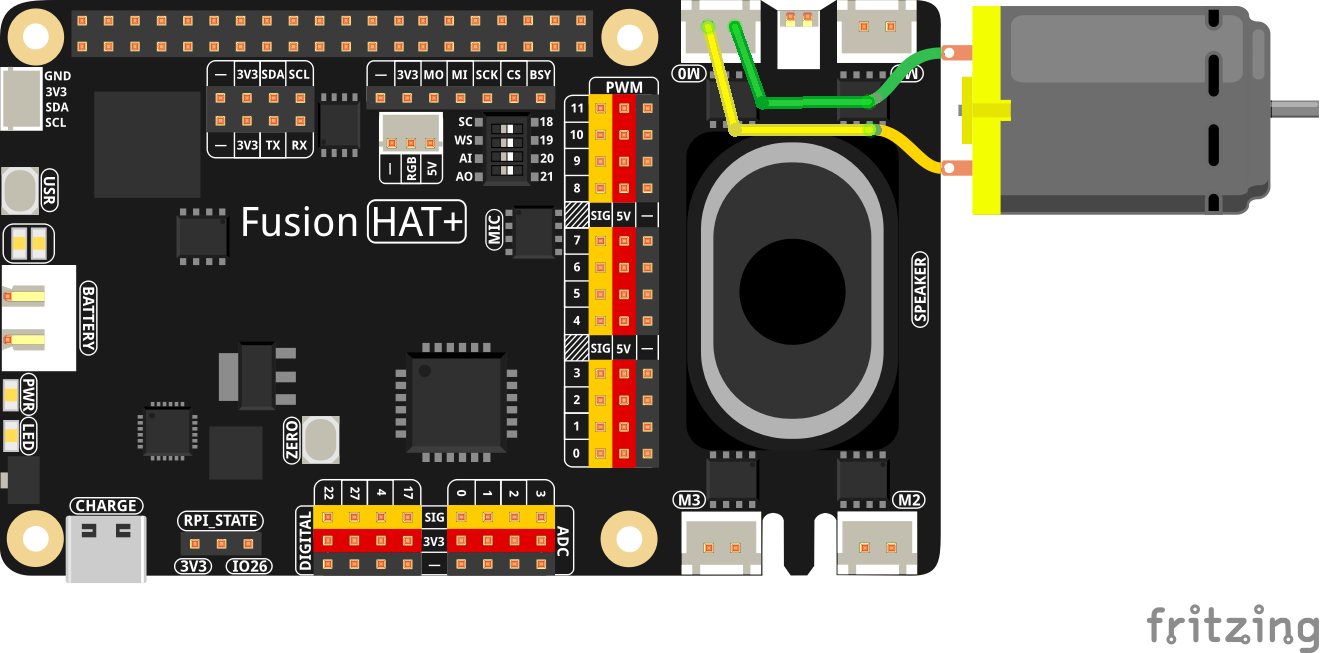
Wiring Diagram
Code
The following Python code controls the motor’s rotation direction and timing:
#!/usr/bin/env python3
# Import sleep function to pause execution
from time import sleep
# Import Motor class from the fusion_hat.motor module
from fusion_hat.motor import Motor

# Create a Motor object for motor port 'M0'
# is_reversed=True means the motor direction is inverted
motor = Motor('M0', is_reversed=True)

try:
   # Loop forever
   while True:
      motor.power(0)       # Stop the motor
      sleep(0.5)           # Wait 0.5 seconds

      motor.power(-50)     # Run the motor at -50% power
      sleep(1)             # Run for 1 second

      motor.power(0)       # Stop again
      sleep(0.5)           # Wait 0.5 seconds

      motor.power(75)      # Run the motor at 75% power
      sleep(1)             # Run for 1 second

finally:
   motor.stop()             # Ensure the motor is stopped on exit
   sleep(.1)                # Short delay for safety