Welcome
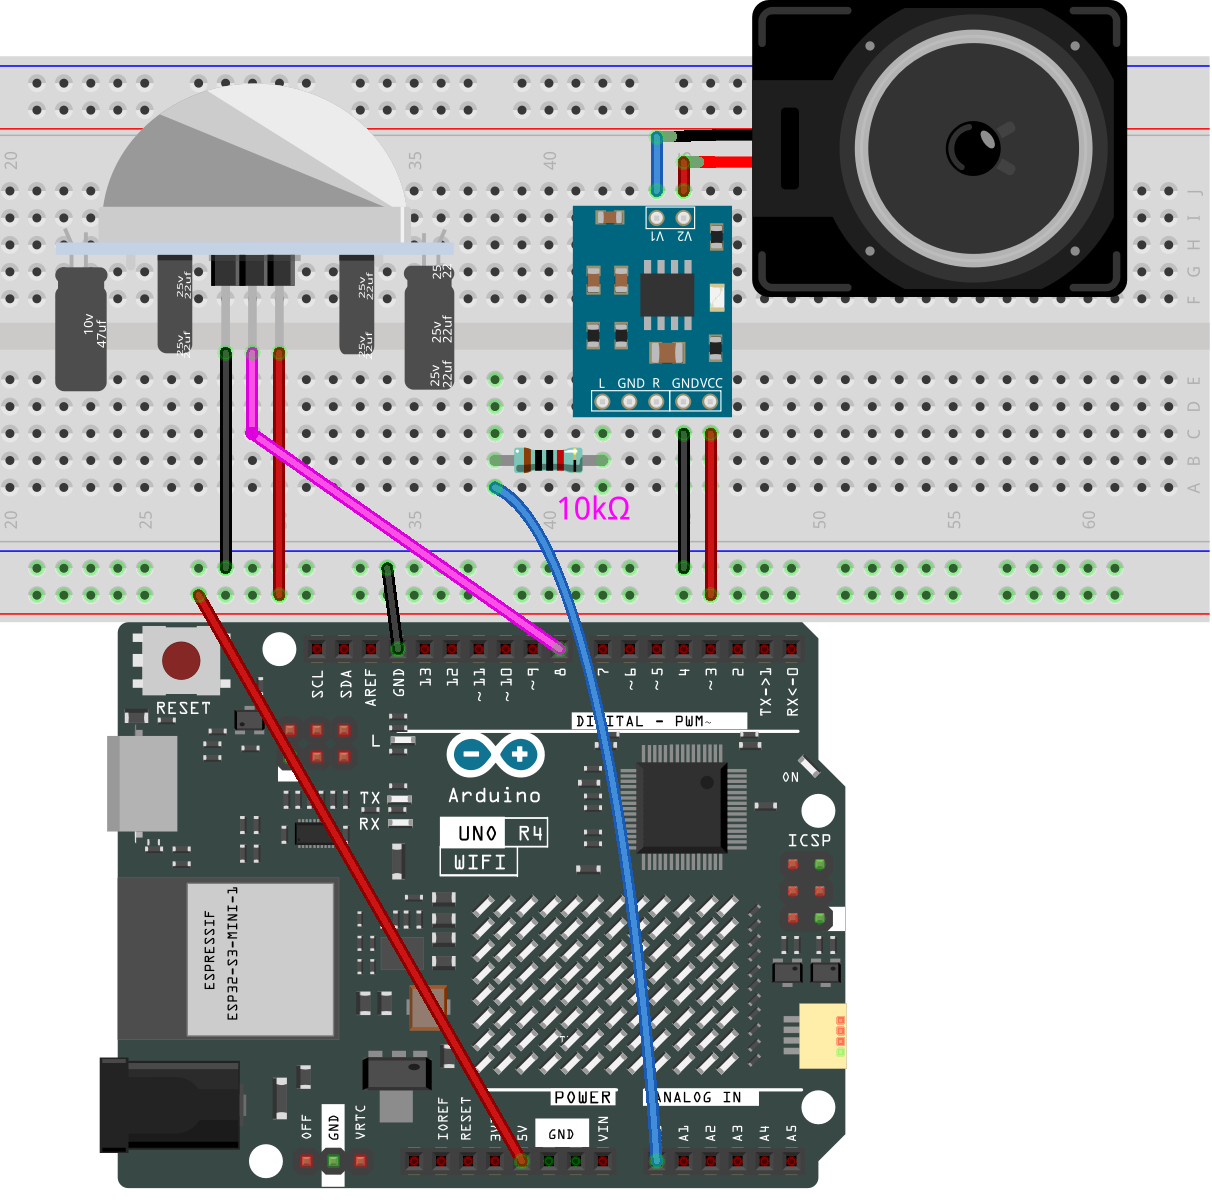
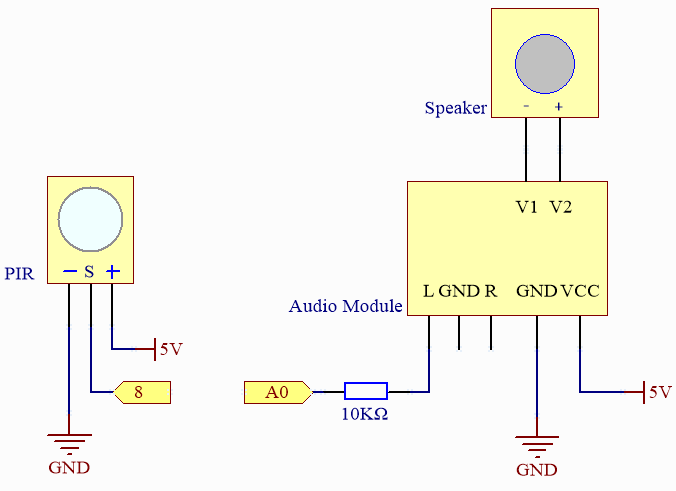
In this project, we will use a PIR sensor to detect human presence and a speaker to simulate a doorbell, similar to the entrance doorbells in convenience stores. When a pedestrian appears within the range of the PIR sensor, the speaker will ring, mimicking a doorbell.
Required Components
In this project, we need the following components.
It’s definitely convenient to buy a whole kit, here’s the link:
Name |
ITEMS IN THIS KIT |
LINK |
|---|---|---|
Elite Explorer Kit |
300+ |
You can also buy them separately from the links below.
COMPONENT INTRODUCTION |
PURCHASE LINK |
|---|---|
- |
|
- |
Wiring

Schematic

Code
Note
You can open the file
01_welcome.inounder the path ofelite-explorer-kit-main\fun_project\01_welcomedirectly.Or copy this code into Arduino IDE.
How it works?
Here is a step-by-step explanation of the code:
Include Header Files:
Include two header files,
analogWave.handpitches.h. TheanalogWave.hfile contains the definition of theanalogWaveclass, whilepitches.hcontains the definitions of musical notes.Instantiate Objects and Define Constants:
Create a
waveobject using theanalogWaveclass and definePIR_PINas 2, which is the pin connected to the PIR sensor.Melody Array:
The
melodyarray defines a musical melody, with each note followed by a number representing its duration. Negative numbers represent dotted notes (increasing the duration by 50%).Global Variables:
Define some global variables for sharing data between functions.
setup():Initialize
PIR_PINas an input and set the frequency of the sine wave to 10 Hz usingwave.sine(10).loop():Continuously monitor the value of the PIR sensor. If human presence is detected (pirValue is HIGH), call the
playMelody()function to play the melody and wait for 10 seconds to prevent repetitive playback of the melody.playMelody():This function calculates the duration of each note based on the data in the
melodyarray and plays the corresponding note. There is a brief pause between notes. The function sets the frequency of the waveform usingwave.freq()and controls the duration of the notes and pauses between notes using thedelay()function.Note: Ensure that the
pitches.hheader file indeed exists before running this code.