Note
Hello, welcome to the SunFounder Raspberry Pi & Arduino & ESP32 Enthusiasts Community on Facebook! Dive deeper into Raspberry Pi, Arduino, and ESP32 with fellow enthusiasts.
Why Join?
Expert Support: Solve post-sale issues and technical challenges with help from our community and team.
Learn & Share: Exchange tips and tutorials to enhance your skills.
Exclusive Previews: Get early access to new product announcements and sneak peeks.
Special Discounts: Enjoy exclusive discounts on our newest products.
Festive Promotions and Giveaways: Take part in giveaways and holiday promotions.
👉 Ready to explore and create with us? Click [here] and join today!
Connect the Product and EzBlock
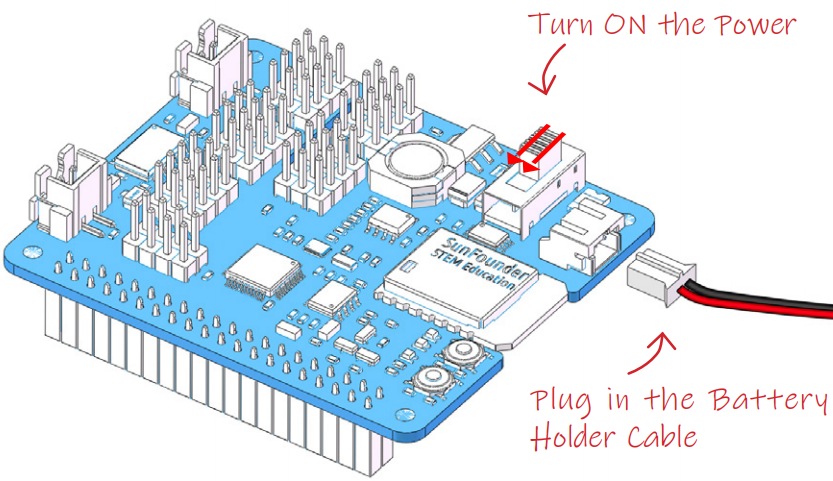
Toggle the power switch of the Robot HAT to the ON position. After a while, you will hear a power-on sound, which means the Raspberry Pi has been successfully started.
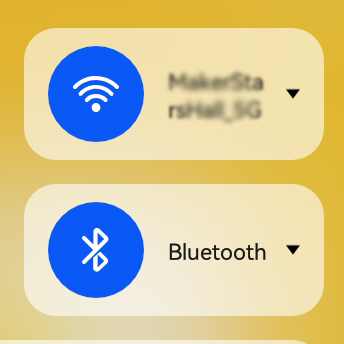
Connect your mobile device (phone/tablet) to WiFi and turn on Bluetooth.
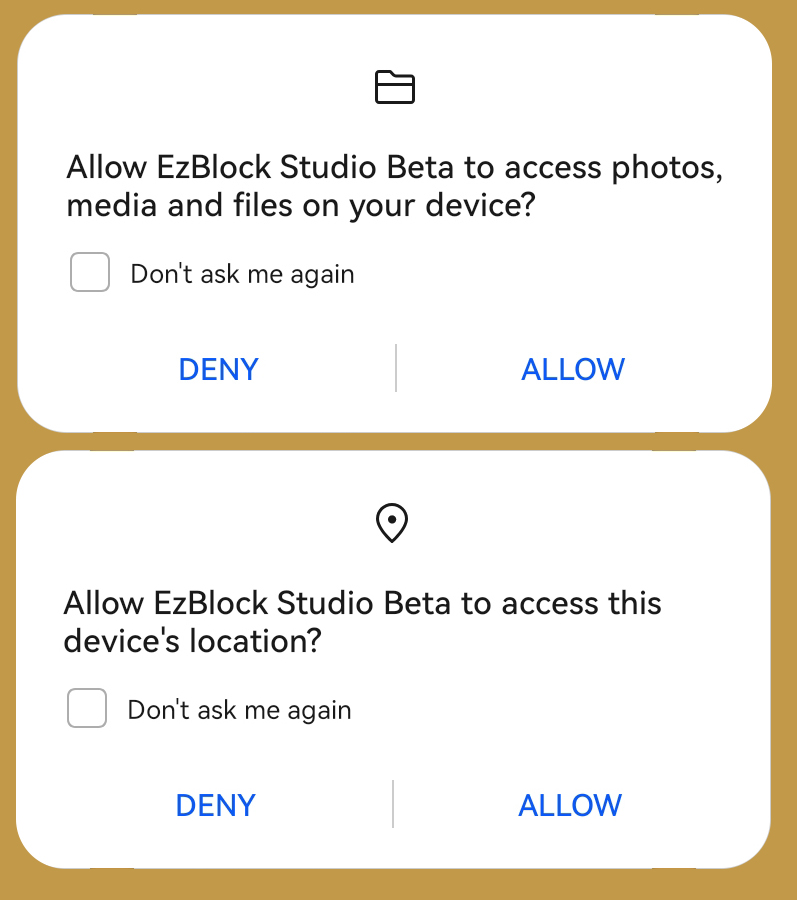
Now open the APP-EzBlock Studio, you will be prompted to allow EzBlock Studio access to the following 2 permissions.
Access photos, media and files on your device: If you are logged in and need to change your avatar, the APP needs access to your device’s photos; when you use the product’s photo feature, the APP needs this permission to save the photos.
Access your device’s location: This permission must be selected as Allow, otherwise APP will not be able to connect to the product via Bluetooth.
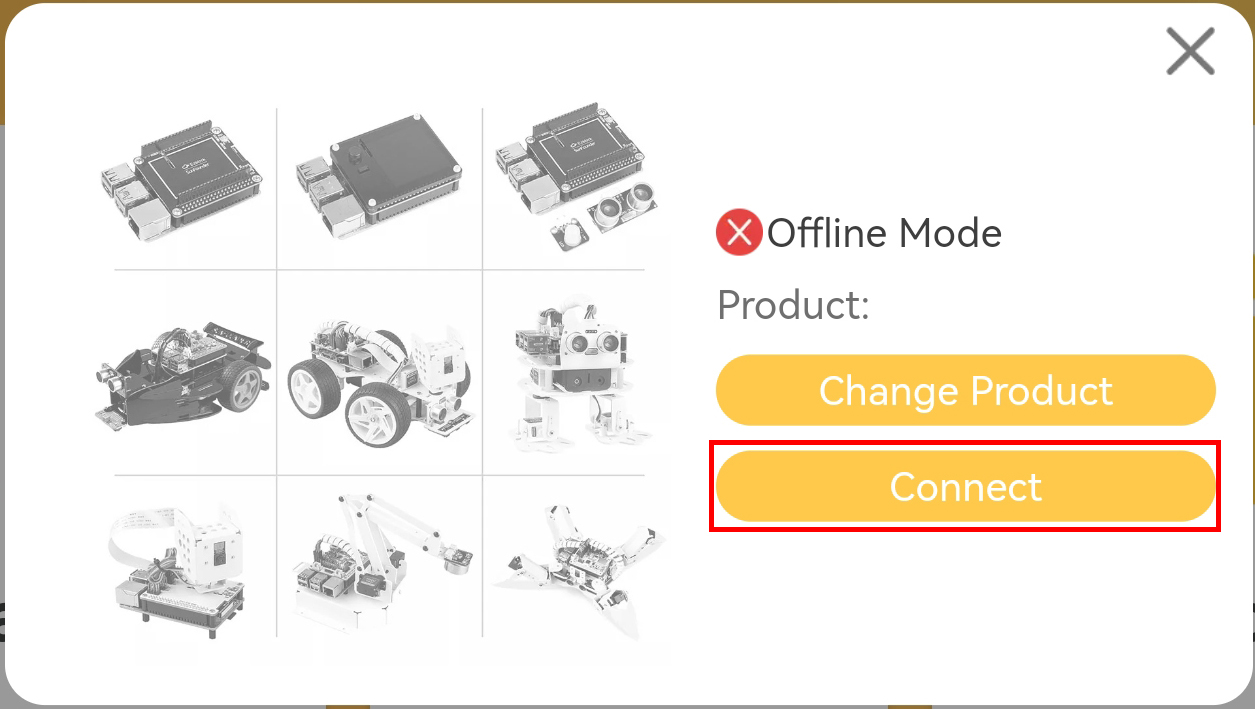
Click the Connect icon in the upper left corner.

On the pop-up page, click Connect.
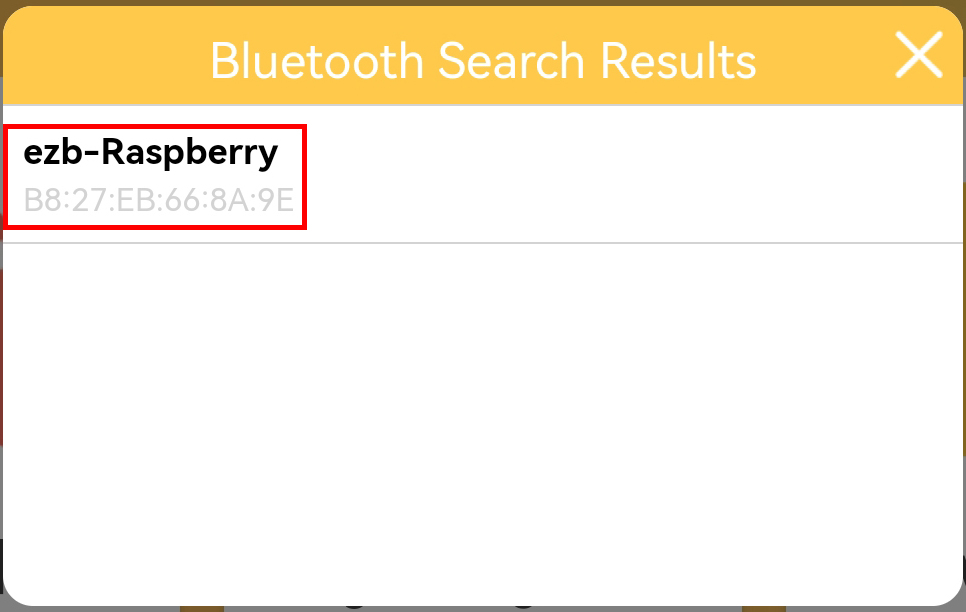
Now enter the Bluetooth connection page, it will automatically search for the corresponding Bluetooth, usually the product name is ezb-Raspberry, but the MAC address is different for different products. If you have more than one product, you can identify it by MAC address. Also this Bluetooth name can be changed in the next steps.
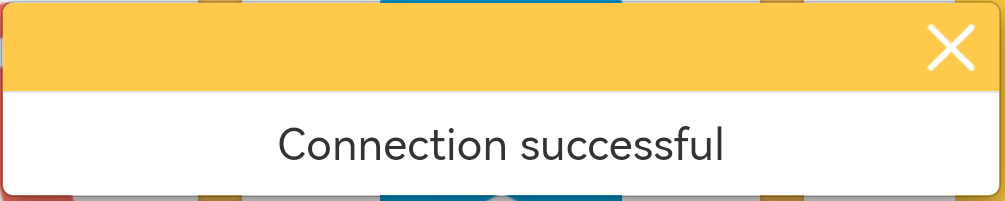
When the connection is successful, your product will make a “ding dong” sound and the app will prompt that the connection is successful.
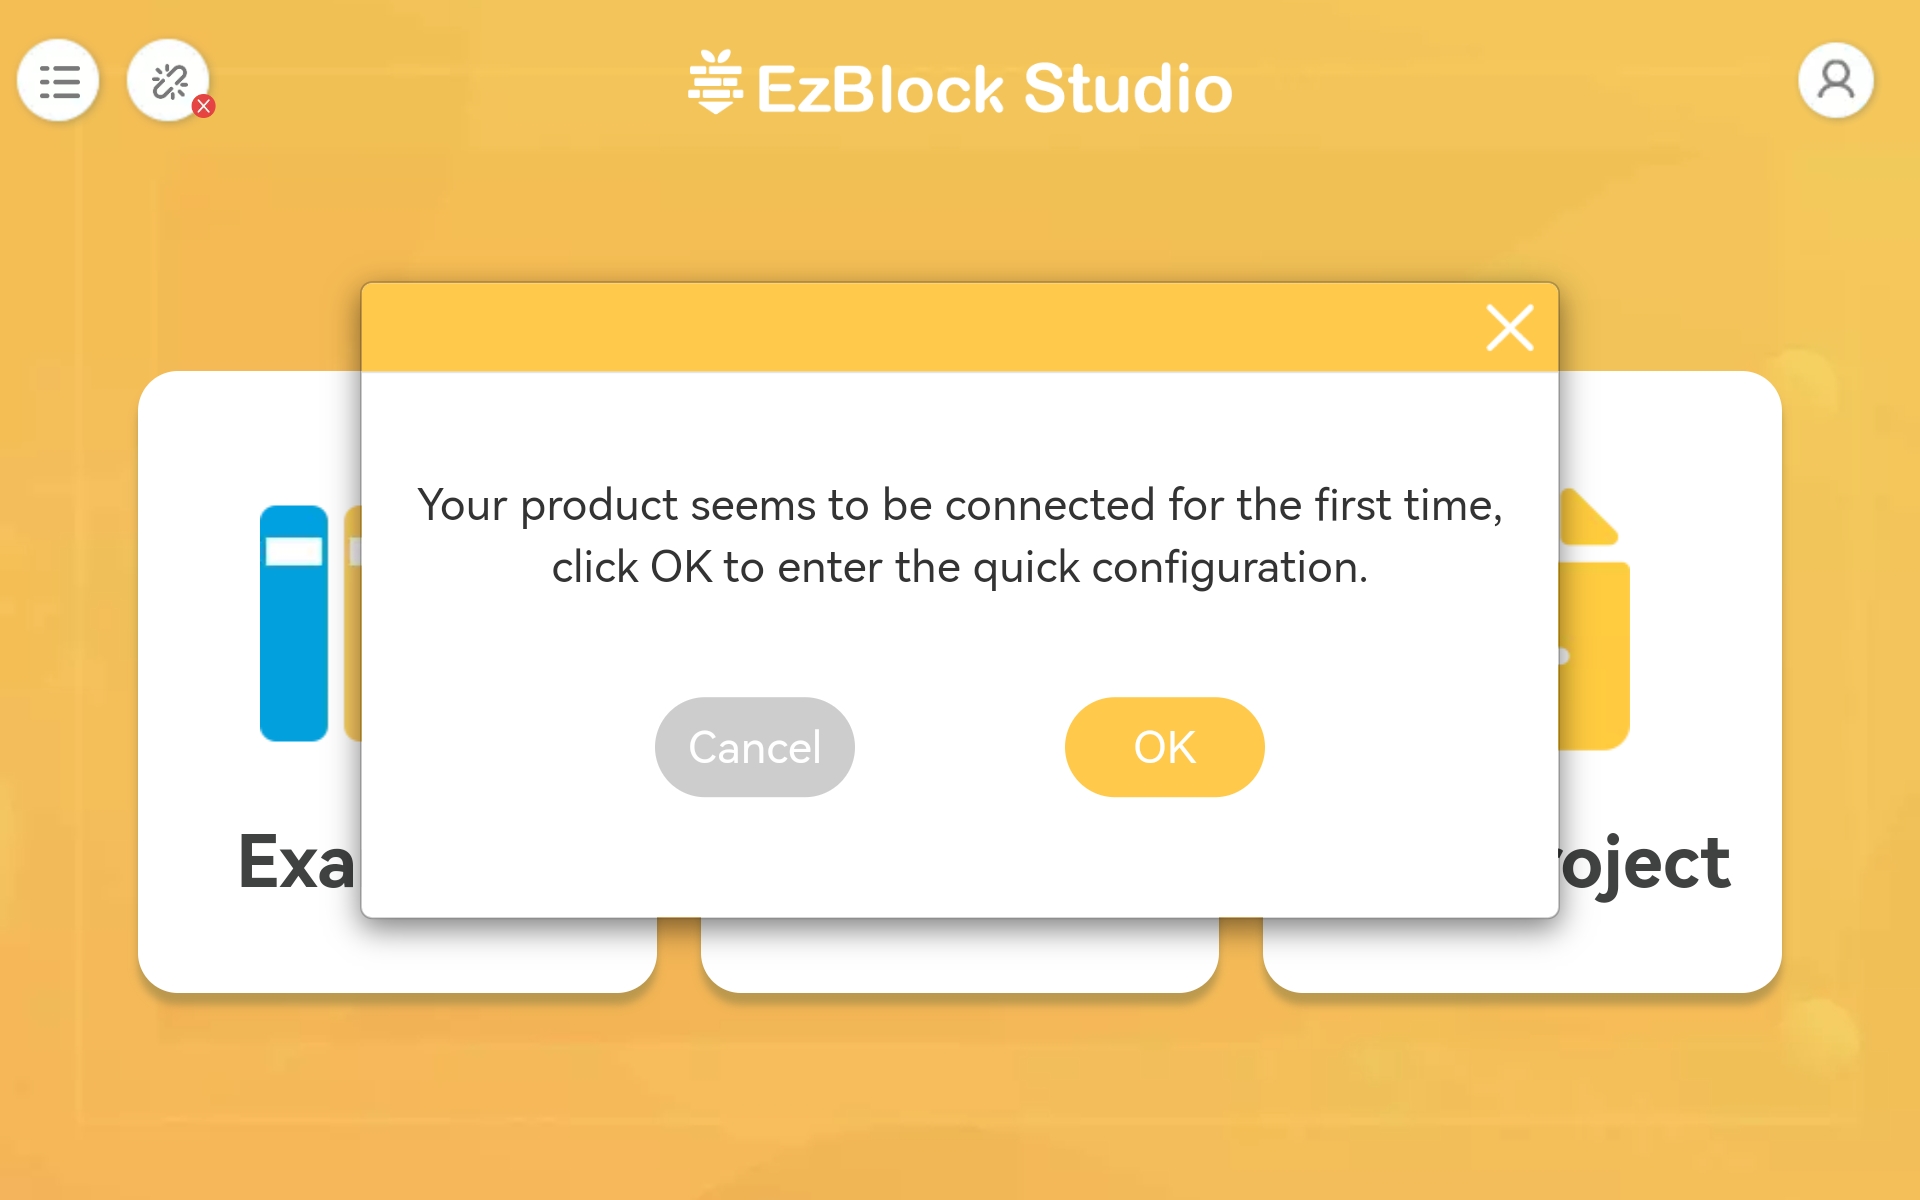
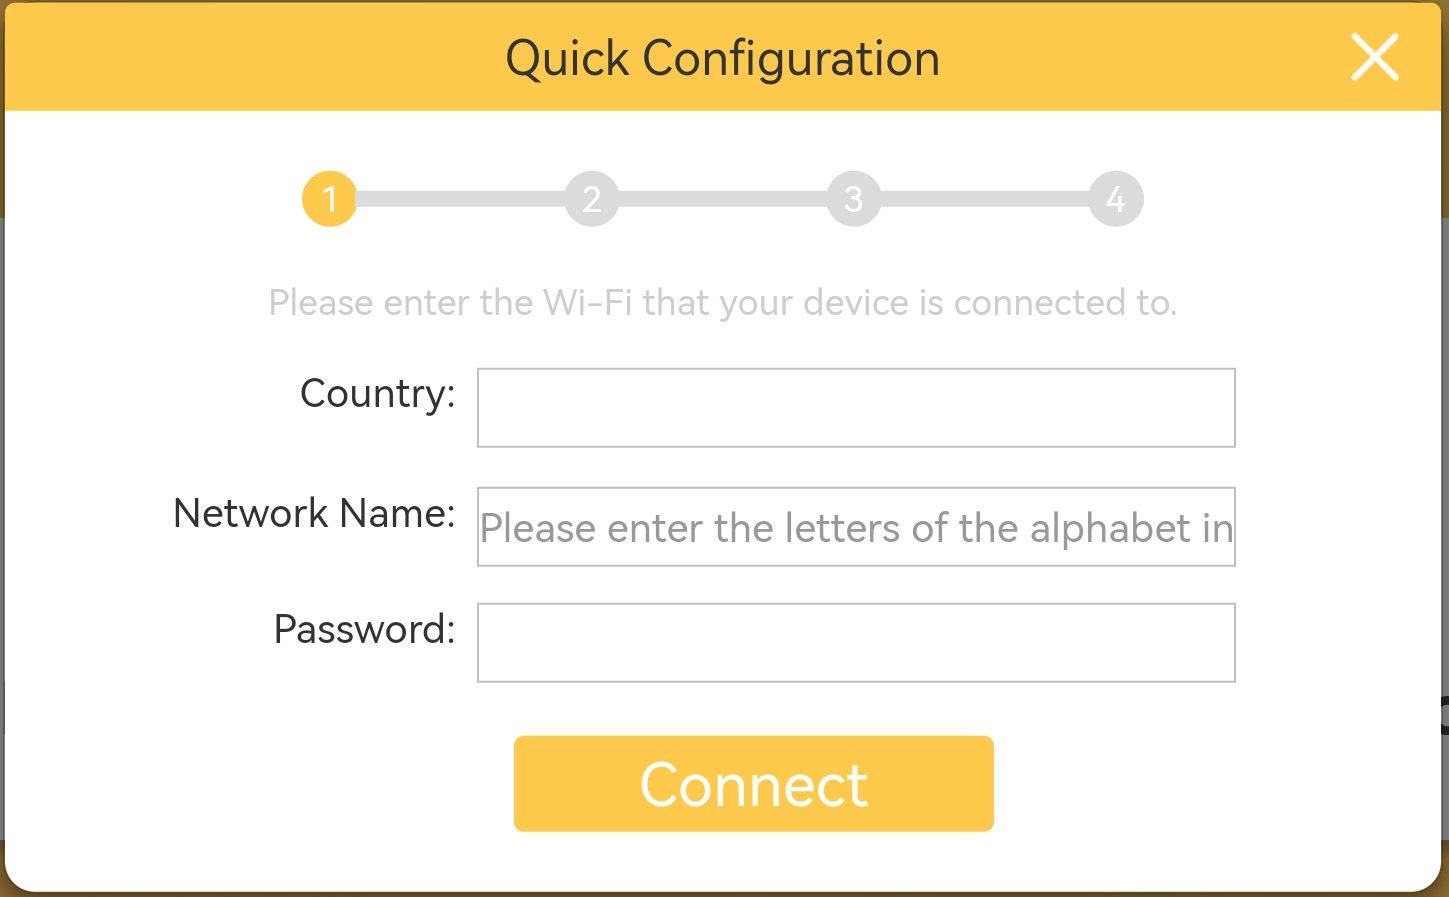
If this is your first time using this product, you will be prompted for a quick configuration of it.
Enter your Wi-Fi account and password.
Note
If you have already configured Wi-Fi on the Raspberry Pi Imager, then this step will not appear and you will go directly to the next step.
This step is to configure WiFi for the Raspberry Pi, which needs to be the same WiFi network as your mobile device (phone/tablet).
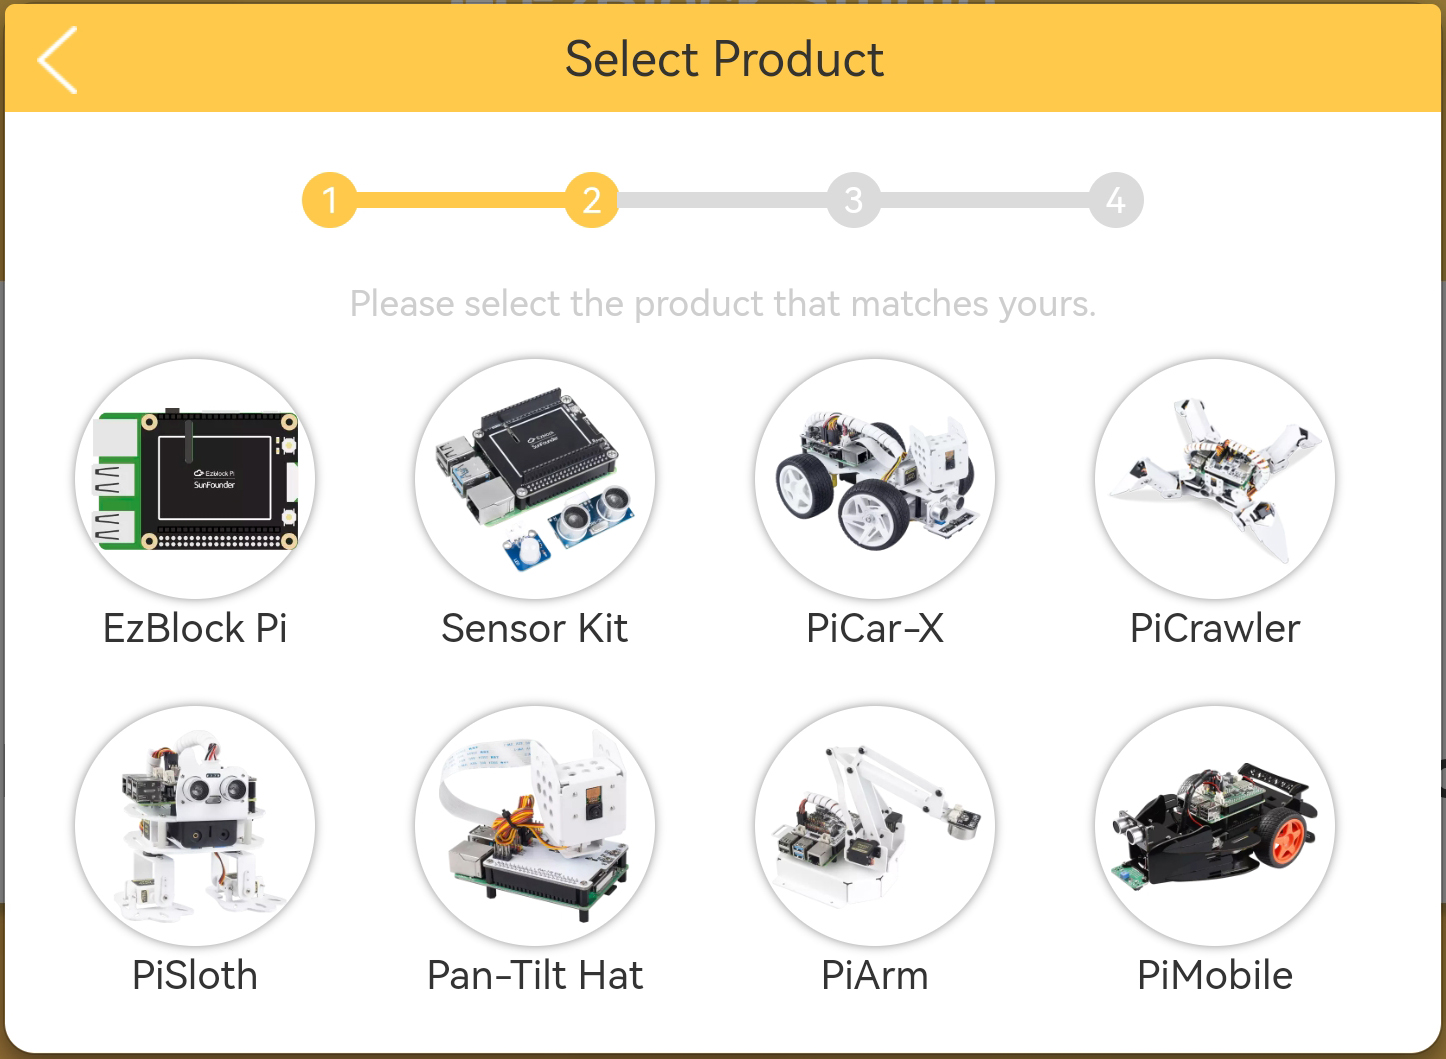
Select the matching product.
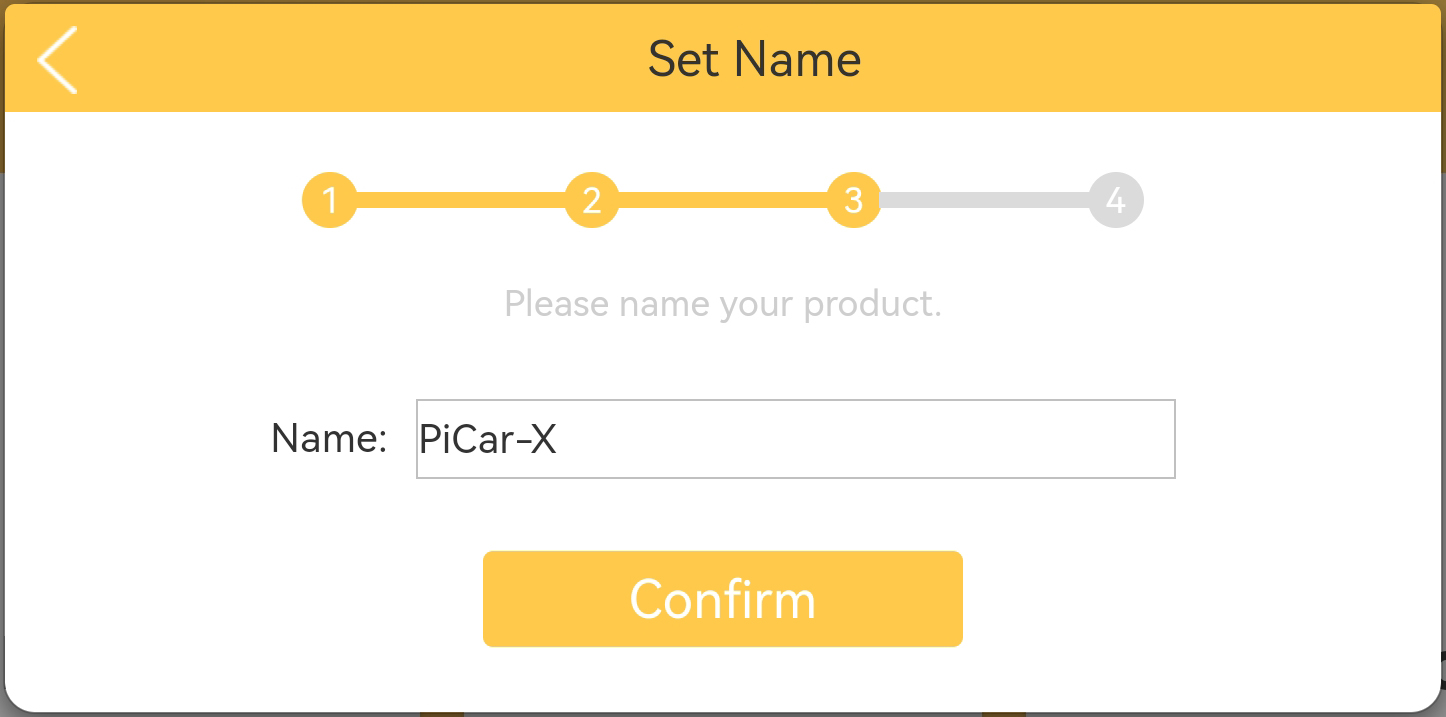
Give your product a unique name, which will be your Bluetooth name ( takes effect after restarting the product and app) and can also be used as hostname when you use EzBlock on a browser, see How to use EzBlock in a Browser for more details.
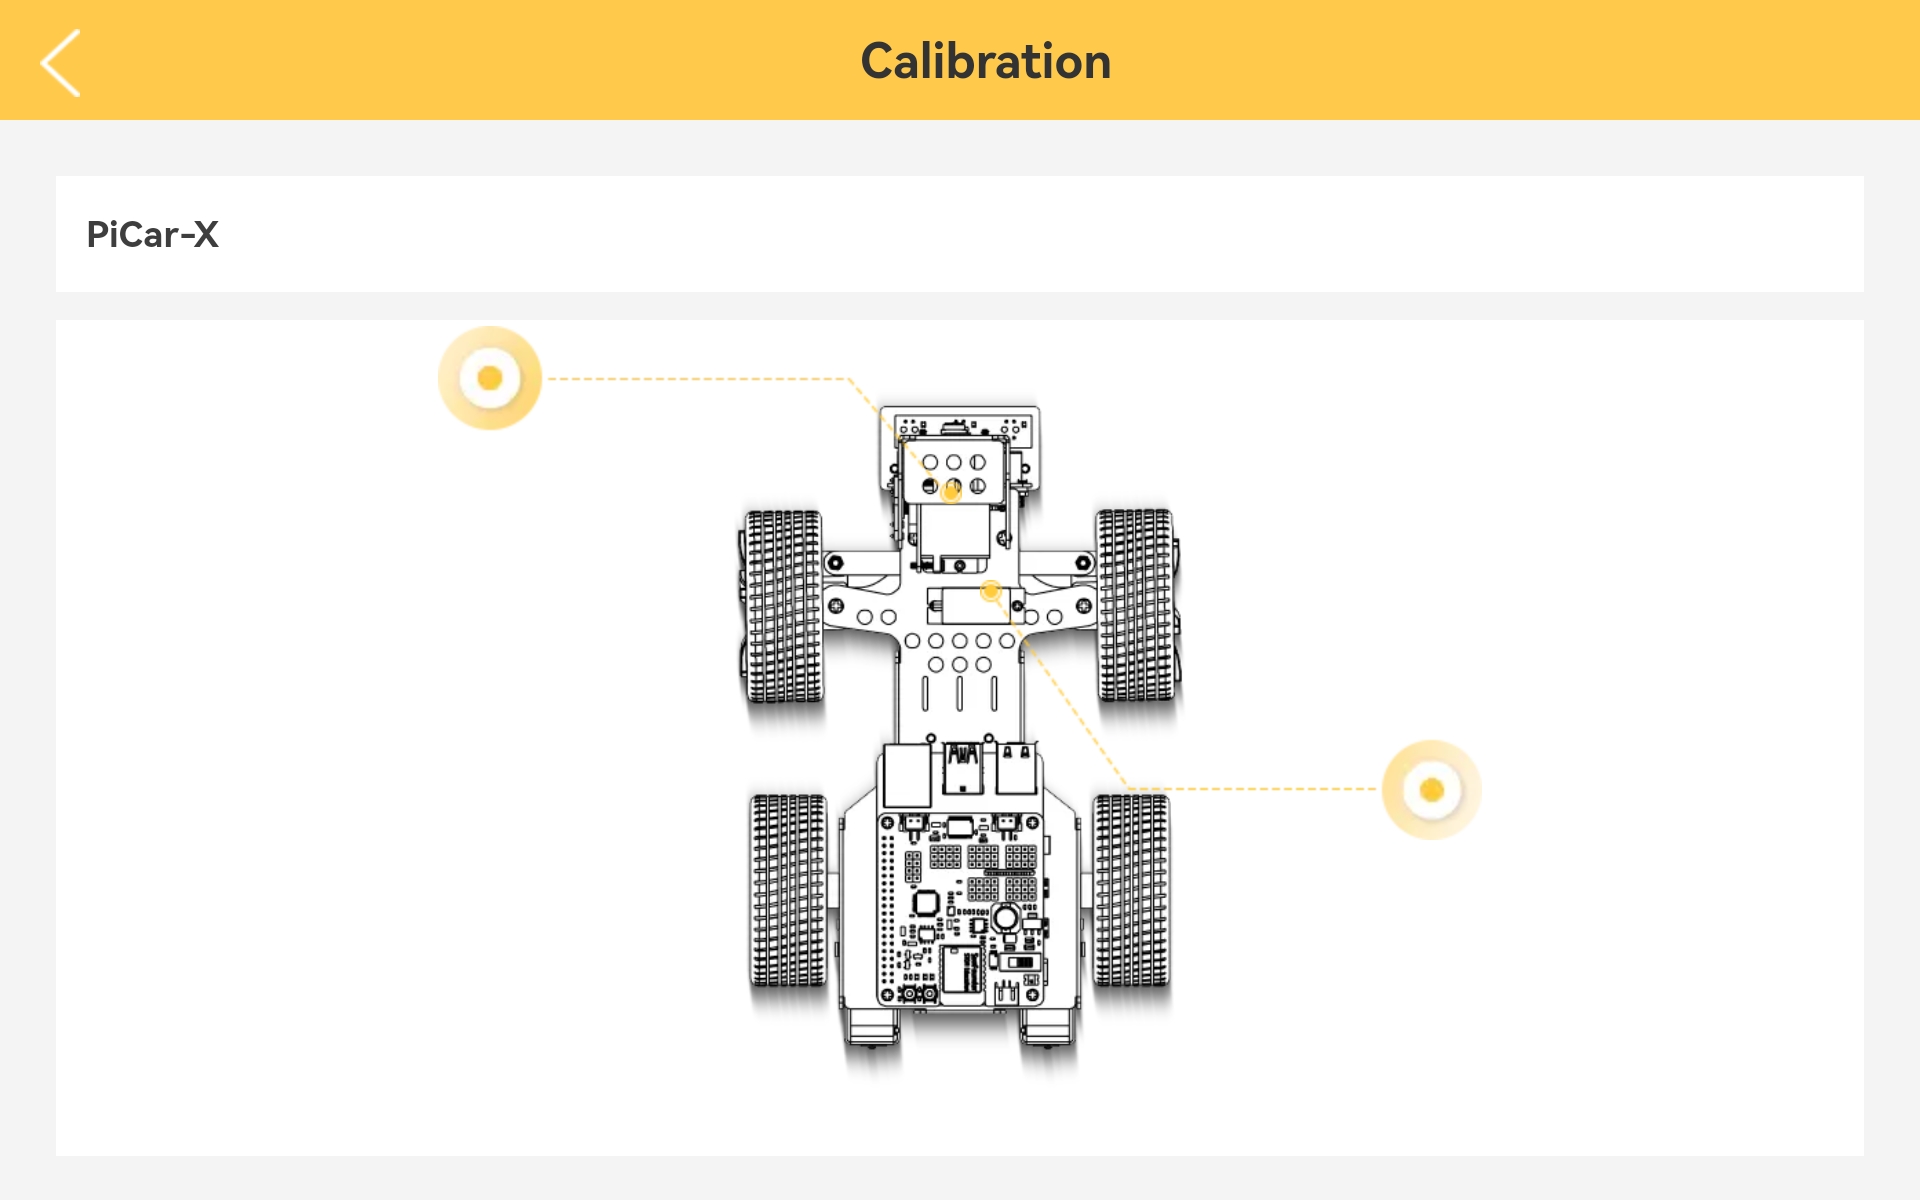
If your product needs to be calibrated, there will be a prompt telling you that you can enter the calibration page by clicking Calibration Now. If it is not needed, the pop-up window disappears and returns to the home page.
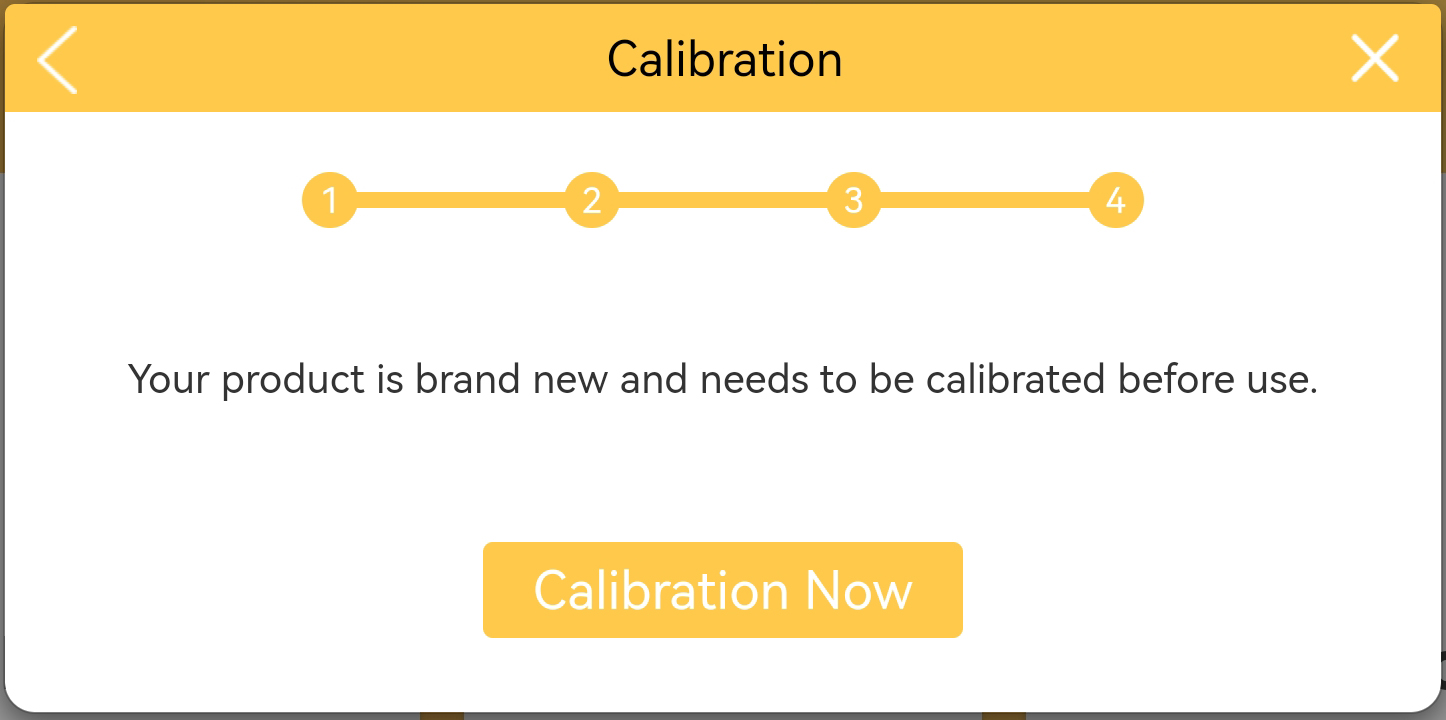
The calibration page of each product is different, but there is a reminder which part needs to be calibrated. You can click the corresponding part, and then refer to the Calibration Help to calibrate. After the calibration is completed, click Comfirm.
Note
If you want to recalibrate the robot during use, please follow the steps below.
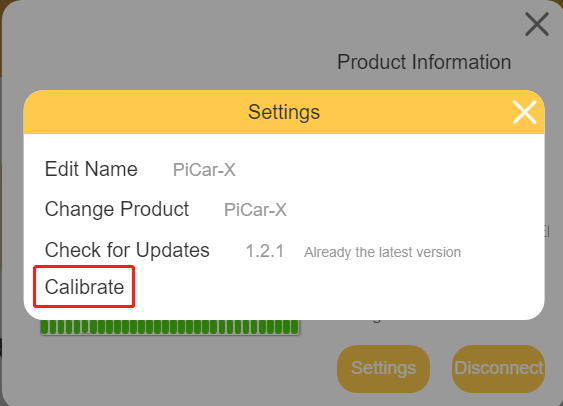
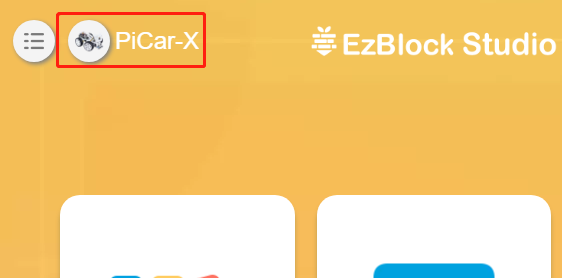
You can open the product detail page by clicking the connect icon in the upper left corner.
Click the Settings button.
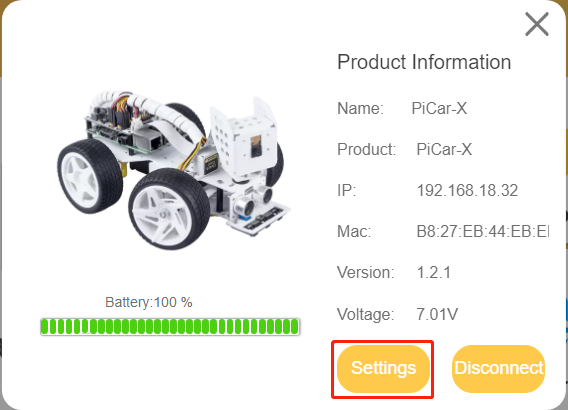
On this page, you can change the product name, product type, view the app version or calibrate the robot. Once you click on Calibrate you can go to the calibration page.