Note
Hello, welcome to the SunFounder Raspberry Pi & Arduino & ESP32 Enthusiasts Community on Facebook! Dive deeper into Raspberry Pi, Arduino, and ESP32 with fellow enthusiasts.
Why Join?
Expert Support: Solve post-sale issues and technical challenges with help from our community and team.
Learn & Share: Exchange tips and tutorials to enhance your skills.
Exclusive Previews: Get early access to new product announcements and sneak peeks.
Special Discounts: Enjoy exclusive discounts on our newest products.
Festive Promotions and Giveaways: Take part in giveaways and holiday promotions.
👉 Ready to explore and create with us? Click [here] and join today!
Home Page
When we open EzBlock, we can see the homepage, as shown below:
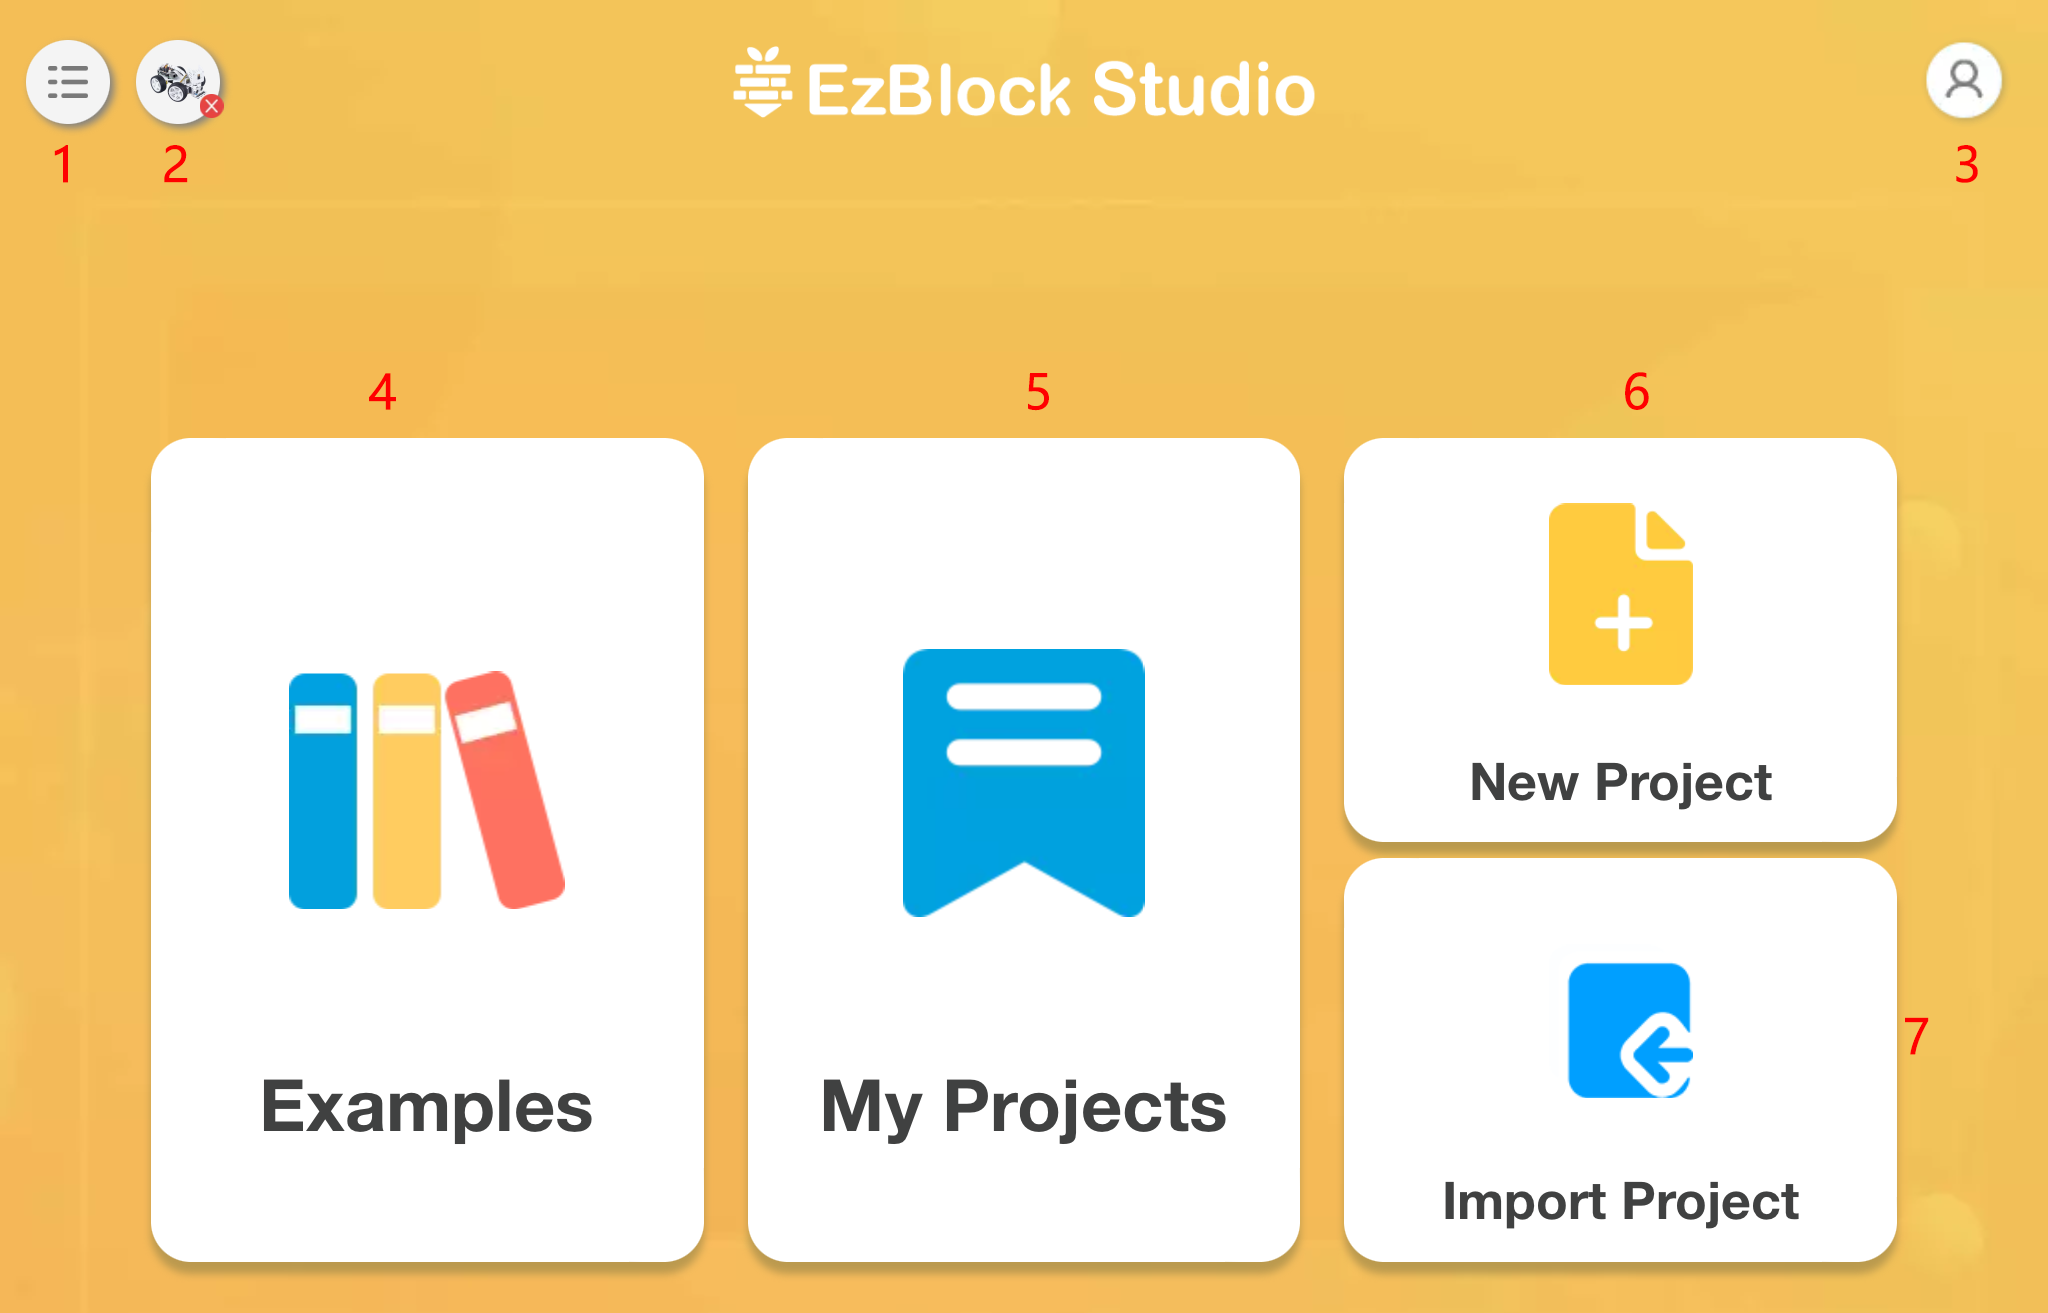
1. Menu: After clicking, a menu window will pop up.
2. Product: Connect your robot from here, please see Quick User Guide and How to use EzBlock in a Browser for specific operations.
3. Profile: After version 3.2, you will no longer need to register or log in to your account, and this icon will be removed.
4. Examples: You can view the preset examples here to let you play quickly.
5. My Projects: Your personal project or library will be saved here.
6. New Project: Create a new project.
Import Projects/Libraries: Used to import projects or libraries.
1. Menu

Language: Chinese and English are included.
Version: View the current version.
Contact us: If you have any questions, you can ask for help here.
About Us: Introduction to SunFounder.
Help: When selected, EzBlock related tutorials will pop up, including FAQ, get started and reference.
2. Product
Product Information
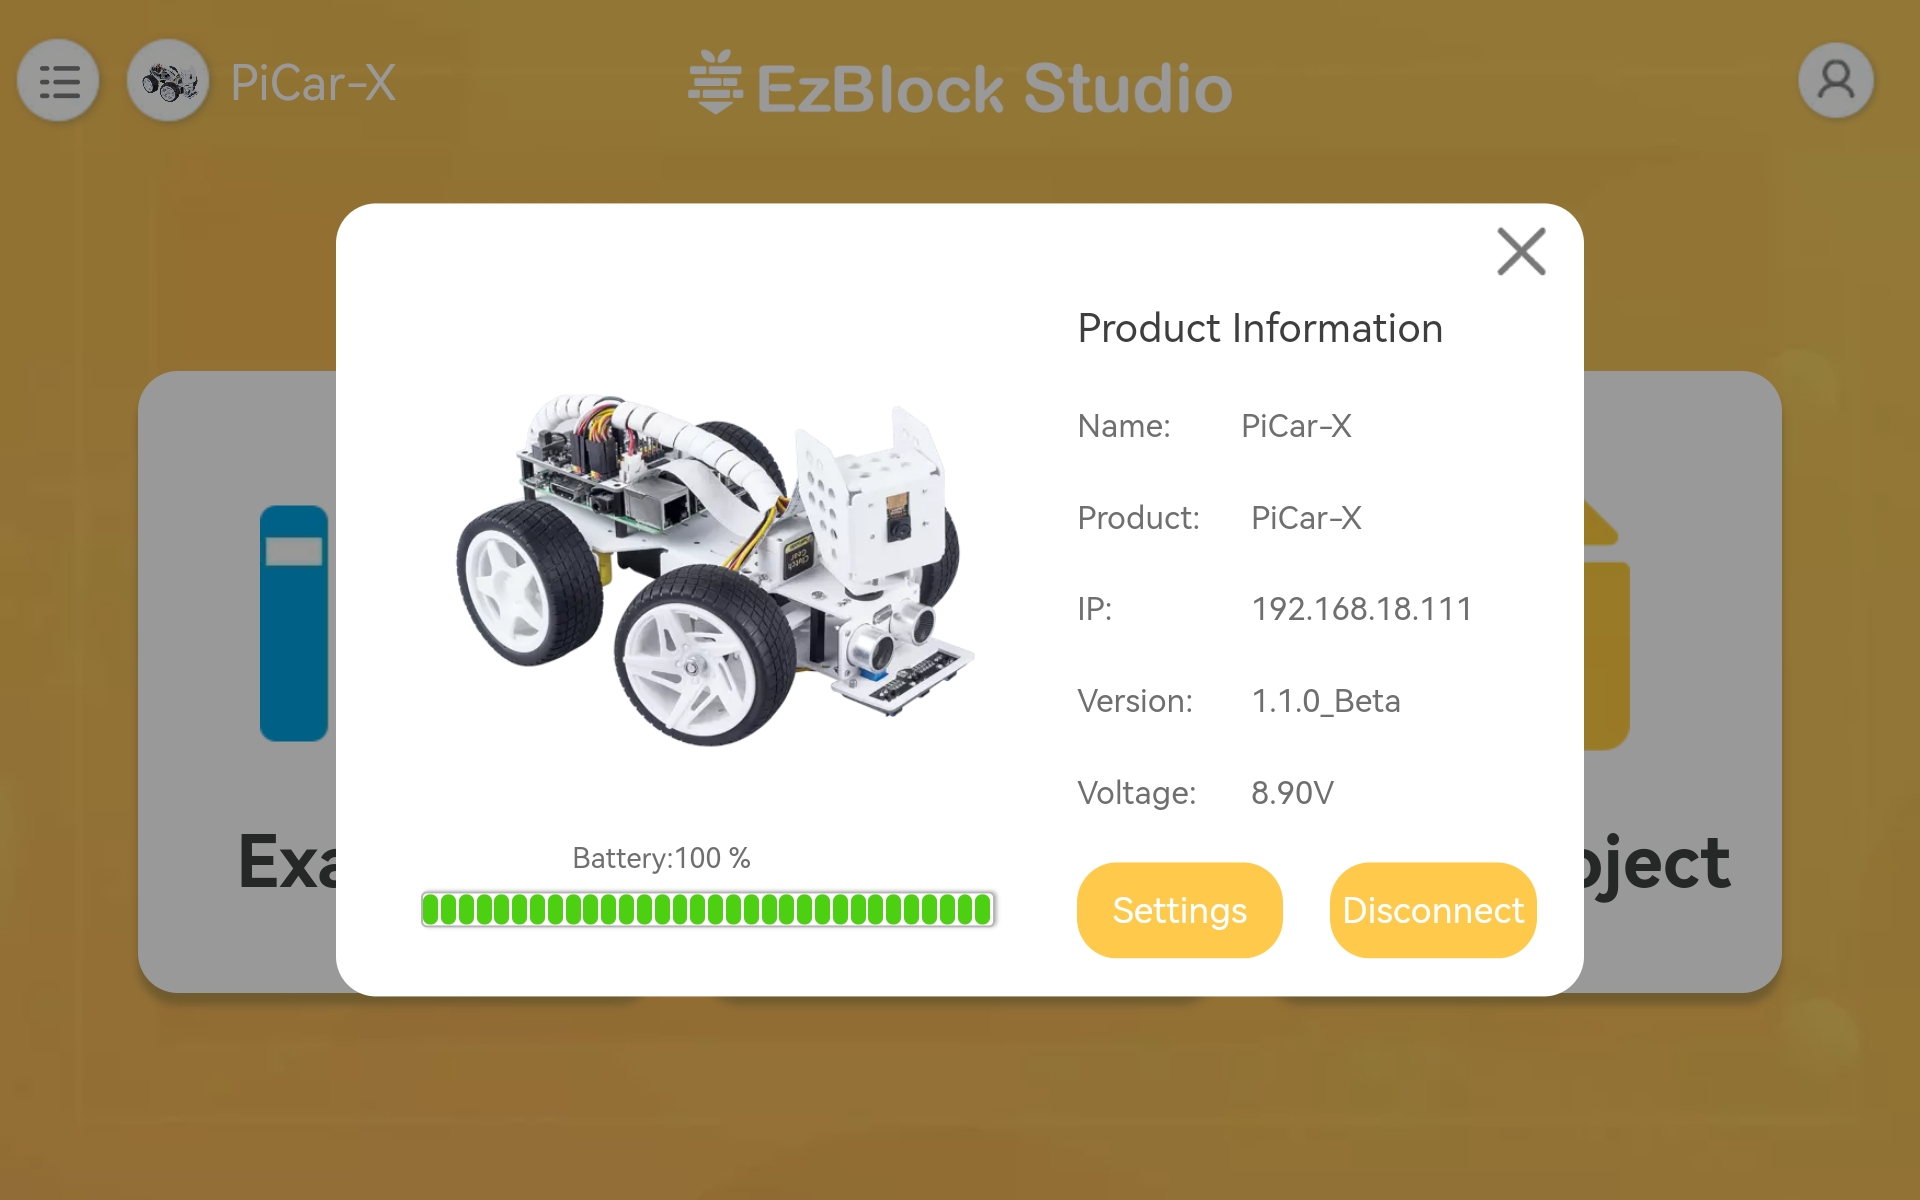
This is the product information page, which contains the product name (you name it), product type, Raspberry Pi IP, APP version, operating voltage and the current power of the product.
Settings
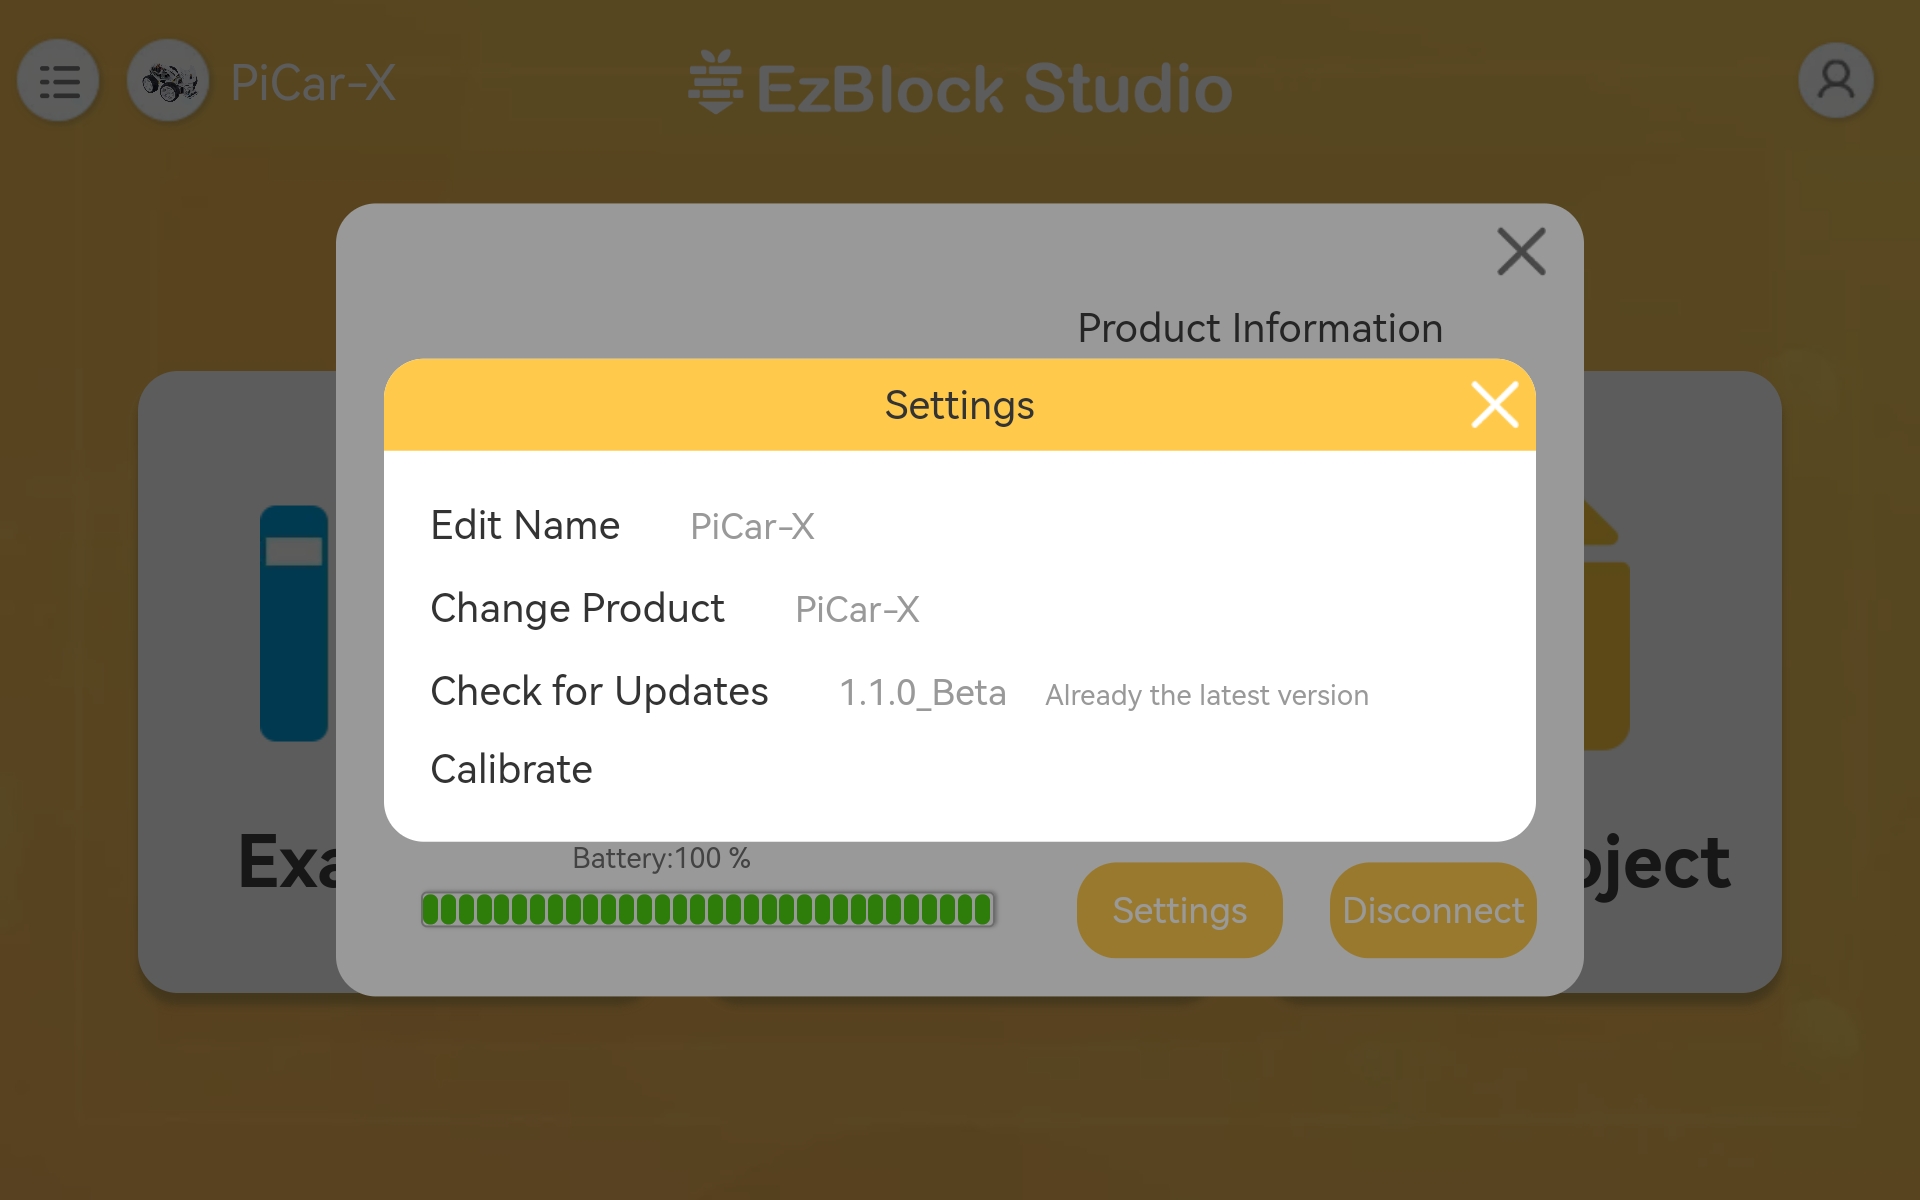
Edit Name: If you are not satisfied with the name you gave before, you can change it here.
Change Product: Change to another product.
Check for Updates: Check the current version of the app, and check if there is a newer version.
Calibrate: If you think your product is still a bit deviated during use, you can use this button to recalibrate it to the right position.
4. Examples
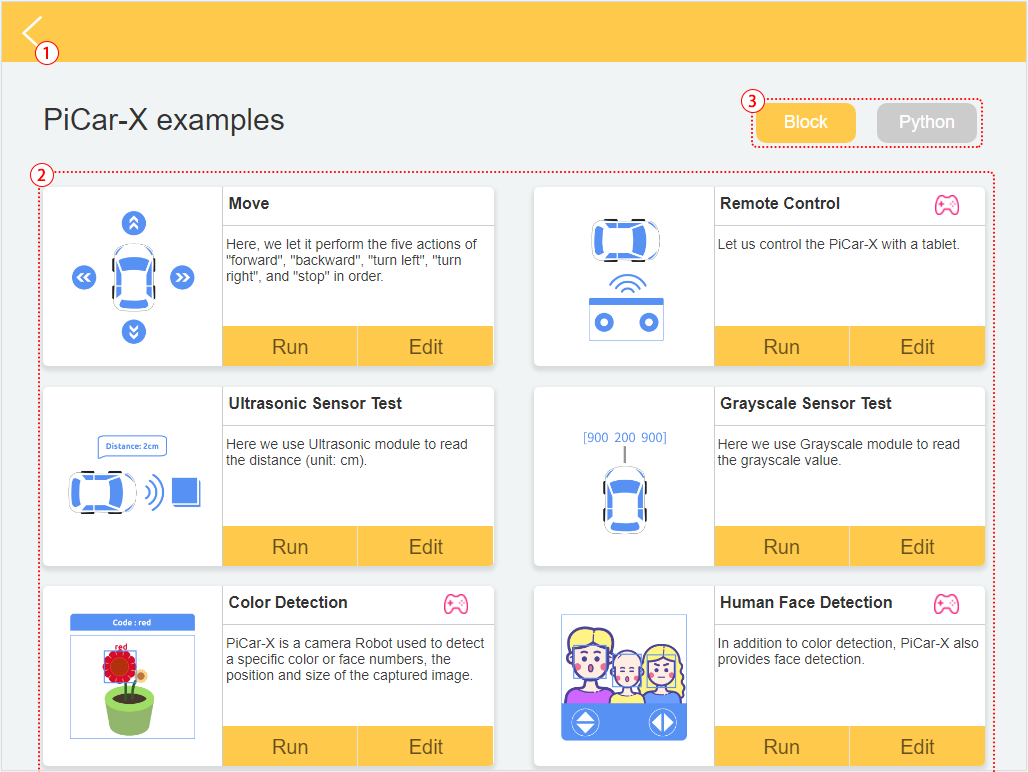
Back to home page
Choose an example. Click Run to flash and run the program directly, and click Edit to enter the programming interface.
To choose a programming language, there are two options: Blockly and Python.
Note
Before entering the Examples page, you need to select the correct product first.
5. My Projects
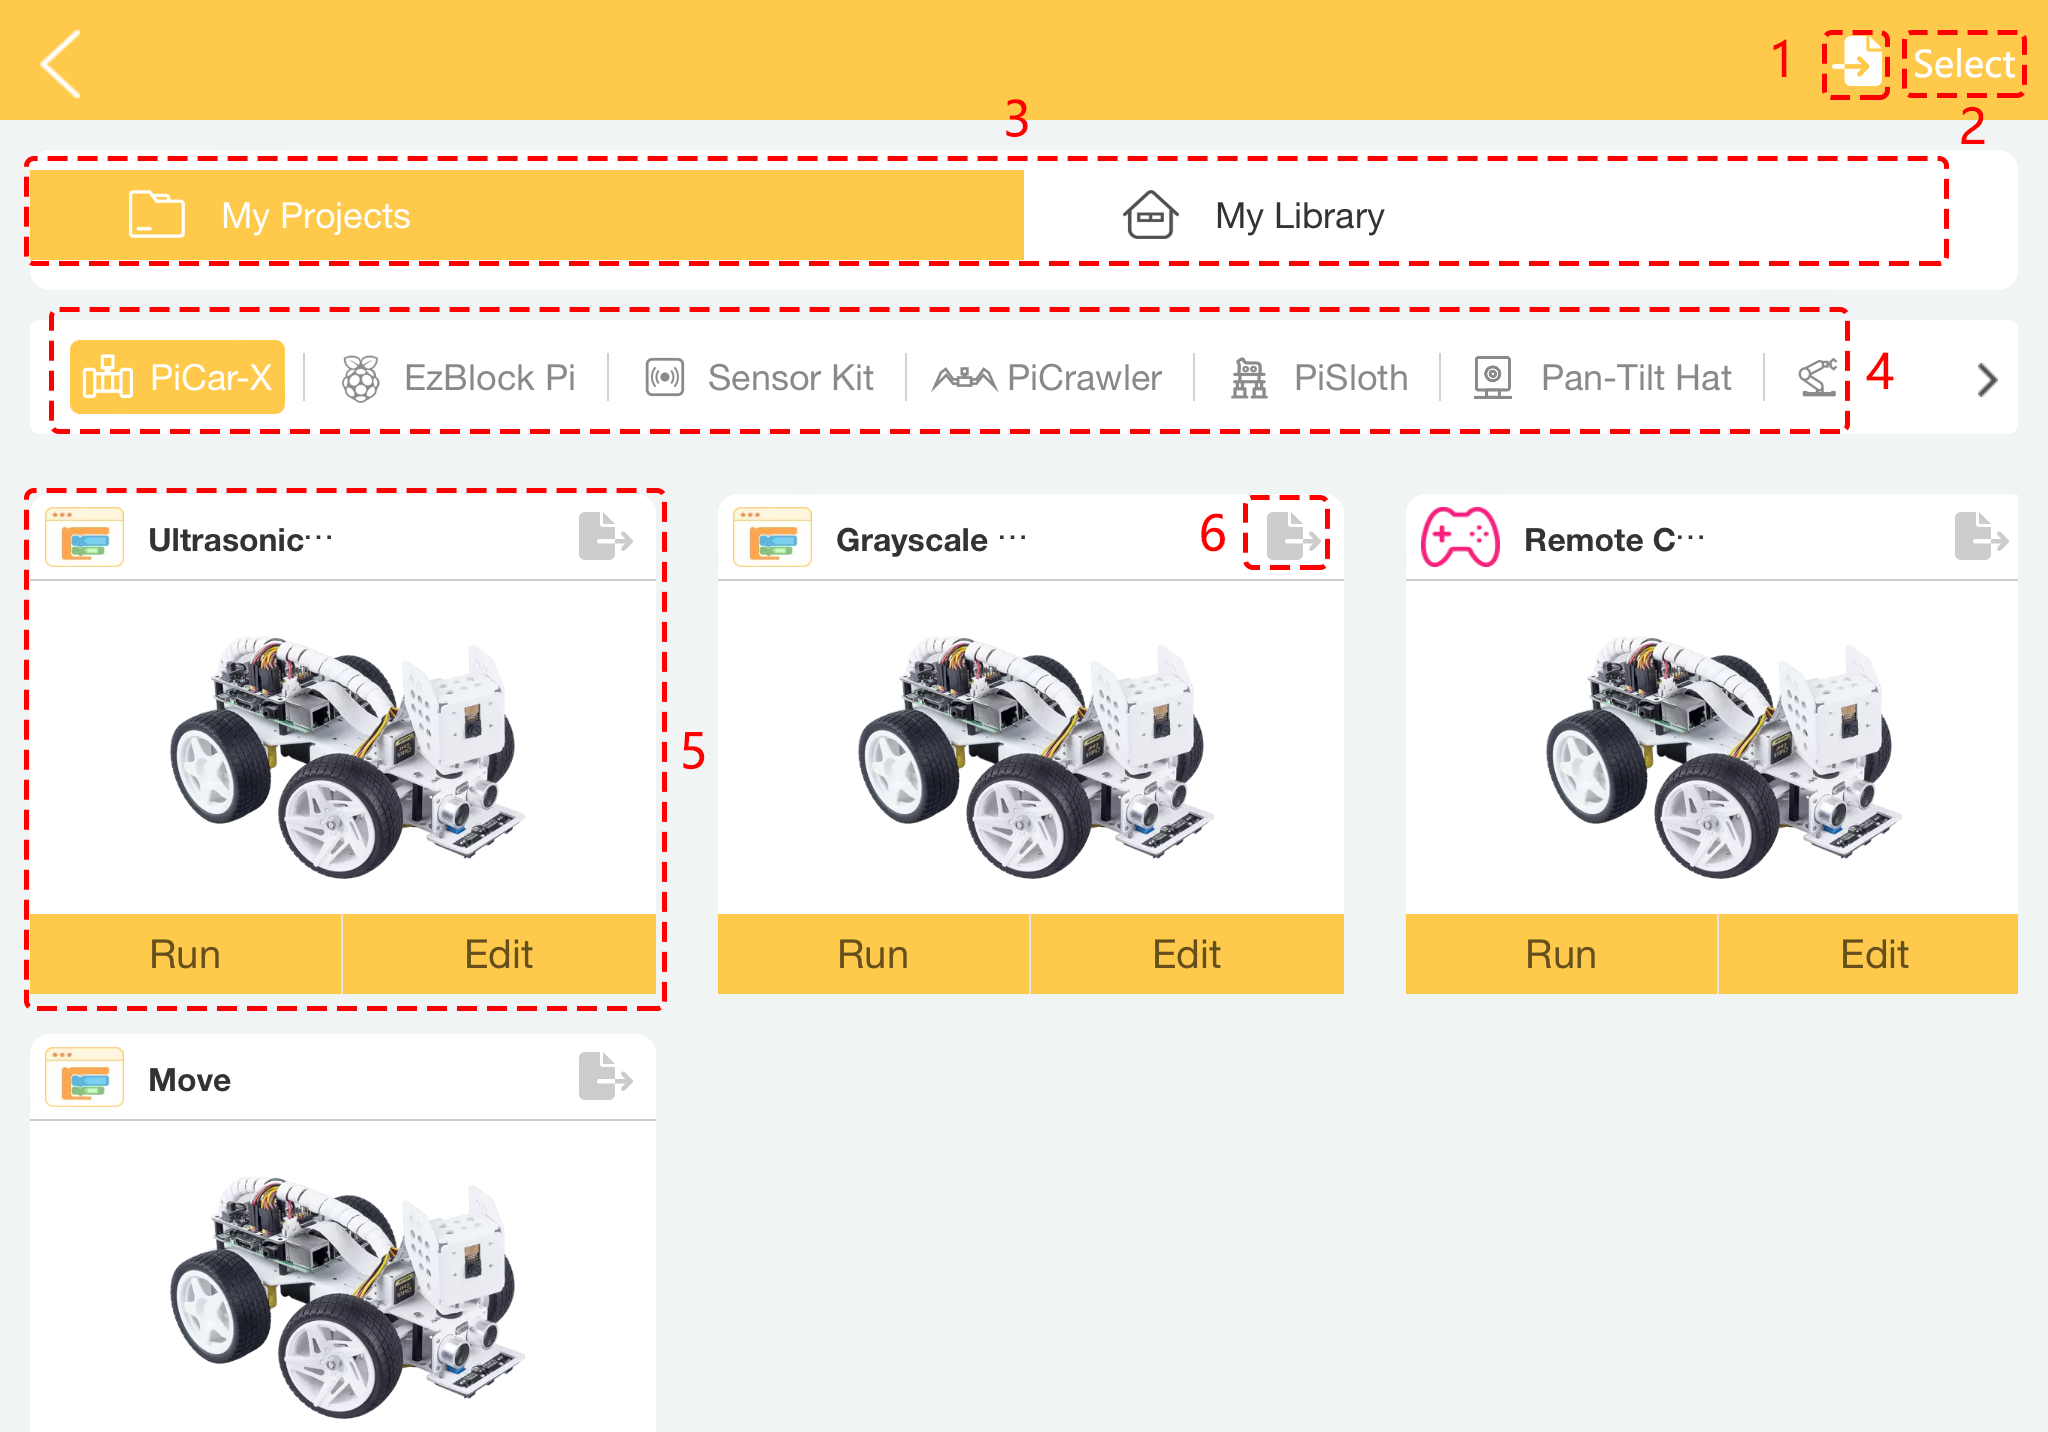
Import projects or libraries.
Select button: After clicking it, you can choose to select multiple projects or libraries at once, or select all to export or delete.
Here are two categories My Projects or My Library.
Your project will be saved under the corresponding product category.
Select your personal project here. You can click Run to flash and run the program directly (if the project uses remote control, it will also take you to the remote control page), and click Edit to enter the programming page.
The export icon is located in the upper right corner of each project or library.
6. New Project
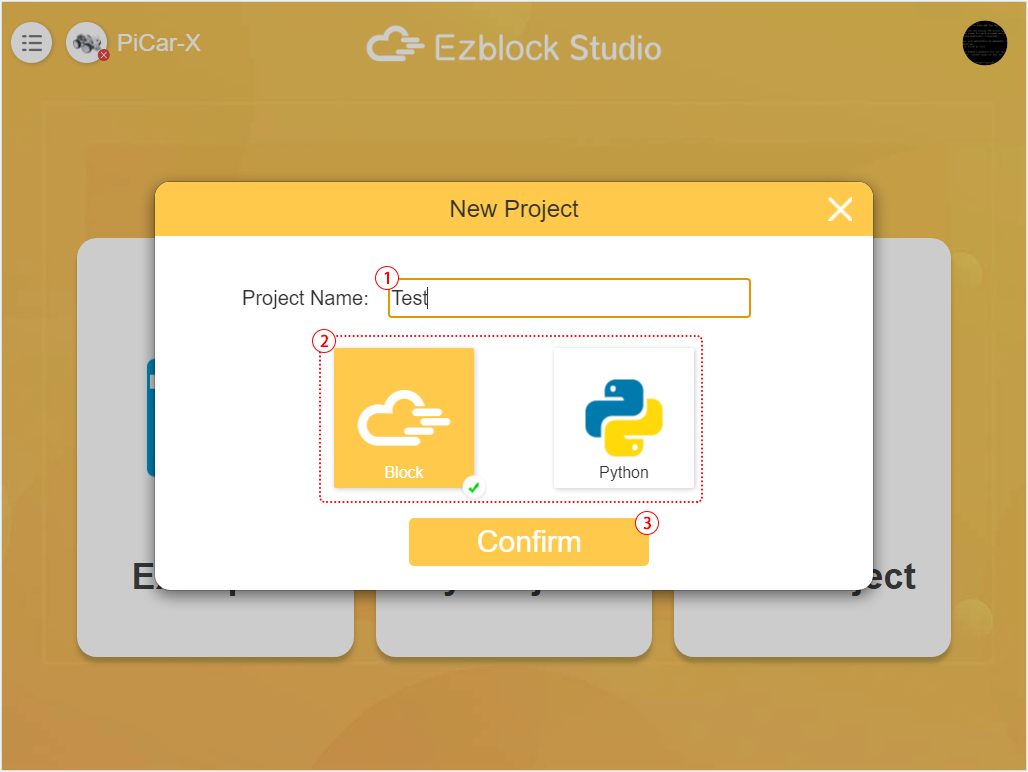
Enter the name of the project.
To choose a programming language, there are two options: Blockly and Python.
Click to enter the programming interface.