Note
Hello, welcome to the SunFounder Raspberry Pi & Arduino & ESP32 Enthusiasts Community on Facebook! Dive deeper into Raspberry Pi, Arduino, and ESP32 with fellow enthusiasts.
Why Join?
Expert Support: Solve post-sale issues and technical challenges with help from our community and team.
Learn & Share: Exchange tips and tutorials to enhance your skills.
Exclusive Previews: Get early access to new product announcements and sneak peeks.
Special Discounts: Enjoy exclusive discounts on our newest products.
Festive Promotions and Giveaways: Take part in giveaways and holiday promotions.
👉 Ready to explore and create with us? Click [here] and join today!
1. Show Image
In this chapter, we’ll explore a simple example to help you quickly experience the basic usage of OpenCV: reading and displaying an image.
In the example project folder, we have already prepared a sample photo named my_photo.jpg.
You can also use the 3.1 Photograph Module example to take a photo and save it to the current folder.
1. Project Overview
In this section, we will accomplish the following tasks:
Use
cv2.imreadto read a local imageUse
cv2.imshowto display the imageUse
cv2.waitKeyto control window behaviorUse
cv2.destroyAllWindowsto close the window
After successfully running this code, an image window will pop up on your screen.
2. Run the Code
Important
Before you start, make sure:
The pan-tilt is assembled
You can access the Raspberry Pi desktop
The code package is installed
Fusion HAT+ is installed and configured
OpenCV is installed
For detailed instructions, see 0. Setup OpenCV.
Open the terminal and enter the following command:
cd ~/ai-lab-kit/opencv_python
python3 cv_1_imgshow.py
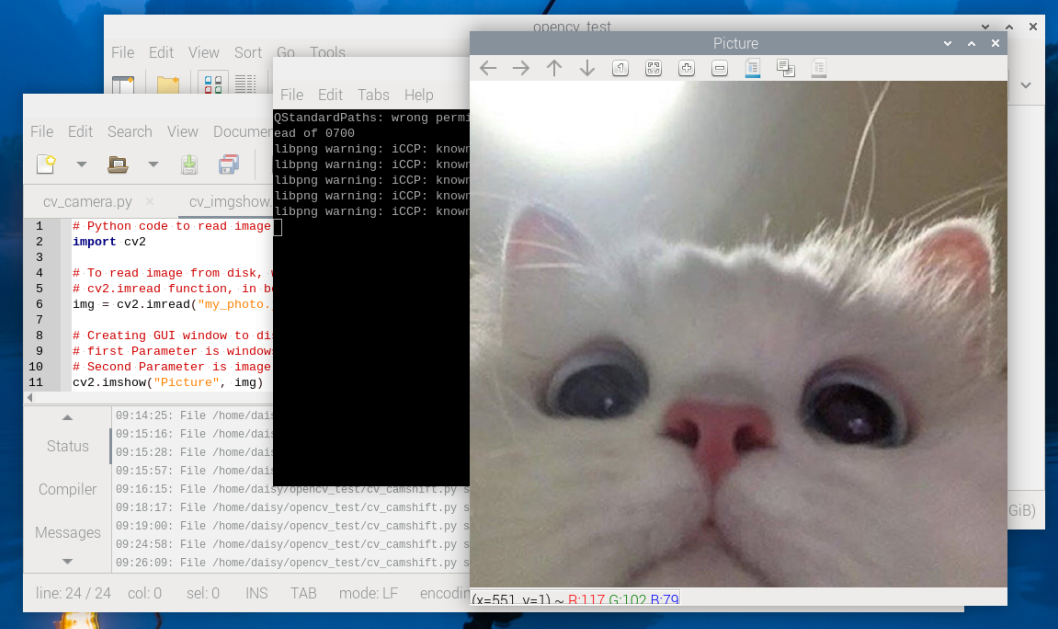
After running the script, OpenCV opens a window titled
Pictureand displays the image loaded frommy_photo.jpg.The window will remain open until the user quits the program.
To exit the program, you can:
Press q on the keyboard
Close the window by clicking the close button
Once the window is closed, all OpenCV resources are released and the program exits.
3. Complete Code
# Python code to read and display an image using OpenCV
import cv2
from pathlib import Path

# Get the directory of the current Python file
BASE_DIR = Path(__file__).resolve().parent

# Read image from disk
# cv2.imread loads the image as a NumPy array
img = cv2.imread(str(BASE_DIR / "my_photo.jpg"), cv2.IMREAD_COLOR)

# Create a GUI window to display the image
# First parameter: window title
# Second parameter: image array
cv2.imshow("Picture", img)

# Keep the window open until the user closes it or presses 'q'
# cv2.waitKey only listens for keyboard events, not the close button
# Therefore, we use a loop to detect both window close and key press
while True:
   # Check if the window has been closed
   if cv2.getWindowProperty("Picture", cv2.WND_PROP_VISIBLE) < 1:
      break

   # Wait for 1 ms and check for key press
   # Press 'q' to exit the program
   if cv2.waitKey(1) & 0xFF == ord("q"):
      break

# Destroy all OpenCV windows and release memory
cv2.destroyAllWindows()
4. Code Explanation
cv2.imread("my_photo.jpg", cv2.IMREAD_COLOR)Reads the image named
my_photo.jpgand loads it in color mode.cv2.imshow("Picture", img)Creates a window titled “Picture” and displays the image.
cv2.waitKey(0)When the parameter is
0, the program will wait indefinitely until you close the window or press any key.cv2.getWindowProperty()Gets a property value of the specified window (for example, whether the window is still visible).
cv2.destroyAllWindows()Closes all OpenCV windows and releases resources.
5. Further Practice
Try changing the window title in
imshowto “My First OpenCV Window”.Replace the image with a different one and observe the result.
Modify the
waitKeyparameter to 3000 so the program automatically closes the window after 3 seconds.