Note
Hello, welcome to the SunFounder Raspberry Pi & Arduino & ESP32 Enthusiasts Community on Facebook! Dive deeper into Raspberry Pi, Arduino, and ESP32 with fellow enthusiasts.
Why Join?
Expert Support: Solve post-sale issues and technical challenges with help from our community and team.
Learn & Share: Exchange tips and tutorials to enhance your skills.
Exclusive Previews: Get early access to new product announcements and sneak peeks.
Special Discounts: Enjoy exclusive discounts on our newest products.
Festive Promotions and Giveaways: Take part in giveaways and holiday promotions.
👉 Ready to explore and create with us? Click [here] and join today!
8. Face and Eye Detection
In this chapter, we will use the Raspberry Pi’s Picamera2 to capture video and apply OpenCV’s Haar feature classifiers for real-time face and eye detection. This approach is lightweight and highly practical—great for beginners deploying on a Raspberry Pi.
1. Haar Features and Detection Principles
Essence of Haar Features
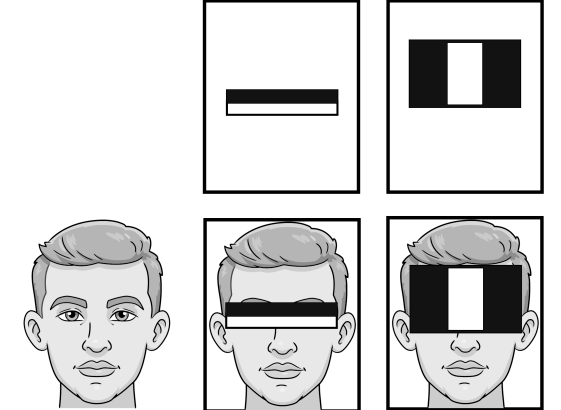
Haar features are a classic method for object detection. They encode patterns of brightness differences within image regions to determine whether a region likely contains a face, eyes, and so on.
Typical Haar feature examples:
Eye regions are usually darker than the forehead above
Brightness is symmetric on both sides of the nose bridge
The area below the mouth often shows a clear edge pattern
OpenCV requires pre-trained Haar classifiers (.xml files). They are already included in the example directory—just load and use them.
Detection Pipeline
Load the trained Haar model using
CascadeClassifierConvert the real-time video to grayscale (to improve efficiency)
Use
detectMultiScaleto detect face/eye regionsDraw rectangles around detected targets

2. Run the Code
Important
Before you start, make sure:
The pan-tilt is assembled
You can access the Raspberry Pi desktop
The code package is installed
Fusion HAT+ is installed and configured
OpenCV is installed
For detailed instructions, see 0. Setup OpenCV.
Open the terminal and enter the following command:
cd ~/ai-lab-kit/opencv_python
python3 cv_8_haarcascade.py
Tip
We also provide
cv_8_haarcascade_video.pyfor detecting faces and eyes from a video file.When you run the program, a window named Raspberry Pi Camera - Face Detection will appear and display the live camera image from the Raspberry Pi Camera.
Faces detected in the video stream are highlighted with yellow rectangles, and each detected face is labeled (Face 1, Face 2, …). Within each detected face region, the program also detects eyes and marks them with orange rectangles.
The detection works in real time, and the rectangles will move as the person moves in front of the camera.
To stop the program:
Press the q key on the keyboard
Or close the display window using the close button (X)
After exiting, the camera will stop and all OpenCV windows will be closed.
3. Complete Code
# Face and eye detection using Raspberry Pi Camera (Picamera2 + OpenCV Haar Cascades)
import cv2
from picamera2 import Picamera2
from pathlib import Path

# -----------------------------
# Load Haar cascade classifiers
# -----------------------------
BASE_DIR = Path(__file__).resolve().parent

face_cascade = cv2.CascadeClassifier(str(BASE_DIR / "haarcascade_frontalface_default.xml"))
eye_cascade  = cv2.CascadeClassifier(str(BASE_DIR / "haarcascade_eye.xml"))

# Check if cascade files are loaded correctly
if face_cascade.empty():
   raise FileNotFoundError("Failed to load haarcascade_frontalface_default.xml")
if eye_cascade.empty():
   raise FileNotFoundError("Failed to load haarcascade_eye.xml")

# -----------------------------
# Initialize Picamera2
# -----------------------------
picam2 = Picamera2()

# Video configuration (resolution can be adjusted)
config = picam2.create_video_configuration(main={"size": (640, 480)})
picam2.configure(config)
picam2.start()

WIN = "Raspberry Pi Camera - Face Detection"
print("Camera started. Press 'q' to quit.")

try:
   while True:
      # Capture a frame (Picamera2 typically provides RGB)
      frame_rgb = picam2.capture_array()

      # Convert RGB -> Grayscale directly (faster than RGB->BGR->GRAY)
      gray = cv2.cvtColor(frame_rgb, cv2.COLOR_RGB2GRAY)

      # Improve contrast to make detection more stable under different lighting
      gray = cv2.equalizeHist(gray)

      # Detect faces
      faces = face_cascade.detectMultiScale(
            gray,
            scaleFactor=1.2,
            minNeighbors=5,
            minSize=(60, 60)
      )

      # Convert RGB -> BGR only for display and drawing (OpenCV imshow expects BGR)
      frame_bgr = cv2.cvtColor(frame_rgb, cv2.COLOR_RGB2BGR)

      # Draw face and eye results
      for i, (x, y, w, h) in enumerate(faces, start=1):
            # Draw face rectangle + label
            cv2.rectangle(frame_bgr, (x, y), (x + w, y + h), (255, 255, 0), 2)
            cv2.putText(frame_bgr, f"Face {i}", (x, max(0, y - 10)),
                        cv2.FONT_HERSHEY_SIMPLEX, 0.5, (255, 255, 0), 2)

            # ROI for eye detection (search eyes only inside the detected face area)
            roi_gray = gray[y:y + h, x:x + w]
            roi_color = frame_bgr[y:y + h, x:x + w]

            eyes = eye_cascade.detectMultiScale(
               roi_gray,
               scaleFactor=1.2,
               minNeighbors=8,
               minSize=(20, 20)
            )

            # Draw up to 2 eyes (typical for a face)
            for (ex, ey, ew, eh) in eyes[:2]:
               cv2.rectangle(roi_color, (ex, ey), (ex + ew, ey + eh), (0, 127, 255), 2)

      # Show the frame
      cv2.imshow(WIN, frame_bgr)

      # Handle keyboard input
      key = cv2.waitKey(1) & 0xFF
      if key == ord("q"):
            break

      # Exit if the user closes the window (click X)
      if cv2.getWindowProperty(WIN, cv2.WND_PROP_VISIBLE) < 1:
            break

finally:
   picam2.stop()
   cv2.destroyAllWindows()
   print("Camera stopped.")
4. Code Explanation
Import required libraries:
import cv2
from picamera2 import Picamera2
from pathlib import Path
OpenCV is used for detection and drawing, Picamera2 is used to capture frames from the Raspberry Pi camera.
Get the directory of the current script:
BASE_DIR = Path(__file__).resolve().parent
This lets you load the cascade XML files from the same folder as the Python script.
Load Haar cascade classifiers (face and eye):
face_cascade = cv2.CascadeClassifier(str(BASE_DIR / "haarcascade_frontalface_default.xml"))
eye_cascade  = cv2.CascadeClassifier(str(BASE_DIR / "haarcascade_eye.xml"))
Haar cascades are pre-trained models that can detect faces and eyes.
Check if the cascade files are loaded correctly:
if face_cascade.empty():
    raise FileNotFoundError("Failed to load haarcascade_frontalface_default.xml")
if eye_cascade.empty():
    raise FileNotFoundError("Failed to load haarcascade_eye.xml")
If the file path is wrong or the file is missing,
CascadeClassifierwill be empty. These checks help you find the problem early.Initialize the camera and set the resolution:
picam2 = Picamera2()
config = picam2.create_video_configuration(main={"size": (640, 480)})
picam2.configure(config)
picam2.start()
This starts the camera in video mode at 640×480.
Capture frames continuously:
frame_rgb = picam2.capture_array()
Each loop captures one frame. Picamera2 typically returns frames in RGB format.
Convert to grayscale (faster for detection):
gray = cv2.cvtColor(frame_rgb, cv2.COLOR_RGB2GRAY)
Face/eye detection works on grayscale images and runs faster than using color images.
Improve contrast for more stable detection:
gray = cv2.equalizeHist(gray)
Histogram equalization can improve detection results under different lighting conditions.
Detect faces in the frame:
faces = face_cascade.detectMultiScale(
    gray,
    scaleFactor=1.2,
    minNeighbors=5,
    minSize=(60, 60)
)
This returns a list of rectangles
(x, y, w, h)for all detected faces.scaleFactorcontrols the image scale step (smaller can be more accurate but slower).minNeighborsreduces false positives (higher = stricter).minSizeignores very small detections.
Convert RGB to BGR for drawing and display:
frame_bgr = cv2.cvtColor(frame_rgb, cv2.COLOR_RGB2BGR)
OpenCV drawing functions and
imshowexpect BGR for color images.Draw face rectangles and labels:
cv2.rectangle(frame_bgr, (x, y), (x + w, y + h), (255, 255, 0), 2)
cv2.putText(frame_bgr, f"Face {i}", (x, max(0, y - 10)),
            cv2.FONT_HERSHEY_SIMPLEX, 0.5, (255, 255, 0), 2)
This draws a box around each detected face and adds a label like “Face 1”.
Detect eyes inside each face (ROI):
roi_gray = gray[y:y + h, x:x + w]
roi_color = frame_bgr[y:y + h, x:x + w]

eyes = eye_cascade.detectMultiScale(
    roi_gray,
    scaleFactor=1.2,
    minNeighbors=8,
    minSize=(20, 20)
)
ROI means “Region of Interest”. Detecting eyes only inside the face area is faster and reduces false detections.
Draw up to two eyes:
for (ex, ey, ew, eh) in eyes[:2]:
    cv2.rectangle(roi_color, (ex, ey), (ex + ew, ey + eh), (0, 127, 255), 2)
This draws rectangles around the first two detected eyes.
Show the result and handle exit:
cv2.imshow(WIN, frame_bgr)

key = cv2.waitKey(1) & 0xFF
if key == ord("q"):
    break

if cv2.getWindowProperty(WIN, cv2.WND_PROP_VISIBLE) < 1:
    break
Press
qto quit, or close the window to exit safely.Cleanup (always runs):
picam2.stop()
cv2.destroyAllWindows()
The camera is stopped and all OpenCV windows are closed even if an error occurs.
5. Pros and Cons of Haar Detection
Aspect |
Advantages |
Disadvantages |
|---|---|---|
Speed |
Very fast; suitable for Raspberry Pi |
|
Accuracy |
Works well for frontal faces |
Sensitive to rotation and profile views |
Lighting |
Good under even lighting |
Performance drops if too bright/dark |
Model |
Small model size; easy to deploy |
Less accurate than deep learning methods |
Because it’s lightweight and fast, Haar features are still very practical on embedded devices.
6. Common Improvements
Lighting Preprocessing: Apply histogram equalization or CLAHE before detection to improve performance in low light.
Multi-Angle Detection: Load both frontal and profile face classifiers to detect more poses.
More Facial Features: Add Haar classifiers for eyes/mouth/nose to enrich detection.
Use DNN Instead of Haar: OpenCV DNN + ResNet/MobileNet can yield higher accuracy (but require more compute).
7. Extended Exercises
Use
cv2.equalizeHiston the grayscale image to enhance low-light detection.Add mouth or nose Haar classifiers to detect more facial features.
Record the detection process with
cv2.VideoWriter.Combine with GPIO output to make a Raspberry Pi project: “turn on LED when a face is detected.”