Note
Hello, welcome to the SunFounder Raspberry Pi & Arduino & ESP32 Enthusiasts Community on Facebook! Dive deeper into Raspberry Pi, Arduino, and ESP32 with fellow enthusiasts.
Why Join?
Expert Support: Solve post-sale issues and technical challenges with help from our community and team.
Learn & Share: Exchange tips and tutorials to enhance your skills.
Exclusive Previews: Get early access to new product announcements and sneak peeks.
Special Discounts: Enjoy exclusive discounts on our newest products.
Festive Promotions and Giveaways: Take part in giveaways and holiday promotions.
👉 Ready to explore and create with us? Click [here] and join today!
2. Play Video
In this chapter, you’ll learn how to read and play video streams in OpenCV, and how to control playback speed by calculating the frame processing time.
1. Project Overview
In this section, we will achieve the following goals:
Use
cv2.VideoCaptureto open a video fileRead and display video frame by frame
Automatically restart the video after it ends
Control the playback frame rate using processing time calculations
Press the
qkey to exit playback
2. Run the Code
Important
Before you start, make sure:
The pan-tilt is assembled
You can access the Raspberry Pi desktop
The code package is installed
Fusion HAT+ is installed and configured
OpenCV is installed
For detailed instructions, see 0. Setup OpenCV.
Open the terminal and enter the following command:
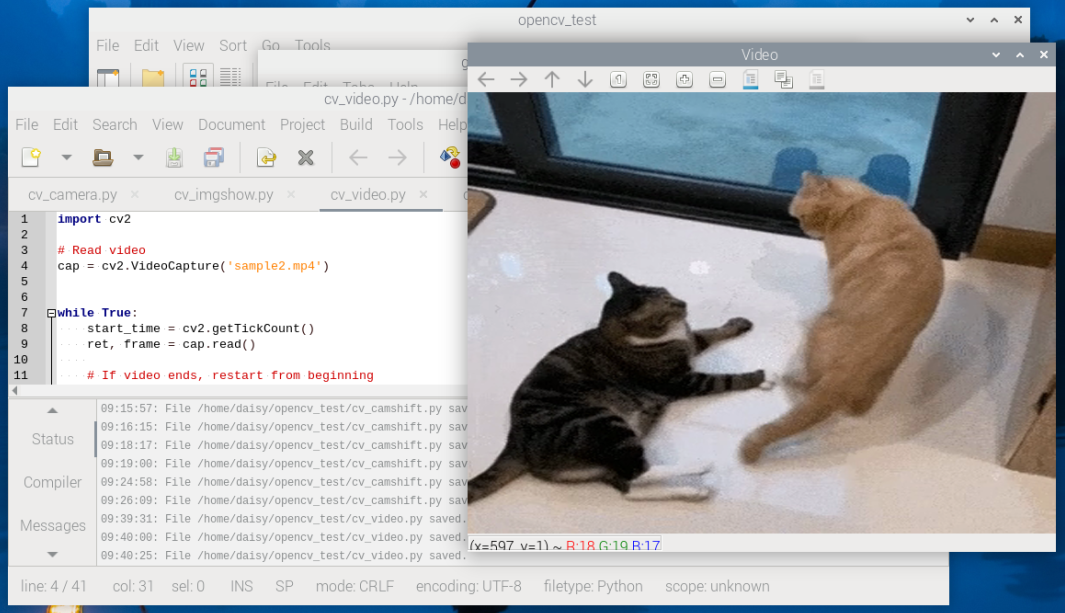
cd ~/ai-lab-kit/opencv_python
python3 cv_2_video.py
After running the script, OpenCV opens a window titled Video and displays the video frames in real time.
If the video reaches the end, it will restart automatically from the beginning.
To stop the program, you can:
Press q on the keyboard to quit playback
Close the window by clicking the close button
Once the window is closed, all OpenCV resources are released and the program exits.
3. Complete Code
import cv2

# Open the video file
cap = cv2.VideoCapture("sample2.mp4")

while True:
    # Read one frame from the video
    ret, frame = cap.read()

    # If the video ends, restart from the beginning
    if not ret:
        cap.set(cv2.CAP_PROP_POS_FRAMES, 0)
        continue

    # Resize the frame for better display performance
    frame = cv2.resize(frame, (640, 480))

    # Display the frame in a window named "Video"
    cv2.imshow("Video", frame)

    # Wait 30 ms between frames (~30 FPS)
    # This also processes GUI events (keyboard and window events)
    key = cv2.waitKey(30) & 0xFF

    # Press 'q' to exit the program
    if key == ord("q"):
        break

    # Exit if the user closes the window (click the close button)
    if cv2.getWindowProperty("Video", cv2.WND_PROP_VISIBLE) < 1:
        break

# Release the video capture object
cap.release()

# Close all OpenCV windows
cv2.destroyAllWindows()
4. Code Explanation
Open the video file:
cap = cv2.VideoCapture("sample2.mp4")
This opens the video file and creates a
VideoCaptureobject for reading frames.Read one frame from the video:
ret, frame = cap.read()
retisTrueif a frame is read successfully.retbecomesFalsewhen the video ends or reading fails.frameis the image data (a NumPy array).
Loop the video when it ends:
if not ret:
    cap.set(cv2.CAP_PROP_POS_FRAMES, 0)
    continue
When the video ends, this resets the playback position to the first frame so the video can restart.
Resize the frame:
frame = cv2.resize(frame, (640, 480))
This resizes each frame to 640×480 for smoother display and lower CPU usage on Raspberry Pi.
Display the frame:
cv2.imshow("Video", frame)
This displays the current frame in a window named
Video.Control playback speed and read keyboard input:
key = cv2.waitKey(30) & 0xFF
This waits about 30 ms between frames (around 30 FPS) and processes GUI events.
Exit by pressing
q:if key == ord("q"): break
Press
qto stop the program.Exit when the window is closed:
if cv2.getWindowProperty("Video", cv2.WND_PROP_VISIBLE) < 1:
    break
This checks whether the window is still visible. If the user closes the window, the program exits safely.
Release the video capture object:
cap.release()
This releases the video file resource.
Close all OpenCV windows:
cv2.destroyAllWindows()
This closes all OpenCV windows and releases GUI resources.
5. Further Practice
Try changing the window size to see how it affects image clarity.
Replace the video file with different ones to test compatibility.
Print the processing time per frame to better understand the relationship between FPS and playback delay.