备注
你好,欢迎来到 SunFounder 树莓派、Arduino 和 ESP32 爱好者社区的 Facebook 页面!与其他爱好者一起深入探讨树莓派、Arduino 和 ESP32。
为什么加入?
专家支持: 通过我们的社区和团队的帮助解决售后问题和技术挑战。
学习与分享: 交流技巧和教程,提升你的技能。
独家预览: 提前了解新产品发布和预告。
特别折扣: 尊享我们最新产品的专属折扣。
节日促销和赠品: 参与赠品活动和节日促销。
👉 准备好与我们一起探索和创造了吗?点击 [这里] 加入我们吧!
第 14 课 红外接收模块
介绍
红外接收器是接收红外信号并能独立接收红外线并输出兼容TTL电平的信号的部件。它的尺寸与普通的塑料封装晶体管相似,适用于各种红外遥控和红外传输。
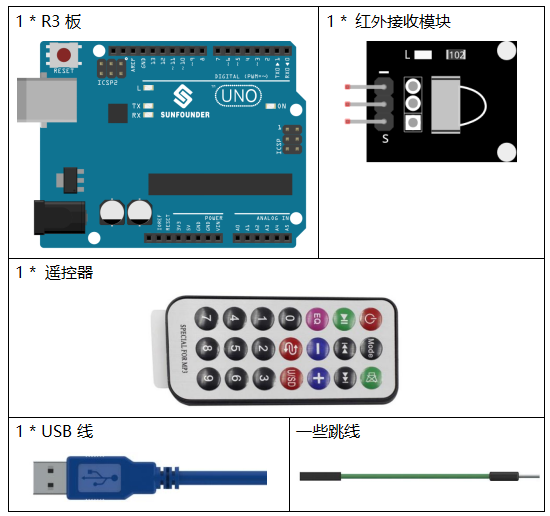
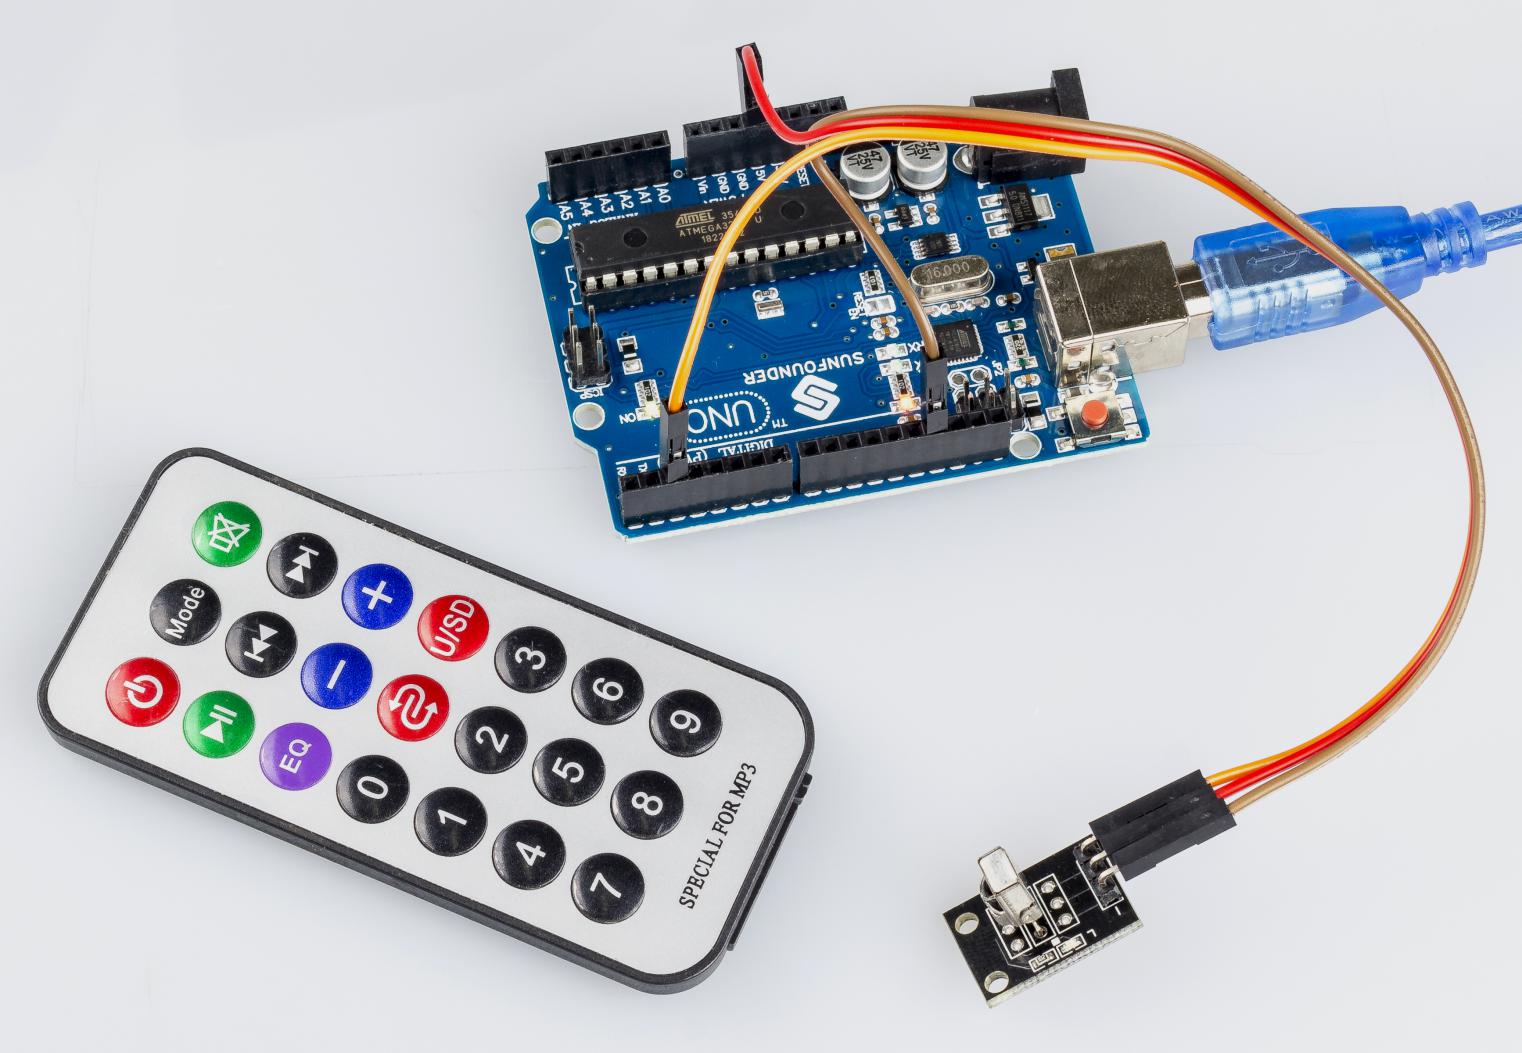
所需器件
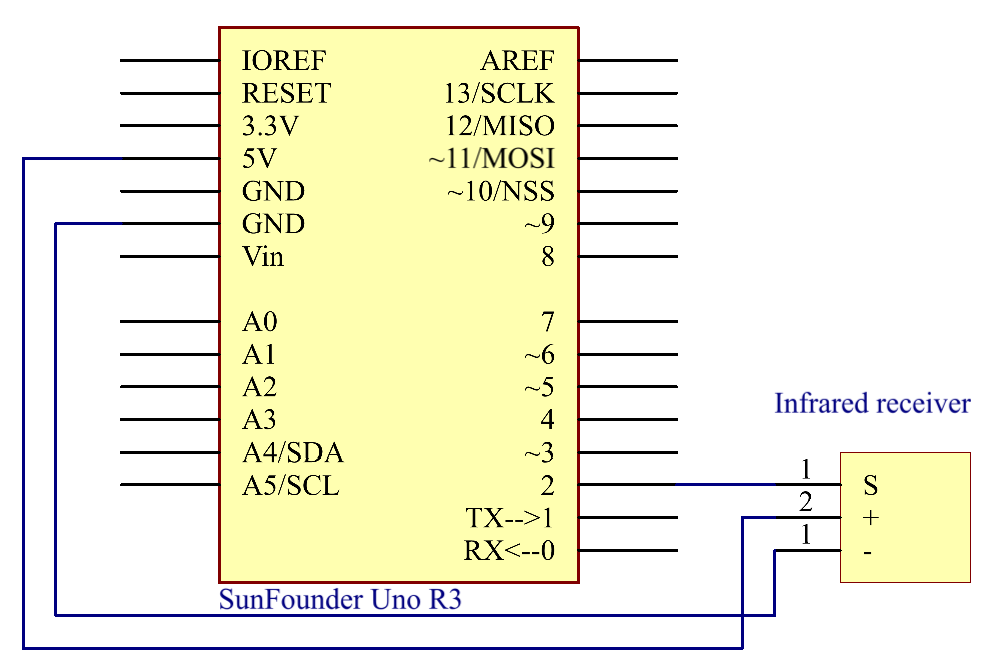
原理图
通过编程读取遥控上的某个键的键值(例如,电源键)。当你按下该键时,红外线会从遥控器发出并被红外线接收器接收,控制板上的 LED 会亮起。
原理图如下所示:
实验步骤
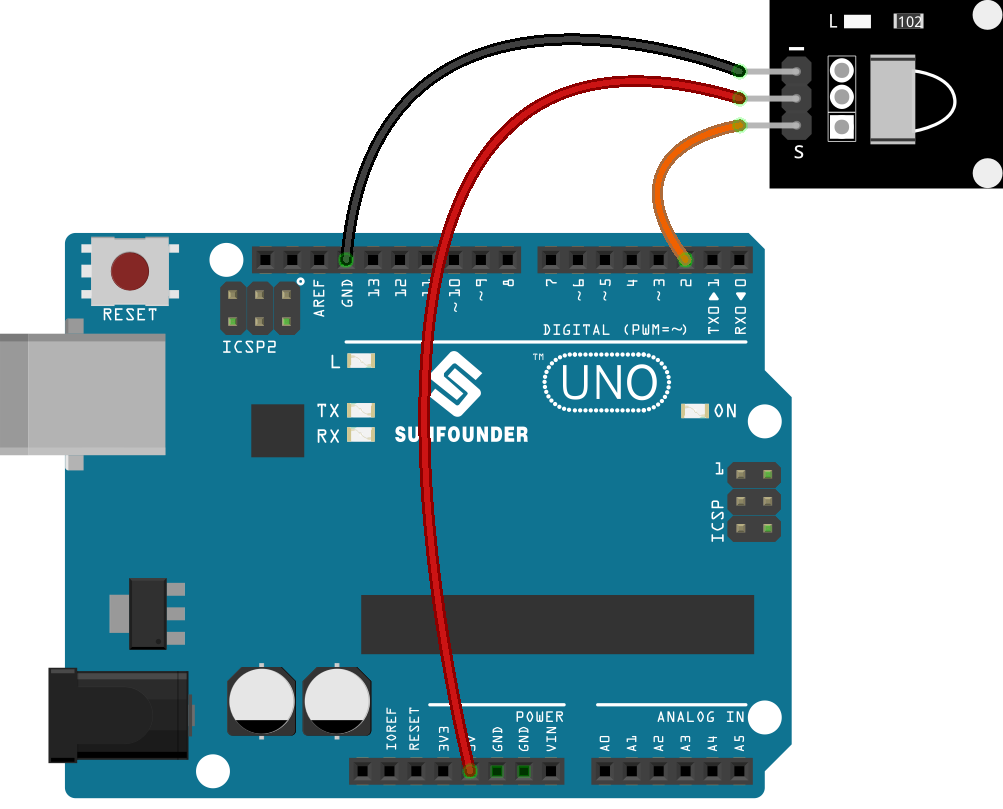
第 1 步:搭建电路。.
第 2 步:打开代码文件 Lesson_14_Infrared_Receiver.ino。
第 3 步:选择 开发板 和 端口。
第 4 步:点击 上传 按钮来上传代码。
现在,按下遥控器上的电源,控制板上连接到引脚 13 的 LED 将亮起。如果按其他键,LED 将熄灭。
备注
遥控器的尾部有一块透明塑料片用来切断电源,你需要在使用前拔出。
请轻轻按下遥控器上的按钮,以避免无效数据FFFFFFFF。
代码
代码分析
初始化红外接收器
#include <IRremote.h>
const int irReceiverPin = 2; // the infrared-receiver attact to pin2
const int ledPin = 13; // built-in LED
IRrecv irrecv(irReceiverPin); // Initialize the infrared-receiver
decode_results results; // The decoding result is placed in the result of the decode results structure.
启用红外接收器
irrecv.enableIRIn(); // Restart the receiver
接收并打印数据
if (irrecv.decode(&results)) { // If receive a data
decode(&results):对接收到的红外信息进行解码,没有数据返回0,否则返回1。解码结果存放在 results 中。
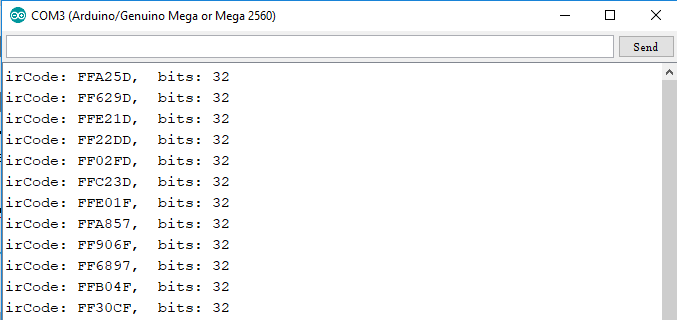
    Serial.print("irCode: "); // print "irCode: " on the serial monitor
    Serial.print(results.value, HEX); // print the signal on serial monitor
    in hexadecimal
    Serial.print(", bits: ");
    Serial.println(results.bits); // Print the data bits
    irrecv.resume(); // Receive next data
}
delay(600);
如果电源键被按下
if(results.value == 0xFFA25D) // if the power button on the remote control is pressed
0xFFA25D 是遥控器电源键的代码,如果你想定义其他按钮,你可以从串口监视器上读取每个按键的代码。
{
    digitalWrite(ledPin,HIGH); // Turn on the LED
}
else
{
    digitalWrite(ledPin,LOW); // else turn of the LED
}