备注
你好,欢迎来到 SunFounder 树莓派、Arduino 和 ESP32 爱好者社区的 Facebook 页面!与其他爱好者一起深入探讨树莓派、Arduino 和 ESP32。
为什么加入?
专家支持: 通过我们的社区和团队的帮助解决售后问题和技术挑战。
学习与分享: 交流技巧和教程,提升你的技能。
独家预览: 提前了解新产品发布和预告。
特别折扣: 尊享我们最新产品的专属折扣。
节日促销和赠品: 参与赠品活动和节日促销。
👉 准备好与我们一起探索和创造了吗?点击 [这里] 加入我们吧!
第 4 课 蜂鸣器
介绍
每当你想发出声音时,蜂鸣器都是你实验中的绝佳工具。在本课中,我们将学习如何驱动有源蜂鸣器来制作一个简单的门铃。
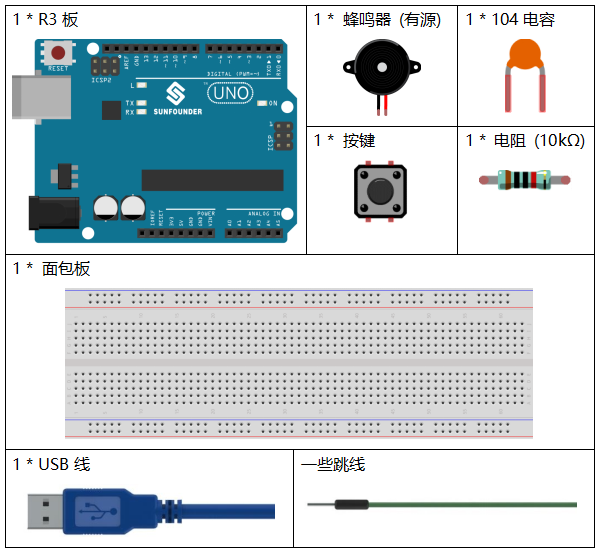
所需器件
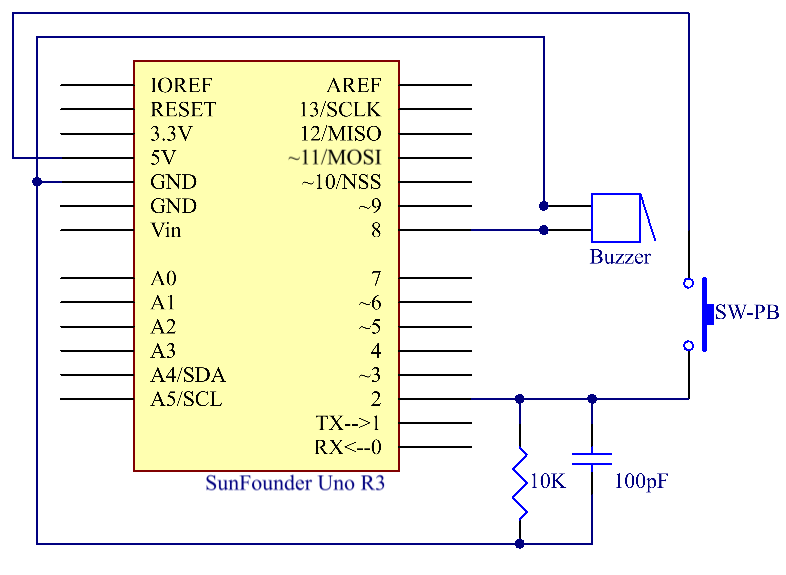
原理图
在这个课程中,使用的是有源蜂鸣器。
原理图如下所示:
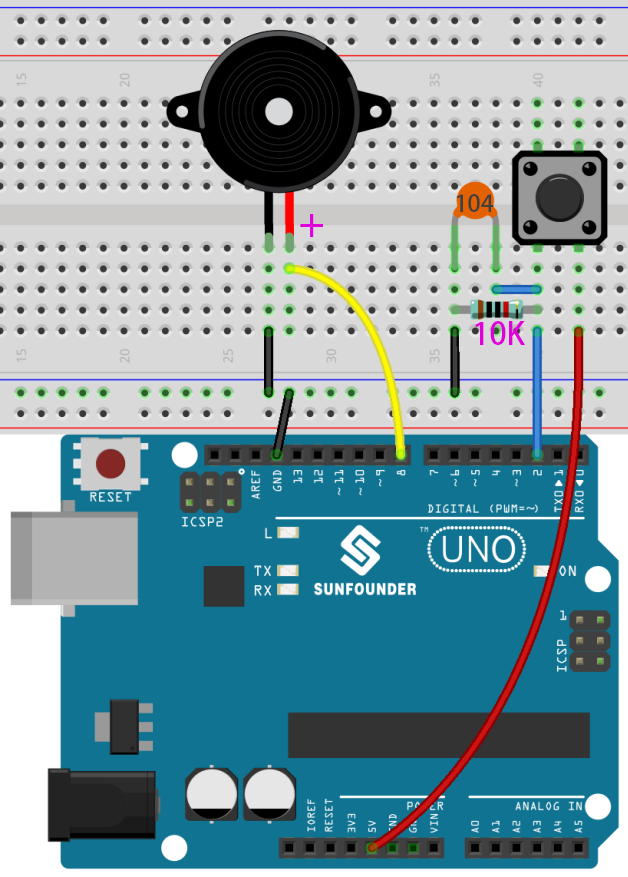
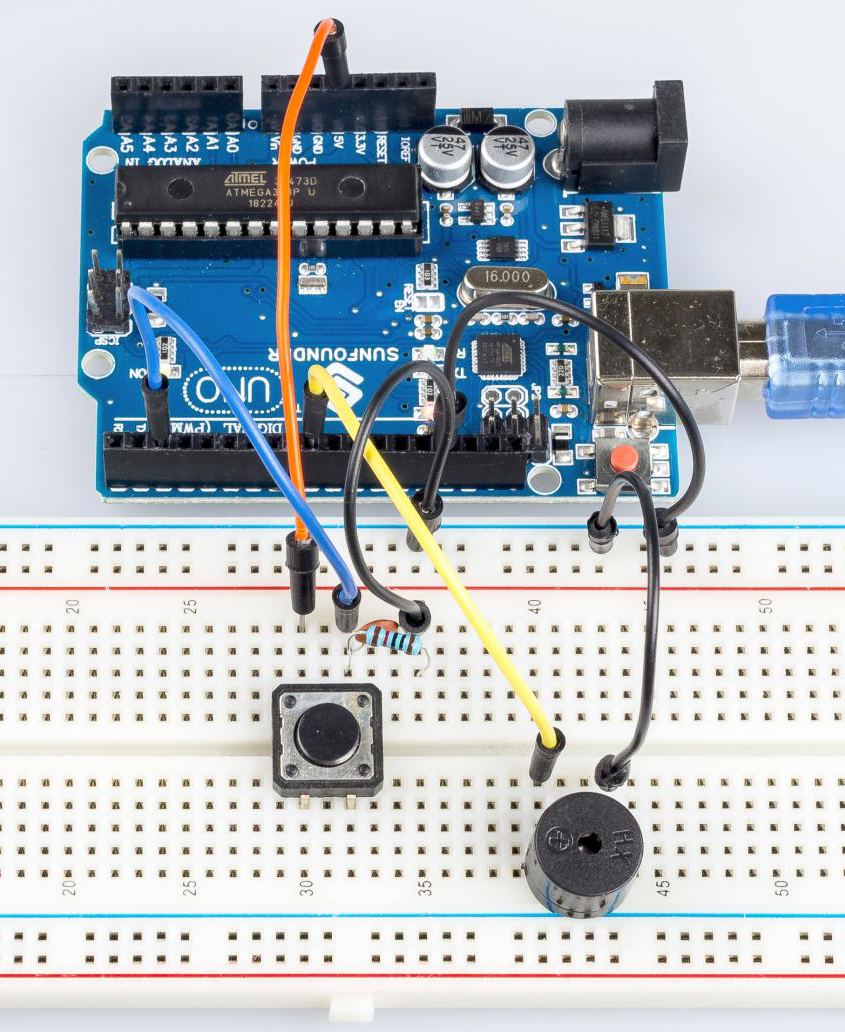
实验步骤
第 1 步:搭建电路。(蜂鸣器长的引脚为阳极,短的为阴极)
第 2 步:打开代码文件 Lesson_4_Buzzer.ino。
第 3 步:选择 开发板 和 端口。
第 4 步:点击 上传 按钮来上传代码。
按下按键,蜂鸣器将发出声音。
Code
代码分析
定义变量
const int buttonPin = 2; //the button connect to pin2
const int buzzerPin = 8; //the led connect to pin8
/**********************************/
int buttonState = 0; //variable for reading the pushbutton status
将按键连接到引脚 2,将蜂鸣器连接到引脚 8。定义一个变量 buttonState 来存储按键的值。
设置引脚的输入输出状态
void setup()
{
    pinMode(buttonPin, INPUT); //initialize the buttonPin as input
    pinMode(buzzerPin, OUTPUT); //initialize the buzzerpin as output
}
本次实验我们需要知道按键的状态,所以这里设置 buttonPin 为 INPUT;要设置蜂鸣器的高/低,我们将 buzzerPin 设置为 OUTPUT。
读取按钮状态
buttonState = digitalRead(buttonPin);
buttonPin (Pin2) 是数字引脚;这里是读取按钮的值并将其存储在 buttonState 中。
digitalRead (Pin):从指定的数字引脚读取值,无论是高电平还是低电平。
按下按钮让蜂鸣器发出声音
if (buttonState == HIGH ) //When press the button, run the following code.
{
    for (i = 0; i < 50; i++)
    /*When i=o, which accords with the condition i<=50, i++ equals to 1
    (here in i = i + 1, the two "i"s are not the same, but i(now) = i(before) + 1).
    Run the code in the curly braces: let the buzzer beep for 3ms and stop for 3ms.
    Then repeat 50 times.*/

    {
        digitalWrite(buzzerPin, HIGH); //Let the buzzer beep.
        delay(3); //wait for 3ms
        digitalWrite(buzzerPin, LOW); //Stop the buzzer.
        delay(3); //wait for 3ms
    }

    for (i = 0; i < 80; i++) //Let the buzzer beep for 5ms and stop for 5ms, repeat 80 times.
    {
        digitalWrite(buzzerPin, HIGH);
        delay(5); //wait for 5ms
        digitalWrite(buzzerPin, LOW);
        delay(5); //wait for 5ms
    }
}
在这部分,当 buttonState 为高电平时,让蜂鸣器以不同的频率发出哔哔声,可以模拟门铃。