注釈
こんにちは、SunFounderのRaspberry Pi & Arduino & ESP32愛好家コミュニティへようこそ!Facebook上でRaspberry Pi、Arduino、ESP32についてもっと深く掘り下げ、他の愛好家と交流しましょう。
参加する理由は?
エキスパートサポート:コミュニティやチームの助けを借りて、販売後の問題や技術的な課題を解決します。
学び&共有:ヒントやチュートリアルを交換してスキルを向上させましょう。
独占的なプレビュー:新製品の発表や先行プレビューに早期アクセスしましょう。
特別割引:最新製品の独占割引をお楽しみください。
祭りのプロモーションとギフト:ギフトや祝日のプロモーションに参加しましょう。
👉 私たちと一緒に探索し、創造する準備はできていますか?[ここ]をクリックして今すぐ参加しましょう!
1.3.1 モーター
はじめに
このプロジェクトでは、L293Dを使用してDCモーターを制御し、時計回りと反時計回りに回転させる方法を学びます。 DCモーターはより大きな電流が必要ですので、安全のためにここでは電源供給モジュールを使用してモーターに電力を供給します。
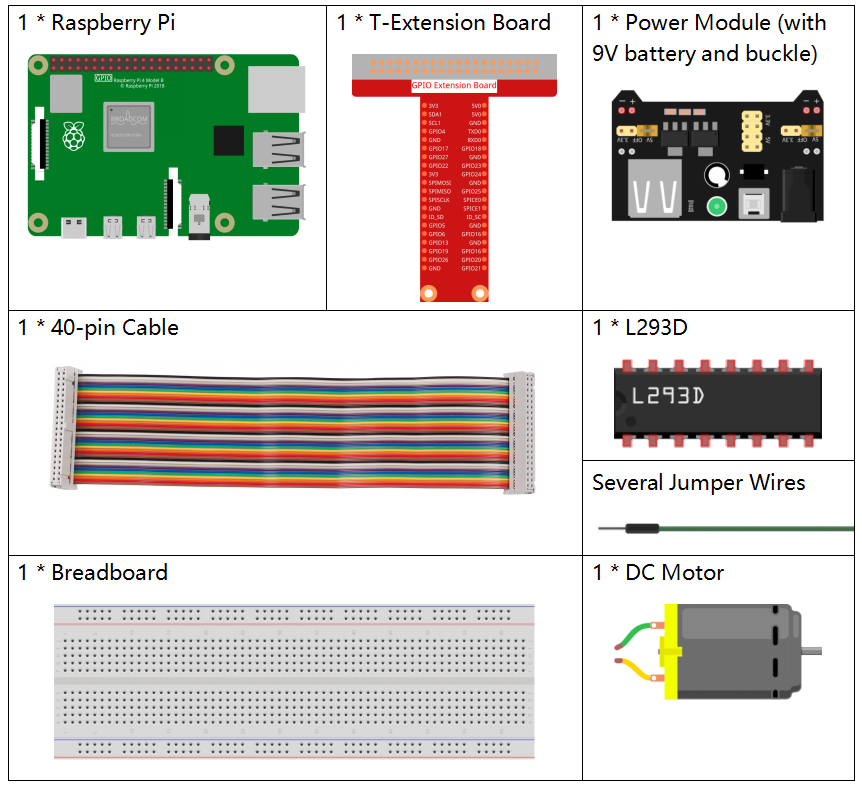
必要な部品
このプロジェクトには、次のコンポーネントが必要です。
一式を購入するのが便利です、こちらがリンクです:
名前 |
このキットのアイテム |
リンク |
|---|---|---|
Raphael Kit |
337 |
以下のリンクから別々に購入することもできます。
コンポーネントの紹介 |
購入リンク |
|---|---|
- |
|
- |
|
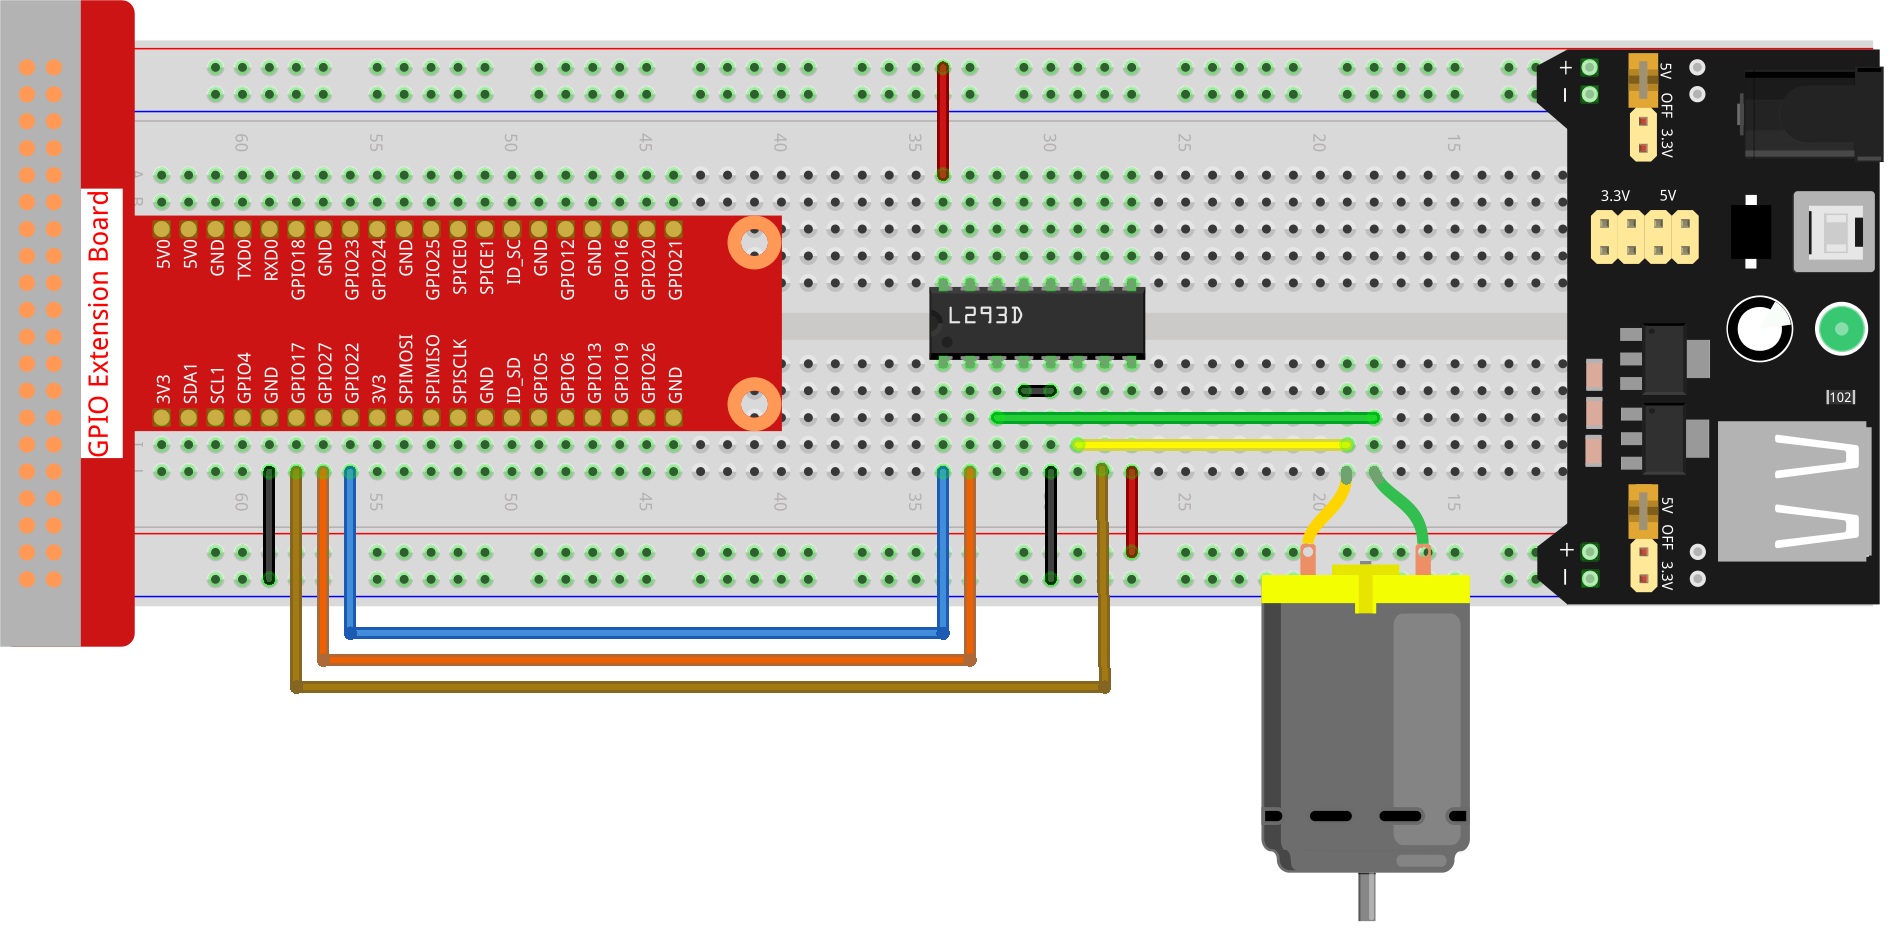
回路図

実験手順
ステップ1: 回路を組み立てます。
注釈
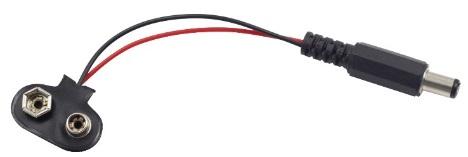
電源モジュールには、キットに含まれている9Vバッテリーと9Vバッテリーバックルを使用できます。 電源モジュールのジャンパーキャップをブレッドボードの5Vバスストリップに挿入してください。
ステップ2: コードのフォルダに入ります。
cd ~/raphael-kit/python-pi5
ステップ3: 実行します。
sudo python3 1.3.1_Motor_zero.py
コードが実行されると、モーターは最初に時計回りに5秒間回転し、5秒間停止し、その後、反時計回りに5秒間回転し、その後、モーターは5秒間停止します。この一連の動作は繰り返し実行されます。
警告
エラー メッセージ RuntimeError: Cannot determine SOC peripheral base address が表示された場合は、 「gpiozero」が動作しない場合。 を参照してください。
コード
注釈
以下のコードは変更/リセット/コピー/実行/停止ができます。ただし、コードを変更する前に raphael-kit/python_5 のようなソースコードのパスに移動する必要があります。コードを変更した後、直接実行して効果を確認できます。
#!/usr/bin/env python3
from gpiozero import Motor
from time import sleep

# Initialize the Motor with GPIO Zero, specifying GPIO pins for forward (17), backward (27), and enable (22) control
motor = Motor(forward=17, backward=27, enable=22)

try:
    # Main function to control the motor's direction and movement.
    # Alternates motor rotation between clockwise and counterclockwise with stops in between.
    actions = {'CW': motor.forward, 'CCW': motor.backward, 'STOP': motor.stop}  # Define motor actions for readability

    while True:
        # Loop through the defined actions to control motor direction
        for action in ['CW', 'STOP', 'CCW', 'STOP']:
            actions[action]()  # Execute the current action (forward, stop, backward, stop)
            print(f"{action}")  # Display the current action in the console
            sleep(5)  # Pause for 5 seconds before proceeding to the next action

except KeyboardInterrupt:
    # Gracefully handle a keyboard interrupt (e.g., Ctrl+C) to stop the program
    pass
コードの説明
これらのインポートステートメントは、
gpiozeroライブラリからMotorクラスと、timeモジュールからsleep関数を取り込みます。#!/usr/bin/env python3 from gpiozero import Motor from time import sleep
この行は、前進(17)、後退(27)、および有効(22)制御のためのGPIOピンを指定して
Motorオブジェクトを初期化します。# Initialize the Motor with GPIO Zero, specifying GPIO pins for forward (17), backward (27), and enable (22) control motor = Motor(forward=17, backward=27, enable=22)
モーター制御のアクションは、可読性のために辞書で定義されています。無限ループ(
while True)がこれらのアクションを繰り返し、各アクションを5秒間実行します。try: # Main function to control the motor's direction and movement. # Alternates motor rotation between clockwise and counterclockwise with stops in between. actions = {'CW': motor.forward, 'CCW': motor.backward, 'STOP': motor.stop} # Define motor actions for readability while True: # Loop through the defined actions to control motor direction for action in ['CW', 'STOP', 'CCW', 'STOP']: actions[action]() # Execute the current action (forward, stop, backward, stop) print(f"{action}") # Display the current action in the console sleep(5) # Pause for 5 seconds before proceeding to the next action
このセグメントは、キーボード割り込み(Ctrl+Cなど)を使用してプログラムを安全に終了できるようにします。
except KeyboardInterrupt:
# Gracefully handle a keyboard interrupt (e.g., Ctrl+C) to stop the program
pass