5. 计算机视觉
本项目将正式进入计算机视觉领域!
运行代码
cd ~/picrawler/examples
sudo python3 5_display.py
查看画面
代码运行后,终端会显示如下提示:
No desktop !
* Serving Flask app "vilib.vilib" (lazy loading)
* Environment: production
WARNING: Do not use the development server in a production environment.
Use a production WSGI server instead.
* Debug mode: off
* Running on http://0.0.0.0:9000/ (Press CTRL+C to quit)
随后,在浏览器中输入 http://<your IP>:9000/mjpg 即可查看视频画面,例如: http://192.168.18.113:9000/mjpg

程序运行后,最后你会在终端看到以下提示信息:
输入按键以调用对应功能!
q: 拍照1: 颜色识别:红色2: 颜色识别:橙色3: 颜色识别:黄色4: 颜色识别:绿色5: 颜色识别:蓝色6: 颜色识别:紫色0: 关闭颜色识别r: 扫描二维码f: 开/关人脸识别s: 显示检测到的对象信息
请根据提示操作以启用对应功能。
拍照
在终端输入
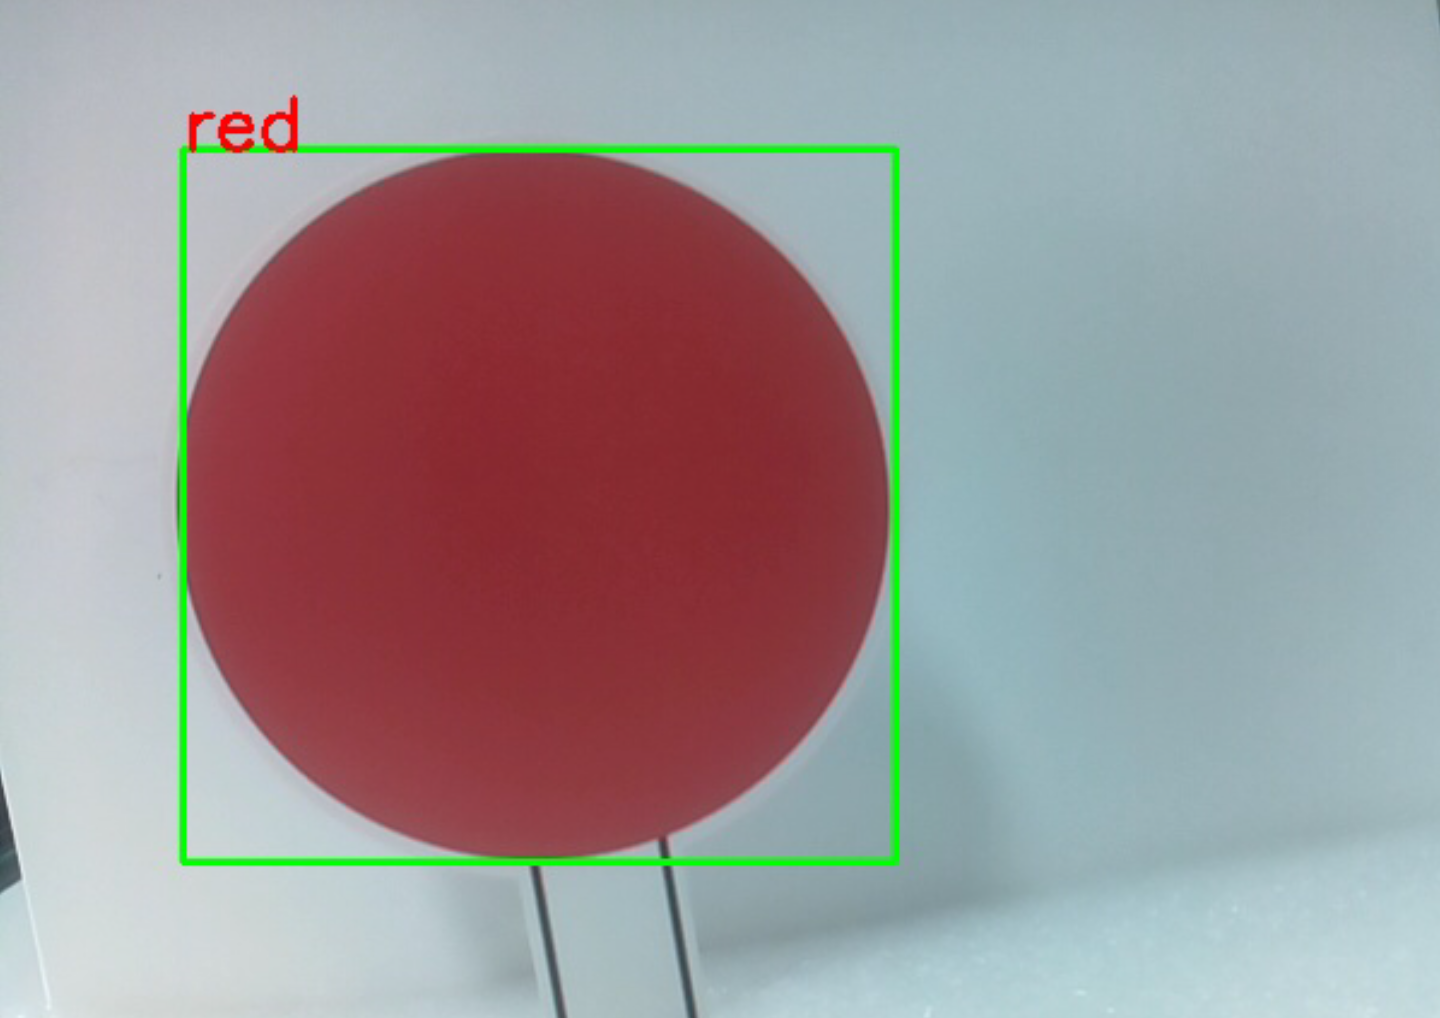
q并按回车,摄像头当前画面将被保存(若颜色识别已开启,保存的照片中也会显示标记框)。照片会保存在树莓派的~/Pictures/PiCrawler/目录下。 你可以使用 FileZilla 软件 等工具将照片传输到电脑。颜色识别
人脸识别
输入
f开启人脸检测。
二维码识别
输入
r开启二维码识别。在二维码识别完成前,无法执行其他操作。二维码的解码信息会打印在终端中。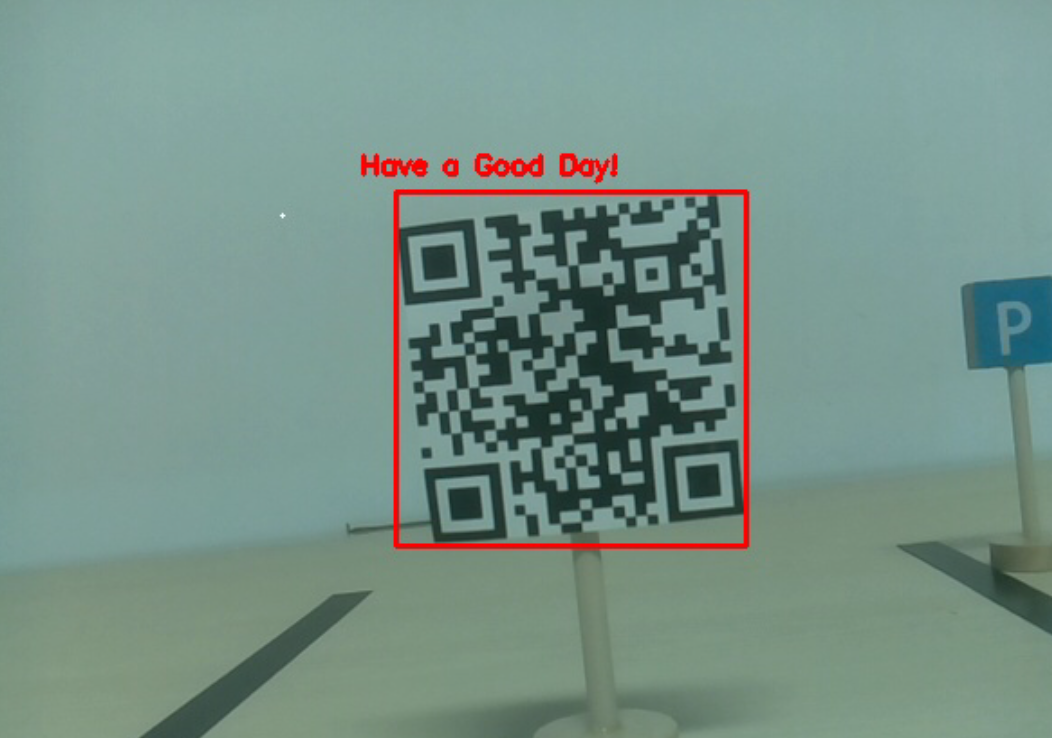
显示信息
输入
s将在终端打印人脸检测(以及颜色检测)的目标信息,包括目标的中心坐标 (X, Y) 以及大小 (宽度、高度)。
代码
from vilib import Vilib
from time import sleep, time, strftime, localtime
import threading
import readchar
from os import getlogin

USERNAME = getlogin()
PICTURE_PATH = f"/home/{USERNAME}/Pictures/"

flag_face = False
flag_color = False
qr_code_flag = False

MANUAL = '''
Press a key to call the function:
    q: Take photo
    1: Color detect : red
    2: Color detect : orange
    3: Color detect : yellow
    4: Color detect : green
    5: Color detect : blue
    6: Color detect : purple
    0: Switch off Color detect
    r: Scan the QR code (toggle)
    f: Switch ON/OFF face detect
    s: Display detected object information
    Ctrl+C: Quit
'''

color_list = ['close', 'red', 'orange', 'yellow', 'green', 'blue', 'purple']

def face_detect(flag):
    print("Face Detect:", flag)
    Vilib.face_detect_switch(flag)

def qrcode_detect():
    global qr_code_flag
    Vilib.qrcode_detect_switch(True)
    print("Waiting for QR code...")

    text = None
    while qr_code_flag:
        temp = Vilib.detect_obj_parameter.get('qr_data', "None")
        if temp != "None" and temp != text:
            text = temp
            print("QR code:", text)
        sleep(0.2)

    Vilib.qrcode_detect_switch(False)

def take_photo():
    _time = strftime('%Y-%m-%d-%H-%M-%S', localtime(time()))
    name = f'photo_{_time}'
    Vilib.take_photo(name, PICTURE_PATH)
    print(f'Photo saved as {PICTURE_PATH}{name}.jpg')

def object_show():
    global flag_color, flag_face

    if flag_color:
        if Vilib.detect_obj_parameter.get('color_n', 0) == 0:
            print('Color Detect: None')
        else:
            x = Vilib.detect_obj_parameter.get('color_x')
            y = Vilib.detect_obj_parameter.get('color_y')
            w = Vilib.detect_obj_parameter.get('color_w')
            h = Vilib.detect_obj_parameter.get('color_h')
            print("[Color Detect] Coordinate:", (x, y), "Size:", (w, h))

    if flag_face:
        if Vilib.detect_obj_parameter.get('human_n', 0) == 0:
            print('Face Detect: None')
        else:
            x = Vilib.detect_obj_parameter.get('human_x')
            y = Vilib.detect_obj_parameter.get('human_y')
            w = Vilib.detect_obj_parameter.get('human_w')
            h = Vilib.detect_obj_parameter.get('human_h')
            print("[Face Detect] Coordinate:", (x, y), "Size:", (w, h))

def main():
    global flag_face, flag_color, qr_code_flag
    qrcode_thread = None

    Vilib.camera_start(vflip=False, hflip=False)
    Vilib.display(local=True, web=True)
    print(MANUAL)

    try:
        while True:
            key = readchar.readkey().lower()

            if key == 'q':
                take_photo()

            elif key in '0123456':
                index = int(key)
                if index == 0:
                    flag_color = False
                    Vilib.color_detect('close')
                else:
                    flag_color = True
                    Vilib.color_detect(color_list[index])
                print('Color detect:', color_list[index])

            elif key == 'f':
                flag_face = not flag_face
                face_detect(flag_face)

            elif key == 'r':
                qr_code_flag = not qr_code_flag
                if qr_code_flag:
                    if qrcode_thread is None or not qrcode_thread.is_alive():
                        qrcode_thread = threading.Thread(target=qrcode_detect, daemon=True)
                        qrcode_thread.start()
                else:
                    print('QRcode Detect: close')

            elif key == 's':
                object_show()

            sleep(0.05)

    except KeyboardInterrupt:
        print("\nQuit.")

    finally:
        # Stop QR thread and switches
        qr_code_flag = False
        try:
            Vilib.qrcode_detect_switch(False)
        except Exception:
            pass

        try:
            Vilib.color_detect('close')
        except Exception:
            pass

        try:
            Vilib.face_detect_switch(False)
        except Exception:
            pass

        # Close camera
        try:
            Vilib.camera_close()
        except Exception:
            pass

if __name__ == "__main__":
    main()
工作原理
首先需要注意以下函数,这两个函数可以启动摄像头:
Vilib.camera_start()
Vilib.display()
与“目标检测”相关的函数有:
Vilib.face_detect_switch(True): 开/关人脸检测Vilib.color_detect(color): 进行颜色检测,同一时间只能检测一种颜色。可输入的参数有:"red"、"orange"、"yellow"、"green"、"blue"、"purple"Vilib.color_detect_switch(False): 关闭颜色检测Vilib.qrcode_detect_switch(False): 开/关二维码检测,并返回二维码的解码数据Vilib.gesture_detect_switch(False): 开/关手势检测Vilib.traffic_sign_detect_switch(False): 开/关交通标志检测
目标检测到的信息会存储在 detect_obj_parameter = Manager().dict() 字典中。
在主程序中,可以这样调用:
Vilib.detect_obj_parameter['color_x']
字典中的键及其含义如下:
color_x: 检测到的颜色块中心点 x 坐标,范围 0~320color_y: 检测到的颜色块中心点 y 坐标,范围 0~240color_w: 检测到的颜色块宽度,范围 0~320color_h: 检测到的颜色块高度,范围 0~240color_n: 检测到的颜色块数量human_x: 检测到的人脸中心点 x 坐标,范围 0~320human_y: 检测到的人脸中心点 y 坐标,范围 0~240human_w: 检测到的人脸宽度,范围 0~320human_h: 检测到的人脸高度,范围 0~240human_n: 检测到的人脸数量traffic_sign_x: 检测到的交通标志中心点 x 坐标,范围 0~320traffic_sign_y: 检测到的交通标志中心点 y 坐标,范围 0~240traffic_sign_w: 检测到的交通标志宽度,范围 0~320traffic_sign_h: 检测到的交通标志高度,范围 0~320traffic_sign_t: 检测到的交通标志内容,可选值为 [‘stop’,’right’,’left’,’forward’]gesture_x: 检测到的手势中心点 x 坐标,范围 0~320gesture_y: 检测到的手势中心点 y 坐标,范围 0~240gesture_w: 检测到的手势宽度,范围 0~320gesture_h: 检测到的手势高度,范围 0~320gesture_t: 检测到的手势内容,可选值为 [“paper”,”scissor”,”rock”]qr_date: 检测到的二维码内容qr_x: 检测到的二维码中心点 x 坐标,范围 0~320qr_y: 检测到的二维码中心点 y 坐标,范围 0~240qr_w: 检测到的二维码宽度,范围 0~320qr_h: 检测到的二维码高度,范围 0~240