10. ブルファイト
PiCar-Xを怒れるブルにしましょう!カメラを使って赤い布を追いかけ、突進させます!
コードの実行
cd ~/picar-x/example
sudo python3 10.bull_fight.py
画像の表示
コードを実行すると、ターミナルに次のプロンプトが表示されます:
No desktop !
* Serving Flask app "vilib.vilib" (lazy loading)
* Environment: production
WARNING: Do not use the development server in a production environment.
Use a production WSGI server instead.
* Debug mode: off
* Running on http://0.0.0.0:9000/ (Press CTRL+C to quit)
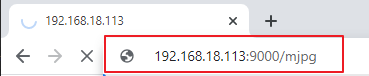
次に、ブラウザで http://<your IP>:9000/mjpg にアクセスして、ビデオ画面を表示できます。例えば: https://192.168.18.113:9000/mjpg
コード
注釈
以下のコードを 変更/リセット/コピー/実行/停止 することができます。しかし、それをする前に、 picar-x\examples のようなソースコードのパスに移動する必要があります。コードを変更した後、直接実行して効果を確認できます。
from picarx import Picarx
from time import sleep
from vilib import Vilib

px = Picarx()

def clamp_number(num,a,b):
return max(min(num, max(a, b)), min(a, b))

def main():
    Vilib.camera_start()
    Vilib.display()
    Vilib.color_detect("red")
    speed = 50
    dir_angle=0
    x_angle =0
    y_angle =0
    while True:
        if Vilib.detect_obj_parameter['color_n']!=0:
            coordinate_x = Vilib.detect_obj_parameter['color_x']
            coordinate_y = Vilib.detect_obj_parameter['color_y']

            # change the pan-tilt angle for track the object
            x_angle +=(coordinate_x*10/640)-5
            x_angle = clamp_number(x_angle,-35,35)
            px.set_cam_pan_angle(x_angle)

            y_angle -=(coordinate_y*10/480)-5
            y_angle = clamp_number(y_angle,-35,35)
            px.set_cam_tilt_angle(y_angle)

            # move
            # The movement direction will change slower than the pan/tilt direction
            # change to avoid confusion when the picture changes at high speed.
            if dir_angle > x_angle:
                dir_angle -= 1
            elif dir_angle < x_angle:
                dir_angle += 1
            px.set_dir_servo_angle(x_angle)
            px.forward(speed)
            sleep(0.05)

        else :
            px.forward(0)
            sleep(0.05)


if __name__ == "__main__":
    try:
    main()

    finally:
        px.stop()
        print("stop and exit")
        sleep(0.1)
どのように動作するのか?
この例の以下の3つの部分に注意が必要です:
メイン関数を定義する:
Vilib.camera_start()を使用してカメラを開始します。Vilib.display()を使用してカメラフィードを表示します。Vilib.color_detect("red")を使用して色検出を有効にし、ターゲット色を「赤」として指定します。変数を初期化:車の移動速度のための
speed、車の移動方向角のためのdir_angle、カメラのパン角度のためのx_angle、カメラのチルト角度のためのy_angle。
赤色のオブジェクトを追跡するために継続的なループ(while True)に入る:
検出された赤色のオブジェクトがあるかどうかをチェックします(
Vilib.detect_obj_parameter['color_n'] != 0)。赤色のオブジェクトが検出された場合、その座標(
coordinate_xとcoordinate_y)を取得します。検出されたオブジェクトの位置に基づいて新しいパンとチルト角度(
x_angleとy_angle)を計算し、それらを調整してオブジェクトを追いかけます。clamp_number関数を使用してパンとチルト角度を指定された範囲内に制限します。px.set_cam_pan_angle()とpx.set_cam_tilt_angle()を使用してカメラのパンとチルト角度を設定し、オブジェクトを視界に保ちます。
dir_angleとx_angleの差に基づいて車の動きを制御する:dir_angleがx_angleより大きい場合、方向角を徐々に変更するためにdir_angleを1減らします。dir_angleがx_angleより小さい場合、dir_angleを1増やします。px.set_dir_servo_angle()を使用して方向サーボ角度を設定し、車の車輪を適切に操縦します。px.forward(speed)を使用して、指定された速度で車を前進させます。