10. Plant Monitor in @SunFounder Controller
With this project, you will learn how to build a plant watering system using the Sunfounder Controller APP.
In the APP, you can check the current temperature and humidity of the environment, as well as the level of water in potted plants. To water the plants, you can also click the button on the APP.
Required Components
In this project, we need the following components.
It’s definitely convenient to buy a whole kit, here’s the link:
Name |
ITEMS IN THIS KIT |
LINK |
|---|---|---|
Kepler Kit |
450+ |
You can also buy them separately from the links below.
SN |
COMPONENT |
QUANTITY |
LINK |
|---|---|---|---|
1 |
1 |
||
2 |
Micro USB Cable |
1 |
|
3 |
1 |
||
4 |
Several |
||
5 |
1 |
||
6 |
1 |
||
7 |
1 |
||
8 |
1 |
||
9 |
18650 Battery |
1 |
|
10 |
Battery Holder |
1 |
|
11 |
1 |
Steps
Note
It is recommended that you complete the previous project 9. Play in @SunFounder Controller, as that will help you get to grips with the basic use of the SunFounder Controller.
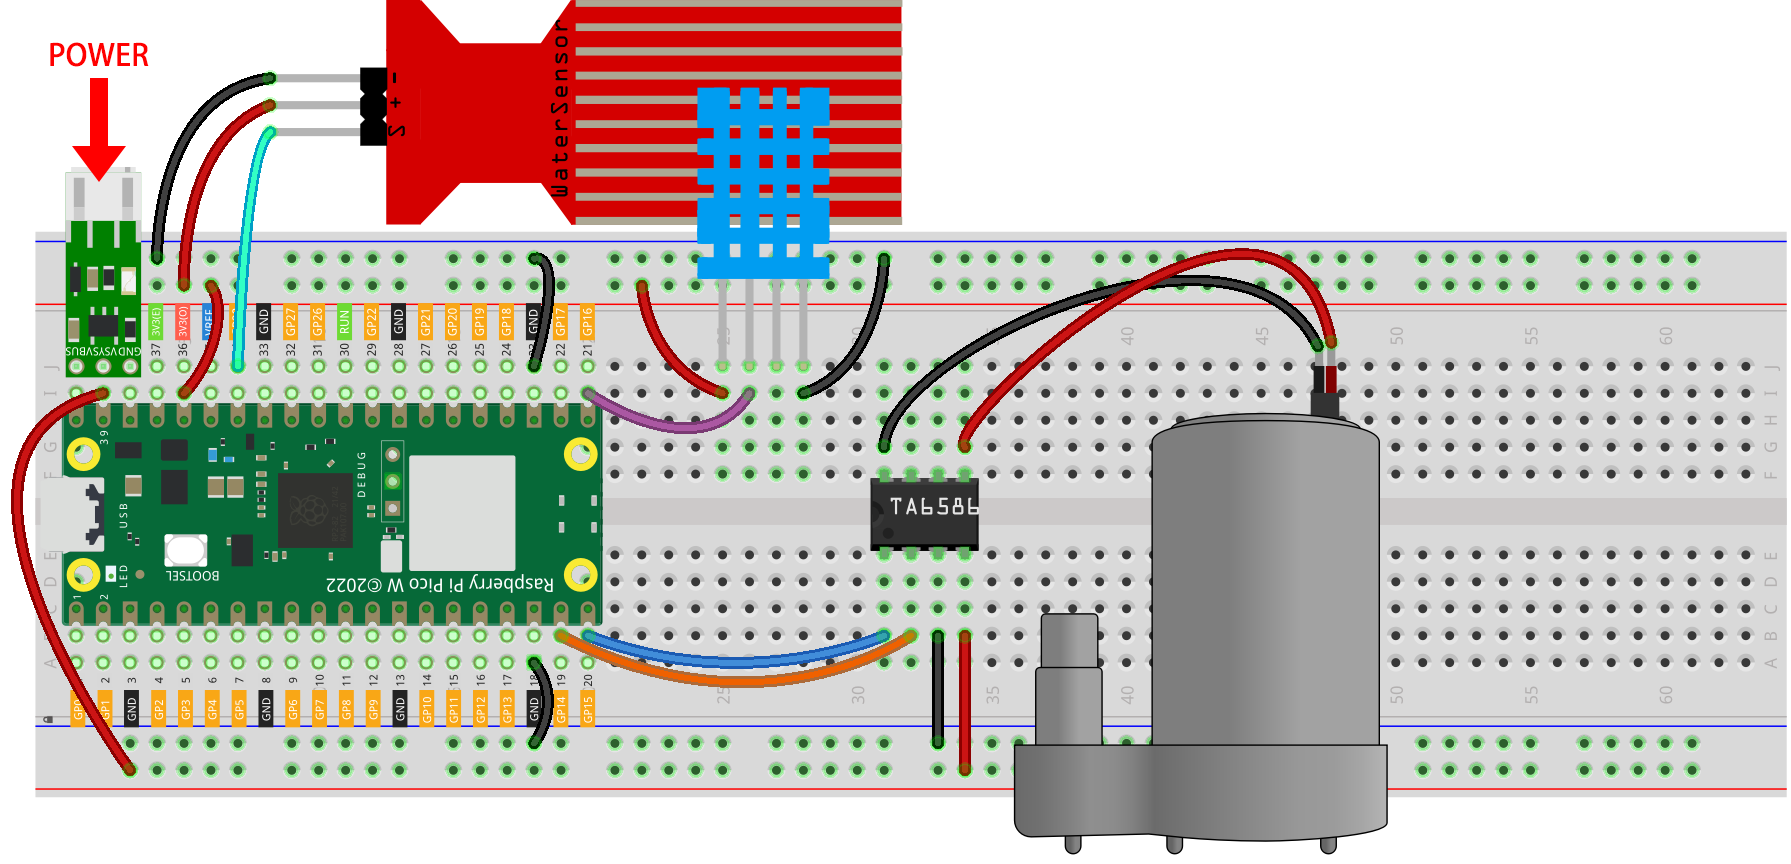
Build the circuit.

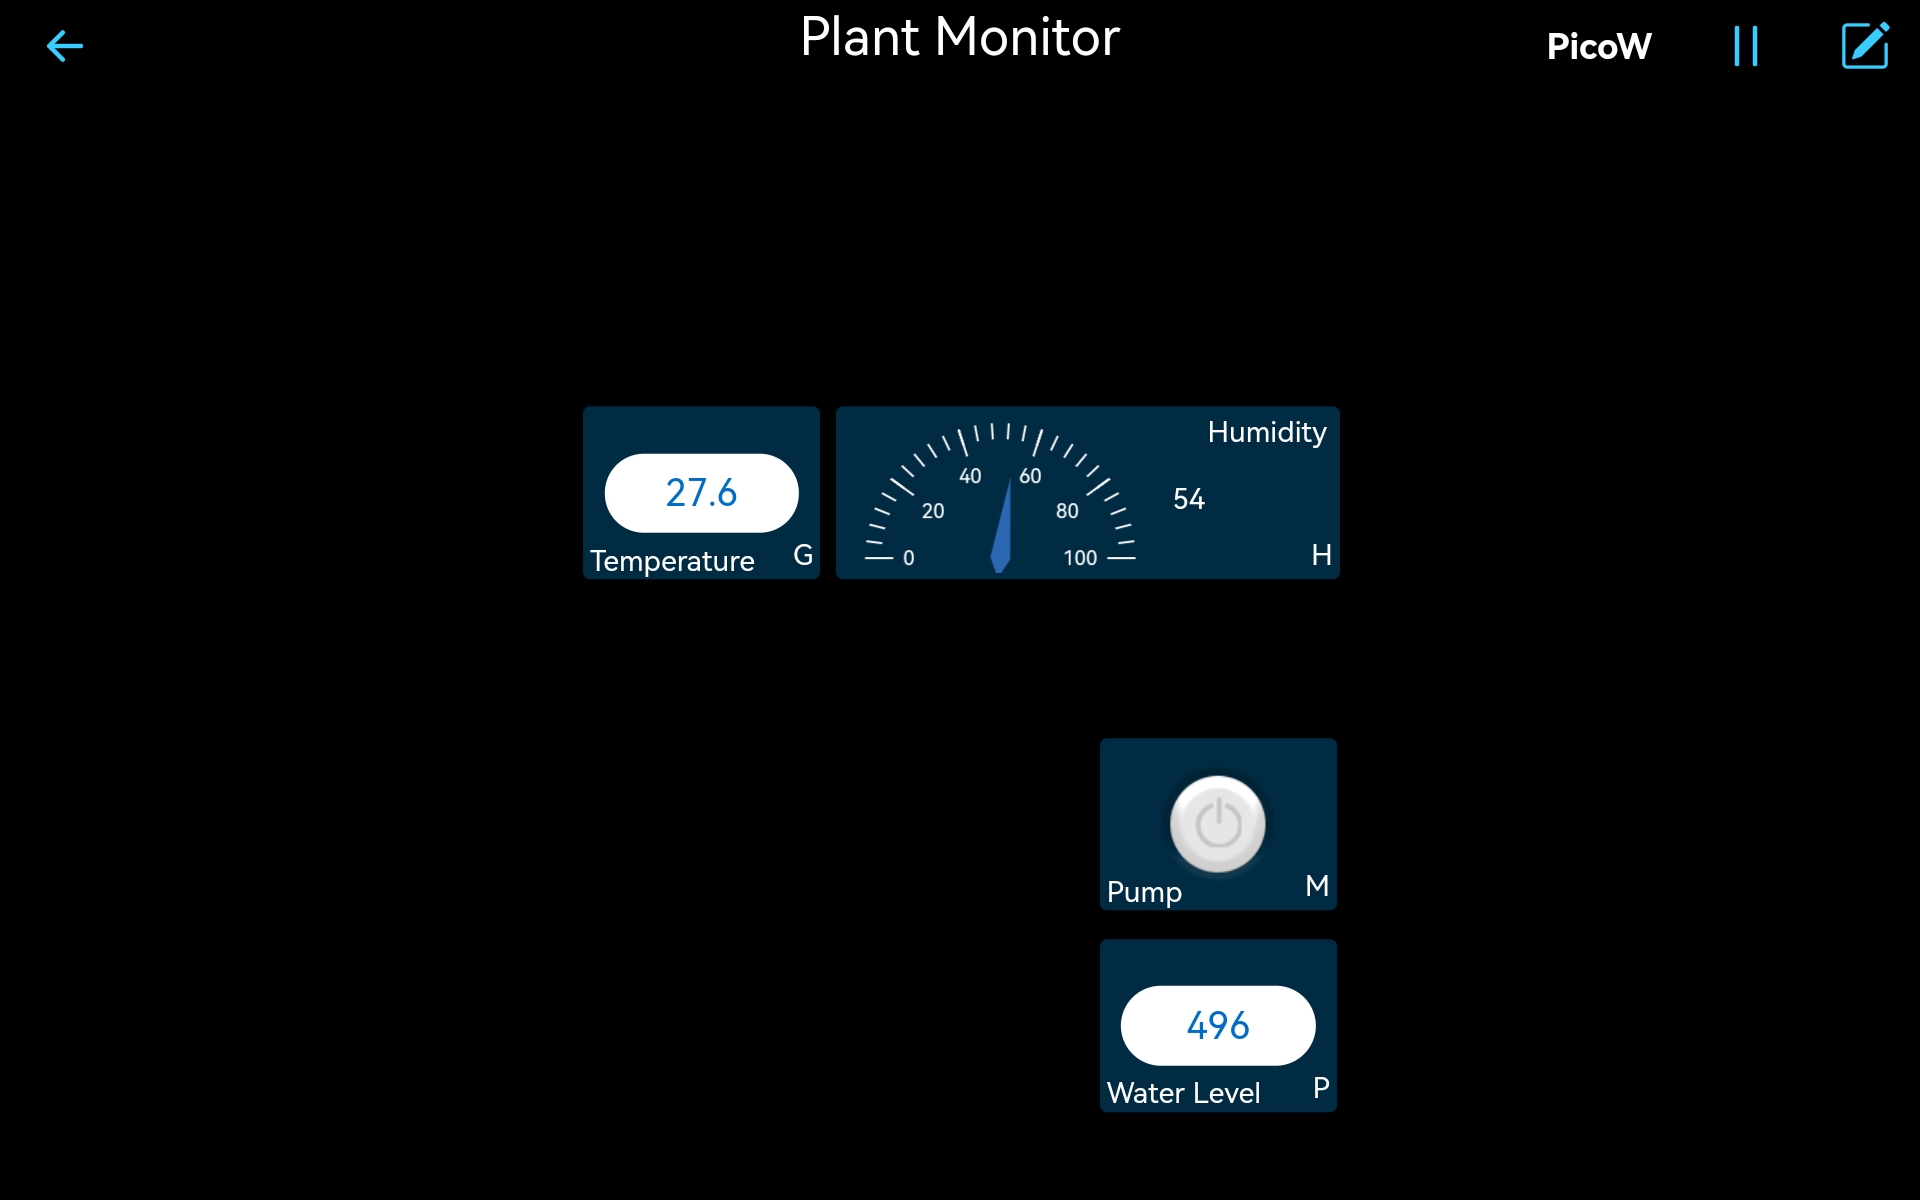
Create a new controller, add the following widgets and change their names.
Open the
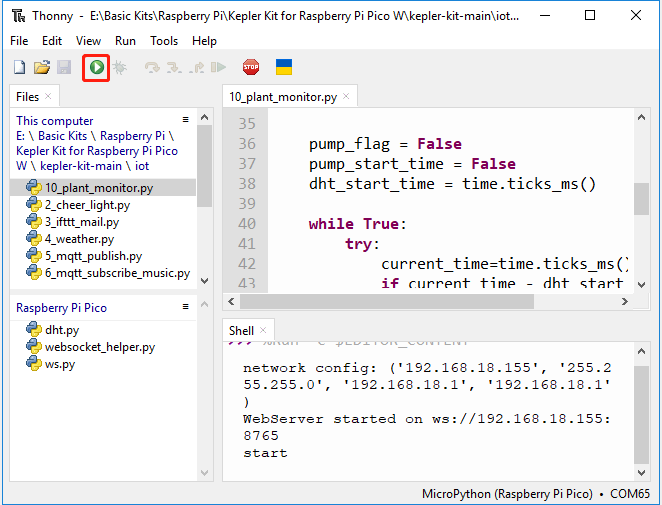
10_plant_monitor.pyunder the path ofkepler-kit-main/iot. Click the Run current script button or press F5 to run it. After successful connection, you will see the IP of Pico W.
Returning to the SunFounder APP, click Run after connecting to PicoW. On the APP, you will be able to see the temperature and humidity of the environment, as well as the water level of the potted plant. You can click the button to water the potted plant for five seconds if you think it’s short of water.
If you want this script to be able to boot up, you can save it to the Raspberry Pi Pico W as
main.py.
How it works?
This project works basically the same way as 9. Play in @SunFounder Controller.
In addition the project also uses DHT11, pump and water level module, you can see the details of using these components in 6.2 Temperature - Humidity , 3.6 Pumping, 2.14 Feel the Water Level.
