4. Real-time Weather From @OpenWeatherMap
This project involves making a smart clock that prints the weather in your city along with the time on the LCD.
1. Required Components
In this project, we need the following components.
It’s definitely convenient to buy a whole kit, here’s the link:
Name |
ITEMS IN THIS KIT |
LINK |
|---|---|---|
Kepler Kit |
450+ |
You can also buy them separately from the links below.
SN |
COMPONENT |
QUANTITY |
LINK |
|---|---|---|---|
1 |
1 |
||
2 |
Micro USB Cable |
1 |
|
3 |
1 |
||
4 |
Several |
||
5 |
1 |
||
6 |
1 |
||
7 |
18650 Battery |
1 |
|
8 |
Battery Holder |
1 |
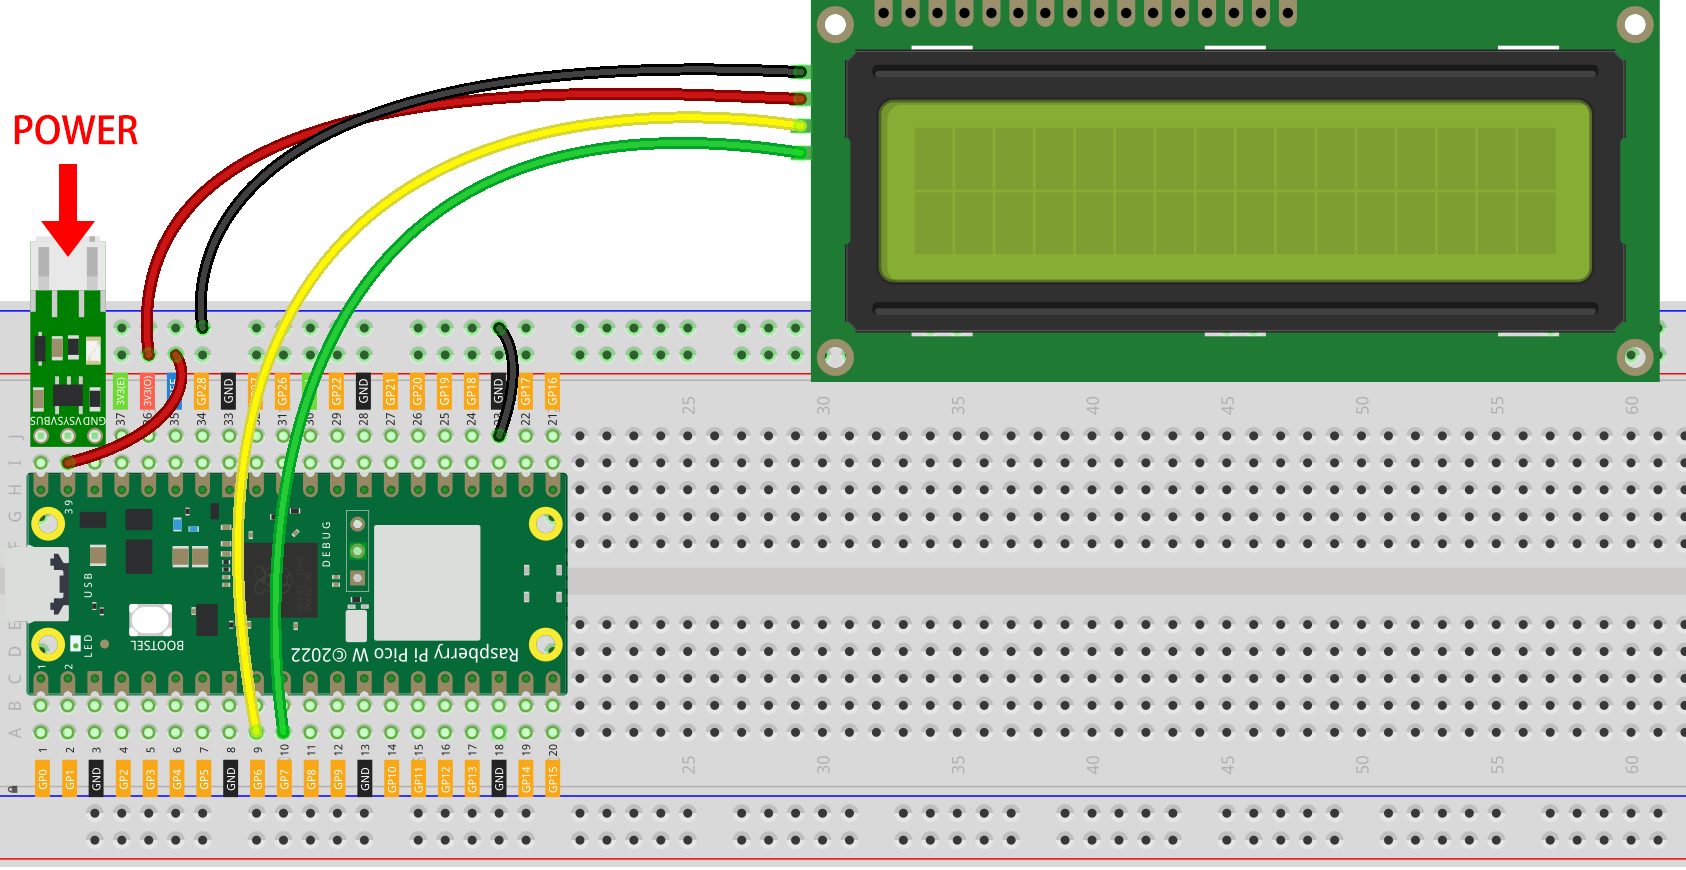
2. Build the Circuit
Warning
Make sure your Li-po Charger Module is connected as shown in the diagram. Otherwise, a short circuit will likely damage your battery and circuitry.
3. Get OpenWeather API keys
OpenWeather is an online service, owned by OpenWeather Ltd, that provides global weather data via API, including current weather data, forecasts, nowcasts and historical weather data for any geographical location.
Visit OpenWeather to log in/create an account.

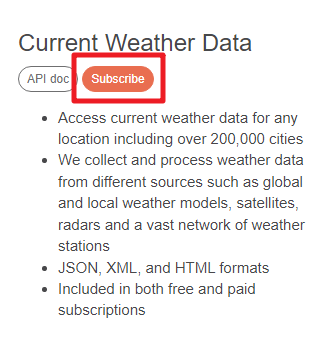
Click into the API page from the navigation bar.

Find Current Weather Data and click Subscribe.
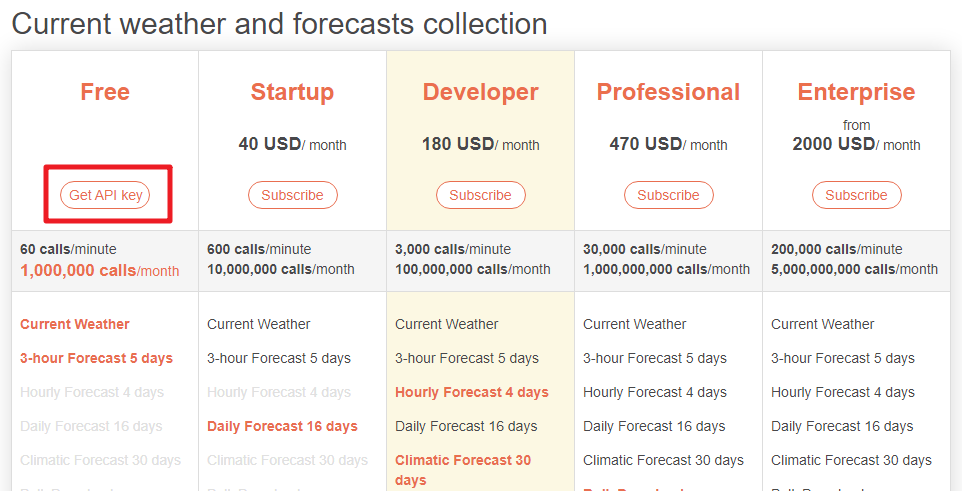
Under Current weather and forecasts collection, subscribe to the appropriate service. In our project, Free is good enough.
Copy the Key from the API keys page.
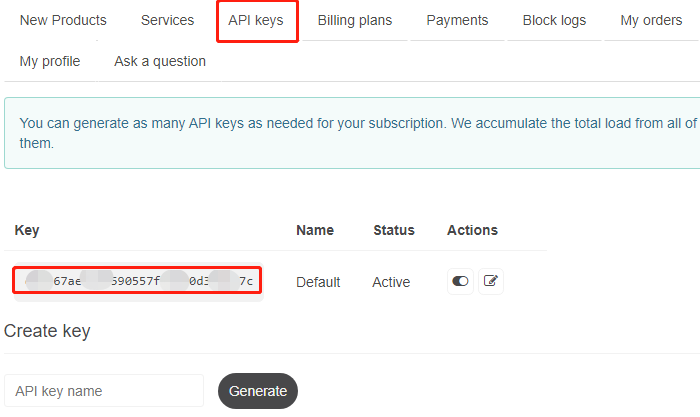
Copy it to the
secrets.pyscript in Raspberry Pi Pico W.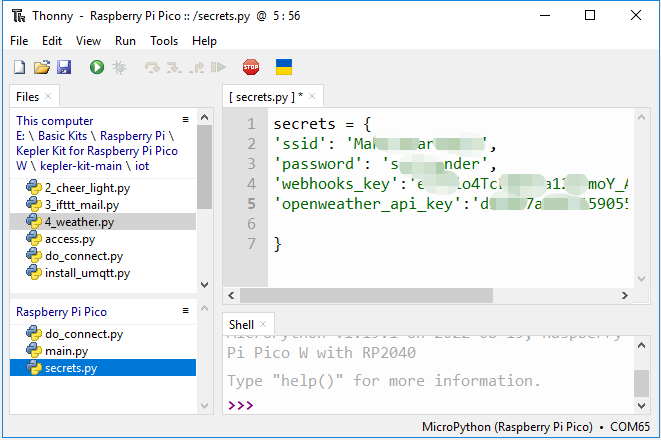
Note
If you don’t have
do_connect.pyandsecrets.pyscripts in your Pico W, please refer to 1. Access to the Network to create them.secrets = { 'ssid': 'SSID', 'password': 'PASSWORD', 'webhooks_key':'WEBHOOKS_API_KEY', 'openweather_api_key':'OPENWEATHERMAP_API_KEY' }
4. Run the Script
Open the
4_weather.pyfile under the path ofkepler-kit-main/iot, click the Run current script button or press F5 to run it.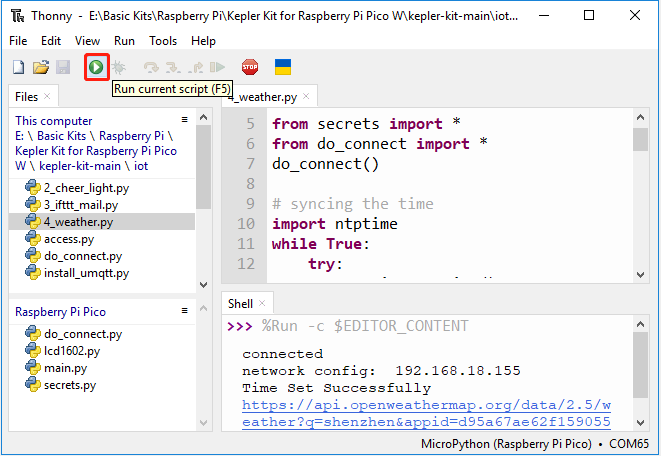
After the script runs, you will see the time and weather information of your location on the I2C LCD1602.
Note
When the code is running, if the screen is blank, you can turn the potentiometer on the back of the module to increase the contrast.
If you want this script to be able to boot up, you can save it to the Raspberry Pi Pico W as
main.py.
How it works?
The Raspberry Pi Pico W needs to be connected to the Internet, as described in 1. Access to the Network. For this project, just use it.
from do_connect import *
do_connect()
After connecting to the Internet, these few lines of code will help synchronize your Pico W to Greenwich Mean Time.
import ntptime
while True:
   try:
      ntptime.settime()
      print('Time Set Successfully')
      break
   except OSError:
      print('Time Setting...')
      continue
Initialize your LCD, please refer to 3.4 Liquid Crystal Display for its usage details.
from lcd1602 import LCD
lcd=LCD()
lcd.clear()
string = 'Loading...'
lcd.message(string)
We need to select the unit for some weather data (e.g. temperature, wind speed) before we get the weather data. In this case, the unit is metric.
# Open Weather
TEMPERATURE_UNITS = {
   "standard": "K",
   "metric": "°C",
   "imperial": "°F",
}

SPEED_UNITS = {
   "standard": "m/s",
   "metric": "m/s",
   "imperial": "mph",
}

units = "metric"
Next, this function gets the weather data from openweathermap.org.
We will post a URL message to it with your city, API keys, and a set unit.
As a result, you will receive a JSON file with weather data.
def get_weather(city, api_key, units='metric', lang='en'):
   '''
   Get weather data from openweathermap.org
      city: City name, state code and country code divided by comma, Please, refer to ISO 3166 for the state codes or country codes. https://www.iso.org/obp/ui/#search
      api_key: Your unique API key (you can always find it on your openweather account page under the "API key" tab https://home.openweathermap.org/api_keys)
      unit: Units of measurement. standard, metric and imperial units are available. If you do not use the units parameter, standard units will be applied by default. More: https://openweathermap.org/current#data
      lang: You can use this parameter to get the output in your language. More: https://openweathermap.org/current#multi
   '''
   url = f"https://api.openweathermap.org/data/2.5/weather?q={city}&appid={api_key}&units={units}&lang={lang}"
   print(url)
   res = urequests.post(url)
   return res.json()
If you print out this set of raw data, you will be able to see information similar to that shown below.
weather data example:
{
    'timezone': 28800,
    'sys': {
        'type': 2,
        'sunrise': 1659650200,
        'country': 'CN',
        'id': 2031340,
        'sunset': 1659697371
    },
    'base': 'stations',
    'main': {
        'pressure': 1008,
        'feels_like': 304.73,
        'temp_max': 301.01,
        'temp': 300.4,
        'temp_min': 299.38,
        'humidity': 91,
        'sea_level': 1008,
        'grnd_level': 1006
    },
    'visibility': 10000,
    'id': 1795565,
    'clouds': {
        'all': 96
    },
    'coord': {
        'lon': 114.0683,
        'lat': 22.5455
    },
    'name': 'Shenzhen',
    'cod': 200,
    'weather':[{
        'id': 804,
        'icon': '04d',
        'main': 'Clouds',
        'description': 'overcast clouds'
    }],
    'dt': 1659663579,
    'wind': {
        'gust': 7.06,
        'speed': 3.69,
        'deg': 146
    }
}
We used the print_weather(weather_data) function to convert these raw data into easy-to-read data format and print them.
But this function is not called, and you can uncomment this line in while True as needed.
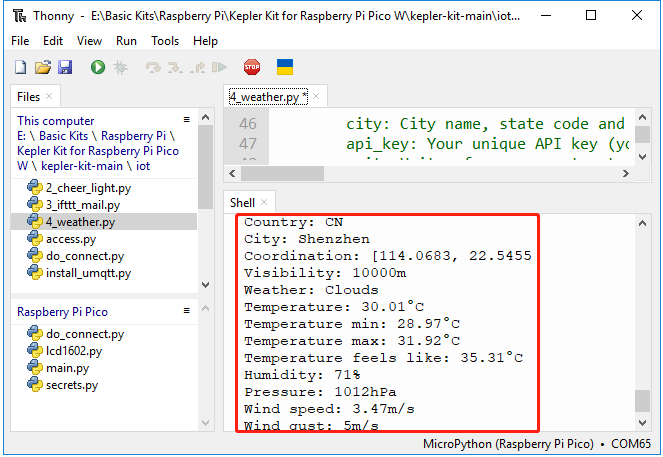
# shell print
print_weather(weather_data)
In the while True loop, the get_weather() function is called first to retrieve the weather, temperature and humidity information needed for this project.
weather_data = get_weather('shenzhen', secrets['openweather_api_key'], units=units)
weather=weather_data["weather"][0]["main"]
t=weather_data["main"]["temp"]
rh=weather_data["main"]["humidity"]
Get the local time. The time.localtime() function is called here to return a set of tuples (year, month, mday, hour, minute, second, weekday, yearday). We have taken hour and minute out of it.
Note that we have already synchronized Pico W to Greenwich Mean Time, so we need to add the time zone of your location.
# get time (+24 allows for western hemisphere)
# if negative, add 24
# hours = time.localtime()[3] + int(weather_data["timezone"] / 3600) + 24  #only for west hemisphere

hours=time.localtime()[3]+int(weather_data["timezone"] / 3600)
mins=time.localtime()[4]
Finally, the weather information and time are just displayed in the LCD1602.
lcd.clear()
time.sleep_ms(200)
string = f'{hours:02d}:{mins:02d} {weather}\n'
lcd.message(string)
string = f'{t}{TEMPERATURE_UNITS[units]} {rh}%rh'
lcd.message(string)
Your LCD1602 will become a clock that refreshes every 30 seconds when the main loop runs every 30 seconds.