1. Access to the Network
Raspberry Pi Pico W is very similar to Raspberry Pi Pico, with the same GPIO, microUSB port, and size. The only difference is the addition of the CYW43439 2.4-GHz Wi-Fi chip from Infineon. Now let’s see how it connects to our Wi-Fi network.
Required Components
In this project, we need the following components.
It’s definitely convenient to buy a whole kit, here’s the link:
Name |
ITEMS IN THIS KIT |
LINK |
|---|---|---|
Kepler Kit |
450+ |
You can also buy them separately from the links below.
SN |
COMPONENT |
QUANTITY |
LINK |
|---|---|---|---|
1 |
1 |
||
2 |
Micro USB Cable |
1 |
1. Connect to the Internet
With just five lines of MicroPython, our Raspberry Pi Pico W is happily connected to the Internet.
These 5 lines of code can be run directly from the Shell, pressing the Enter after you typing.
Or refer to the following method and create a new .py file to run it.
import network
wlan = network.WLAN(network.STA_IF)
wlan.active(True)
wlan.connect("SSID","PASSWORD")
print(wlan.isconnected())
Create a new script by clicking the New button on Thonny, and copy and paste the above code, changing the
SSIDandPASSWORDto your own.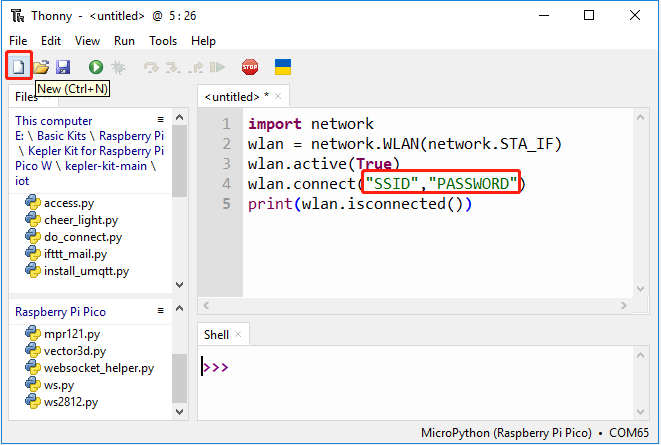
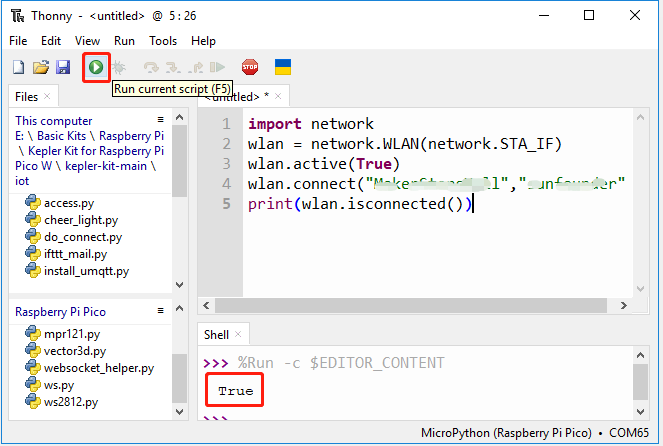
To run the script, click the Run current script button or press F5. If the connection is successful,
truewill be printed.Note
Make sure the Raspberry Pi Pico W is connected to computer via a USB cable, then click on the bottom right corner to select MicroPython (Raspberry Pi Pico).COMXxx as the interpreter.
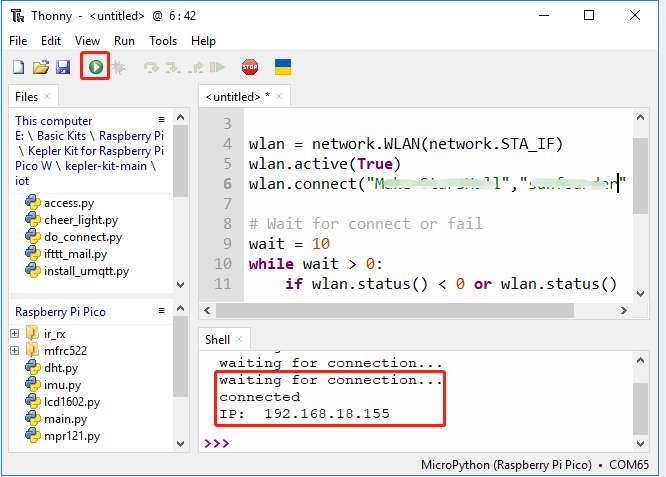
2. Timeout Judgment and Show IP
Considering some poor network conditions, let’s add some timeout judgment to the code.
If the connection is successful, the IP of Pico W will be displayed after copying and running the script.
import network
import time

wlan = network.WLAN(network.STA_IF)
wlan.active(True)
wlan.connect("SSID","PASSWORD")

# Wait for connect or fail
wait = 10
while wait > 0:
    if wlan.status() < 0 or wlan.status() >= 3:
        break
    wait -= 1
    print('waiting for connection...')
    time.sleep(1)

# Handle connection error
if wlan.status() != 3:
    raise RuntimeError('wifi connection failed')
else:
    print('connected')
    print('IP: ', wlan.ifconfig()[0])
wlan.status()function: Returns the current status of the wireless connection, the return value is shown in the table below.Status
Value
Description
STAT_IDLE
0
no connection and no activity,
STAT_CONNECTING
1
connecting in progress,
STAT_WRONG_PASSWORD
-3
failed due to incorrect password,
STAT_NO_AP_FOUND
-2
failed because no access point replied,
STAT_CONNECT_FAIL
-1
failed due to other problems,
STAT_GOT_IP
3
connection successful.
wlan.ifconfig()function: Obtains IP addresses, subnet masks, gateways, and DNS servers. This method will return a 4-tuple containing the above information when called directly. In this case, we only print the IP address.
3. Save private information to secrets.py
When you share your Pico W project, you should not want others to see your Wi-Fi password or API key.
For good security, we can create a secrets.py file to store your private information.
Copy the following code into a new script file on Thonny. Note to change
SSIDandPASSWORDto yours.secrets = { 'ssid': 'SSID', 'password': 'PASSWORD', }
Choose Raspberry Pi Pico in the pop-up window that appears when you click the Save button or press
Ctrl+S.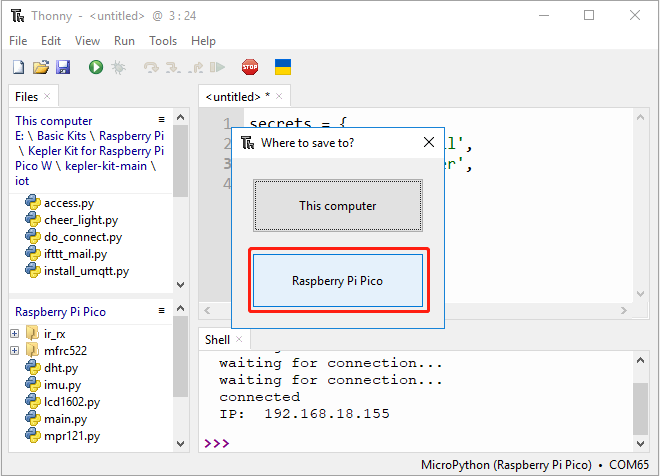
Set the name to
secrets.py.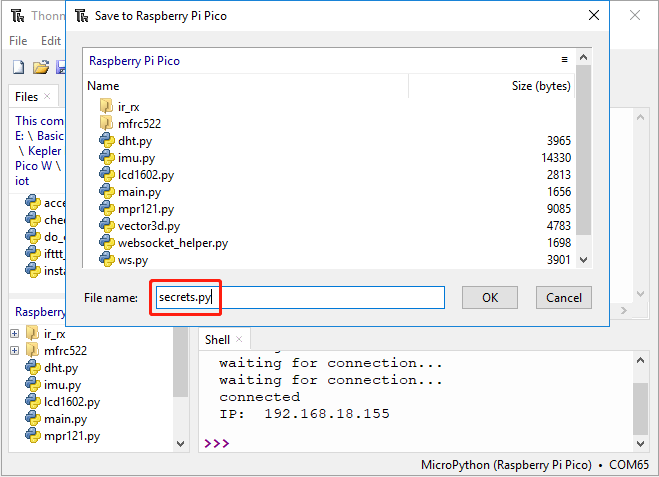
Now you can see this script in your Raspberry Pi Pico W.
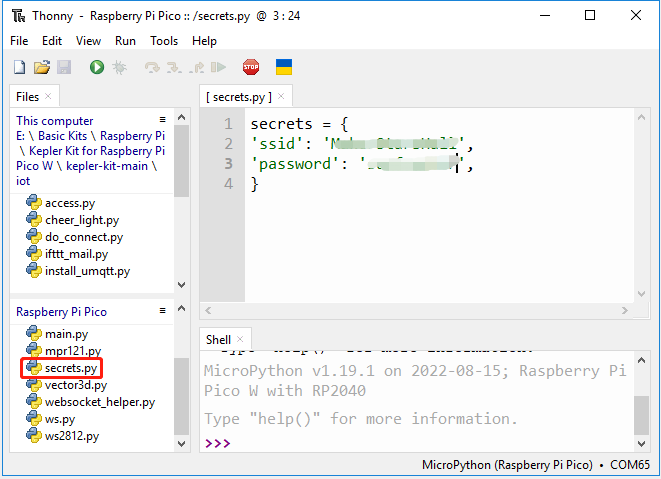
In other scripts, you can call it as follows. If you run it, you will see a successful Wi-Fi connection. The
secrets.pyfile is imported as a library, so we need not worry about leakage of information.import network import time from secrets import secrets wlan = network.WLAN(network.STA_IF) wlan.active(True) wlan.connect(secrets['ssid'], secrets['password']) # Wait for connect or fail wait = 10 while wait > 0: if wlan.status() < 0 or wlan.status() >= 3: break wait -= 1 print('waiting for connection...') time.sleep(1) # Handle connection error if wlan.status() != 3: raise RuntimeError('wifi connection failed') else: print('connected') print('IP: ', wlan.ifconfig()[0])

4. Connect to the Internet via do_connect.py
Considering that each of our next projects will require a network connection, why don’t we create a new do_connect.py file and write the relevant functions into it for reuse, which can greatly streamline the code of complex projects.
Copy the following code into a new script file, and save it to Raspberry Pi Pico as
do_connect.py.import network import time from secrets import * def do_connect(ssid=secrets['ssid'],psk=secrets['password']): wlan = network.WLAN(network.STA_IF) wlan.active(True) wlan.connect(ssid, psk) # Wait for connect or fail wait = 10 while wait > 0: if wlan.status() < 0 or wlan.status() >= 3: break wait -= 1 print('waiting for connection...') time.sleep(1) # Handle connection error if wlan.status() != 3: raise RuntimeError('wifi connection failed') else: print('connected') ip=wlan.ifconfig()[0] print('network config: ', ip) return ip

Calling it in other scripts by the following will allow the Raspberry Pi Pico W to connect to the network.
from do_connect import *
do_connect()