2.1.6 Joystick
Introduction
In this project, We’re going to learn how joystick works. We manipulate the Joystick and display the results on the screen.
Required Components
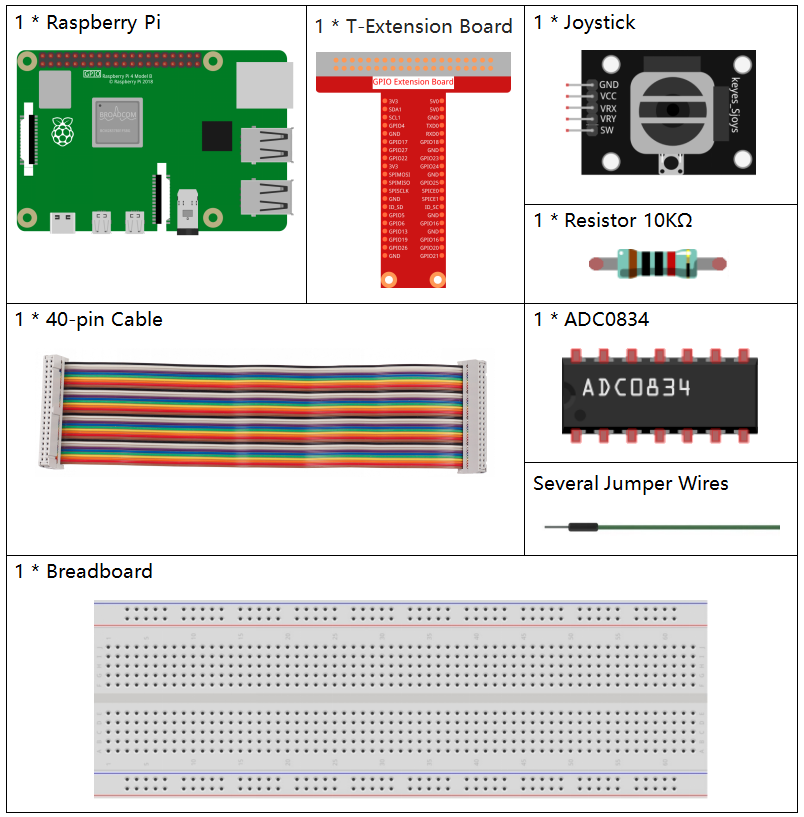
In this project, we need the following components.

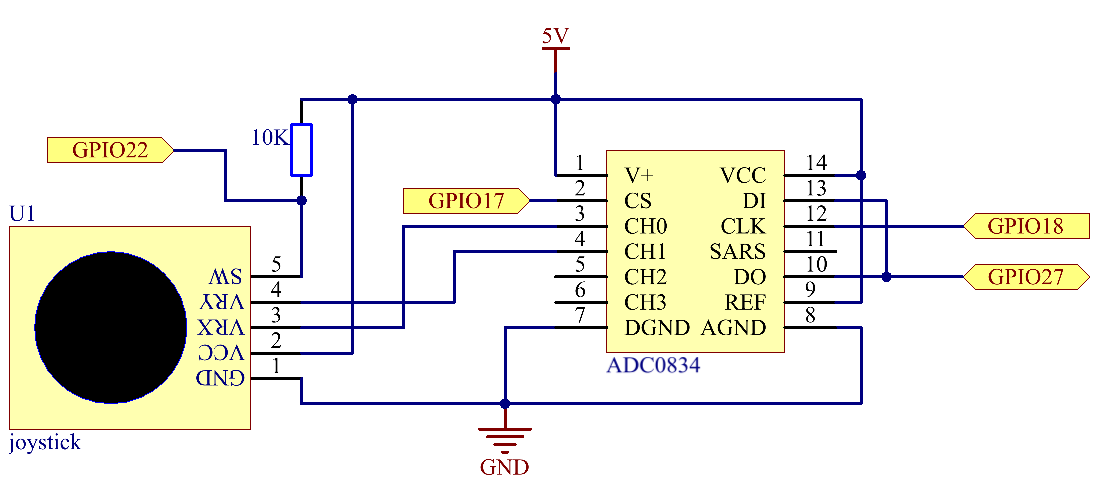
Schematic Diagram
When the data of joystick is read, there are some differents between axis: data of X and Y axis is analog, which need to use ADC0834 to convert the analog value to digital value. Data of Z axis is digital, so you can directly use the GPIO to read, or you can also use ADC to read.


Experimental Procedures
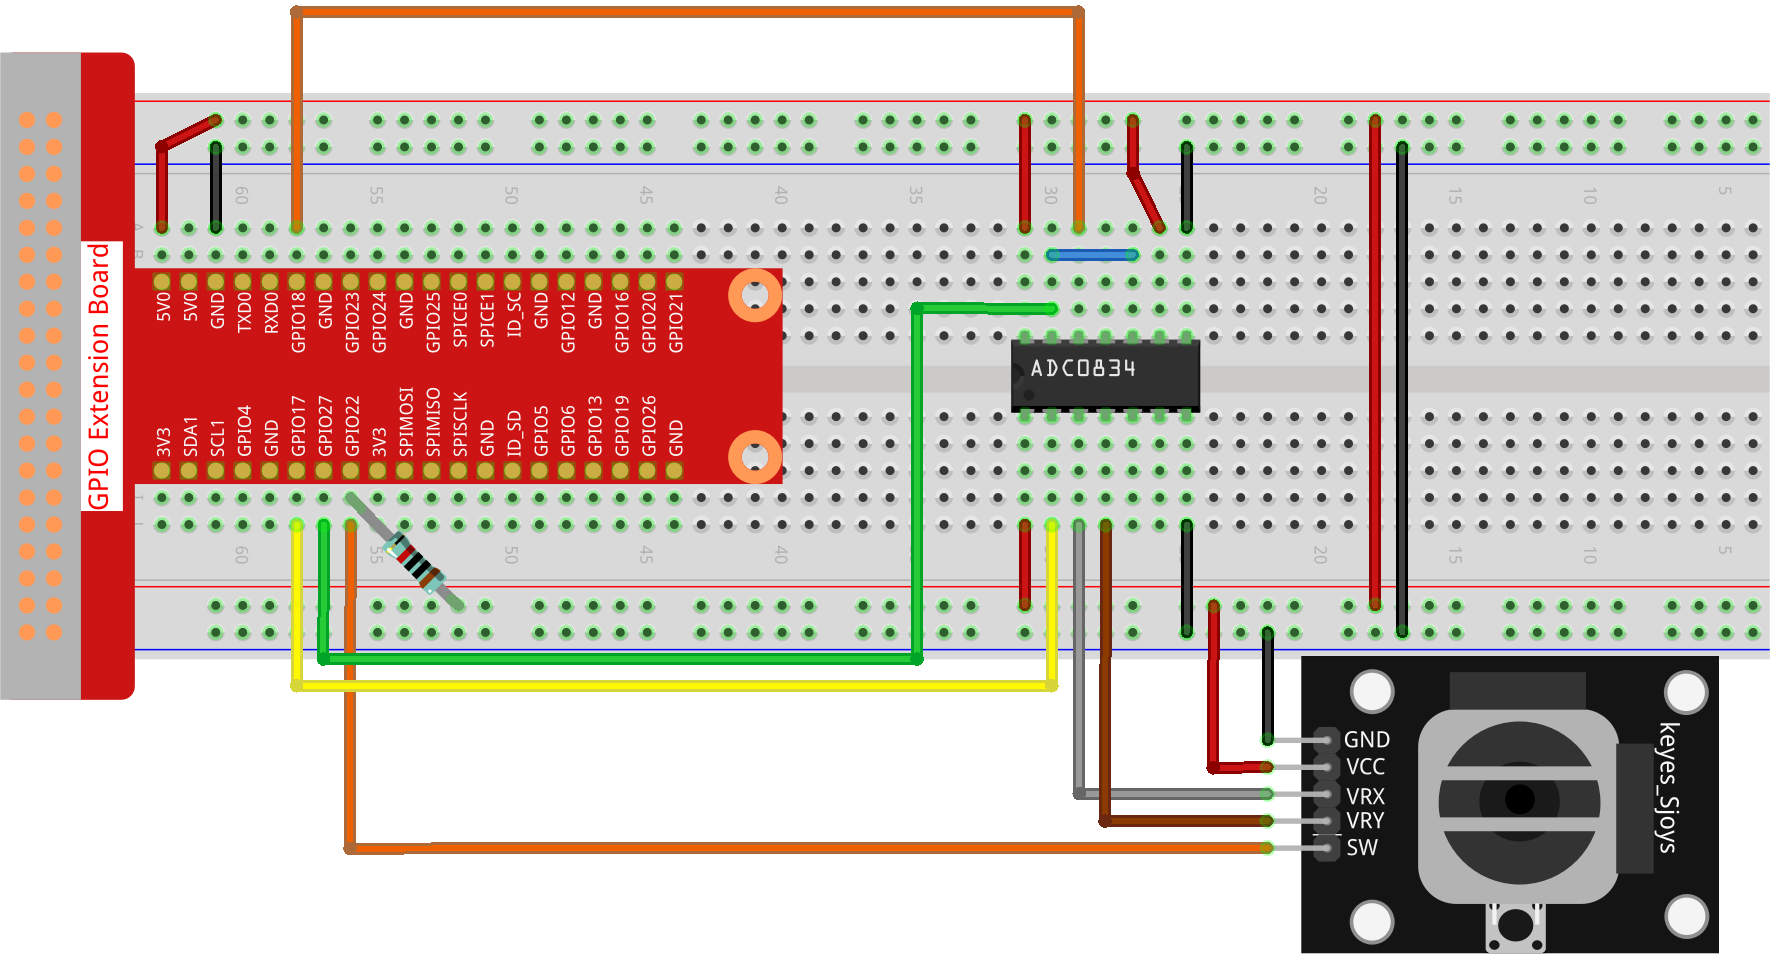
Step 1: Build the circuit.

Step 2: Go to the folder of the code.
cd ~/raphael-kit/python-pi5
Step 3: Run.
sudo python3 2.1.6_Joystick_zero.py
After the code runs, turn the Joystick, then the corresponding values of x, y, Btn are displayed on screen.
Code
Note
You can Modify/Reset/Copy/Run/Stop the code below. But before that, you need to go to source code path like raphael-kit/python-pi5. After modifying the code, you can run it directly to see the effect.
#!/usr/bin/env python3
from gpiozero import Button
import ADC0834
import time

# Initialize the button connected to GPIO pin 22
BtnPin = Button(22)

# Setup the ADC0834 ADC
ADC0834.setup()

try:
    # Main loop to read and print ADC values and button state
    while True:
        # Read X and Y values from ADC channels 0 and 1
        x_val = ADC0834.getResult(0)
        y_val = ADC0834.getResult(1)

        # Read the state of the button (pressed or not)
        Btn_val = BtnPin.value

        # Print the X, Y, and button values
        print('X: %d  Y: %d  Btn: %d' % (x_val, y_val, Btn_val))

        # Delay of 0.2 seconds before the next read
        time.sleep(0.2)

# Gracefully handle script termination (e.g., via KeyboardInterrupt)
except KeyboardInterrupt:
    pass
Code Explanation
This section imports the Button class from the
gpiozerolibrary to manage a button connected to a GPIO pin. It also imports theADC0834library for interfacing with the ADC0834 ADC (Analog-to-Digital Converter) module.#!/usr/bin/env python3 from gpiozero import Button import ADC0834 import time
Initializes a button connected to GPIO pin 22 and sets up the ADC0834 module for usage.
# Initialize the button connected to GPIO pin 22
BtnPin = Button(22)

# Setup the ADC0834 ADC
ADC0834.setup()
The VRX and VRY connections of the joystick are linked to CH0 and CH1 of the ADC0834, respectively. This setup facilitates reading the values from CH0 and CH1, which are then saved in the
x_valandy_valvariables. In addition, the SW value of the joystick is read and assigned to theBtn_valvariable. The retrieved values ofx_val,y_val, andBtn_valare subsequently displayed using theprint()function.try: # Main loop to read and print ADC values and button state while True: # Read X and Y values from ADC channels 0 and 1 x_val = ADC0834.getResult(0) y_val = ADC0834.getResult(1) # Read the state of the button (pressed or not) Btn_val = BtnPin.value # Print the X, Y, and button values print('X: %d Y: %d Btn: %d' % (x_val, y_val, Btn_val)) # Delay of 0.2 seconds before the next read time.sleep(0.2) # Gracefully handle script termination (e.g., via KeyboardInterrupt) except KeyboardInterrupt: pass