Note
Hello, welcome to the SunFounder Raspberry Pi & Arduino & ESP32 Enthusiasts Community on Facebook! Dive deeper into Raspberry Pi, Arduino, and ESP32 with fellow enthusiasts.
Why Join?
Expert Support: Solve post-sale issues and technical challenges with help from our community and team.
Learn & Share: Exchange tips and tutorials to enhance your skills.
Exclusive Previews: Get early access to new product announcements and sneak peeks.
Special Discounts: Enjoy exclusive discounts on our newest products.
Festive Promotions and Giveaways: Take part in giveaways and holiday promotions.
👉 Ready to explore and create with us? Click [here] and join today!
Clickable Color Blocks
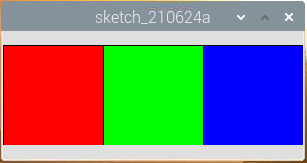
We’ve already tried drawing a clickable dot to control the LED, so let’s take it a step further and draw 3 colored squares to adjust the RGB colors!
Wiring

Sketch
import processing.io.*; // use the GPIO library

int[] pins = { 17, 18, 27 };

void setup() {
    for (int i = 0; i < pins.length; i++) {
        GPIO.pinMode(pins[i], GPIO.OUTPUT);
    }
    size(300, 100);
    background(255);
}

void draw() {
    fill(255, 0, 0);
    rect(0, 0, width/3, height);

    fill(0,255,0);
    rect(width/3, 0, 2*width/3, height);

    fill(0,0,255);
    rect(2*width/3, 0, width, height);
}

void mouseClicked() {
    for (int i = 0; i < pins.length; i++) {
        GPIO.digitalWrite(pins[i],GPIO.LOW);
    }
    if (mouseX<width/3){
        GPIO.digitalWrite(pins[0],GPIO.HIGH);
    }else if (mouseX>width/3&&mouseX<2*width/3){
        GPIO.digitalWrite(pins[1],GPIO.HIGH);
    }else if (mouseX>2*width/3){
        GPIO.digitalWrite(pins[2],GPIO.HIGH);
    }
}
How it works?
This project has a lot in common with Clickable Dot, except that it refines the conditions for determining mouse click event.
First draw three color blocks in draw(), then get which color block was clicked based on the value of mouseX (the X-axis coordinate of the mouse), and finally make RGB light up the corresponding color.
What more?
Based on the addition of light, we can make RGB LED display seven colors - adding red to green produces yellow; adding all three primary colors together produces white. Now you can try it out for yourself.
For more please refer to Processing Reference.