Note
Hello, welcome to the SunFounder Raspberry Pi & Arduino & ESP32 Enthusiasts Community on Facebook! Dive deeper into Raspberry Pi, Arduino, and ESP32 with fellow enthusiasts.
Why Join?
Expert Support: Solve post-sale issues and technical challenges with help from our community and team.
Learn & Share: Exchange tips and tutorials to enhance your skills.
Exclusive Previews: Get early access to new product announcements and sneak peeks.
Special Discounts: Enjoy exclusive discounts on our newest products.
Festive Promotions and Giveaways: Take part in giveaways and holiday promotions.
👉 Ready to explore and create with us? Click [here] and join today!
2.2.4 PIR
Introduction
In this project, we will make a device by using the human body infrared pyroelectric sensors. When someone gets closer to the LED, the LED will turn on automatically. If not, the light will turn off. This infrared motion sensor is a kind of sensor that can detect the infrared emitted by human and animals.
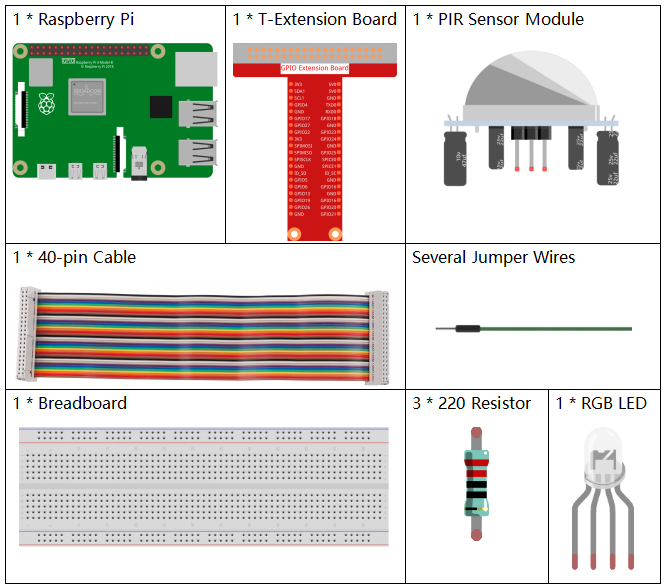
Components
Principle
The PIR sensor detects infrared heat radiation that can be used to detect the presence of organisms that emit infrared heat radiation.
The PIR sensor is split into two slots that are connected to a differential amplifier. Whenever a stationary object is in front of the sensor, the two slots receive the same amount of radiation and the output is zero. Whenever a moving object is in front of the sensor, one of the slots receives more radiation than the other , which makes the output fluctuate high or low. This change in output voltage is a result of detection of motion.

After the sensing module is wired, there is a one-minute initialization. During the initialization, module will output for 0~3 times at intervals. Then the module will be in the standby mode. Please keep the interference of light source and other sources away from the surface of the module so as to avoid the misoperation caused by the interfering signal. Even you’d better use the module without too much wind, because the wind can also interfere with the sensor.
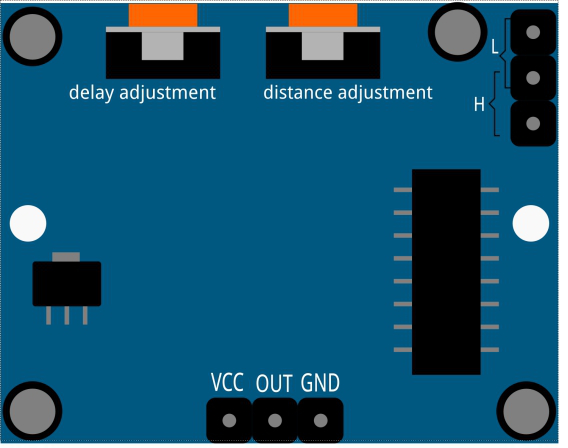
Distance Adjustment
Turning the knob of the distance adjustment potentiometer clockwise, the range of sensing distance increases, and the maximum sensing distance range is about 0-7 meters. If turn it anticlockwise, the range of sensing distance is reduced, and the minimum sensing distance range is about 0-3 meters.
Delay adjustment
Rotate the knob of the delay adjustment potentiometer clockwise, you can also see the sensing delay increasing. The maximum of the sensing elay can reach up to 300s. On the contrary, if rotate it anticlockwise, you can shorten the delay with a minimum of 5s.
Two trigger modes: (choosing different modes by using the jumper cap).
H: Repeatable trigger mode, after sensing the human body, the module outputs high level. During the subsequent delay period, if somebody enters the sensing range,the output will keep being the high level.
L: Non-repeatable trigger mode, outputs high level when it senses the human body. After the delay, the output will change from high level into low level automatically.
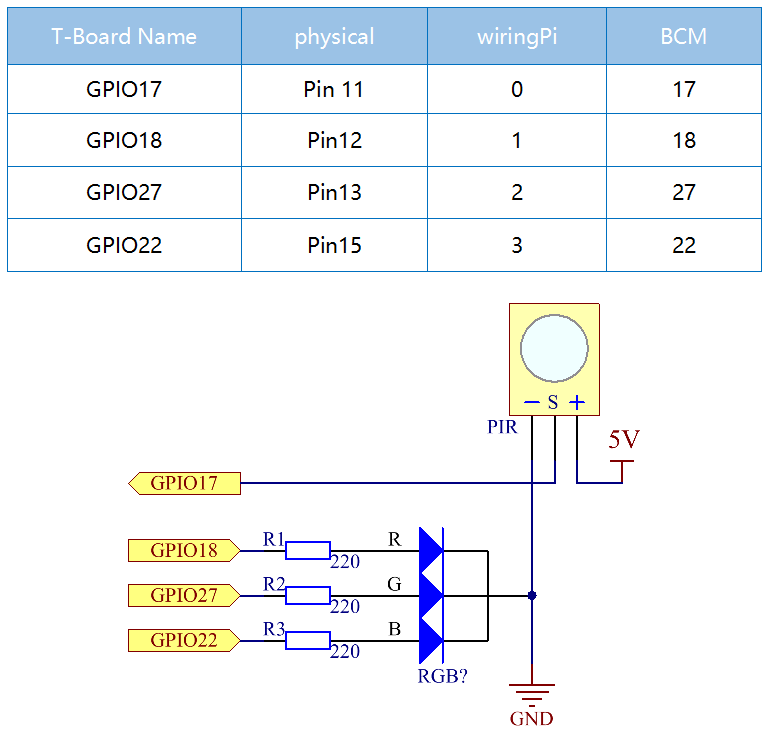
Schematic Diagram
Experimental Procedures
Step 1: Build the circuit.

Step 2: Go to the folder of the code.
cd ~/davinci-kit-for-raspberry-pi/c/2.2.4/
Step 3: Compile the code.
gcc 2.2.4_PIR.c -lwiringPi
Step 4: Run the executable file.
sudo ./a.out
After the code runs, PIR detects surroundings and let RGB LED glow yellow if it senses someone walking by. There are two potentiometers on the PIR module: one is to adjust sensitivity and the other is to adjust the detection distance. To make the PIR module work better, you You need to turn both of them counterclockwise to the end.

Note
If it does not work after running, or there is an error prompt: "wiringPi.h: No such file or directory", please refer to Install and Check the WiringPi.
Code
#include <wiringPi.h>
#include <softPwm.h>
#include <stdio.h>
#define uchar unsigned char

#define pirPin    0     //the pir connect to GPIO0
#define redPin    1
#define greenPin  2
#define bluePin   3

void ledInit(void){
    softPwmCreate(redPin,  0, 100);
    softPwmCreate(greenPin,0, 100);
    softPwmCreate(bluePin, 0, 100);
}
void ledColorSet(uchar r_val, uchar g_val, uchar b_val){
    softPwmWrite(redPin,   r_val);
    softPwmWrite(greenPin, g_val);
    softPwmWrite(bluePin,  b_val);
}
int main(void)
{
    int pir_val;
    if(wiringPiSetup() == -1){ //when initialize wiring failed,print message to screen
        printf("setup wiringPi failed !");
        return 1;
    }
    ledInit();
    pinMode(pirPin, INPUT);
    while(1){
    pir_val = digitalRead(pirPin);
        if(pir_val== 1){ //if read pir is HIGH level
            ledColorSet(0xff,0xff,0x00);
        }
        else {
        ledColorSet(0x00,0x00,0xff);
        }
    }
    return 0;
}
Code Explanation
void ledInit(void);
void ledColorSet(uchar r_val, uchar g_val, uchar b_val);
These codes are used to set the color of the RGB LED, and please refer to 1.1.2 RGB LED for more details.
int main(void)
{
    int pir_val;
    //……
    pinMode(pirPin, INPUT);
    while(1){
    pir_val = digitalRead(pirPin);
        if(pir_val== 1){ //if read pir is HIGH level
            ledColorSet(0xff,0xff,0x00);
        }
        else {
        ledColorSet(0x00,0x00,0xff);
        }
    }
    return 0;
}
When PIR detects the human infrared spectrum, RGB LED emits the yellow light; if not, emits the blue light.