Lesson 3 Flowing LED Lights
Introduction
In this lesson, we will learn how to make eight LEDs blink in various effects as you want based on Raspberry Pi.
Schematic Diagram
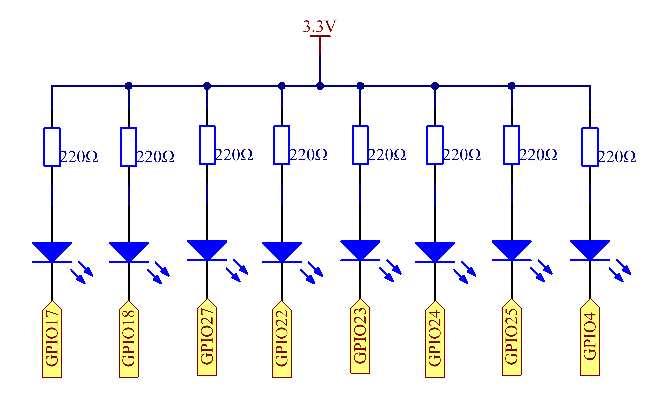
Set GPIO17-GPIO25 to low level in turn by programming, and then LED0-LED7 will light up in turn. You can make eight LEDs blink in different effects by controlling their delay time and the order of lighting up.
Experimental Procedures
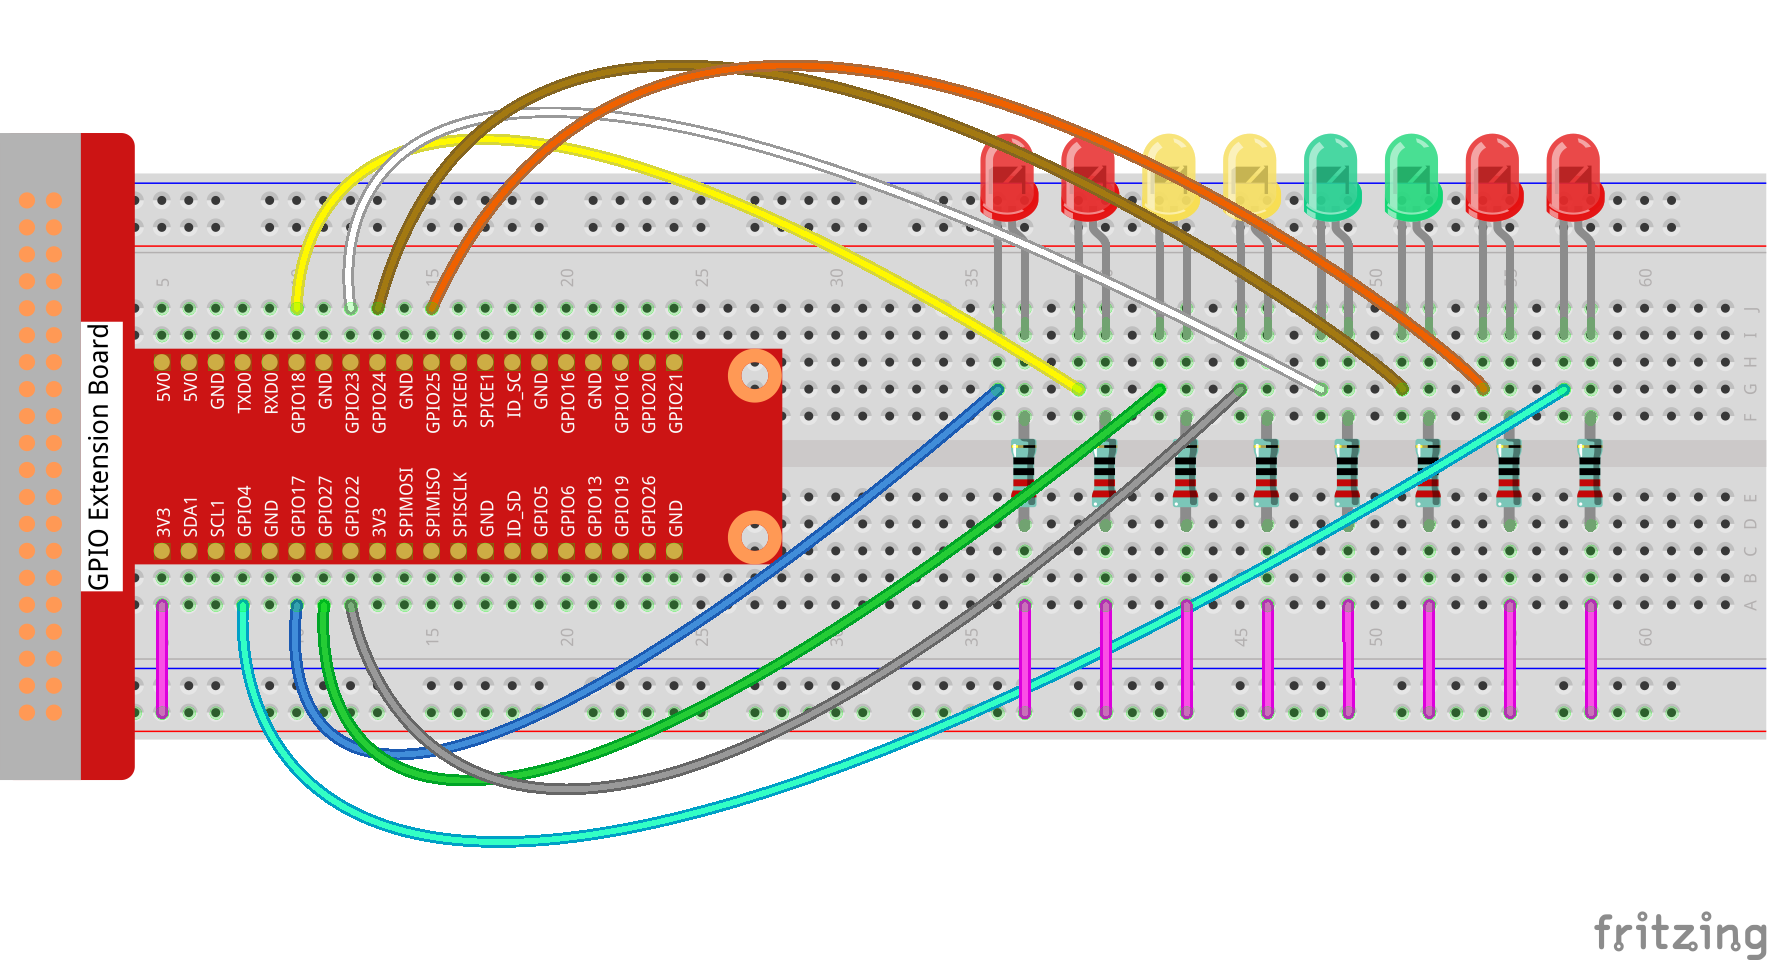
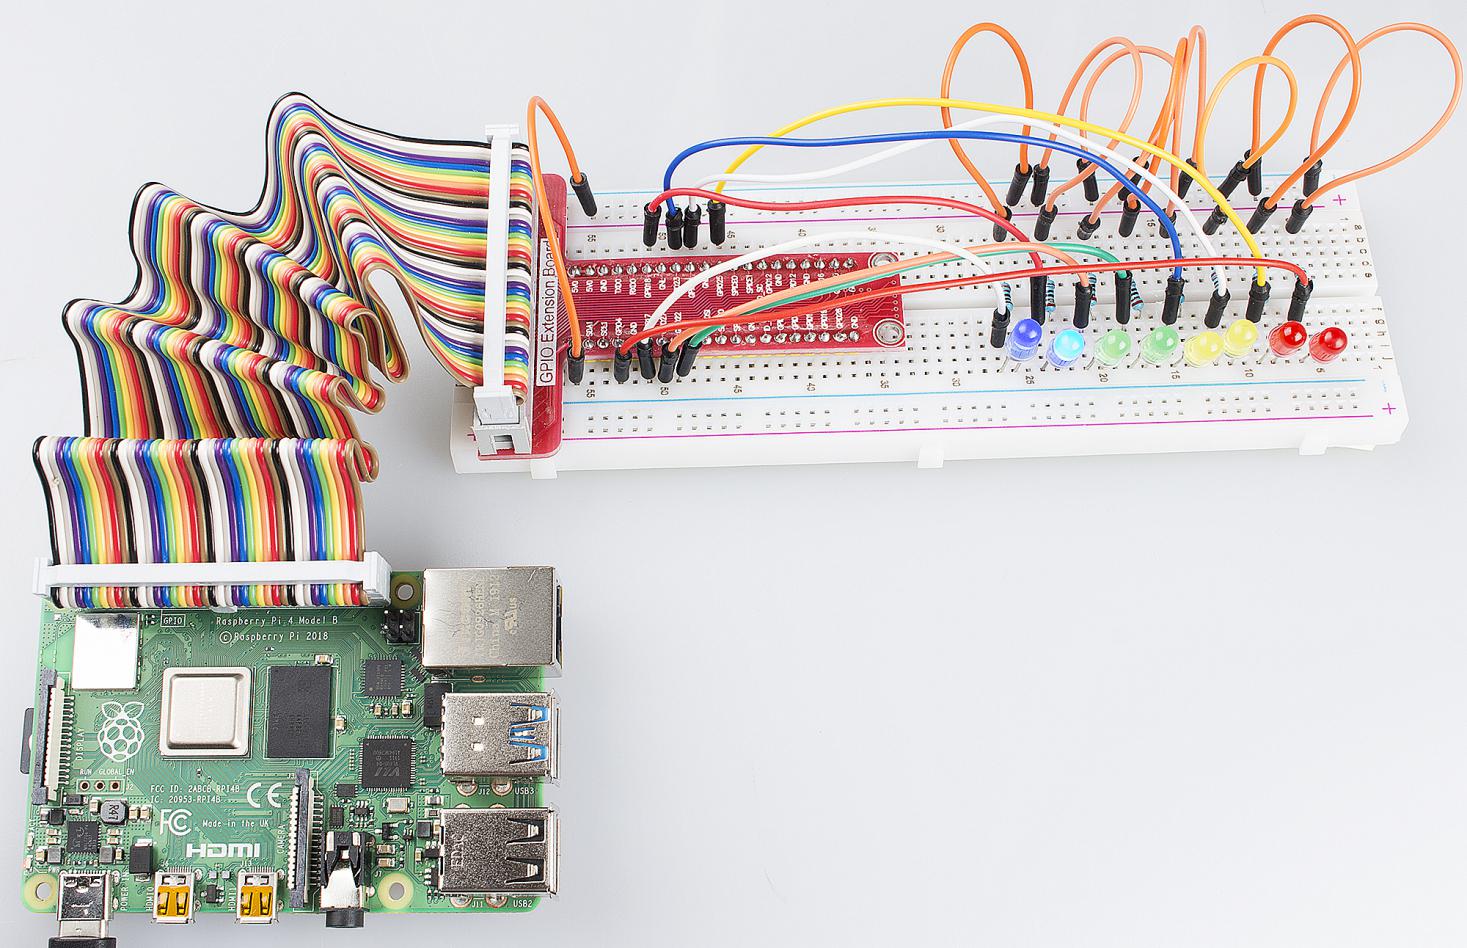
Step 1: Build the circuit.
Step 2: GPIO4 is the default pin for onewire driver (w1-gpio). In this lesson, we need to disable the onewire function and use it as an output pin.
sudo nano /boot/config.txt
Commit the following line.
#dtoverlay = w1-gpio
For C Language Users:
Step 3: Change directory.
cd /home/pi/Sunfounder_SuperKit_C_code_for_RaspberryPi/03_8Led/
Step 4: Compile.
gcc 8Led.c -o 8Led -lwiringPi
Step 5: Run.
sudo ./8Led
Note
If it does not work after running, or there is an error prompt: “wiringPi.h: No such file or directory”, please refer to C code is not working?.
Code
#include <wiringPi.h>
#include <stdio.h>

//make led_n on
void led_on(int n)
{
    digitalWrite(n, LOW);
}

//make led_n off
void led_off(int n)
{
    digitalWrite(n, HIGH);
}

int main(void)
{
    int i;

    if(wiringPiSetup() == -1){ //when initialize wiring failed,print messageto screen
        printf("setup wiringPi failed !");
        return 1;
    }

    for(i=0;i<8;i++){
        printf("linker LedPin : GPIO %d(wiringPi pin)\n",i); //when initialize wiring successfully,print message to screen
    }

    for(i=0;i<8;i++){       //make 8 pins' mode is output
        pinMode(i, OUTPUT);
    }

    while(1){
        for(i=0;i<8;i++){   //make led on from left to right
            led_on(i);
            delay(100);
            led_off(i);
        }
    //      delay(500);
        for(i=8;i>=0;i--){  //make led off from right to left
            led_on(i);
            delay(100);
            led_off(i);
        }
    }

    return 0;
}
For Python Users:
Step 3: Change directory.
cd /home/pi/Sunfounder_SuperKit_Python_code_for_RaspberryPi/
Step 4: Run.
sudo python3 03_8Led.py
Then you will see eight LEDs brighten and dim left to right and right to left circularly, just like flowing water.
Code
import RPi.GPIO as GPIO
import time

pins = [17, 18, 27, 22, 23, 24, 25, 4]

def setup():
    GPIO.setmode(GPIO.BCM)        # Numbers GPIOs by BCM
    for pin in pins:
        GPIO.setup(pin, GPIO.OUT)   # Set all pins' mode is output
        GPIO.output(pin, GPIO.HIGH) # Set all pins to high(+3.3V) to off led

def loop():
    while True:
        for pin in pins:
            GPIO.output(pin, GPIO.LOW)
            time.sleep(0.05)
            GPIO.output(pin, GPIO.HIGH)
        for pin in reversed(pins):
            GPIO.output(pin, GPIO.LOW)
            time.sleep(0.05)
            GPIO.output(pin, GPIO.HIGH)

def destroy():
    for pin in pins:
        GPIO.output(pin, GPIO.HIGH)    # turn off all leds
    GPIO.cleanup()                     # Release resource

if __name__ == '__main__':     # Program start from here
    setup()
    try:
        loop()
    except KeyboardInterrupt:  # When 'Ctrl+C' is pressed, the child program destroy() will be  executed.
        destroy()
Further Exploration
You can write the blinking effects of LEDs in an array. If you want to use one of these effects, you can call it in the main() function directly.