Lesson 1 Blinking LED
Introduction
In this lesson, we will learn how to program Raspberry Pi to make an LED blink. You can play numerous tricks with an LED as you want. Now get to start and you will enjoy the fun of DIY at once!
Principle
Semiconductor light-emitting diode is a type of component which can turn electric energy into light energy via PN junctions. By wavelength, it can be categorized into laser diode, infrared light-emitting diode and visible light-emitting diode which is usually known as light-emitting diode (LED).
When 2V-3V forward voltage is supplied to an LED, it will blink only if forward currents flow through the LED. Usually there are red, yellow, green, blue and color-changing LEDs which change color with different voltages. LEDs are widely used due to their low operating voltage, low current, luminescent stability and small size.
LEDs are diodes too. Hence they have a voltage drop which usually varies from 1V to 3V depending on their types. Generally, they brighten if supplied with a 5mA–30mA current, and we usually use 10mA–20mA. Thus when an LED is used, it is necessary to connect a current-limiting resistor to protect it from being burnt.
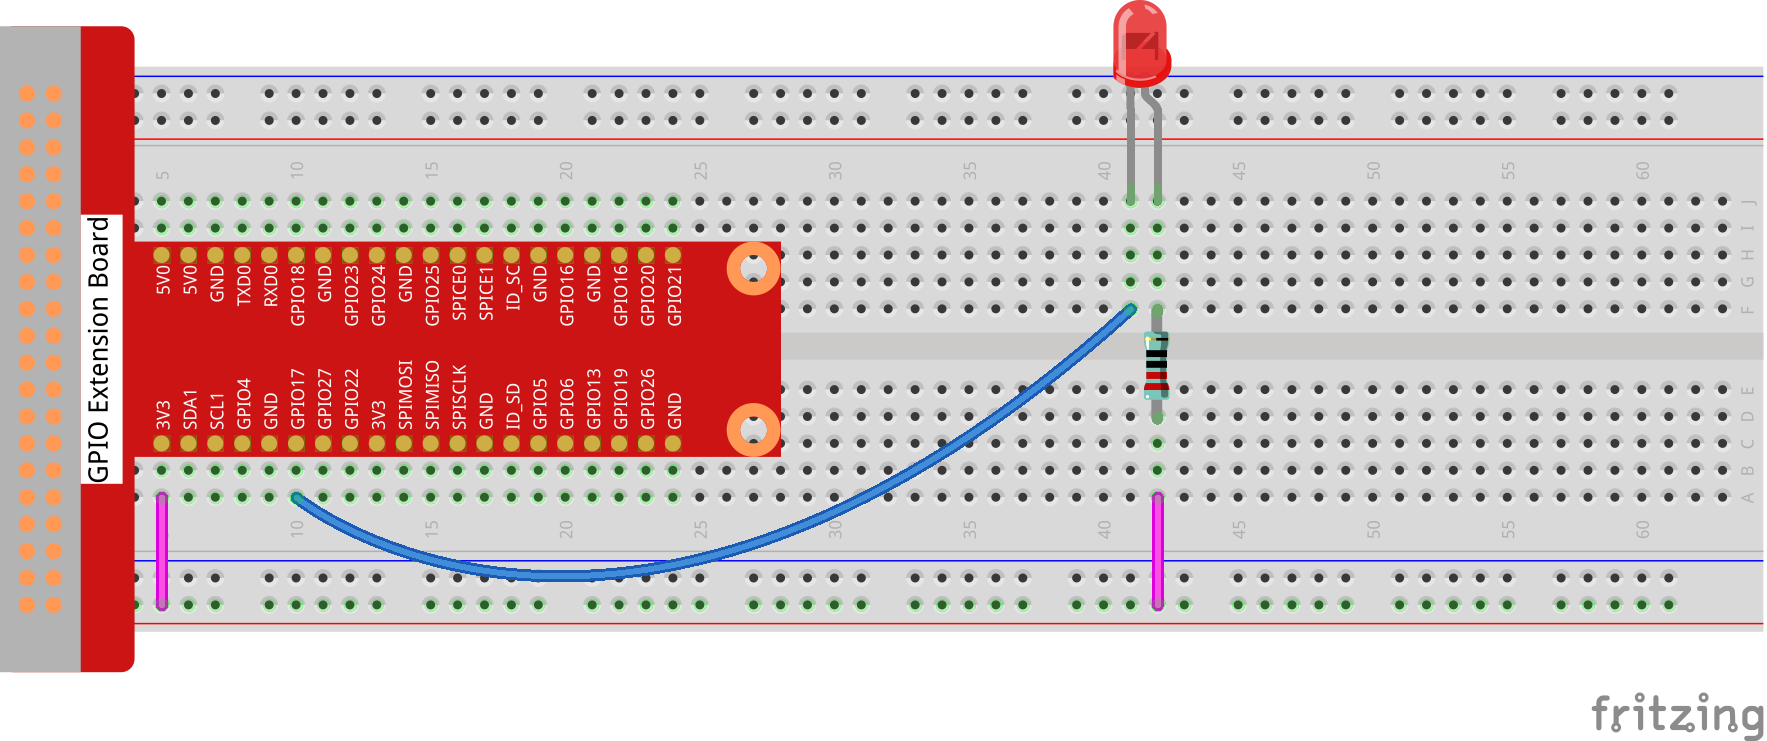
Schematic Diagram

In this experiment, connect a 220Ω resistor to the anode of the LED, then the resistor to 3.3 V, and connect the cathode of the LED to GPIO17 (See Raspberry Pi Pin Number Introduction). Write 1 to GPIO17, and the LED will stay off; write 0 to GPIO17, and then the LED will blink, just as indicated by the principle above.
Experimental Procedures
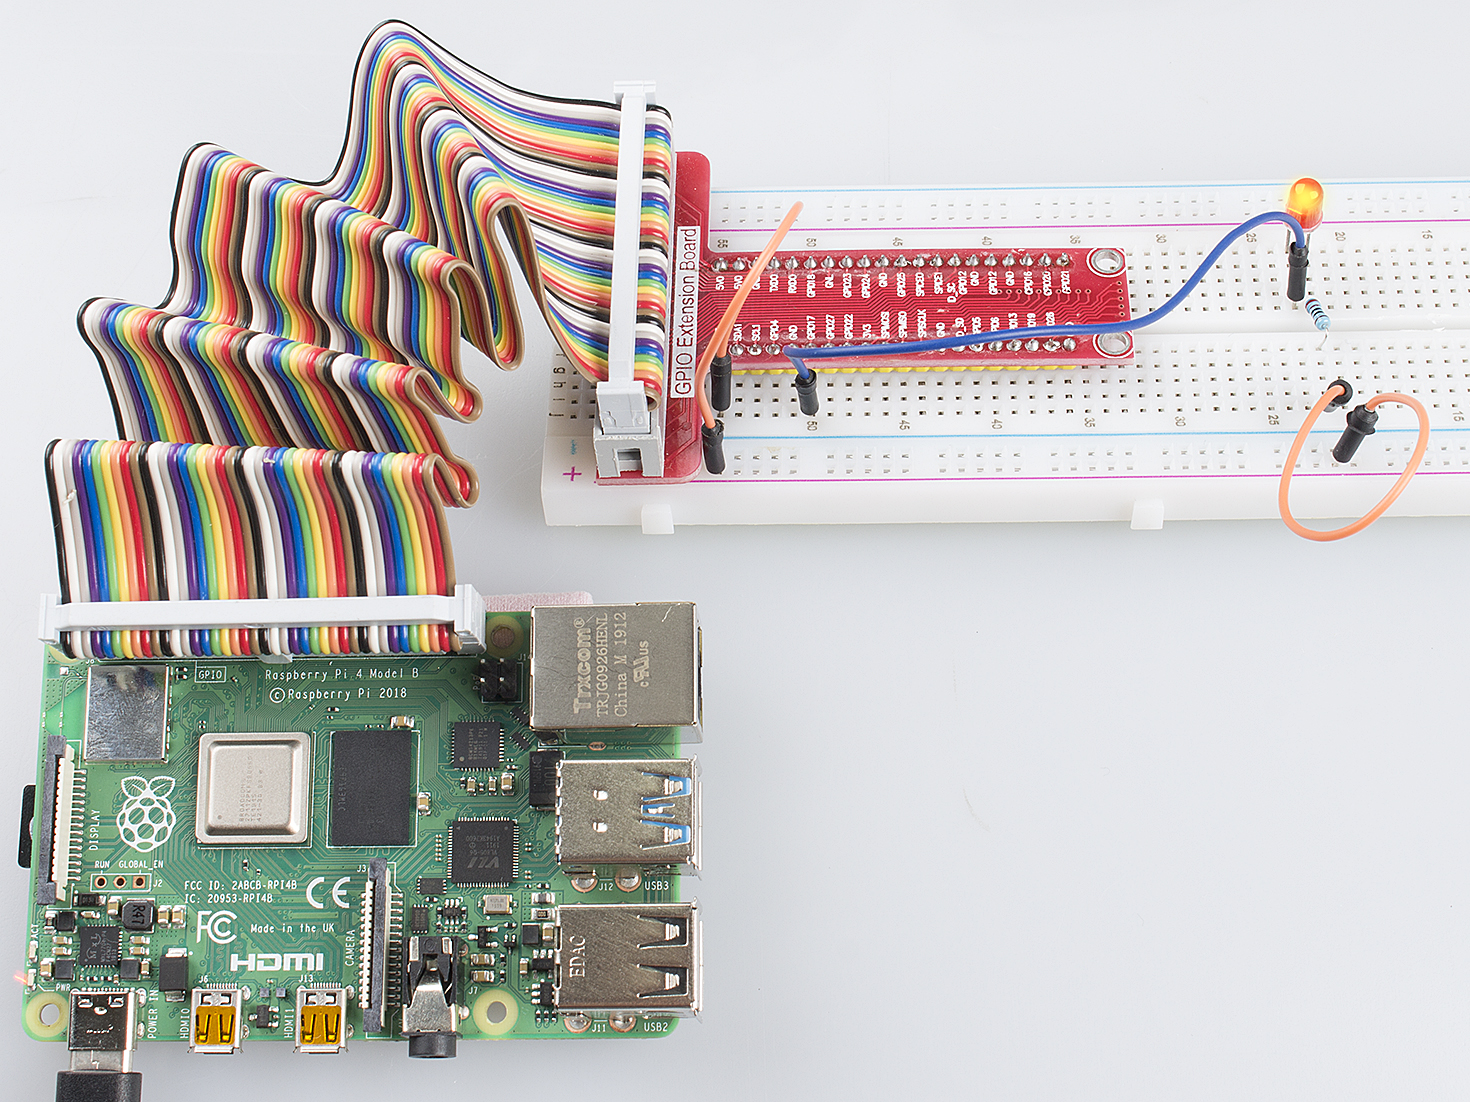
Step 1: Build the circuit.
For C Language Users:
Step 2: Change directory.
cd /home/pi/Sunfounder_SuperKit_C_code_for_RaspberryPi/01_LED
Step 3: Compile.
gcc led.c -o led -lwiringPi
Step 4: Run.
sudo ./led
Note
If it does not work after running, or there is an error prompt: “wiringPi.h: No such file or directory”, please refer to C code is not working?.
Code
#include <wiringPi.h>
#include <stdio.h>

#define  LedPin    0

int main(void)
{
    if(wiringPiSetup() == -1){ //when initialize wiring failed,print messageto screen
        printf("setup wiringPi failed !");
        return 1;
    }
    printf("linker LedPin : GPIO %d(wiringPi pin)\n",LedPin); //when initialize wiring successfully,print message to screen

    pinMode(LedPin, OUTPUT);

    while(1){
            digitalWrite(LedPin, LOW);  //led on
            printf("led on...\n");
            delay(500);
            digitalWrite(LedPin, HIGH);  //led off
            printf("...led off\n");
            delay(500);
    }

    return 0;
}
For Python Users:
Step 2: Change directory.
cd /home/pi/Sunfounder_SuperKit_Python_code_for_RaspberryPi/
Step 3: Run.
sudo python3 01_led.py
Now, you should see the LED blink.
Code
import RPi.GPIO as GPIO
import time

LedPin = 17

def setup():
    GPIO.setmode(GPIO.BCM)       # Numbers GPIOs by BCM
    GPIO.setup(LedPin, GPIO.OUT)   # Set LedPin's mode is output
    GPIO.output(LedPin, GPIO.HIGH) # Set LedPin high(+3.3V) to off led

def loop():
    while True:
        print ("...led on")
        GPIO.output(LedPin, GPIO.LOW)  # led on
        time.sleep(0.5)
        print ("led off...")
        GPIO.output(LedPin, GPIO.HIGH) # led off
        time.sleep(0.5)

def destroy():
    GPIO.output(LedPin, GPIO.HIGH)     # led off
    GPIO.cleanup()                     # Release resource

if __name__ == '__main__':     # Program start from here
    setup()
    try:
        loop()
    except KeyboardInterrupt:  # When 'Ctrl+C' is pressed, the child program destroy() will be  executed.
        destroy()
Further Exploration
If you want the LED to speed up the blinking, just change the delay time. For example, change the time to delay (200) in the program, recompile and run, and then you will see the LED blink faster.
Summary
Raspberry Pi packages many low-level detail designs, which enable you to explore your own apps more conveniently. Maybe that is the charm of Raspberry Pi.
Now you have already learnt how to use the Raspberry Pi GPIO to blink an LED. Keep moving to the next contents.
Tips:
For any TECHNICAL questions, add a topic under FORUM section on our website www.sunfounder.com and we’ll reply as soon as possible. For NON-TECH questions like order issues, please email service@sunfounder.com.