Note
Hello, welcome to the SunFounder Raspberry Pi & Arduino & ESP32 Enthusiasts Community on Facebook! Dive deeper into Raspberry Pi, Arduino, and ESP32 with fellow enthusiasts.
Why Join?
Expert Support: Solve post-sale issues and technical challenges with help from our community and team.
Learn & Share: Exchange tips and tutorials to enhance your skills.
Exclusive Previews: Get early access to new product announcements and sneak peeks.
Special Discounts: Enjoy exclusive discounts on our newest products.
Festive Promotions and Giveaways: Take part in giveaways and holiday promotions.
👉 Ready to explore and create with us? Click [here] and join today!
1.4 Install Arduino IDE
Exciting times ahead! Now that we’ve introduced Arduino and its board, let’s get our hands dirty by installing the Arduino IDE. This software is your toolbox for programming the Arduino board to do all the amazing things you’ve imagined.
The latest iteration, Arduino IDE 2.0, is both feature-rich and user-friendly. Before diving in, ensure your system meets these requirements:
Windows: Win 10 or newer, 64-bit
Linux: 64-bit
Mac OS X: Version 10.14 “Mojave” or newer, 64-bit
Follow these steps to get set up:
For Windows Users
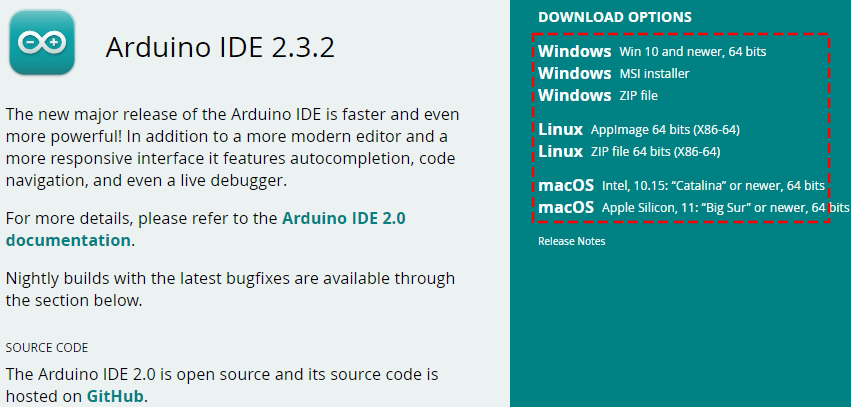
Head to the Arduino Software Page, where you’ll find the Arduino IDE available for three different operating systems. For Windows users, there are three versions to choose from:
Windows Win 10 and newer, 64 bits (Installer): Recommended for most users. Automatically installs needed drivers.
Windows MSI Installer: Suitable for network deployment or if you prefer MSI over a standard setup.
Windows ZIP File: Offers a portable version that doesn’t require installation. Ideal if you’re using multiple PCs or lack admin rights. Manual driver installation may be needed.
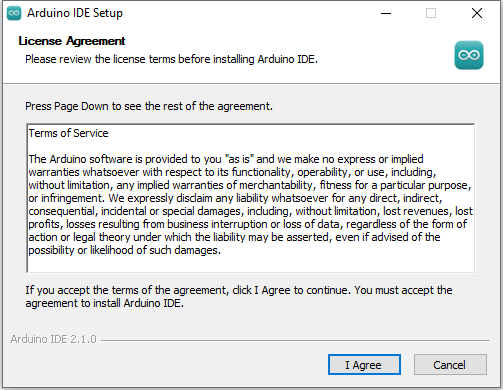
After downloading (the file will be named like
arduino-ide_xxxx.exe), double-click it to initiate installation.Read through the License Agreement. If you’re okay with the terms, click “I Agree”.
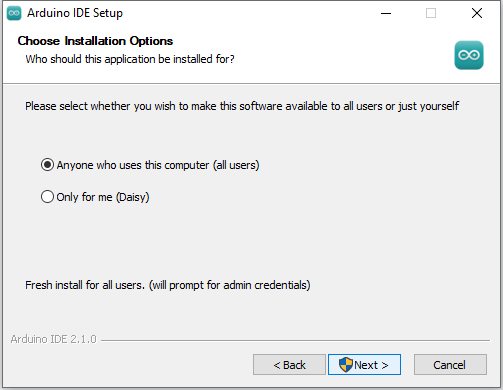
You’ll be prompted to select installation options. Keep the defaults and click “Next”.
Choose the installation path. Installing it on a drive other than your system drive is recommended.
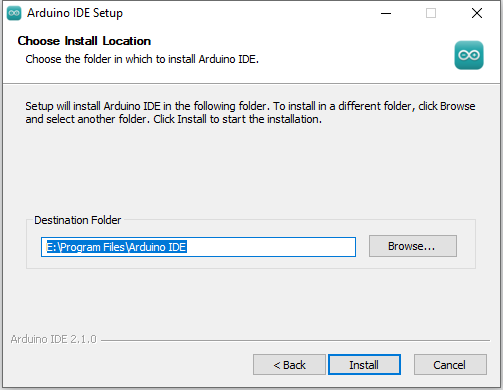
Click “Install”. Once completed, click “Finish”.

For macOS Users
Head to the Arduino Software Page, where you’ll find the Arduino IDE tailored for different operating systems. For macOS users, there are two specialized versions:
macOS Intel, 10.15 “Catalina” or newer, 64 bits: This version is designed for Macs with Intel processors. It’s optimized to ensure smooth operation on macOS versions from Catalina onwards, supporting the latest features and security standards of macOS on Intel architecture.
macOS Apple Silicon, 11 “Big Sur” or newer, 64 bits: Specifically crafted for the latest generation of Macs with Apple Silicon chips, this version offers enhanced performance and efficiency on macOS Big Sur and later. It leverages the advanced capabilities of Apple’s own chips to provide an optimized Arduino development experience.
Double-click the downloaded file (
arduino_ide_xxxx.dmg). Follow on-screen instructions to drag the Arduino IDE app into your Applications folder.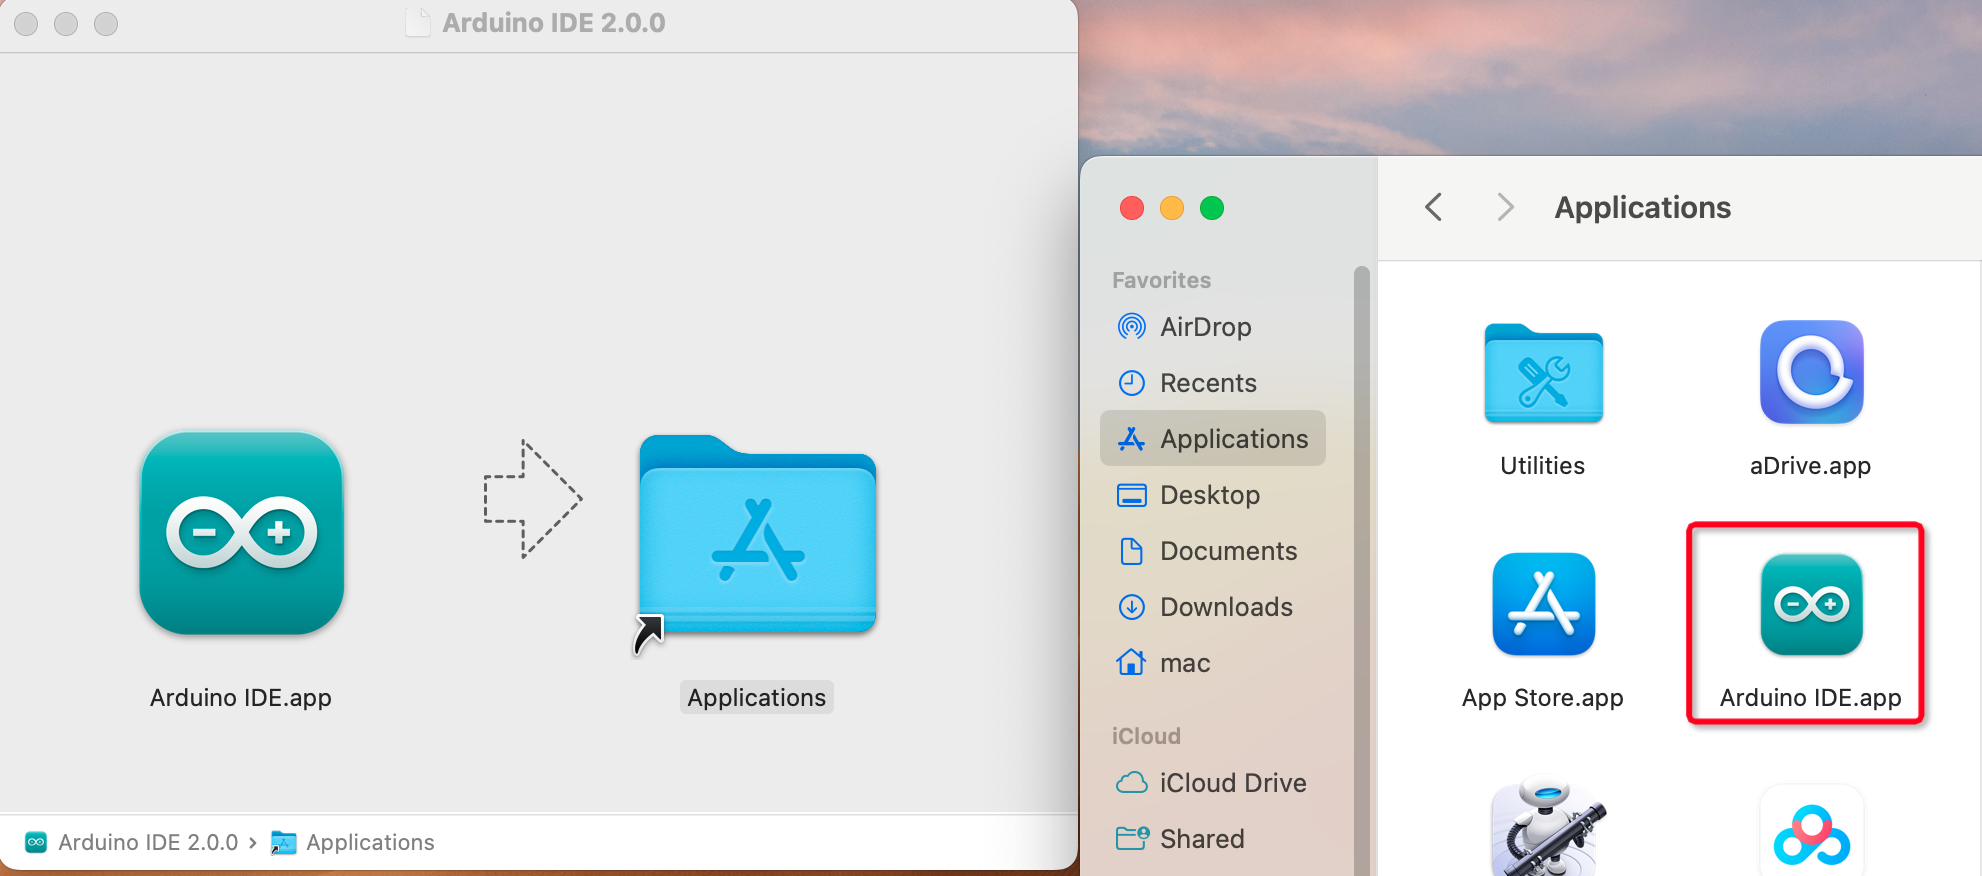
For Linux Users
Visit the Arduino Software Page, where the Arduino IDE is available for three different operating systems. For Linux users, two options are provided:
Linux AppImage 64 bits (X86-64): This version comes as an AppImage, which is a type of portable software package. It doesn’t require installation; simply make the file executable and run it directly.
Linux ZIP file 64 bits (X86-64): This is a ZIP file containing the IDE. It’s suitable for users who prefer manually managing their installations or need a portable version of the IDE.
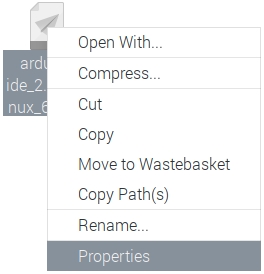
Navigate to your download folder. Before we can start the editor, the file needs to be executable. Right-click the file, choose Properties.
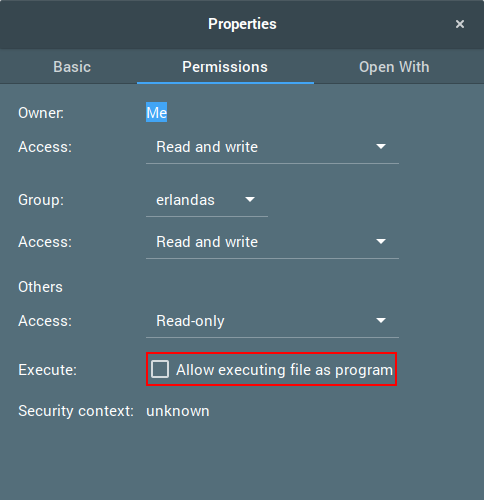
In the Permissions tab, tick “Allow executing file as a program”.
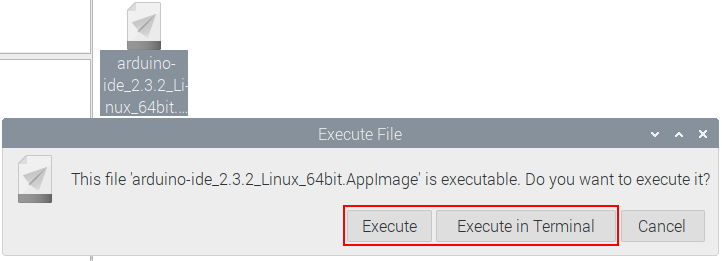
Now, double-click the file to launch Arduino IDE 2 on your Linux machine. If you’re unable to run the AppImage, ensure that FUSE is installed on your system.
You’re all set to begin your Arduino programming adventure. Happy coding!