注釈
こんにちは、SunFounderのRaspberry Pi & Arduino & ESP32愛好家コミュニティへようこそ!Facebook上でRaspberry Pi、Arduino、ESP32についてもっと深く掘り下げ、他の愛好家と交流しましょう。
参加する理由は?
エキスパートサポート:コミュニティやチームの助けを借りて、販売後の問題や技術的な課題を解決します。
学び&共有:ヒントやチュートリアルを交換してスキルを向上させましょう。
独占的なプレビュー:新製品の発表や先行プレビューに早期アクセスしましょう。
特別割引:最新製品の独占割引をお楽しみください。
祭りのプロモーションとギフト:ギフトや祝日のプロモーションに参加しましょう。
👉 私たちと一緒に探索し、創造する準備はできていますか?[ ここ]をクリックして今すぐ参加しましょう!
Bluetooth環境モニター
このプロジェクトでは、MITアップインベンターで作成されたAndroidアプリを使用して、Arduinoボードからの環境データを受信し表示します。ArduinoボードはDHT11センサーから温度と湿度のデータを取得します。データが収集されると、Bluetoothを介して送信されます。アプリはデータを受信すると、画面上に表示します。
Androidアプリケーションは、 MIT App Inventor という無料のWebベースプラットフォームを利用して構築されます。このプロジェクトは、Arduinoとスマートフォンのインターフェースに慣れる絶好の機会を提供します。
必要なコンポーネント
このプロジェクトでは、以下のコンポーネントが必要です。
全てのキットを一括購入するのが便利です。こちらがリンクです:
名称 |
このキットのアイテム数 |
リンク |
|---|---|---|
Elite Explorer Kit |
300+ |
また、以下のリンクから個別に購入することもできます。
コンポーネント紹介 |
購入リンク |
|---|---|
- |
|
1. 回路を組む


2. Androidアプリを作成する
Androidアプリケーションは、 MIT App Inventor という無料のウェブアプリケーションを使用して開発されます。 MITアップインベンターは、直感的なドラッグアンドドロップ機能により、簡易なアプリケーションを作成するための優れたスタートポイントとして機能します。
さあ、始めましょう。
~の始め方 MIT App Inventor にアクセスし、「オンラインツール」をクリックしてログインします。MITアップインベンターに登録するためにはGoogleアカウントが必要です。

ログインしたら、 Projects -> Import project (.aia) from my computer に進みます。その後、
elite-explorer-kit-main\iot_project\08-bluetooth_environmental_monitorのパスにあるble_environmental_monitor.aiaファイルをアップロードします。また、こちらから直接ダウンロードもできます:
ble_environmental_monitor.aia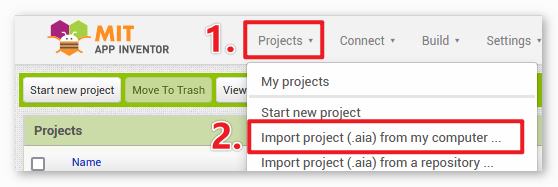
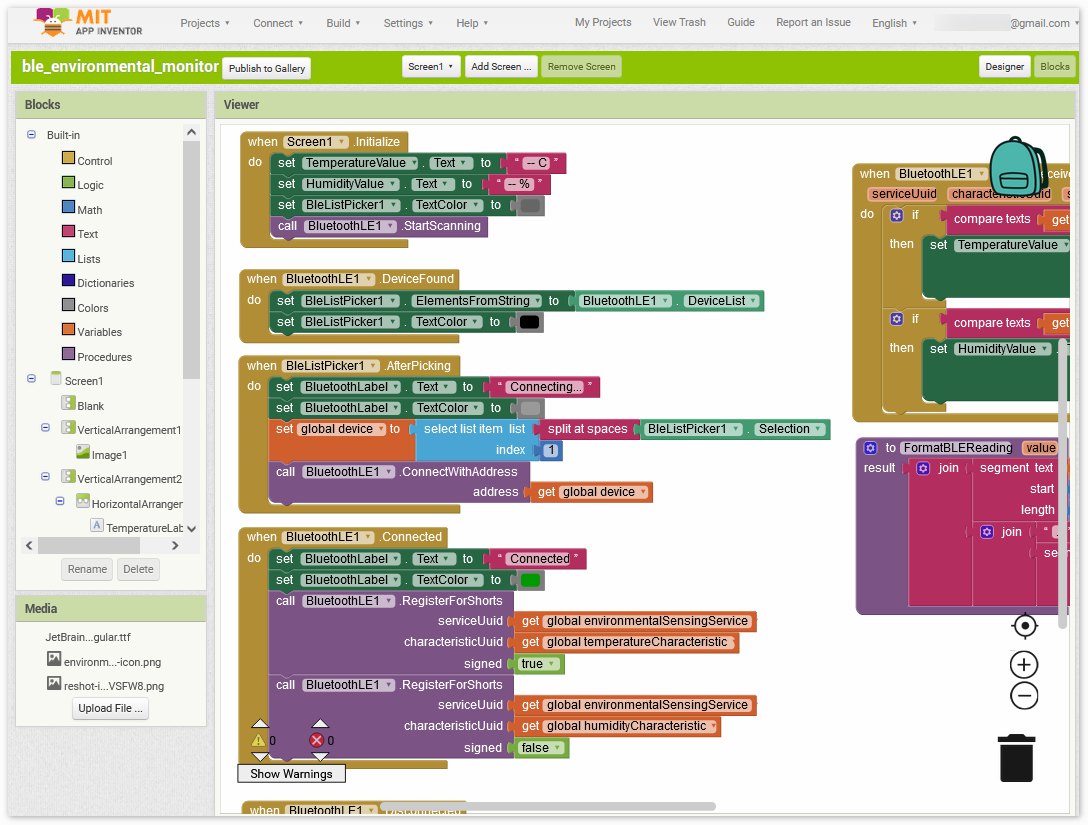
.aiaファイルをアップロードすると、MITアップインベンターソフトウェア上にアプリケーションが表示されます。これは事前に設定されたテンプレートです。MITアップインベンターに慣れた後、このテンプレートを変更することができます。MITアップインベンターには、主に Designer と Blocks の2つのセクションがあります。ページの右上隅でこれらのセクション間を切り替えることができます。
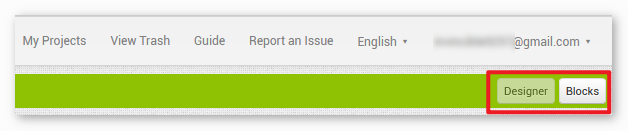
Designer では、ボタン、テキスト、スクリーンを追加したり、アプリケーションの全体的な見た目を変更したりすることができます。

次に、 Blocks セクションがあります。このセクションでは、アプリのGUI上の各コンポーネントにカスタム機能を作成し、望ましい機能を実現することができます。
スマートフォンにアプリケーションをインストールするには、 Build タブに移動します。
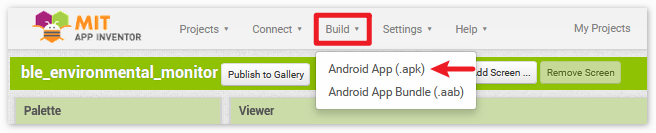
.apkファイルを生成できます。このオプションを選択すると、.apkファイルをダウンロードするか、QRコードをスキャンしてインストールするかを選択するページが表示されます。インストールガイドに従ってアプリケーションのインストールを完了してください。こちらから事前にコンパイルされたAPKもダウンロードできます:
ble_environmental_monitor.apkこのアプリをGoogle Playや他のアプリマーケットにアップロードしたい場合は、
.aabファイルを生成できます。
3. コードをアップロードする
elite-explorer-kit-main\iot_project\08-bluetooth_environmental_monitorのパスにある08-bluetooth_environmental_monitor.inoファイルを開くか、このコードを Arduino IDE にコピーします。注釈
ライブラリをインストールするには、Arduinoライブラリマネージャーを使用して、 「DHT sensor library」 と 「ArduinoBLE」 を検索し、インストールします。
  1/*
  2  This code is designed for an Arduino Uno R4 board to read temperature and humidity data
  3  from a DHT11 sensor. It then transmits this data via Bluetooth Low Energy (BLE) to a connected
  4  device. The code uses the DHT library for reading sensor data and the ArduinoBLE library for
  5  Bluetooth communication. The BLE service and characteristics are set up according to the
  6  specifications of the Bluetooth SIG for environmental sensing. Additionally, the code includes
  7  functions for managing BLE connection and disconnection events, as well as a debug function
  8  that prints sensor data to the serial monitor.
  9
 10  Board: Arduino Uno R4
 11  Component: DHT11
 12  Library: https://github.com/adafruit/DHT-sensor-library  (DHT sensor library by Adafruit)
 13           https://www.arduino.cc/reference/en/libraries/arduinoble/ (ArduinoBLE by Arduino)
 14*/
 15
 16
 17#include <DHT.h>
 18#include <ArduinoBLE.h>
 19
 20#define DHTPIN 11      // Define the pin used to connect the sensor
 21#define DHTTYPE DHT11  // Define the sensor type
 22
 23// Define UUIDs for BLE Environmental Sensing Service and Characteristics as per Bluetooth SIG specifications
 24// https://bitbucket.org/bluetooth-SIG/public/src/8a7ea26ae56d43e6fea88693232a01a78e28213e/assigned_numbers/uuids/service_uuids.yaml#lines-104:105
 25BLEService environmentalSensingService("181A");
 26// https://bitbucket.org/bluetooth-SIG/public/src/8a7ea26ae56d43e6fea88693232a01a78e28213e/assigned_numbers/uuids/characteristic_uuids.yaml#lines-299:303
 27BLEShortCharacteristic temperatureCharacteristic("2A6E", BLERead | BLENotify);
 28BLEUnsignedShortCharacteristic humidityCharacteristic("2A6F", BLERead | BLENotify);
 29
 30DHT dht(DHTPIN, DHTTYPE);  // Create a DHT object
 31
 32unsigned long lastUpdateTime = 0;           // Timestamp of last sensor data update
 33const unsigned long updateInterval = 5000;  // Sensor data update interval (ms)
 34
 35void setup() {
 36
 37  Serial.begin(9600);  // Initialize serial communication at 9600 baud
 38  dht.begin();         // Initialize DHT sensor
 39
 40  // Initialize BLE, halt if initialization fails
 41  if (!BLE.begin()) {
 42    Serial.println("starting Bluetooth® Low Energy module failed!");
 43    while (1)
 44      ;
 45  }
 46
 47  setupBle();  // Setup BLE service and characteristics
 48}
 49
 50void loop() {
 51
 52  BLE.poll();  // Poll for BLE events
 53
 54  // Check if it's time to update sensor data
 55  if (lastUpdateTime == 0 || millis() - lastUpdateTime > updateInterval) {
 56    float humidity = dht.readHumidity();        // Read humidity
 57    float temperature = dht.readTemperature();  // Read temperature
 58
 59    // Check if any reads failed and exit early (to try again).
 60    if (isnan(humidity) || isnan(temperature)) {
 61      Serial.println(F("Failed to read from DHT sensor!"));
 62      return;
 63    }
 64
 65    // Debug: print sensor data to serial monitor
 66    printDHT(humidity, temperature);
 67
 68    // Update BLE characteristics with new sensor data
 69    temperatureCharacteristic.writeValue(round(temperature * 100.0));
 70    humidityCharacteristic.writeValue(round(humidity * 100.0));
 71
 72    lastUpdateTime = millis();  // Update timestamp
 73  }
 74}
 75
 76void printDHT(float h, float t) {
 77  // Print humidity and temperature data to serial monitor
 78  Serial.print(F("Humidity: "));
 79  Serial.print(h);
 80  Serial.print(F("%  Temperature: "));
 81  Serial.print(t);
 82  Serial.println(F("°C "));
 83}
 84
 85void setupBle() {
 86  // Set advertised local name and service UUID:
 87  BLE.setLocalName("UNO R4 Home");
 88  BLE.setAdvertisedService(environmentalSensingService);
 89
 90  // Add characteristics to the service
 91  environmentalSensingService.addCharacteristic(temperatureCharacteristic);
 92  environmentalSensingService.addCharacteristic(humidityCharacteristic);
 93
 94  // Add service
 95  BLE.addService(environmentalSensingService);
 96
 97  // Set initial characteristic values
 98  temperatureCharacteristic.writeValue(0);
 99  humidityCharacteristic.writeValue(0);
100
101  // Set BLE event handlers for connection and disconnection
102  BLE.setEventHandler(BLEConnected, blePeripheralConnectHandler);
103  BLE.setEventHandler(BLEDisconnected, blePeripheralDisconnectHandler);
104
105  // Start advertising
106  BLE.advertise();
107}
108
109void blePeripheralConnectHandler(BLEDevice central) {
110  // Handle BLE peripheral connect event
111  digitalWrite(LED_BUILTIN, HIGH);  // Turn on built-in LED
112  Serial.print(F("Connected to central: "));
113  Serial.println(central.address());
114}
115
116void blePeripheralDisconnectHandler(BLEDevice central) {
117  // Handle BLE peripheral disconnect event
118  digitalWrite(LED_BUILTIN, LOW);  // Turn off built-in LED
119  Serial.print(F("Disconnected from central: "));
120  Serial.println(central.address());
121}
正しいボードとポートを選択したら、 Upload ボタンをクリックします。
シリアルモニター(ボーレートは 9600 に設定)を開き、デバッグメッセージを確認します。
4. アプリとBluetoothモジュールの接続
先に作成したアプリケーションがスマートフォンにインストールされていることを確認します。
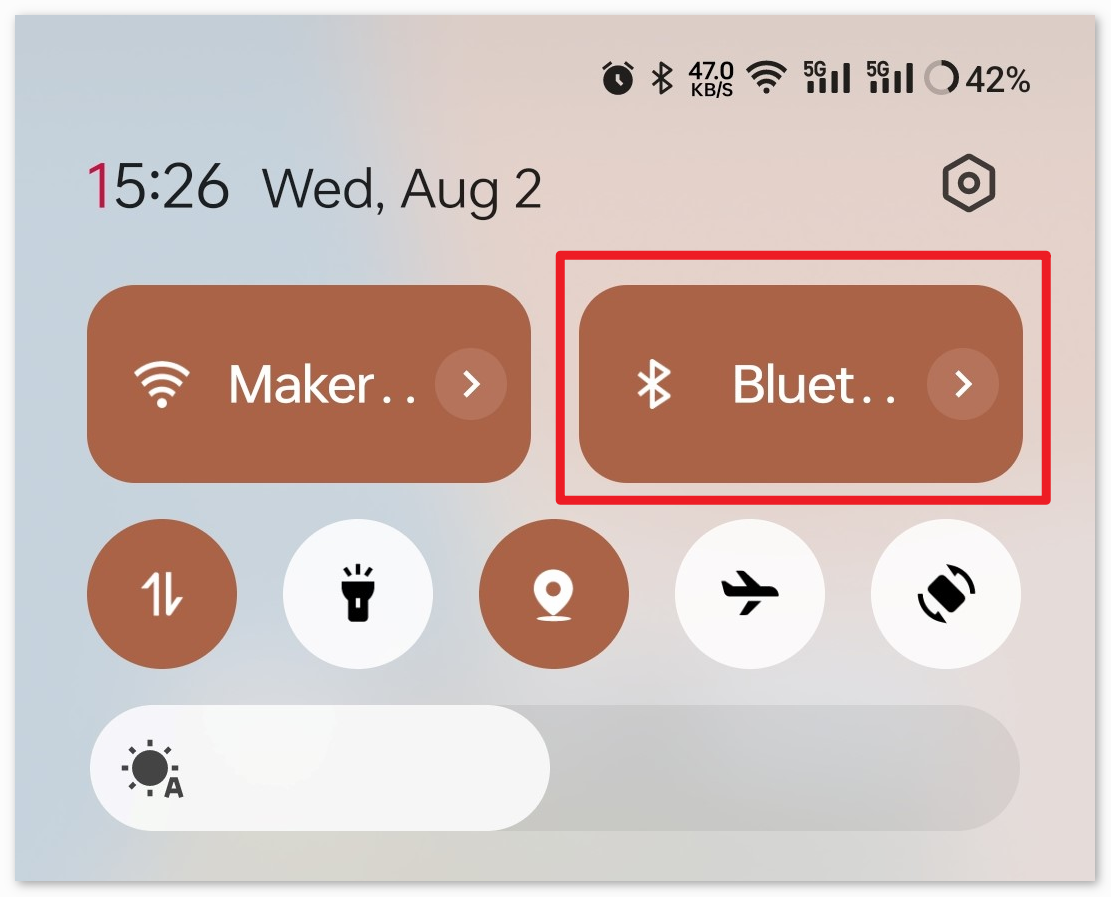
まず、スマートフォンで Bluetooth をオンにします。
次に、新しくインストールされた Environmental Monitor アプリを開きます。
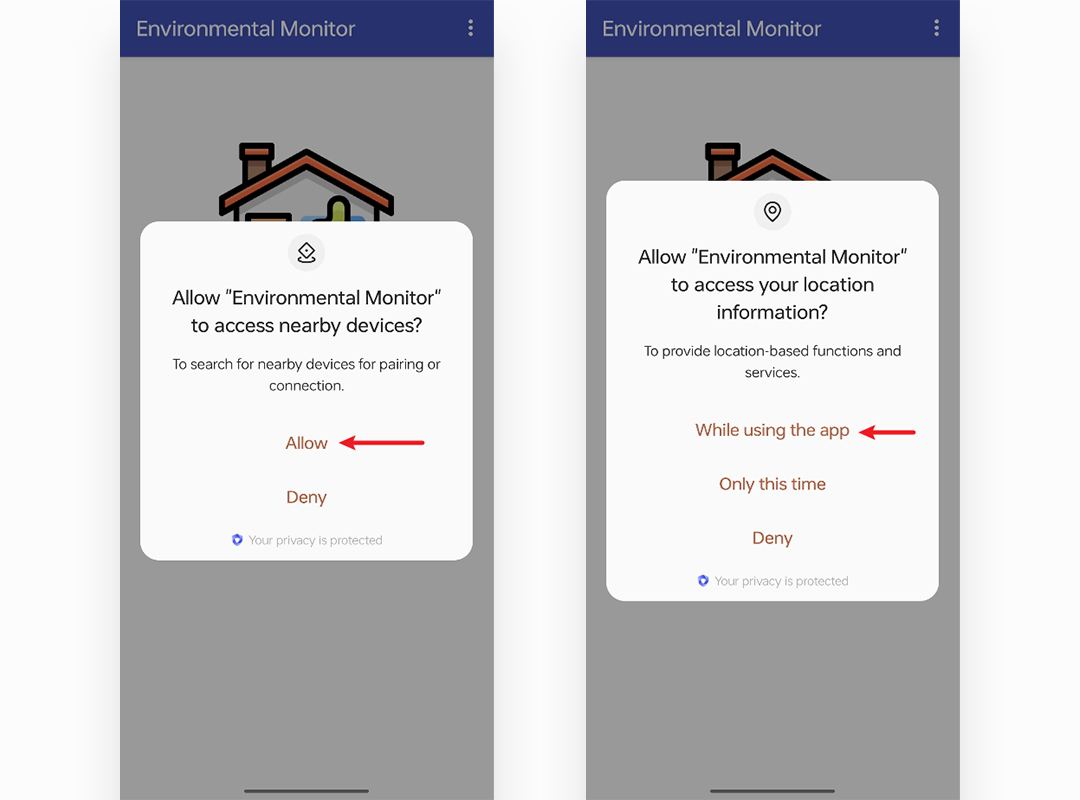
このアプリを初めて開くと、Bluetoothの使用に必要な許可を求める2つのプロンプトが連続して表示されます。
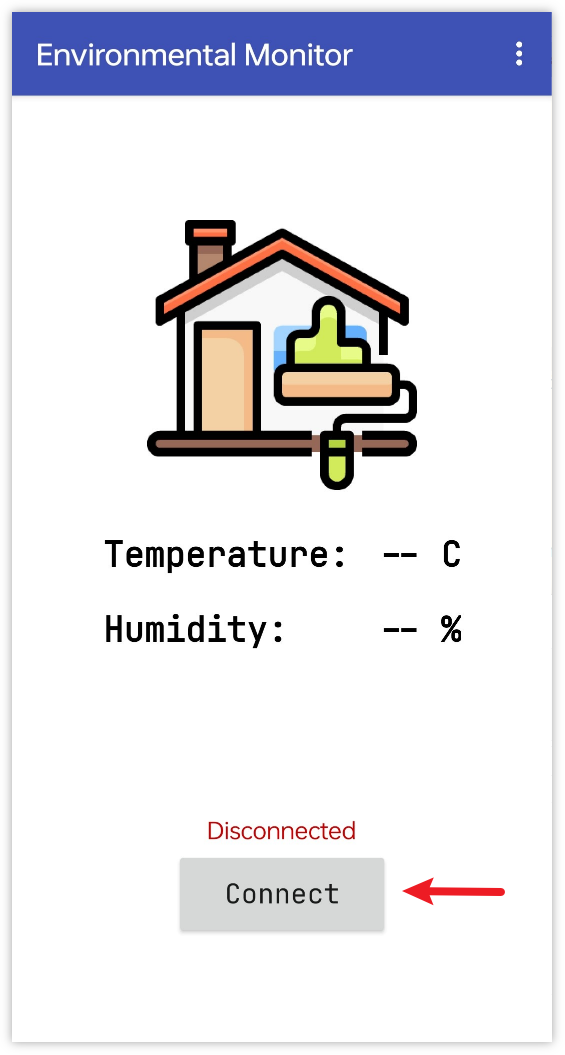
アプリ内で Connect ボタンをクリックし、アプリとBluetoothモジュール間の接続を確立します。
このページには、すべてのペアリングされたBluetoothデバイスのリストが表示されます。リストから
xx.xx.xx.xx.xx.xx UNO R4 Homeオプションを選択します。各デバイスの名前はMACアドレスの隣にリストされています。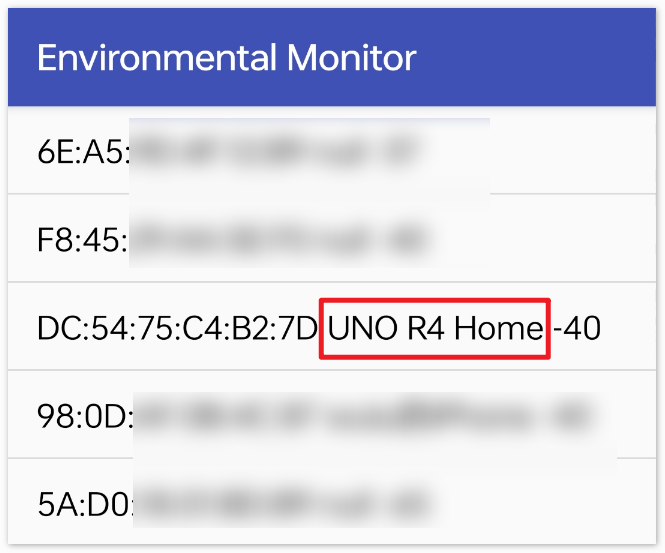
上記のページにデバイスが表示されない場合は、デバイスの位置情報スイッチをオンにしてみてください(一部のAndroidシステムバージョンでは、Bluetooth機能と位置情報スイッチが統合されています)。

接続が成功すると、メインページにリダイレクトされ、そこで温度と湿度が表示されます。

5. コードの説明
ライブラリのインポートと定数の定義
必要なライブラリをインポートし、DHTセンサーピンとタイプに関する定数を定義します。
注釈
ライブラリをインストールするには、Arduinoライブラリマネージャーを使用して、 「DHT sensor library」 と 「ArduinoBLE」 を検索し、インストールします。
#include <DHT.h>
#include <ArduinoBLE.h>
#define DHTPIN 11
#define DHTTYPE DHT11
BLEサービスと特性の初期化
BLE環境センシングサービスと特性のUUIDを定義します。 ブルートゥース SIG によって提供された事前定義されたUUIDを使用しています。 環境センシングサービス には
0x181Aが割り当てられ、それぞれ0x2A6Eと0x2A6Fは 温度と湿度 用に予約されています。
BLEService environmentalSensingService("181A");
BLEShortCharacteristic temperatureCharacteristic("2A6E", BLERead | BLENotify);
BLEUnsignedShortCharacteristic humidityCharacteristic("2A6F", BLERead | BLENotify);
Setup関数
シリアル通信、DHTセンサー、BLEを初期化します。
void setup() {
  Serial.begin(9600);
  dht.begin();
  if (!BLE.begin()) {
    Serial.println("starting Bluetooth® Low Energy module failed!");
    while (1)
      ;
  }
  setupBle();
}
メインループ
BLEイベントをポーリングし、定期的にセンサーデータを更新します。
millis() - lastUpdateTime > updateIntervalの行は、センサーデータがupdateIntervalミリ秒ごとに更新されることを保証します。
void loop() {
  BLE.poll();
  if (millis() - lastUpdateTime > updateInterval) {
    // Read sensor data and update BLE characteristics
  }
}
BLEおよびデバッグ関数
BLEを設定し、デバッグ情報を出力し、BLEイベントを管理するための関数。
void printDHT(float h, float t) { /* ... */ }
void setupBle() { /* ... */ }
void blePeripheralConnectHandler(BLEDevice central) { /* ... */ }
void blePeripheralDisconnectHandler(BLEDevice central) { /* ... */ }
printDHT(float h, float t): DHT11によって読み取られた温度と湿度のデータをシリアルモニターに出力するために使用されます。この関数はデバッグ目的のためです。setupBle(): ブロードキャスト名、特性、およびサービスを設定を含むBluetoothを初期化します。blePeripheralConnectHandler(BLEDevice central)およびblePeripheralDisconnectHandler(BLEDevice central): これらの関数は、Bluetoothが接続または切断されたときのイベントを処理します。デバイスがUNO R4とBluetooth経由で正常に接続すると、オンボードLEDが点灯します。デバイスが切断されると、LEDが消灯します。