CherryLight
CheerLights is a global network of synchronized lights that can be controlled by anyone. Join the @CheerLights - Twitter LED color-changing community, which allows LEDs around the world to change colors simultaneously. Place your LEDs in a corner of your office to remind yourself that you are not alone.
In this case, we also utilize MQTT, but instead of publishing our own messages, we subscribe to the “cheerlights” topic. This allows us to receive messages sent by others to the “cheerlights” topic and use that information to change the color of our LED strip accordingly.
Required Components
In this project, we need the following components.
It’s definitely convenient to buy a whole kit, here’s the link:
Name |
ITEMS IN THIS KIT |
LINK |
|---|---|---|
Elite Explorer Kit |
300+ |
You can also buy them separately from the links below.
COMPONENT INTRODUCTION |
PURCHASE LINK |
|---|---|
- |
|
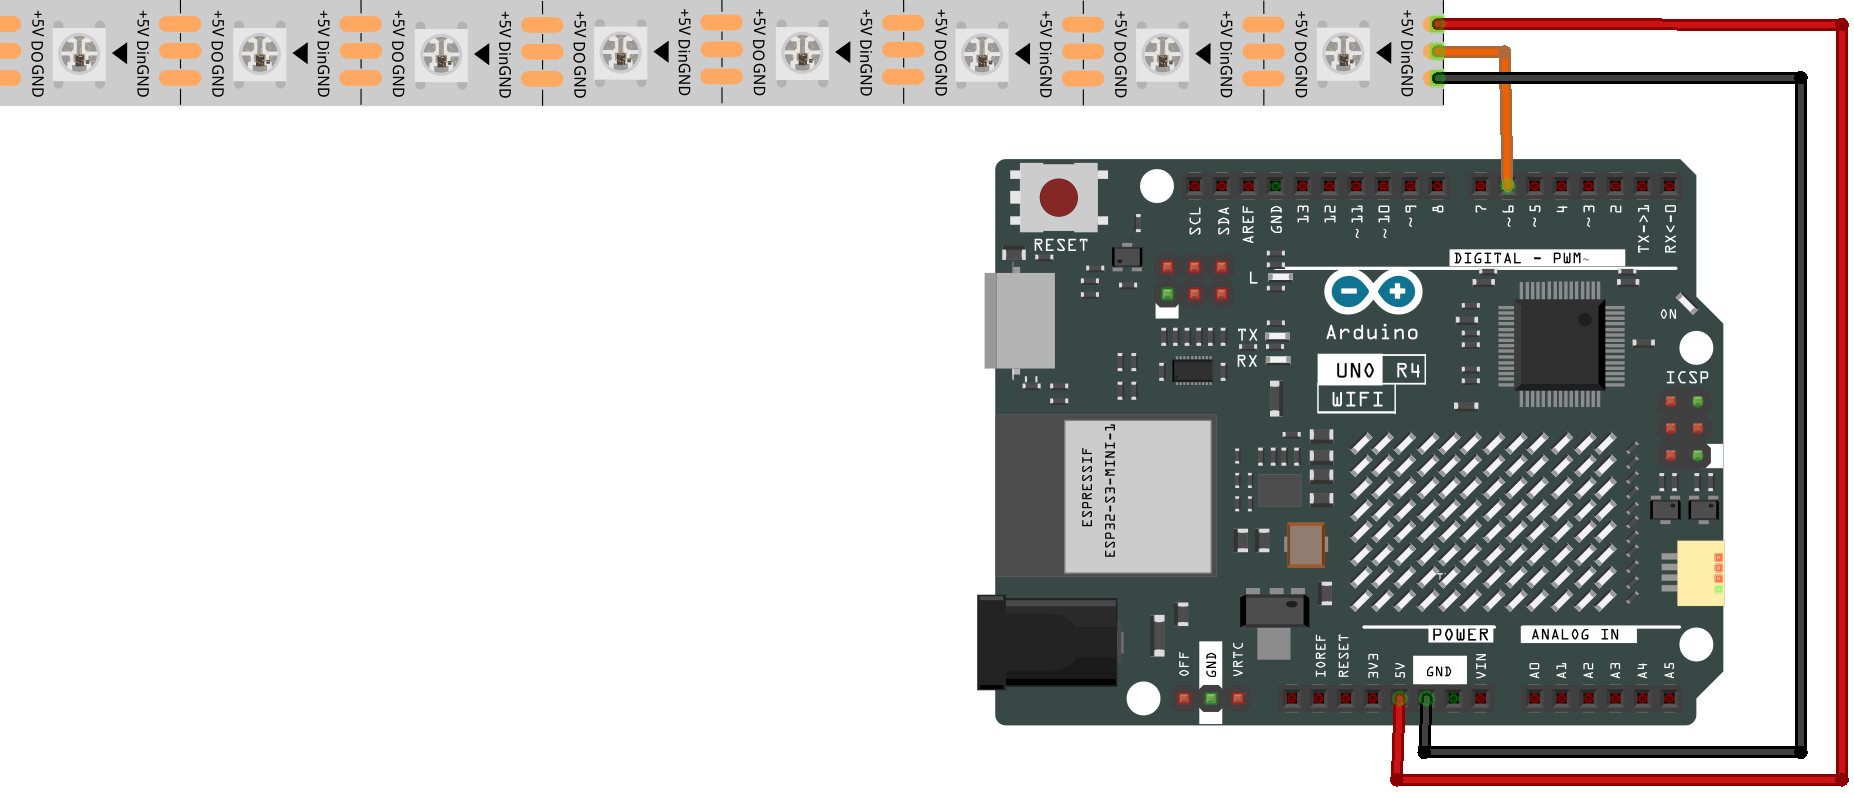
Wiring

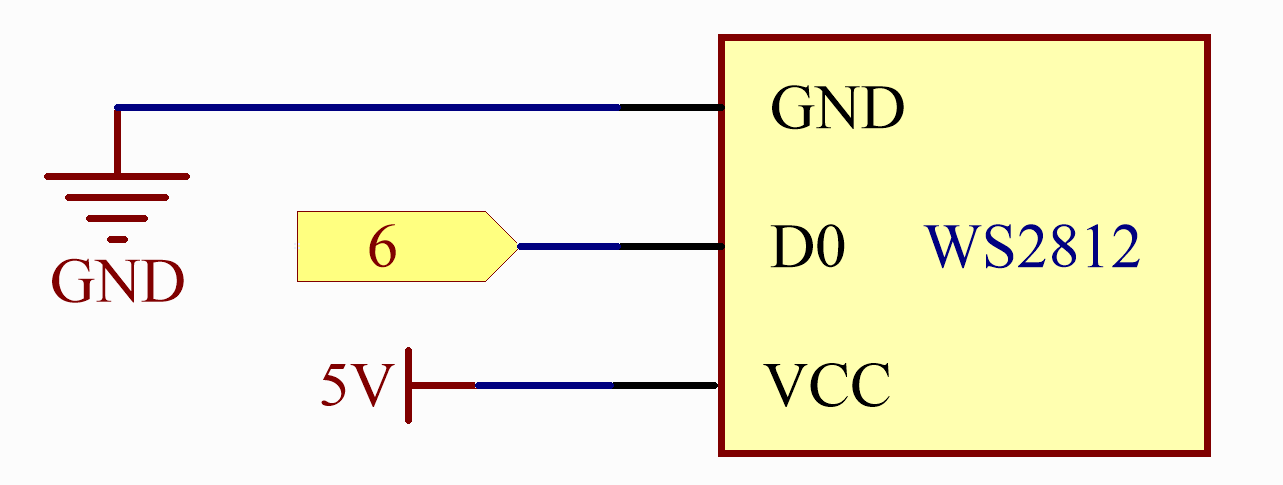
Schematic

Install the Library
To install the library, use the Arduino Library Manager and search for “ArduinoMqttClient” and “FastLED” and install them.
ArduinoMqttClient.h: Used for MQTT communication.
FastLED.h: Used to drive the RGB LED Strip.
Warning
Since the FastLED library has not officially released a version supporting Arduino R4 yet, you’ll need to download the latest development code of the FastLED library and overwrite the existing FastLED library files. For detailed instructions on how to do this, please refer to the Manual Installation section. (This note will be retracted when the FastLED library officially releases an update that supports the Arduino UNO R4.)
Run the Code
Note
You can open the file
05_cheerlight.inounder the path ofelite-explorer-kit-main\iot_project\05_cheerlightdirectly.Or copy this code into Arduino IDE.
Note
In the code, SSID and password are stored in arduino_secrets.h. Before uploading this example, you need to modify them with your own WiFi credentials. Additionally, for security purposes, ensure that this information is kept confidential when sharing or storing the code.
Control global @CheerLights devices
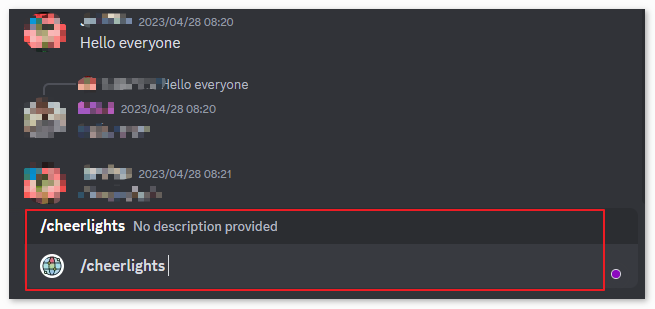
Join the Discord Server and utilize the CheerLights bot to set the color. Simply type
/cheerlightsin any of the channels on the CheerLights Discord Server to activate the bot.
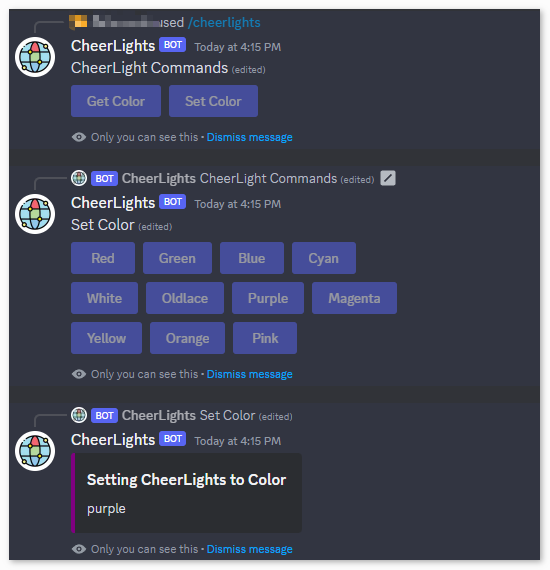
Follow the instructions provided by the bot to set the color. This will allow you to control CheerLights devices globally.

How it works?
Here are the main parts of the code and explanations of their functions:
Include the required libraries:
WiFiS3.h: Used for handling Wi-Fi connections.ArduinoMqttClient.h: Used for handling MQTT connections.FastLED.h: Used for controlling NeoPixel LED strips.
Define some constants:
NUM_LEDS: The number of LEDs on the LED strip.DATA_PIN: The data pin connected to Arduino for controlling the LED strip.arduino_secrets.h: Header file containing Wi-Fi network name and password to protect sensitive information.broker: Address of the MQTT server.port: Port of the MQTT server.topic: The MQTT topic to subscribe to.
Define some global variables:
CRGB leds[NUM_LEDS]: An array to store LED color data.colorName: An array of color names supported by the CheerLights project.colorRGB: An array of RGB color codes corresponding to color names.
setup()function:Initialize serial communication.
Check if the Wi-Fi module is present and output its firmware version.
Attempt to connect to the Wi-Fi network; if it fails, wait 10 seconds and retry.
Upon successful connection, connect to the MQTT broker (server) and subscribe to the specified topic.
Initialize the NeoPixel LED strip.
loop()function:Periodically call the
mqttClient.poll()function to receive MQTT messages and send MQTT keep-alive signals.Add a 5-second delay to avoid continuous connection.
printWifiData()andprintCurrentNet()functions are used to output Wi-Fi network and connection information.printMacAddress()function is used to print the MAC address in hexadecimal format.onMqttMessage()function is a callback function triggered when an MQTT message is received. It outputs the received topic and message content, converting the message content to lowercase. If the topic is “cheerlights,” it calls thesetColor()function to set the LED strip color.setColor()function takes a color name as a parameter, then looks for a matching color in thecolorNamearray. If a matching color is found, it sets the LED strip’s color to the corresponding RGB value and updates the LED strip’s color using theFastLED.show()function.