Note
Hello, welcome to the SunFounder Raspberry Pi & Arduino & ESP32 Enthusiasts Community on Facebook! Dive deeper into Raspberry Pi, Arduino, and ESP32 with fellow enthusiasts.
Why Join?
Expert Support: Solve post-sale issues and technical challenges with help from our community and team.
Learn & Share: Exchange tips and tutorials to enhance your skills.
Exclusive Previews: Get early access to new product announcements and sneak peeks.
Special Discounts: Enjoy exclusive discounts on our newest products.
Festive Promotions and Giveaways: Take part in giveaways and holiday promotions.
👉 Ready to explore and create with us? Click [here] and join today!
Security System via IFTTT
With this project, we create a security device that employs a PIR Sensor to detect intruders or stray animals entering your home. In case of a breach, you will receive an email alert.
We’ll utilize Webhooks as the fundamental service. A POST request is sent to IFTTT’s service from UNO R4.
Required Components
In this project, we need the following components.
It’s definitely convenient to buy a whole kit, here’s the link:
Name |
ITEMS IN THIS KIT |
LINK |
|---|---|---|
Elite Explorer Kit |
300+ |
You can also buy them separately from the links below.
COMPONENT INTRODUCTION |
PURCHASE LINK |
|---|---|
- |
|
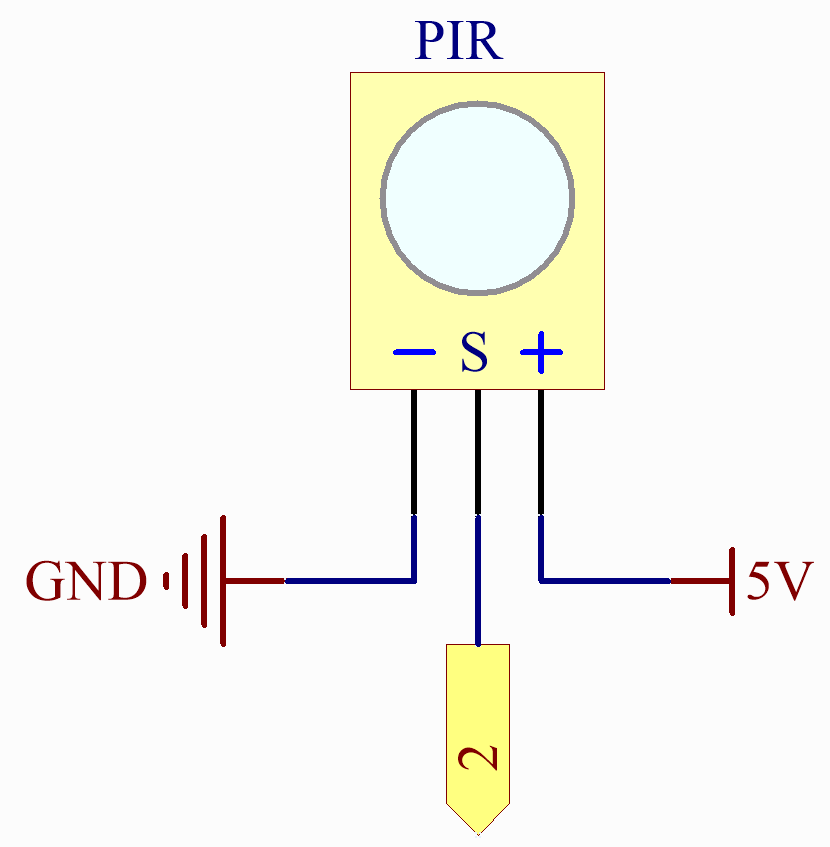
Wiring
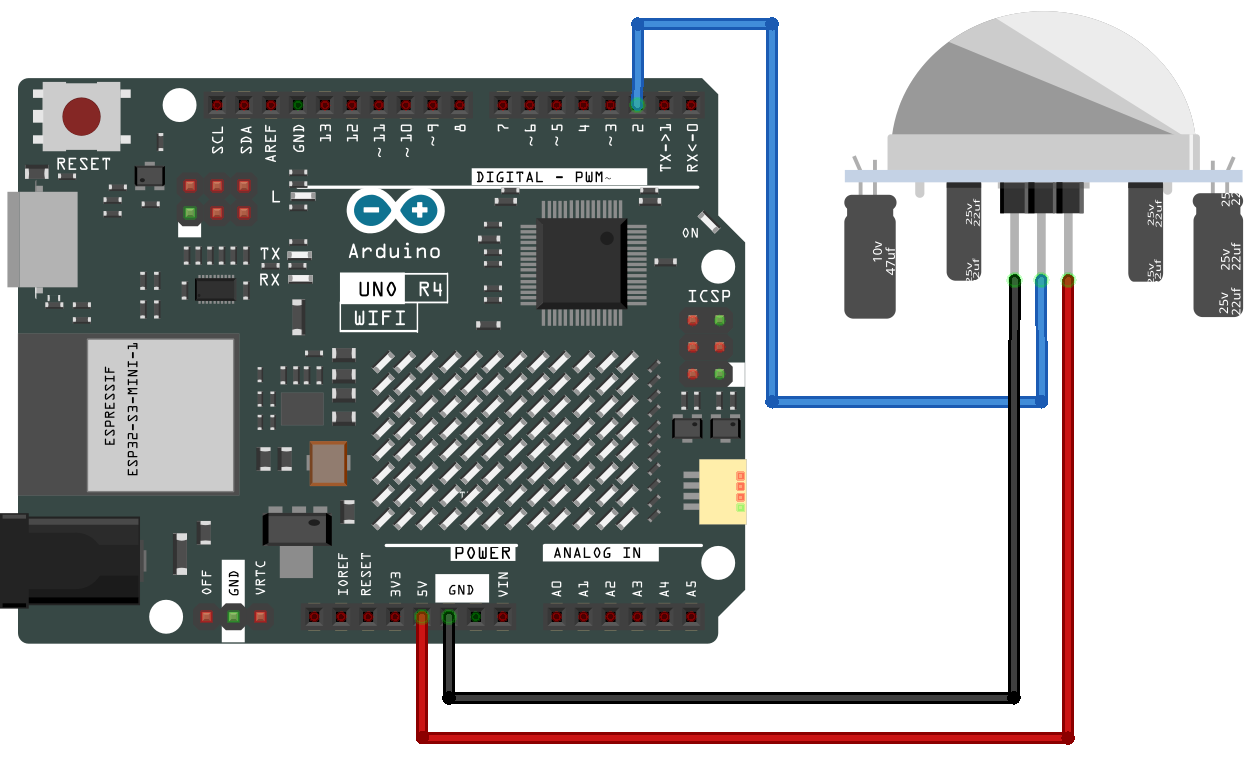
Schematic
Setting up IFTTT
IFTTT is a free service that offers various methods to link different data services together.
Let’s create an Applet that responds to a webhook (custom URL) sending data to IFTTT, which will then send you an email.
Please follow the steps below on IFTTT.
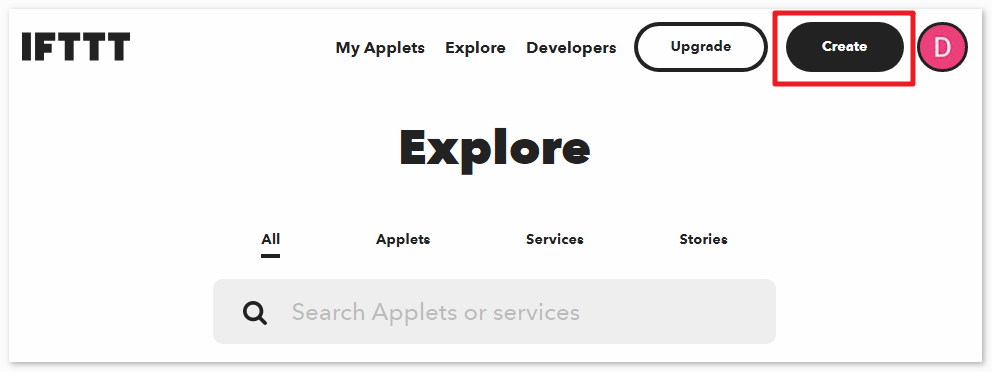
Visit IFTTT to log in or create an account.

Click on Create.
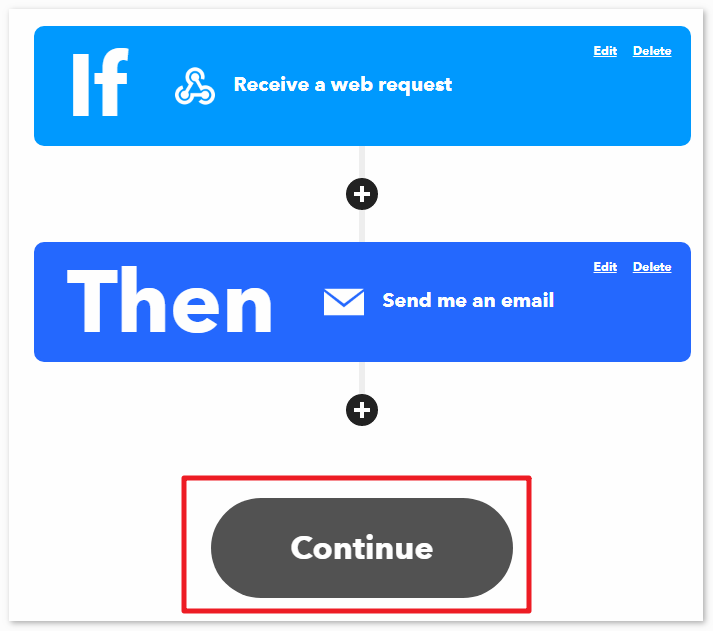
Add an If This event.

Search for Webhooks.

Select Receive a web request.

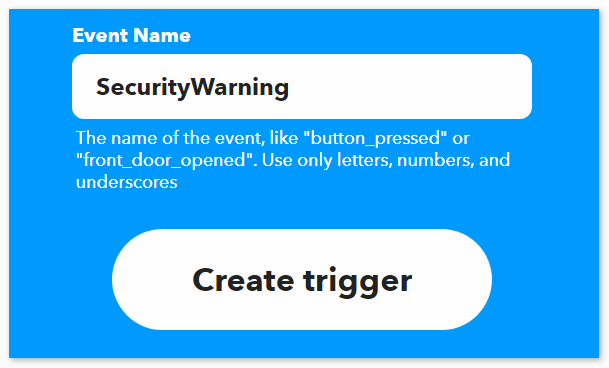
Fill in the event name (e.g., SecurityWarning), and click Create trigger.
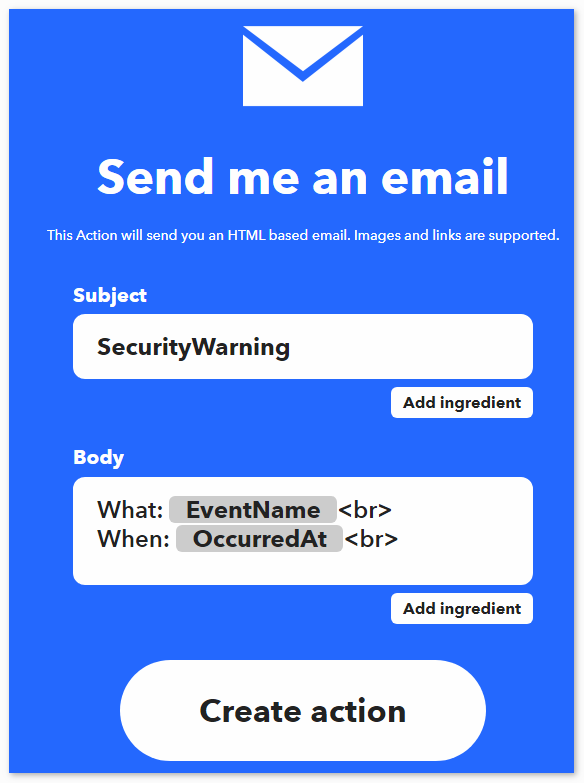
Add a Then That event.

Search for Email.

Choose Send me an email.

Enter the Subject and Body, then click Create action.
Click Continue to finish the setup.
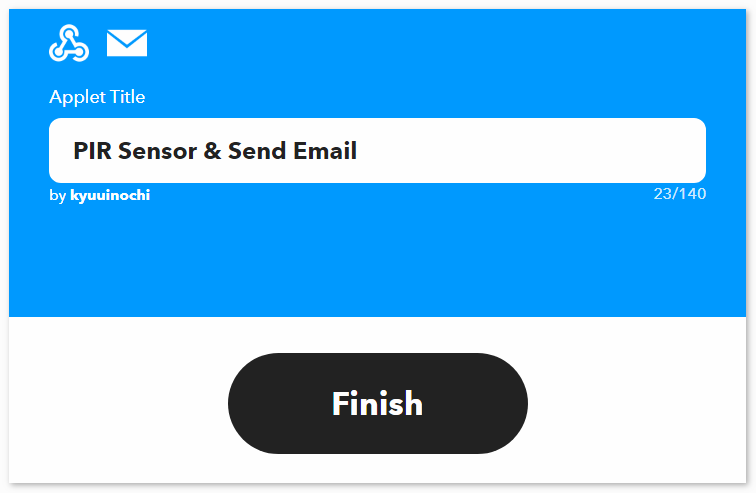
Adjust the title name as needed.
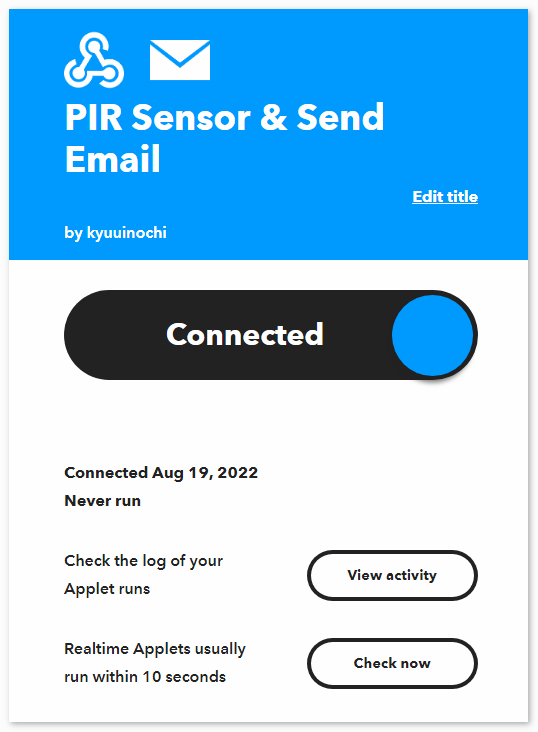
You’ll be automatically redirected to the Applet details page, where you can see that the Applet is currently connected and you can toggle the switch to enable/disable it.
Now that we’ve created the IFTTT Applet, we also need the webhooks key, which can be obtained from Webhooks Settings to allow your device to access IFTTT.
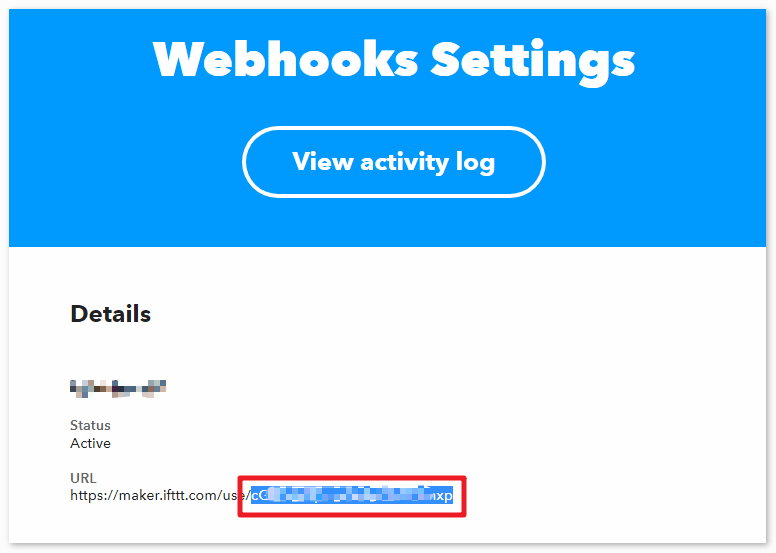
Copy the webhooks key to “arduino_secrets.h” and fill in your SSID and password.
#define SECRET_SSID "your_ssid"        // your network SSID (name)
#define SECRET_PASS "your_password"        // your network password (used for WPA, or as a key for WEP)
#define WEBHOOKS_KEY "your_key"
Run the Code
Note
You can open the file
03_ifttt_pir.inounder the path ofelite-explorer-kit-main\iot_project\03_ifttt_pirdirectly.Or copy this code into Arduino IDE.
Note
In the code, SSID and password are stored in arduino_secrets.h. Before uploading this example, you need to modify them with your own WiFi credentials.
Warning
To prevent your mailbox from being flooded, please debug the PIR Motion Sensor Module beforehand before running the code for this project.
#define SECRET_SSID "your_ssid"        // your network SSID (name)
#define SECRET_PASS "your_password"        // your network password (use for WPA, or use as key for WEP)
#define WEBHOOKS_KEY "your_key"
  1/*
  2  This code is designed to connect an Arduino Uno R4 WiFi board to the internet and detect
  3  motion using a PIR sensor. Upon detecting motion, it sends an HTTP GET request
  4  to the IFTTT web service to trigger an event named "SecurityWarning". The code handles
  5  WiFi connection setup, motion detection, server communication, and provides feedback via
  6  the serial monitor.
  7
  8  Board: Arduino Uno R4 WiFi
  9  Component: PIR Motion Sensor Module
 10*/
 11
 12#include "WiFiS3.h"           // Include the WiFiS3 library for internet connectivity
 13#include "arduino_secrets.h"  // Include the file containing Wi-Fi credentials
 14
 15// Wi-Fi credentials are stored in arduino_secrets.h
 16char ssid[] = SECRET_SSID;
 17char pass[] = SECRET_PASS;
 18
 19int status = WL_IDLE_STATUS;
 20WiFiClient client;
 21
 22// IFTTT server information and event name
 23char server[] = "maker.ifttt.com";
 24char event[] = "SecurityWarning";
 25String webRequestURL = "/trigger/" + String(event) + "/with/key/" + String(WEBHOOKS_KEY);
 26
 27const int pirPin = 2;         // PIR sensor is connected to digital pin 2
 28bool motionDetected = false;  // Variable to track motion detection
 29
 30void setup() {
 31  Serial.begin(9600);
 32  while (!Serial) {
 33    ;
 34  }
 35
 36  // Check the status of the WiFi module
 37  if (WiFi.status() == WL_NO_MODULE) {
 38    Serial.println("Communication with WiFi module failed!");
 39    while (1)
 40      ;  // Infinite loop to halt further execution
 41  }
 42
 43  // Check if the WiFi firmware is up to date
 44  String fv = WiFi.firmwareVersion();
 45  if (fv < WIFI_FIRMWARE_LATEST_VERSION) {
 46    Serial.println("Please upgrade the firmware");
 47  }
 48
 49  // Attempt to connect to the Wi-Fi network
 50  while (status != WL_CONNECTED) {
 51    Serial.print("Attempting to connect to SSID: ");
 52    Serial.println(ssid);
 53    status = WiFi.begin(ssid, pass);
 54  }
 55  printWifiStatus();  // Print the status of the WiFi connection
 56
 57  pinMode(pirPin, INPUT);
 58}
 59
 60void loop() {
 61  readResponse();  // Read and print server response if available
 62
 63  // Check for motion using PIR sensor
 64  if (digitalRead(pirPin) == HIGH) {
 65    if (!motionDetected) {
 66      Serial.println("Motion detected!");
 67      triggerIFTTTEvent();  // Trigger IFTTT notification
 68      motionDetected = true;
 69    }
 70  } else {
 71    motionDetected = false;
 72  }
 73}
 74
 75void readResponse() {
 76  // Read incoming data from the WiFi connection
 77  uint32_t received_data_num = 0;
 78  while (client.available()) {
 79    char c = client.read();
 80    Serial.print(c);
 81    received_data_num++;
 82    if (received_data_num % 80 == 0) {
 83      Serial.println();
 84    }
 85  }
 86}
 87
 88void triggerIFTTTEvent() {
 89  client.stop();  // Terminate any existing connections
 90
 91  // Attempt to connect to the IFTTT server
 92  if (client.connect(server, 80)) {  // If the connection is successful
 93    Serial.println("connecting...");
 94    // Construct and send the HTTP GET request
 95    client.println("GET " + webRequestURL + " HTTP/1.1");
 96    client.println("Host: maker.ifttt.com");
 97    client.println("User-Agent: ArduinoWiFi/1.1");
 98    client.println("Connection: close");
 99    client.println();  // End of HTTP request
100  } else {
101    Serial.println("connection failed");  // Notify if the connection fails
102  }
103}
104
105void printWifiStatus() {
106  // Print the current Wi-Fi status to the serial monitor
107  Serial.print("SSID: ");
108  Serial.println(WiFi.SSID());
109
110  IPAddress ip = WiFi.localIP();
111  Serial.print("IP Address: ");
112  Serial.println(ip);
113
114  long rssi = WiFi.RSSI();
115  Serial.print("Signal Strength (RSSI):");
116  Serial.print(rssi);
117  Serial.println(" dBm");
118}
How it works?
Include the necessary libraries and header files:
"WiFiS3.h": Used for managing Wi-Fi connections."arduino_secrets.h": Contains Wi-Fi network name and password to safeguard sensitive information.
Define some global variables and constants:
ssid: Name of the Wi-Fi network.pass: Wi-Fi network password.status: Status of the Wi-Fi connection.client: Client used for communicating with the Wi-Fi server.server: Address of the IFTTT Webhook server.event: Name of the IFTTT Webhook event.webRequestURL: Constructed URL for sending HTTP requests, including the Webhook event name and key.pirPin: Digital pin to which the PIR sensor is connected.motionDetected: Flag variable to track motion detection.
setup()function:Initializes serial communication.
Checks for the presence of the Wi-Fi module and outputs its firmware version.
Attempts to connect to the Wi-Fi network, with retries if unsuccessful.
Sets the pin connected to the PIR sensor to input mode.
readResponse()function:Reads HTTP response data from the IFTTT server and prints it to the serial console.
loop()function:Calls the
readResponse()function to read HTTP response data.- Checks for motion using the PIR sensor. If motion is detected and was not detected previously:
Prints “Motion detected!” to the console.
Calls the
triggerIFTTTEvent()function to send an HTTP request to the IFTTT server, triggering the Webhook event.Sets the
motionDetectedflag totrueto indicate motion has been detected.
If no motion is detected, sets the
motionDetectedflag tofalse.
triggerIFTTTEvent()function:Establishes a connection with the IFTTT server.
Sends an HTTP GET request, including the URL of the Webhook event and other HTTP headers.
printWifiStatus()function:Outputs information about the connected Wi-Fi network, including SSID, IP address, and signal strength (RSSI) to the serial console.