Note
Hello, welcome to the SunFounder Raspberry Pi & Arduino & ESP32 Enthusiasts Community on Facebook! Dive deeper into Raspberry Pi, Arduino, and ESP32 with fellow enthusiasts.
Why Join?
Expert Support: Solve post-sale issues and technical challenges with help from our community and team.
Learn & Share: Exchange tips and tutorials to enhance your skills.
Exclusive Previews: Get early access to new product announcements and sneak peeks.
Special Discounts: Enjoy exclusive discounts on our newest products.
Festive Promotions and Giveaways: Take part in giveaways and holiday promotions.
👉 Ready to explore and create with us? Click [here] and join today!
Arduino IoT Cloud
This example demonstrates code for communicating with the Arduino IoT Cloud. Its purpose is to connect to the Arduino IoT Cloud and interact with cloud variables. Here, we send the temperature values read from the DHT11 sensor to the Arduino IoT Cloud, allowing us to monitor it from the cloud.
Required Components
In this project, we need the following components.
It’s definitely convenient to buy a whole kit, here’s the link:
Name |
ITEMS IN THIS KIT |
LINK |
|---|---|---|
Elite Explorer Kit |
300+ |
You can also buy them separately from the links below.
COMPONENT INTRODUCTION |
PURCHASE LINK |
|---|---|
- |
|
Wiring

Schematic

Install Arduino Create Agent
Visit the address https://create.arduino.cc/getting-started/plugin/welcome.
Click START.

Choose the version that suits your computer, and it will download an installation package.

Install the agent.

After installation, go back to your browser, and you will see the following interface.

Click NEXT, and then you can GO TO the web editor.

Using Arduino IoT Cloud
First, you need to log in or register with Arduino.
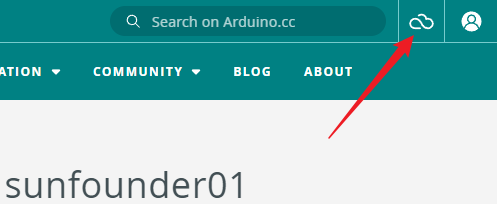
Once logged in, click on IoT Cloud in the upper right corner.
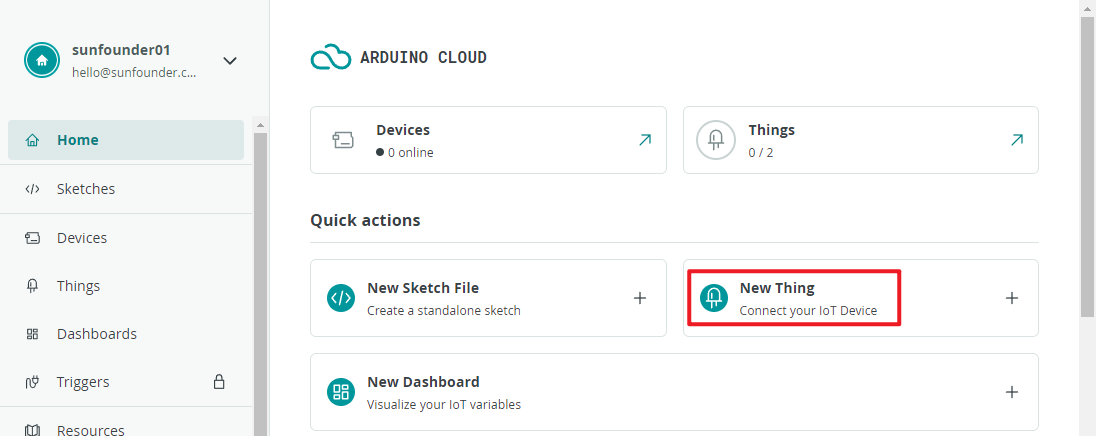
Create a new thing.
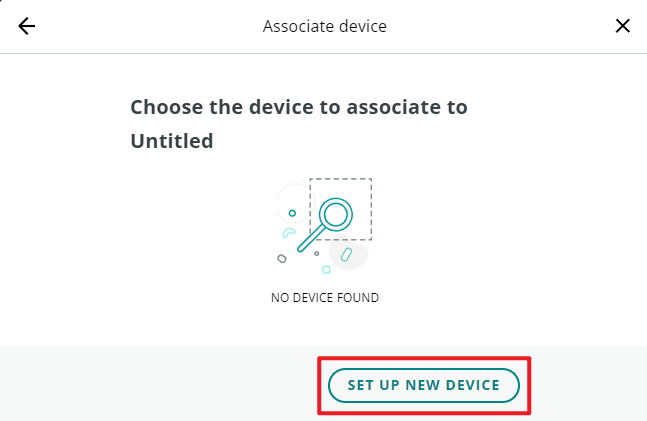
Associate your device.
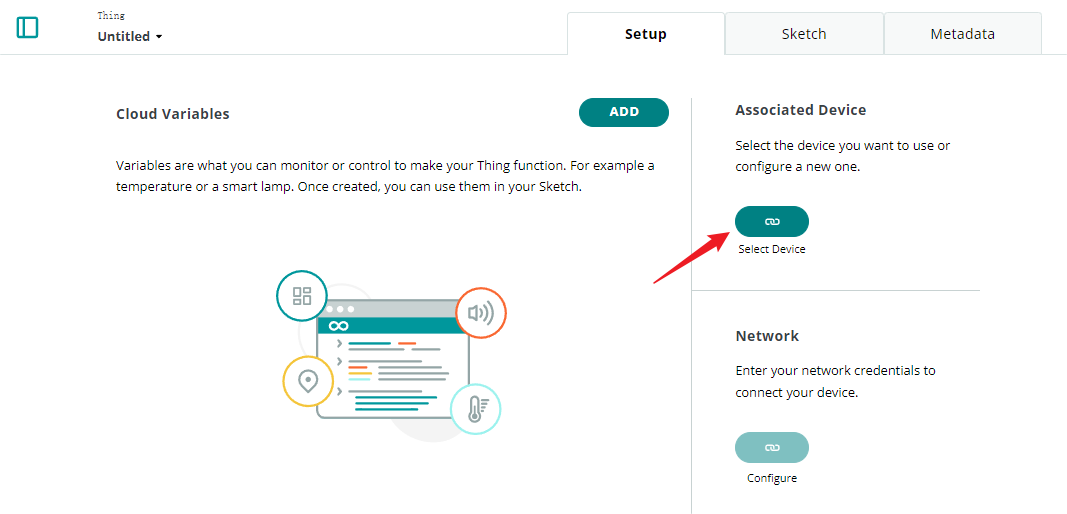
Set up a new device.
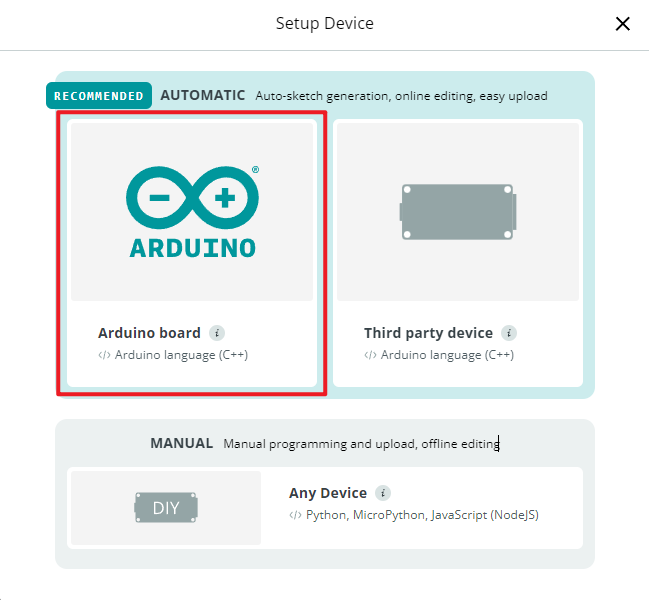
Choose your Arduino board.
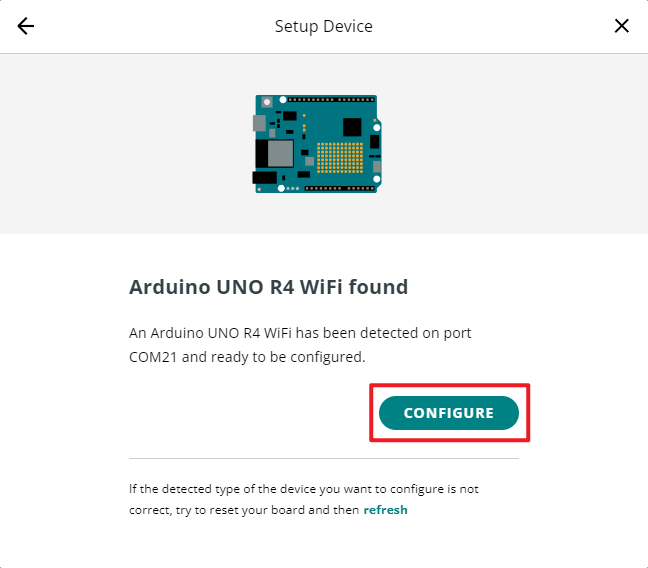
Wait for a moment, and your UNO R4 WiFi will be detected. Continue by clicking configure.
Give your device a name.

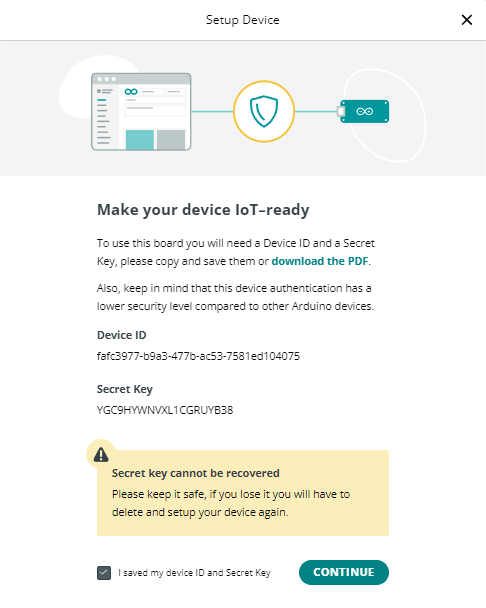
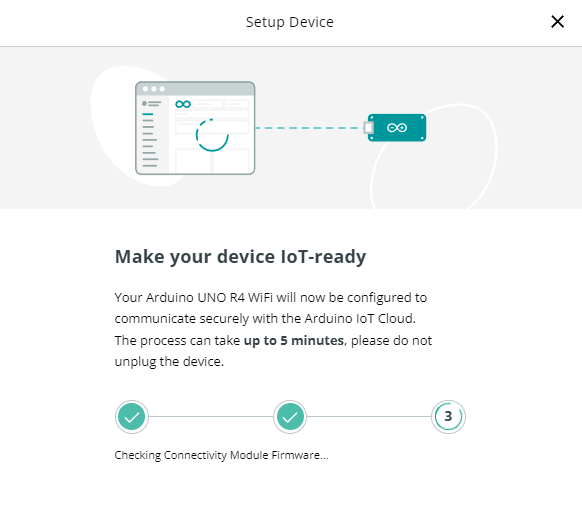
Make your device IoT-ready, and remember to save the secret key.
Wait for a few minutes.
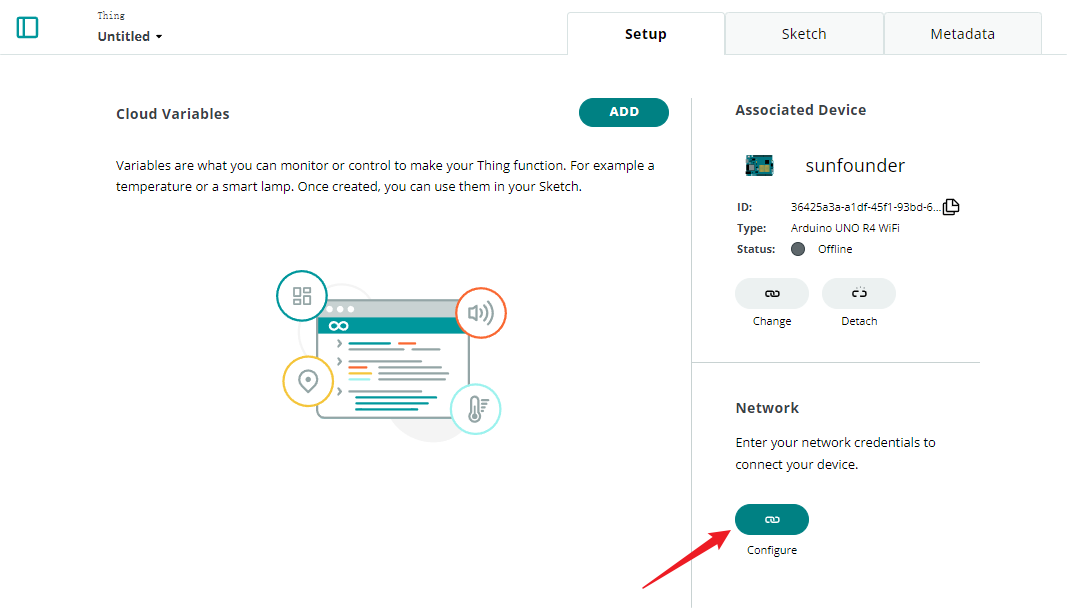
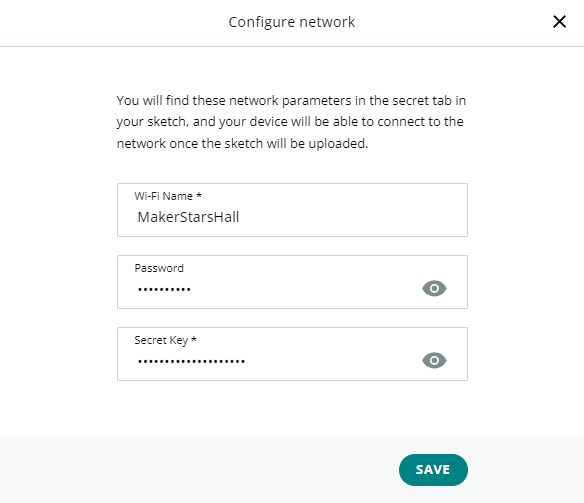
Configure WiFi.
Here you will need to enter your WiFi password and secret key.
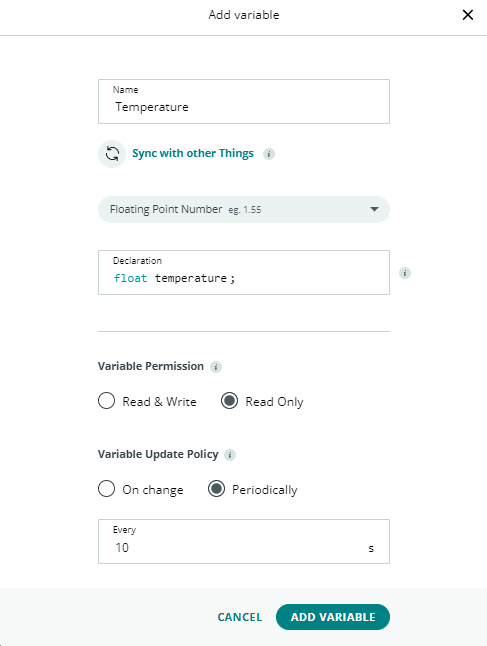
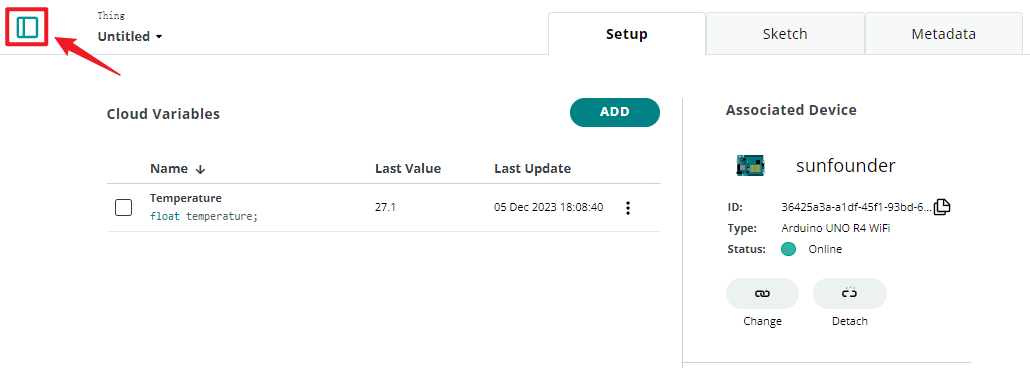
Add a variable.
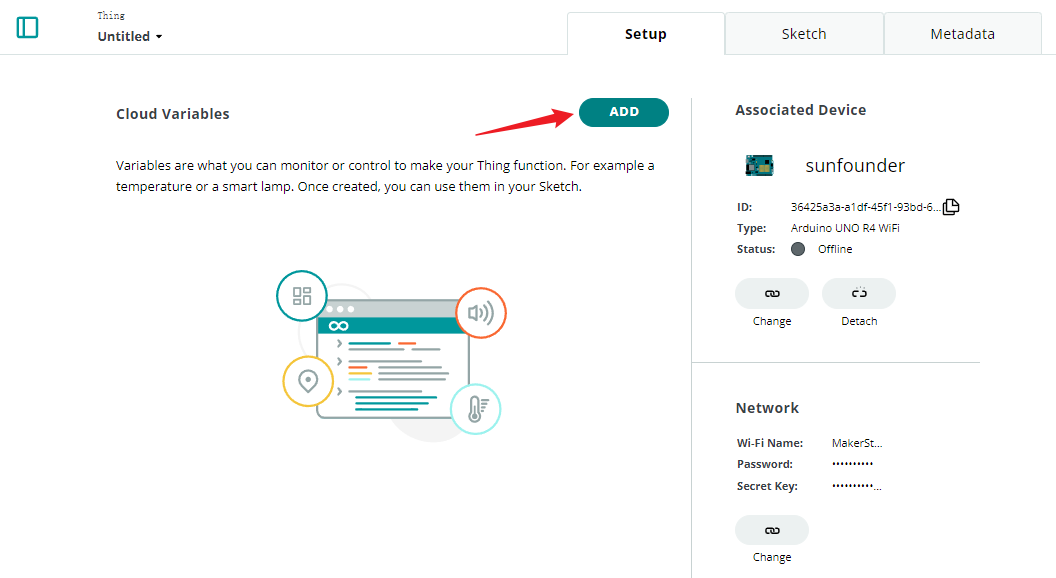
Here, we want to display the temperature in IoT Cloud, so we configure a read-only float variable.
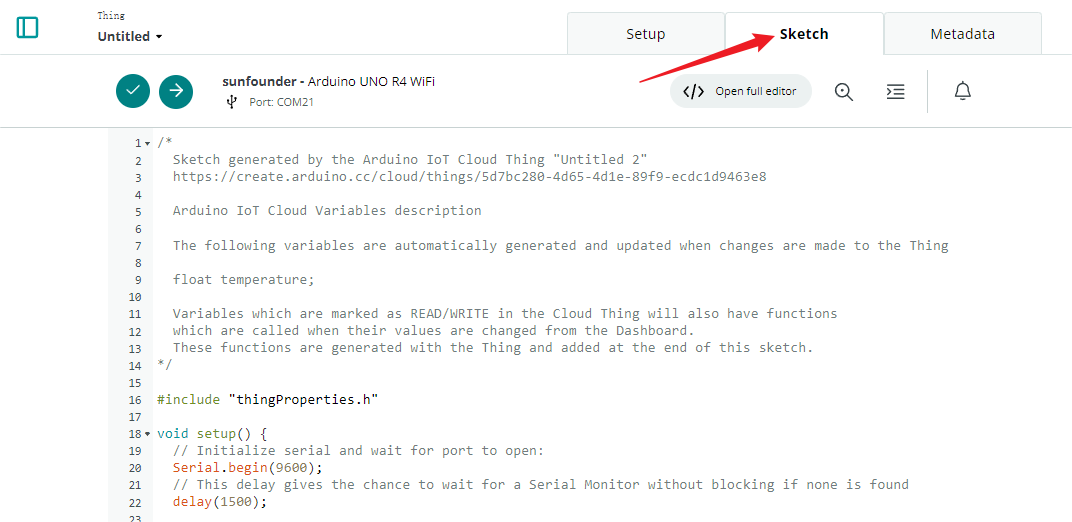
After completion, go to the sketch.
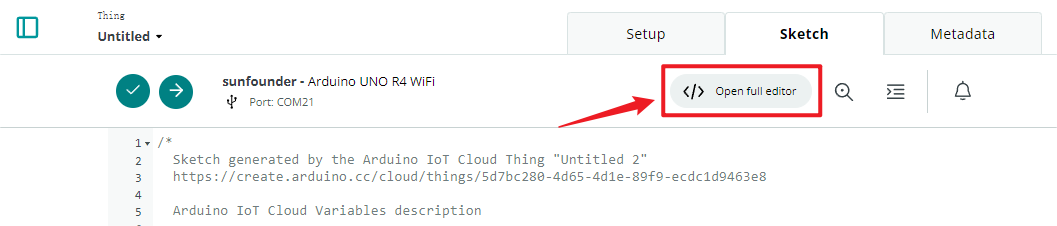
Open the full editor.
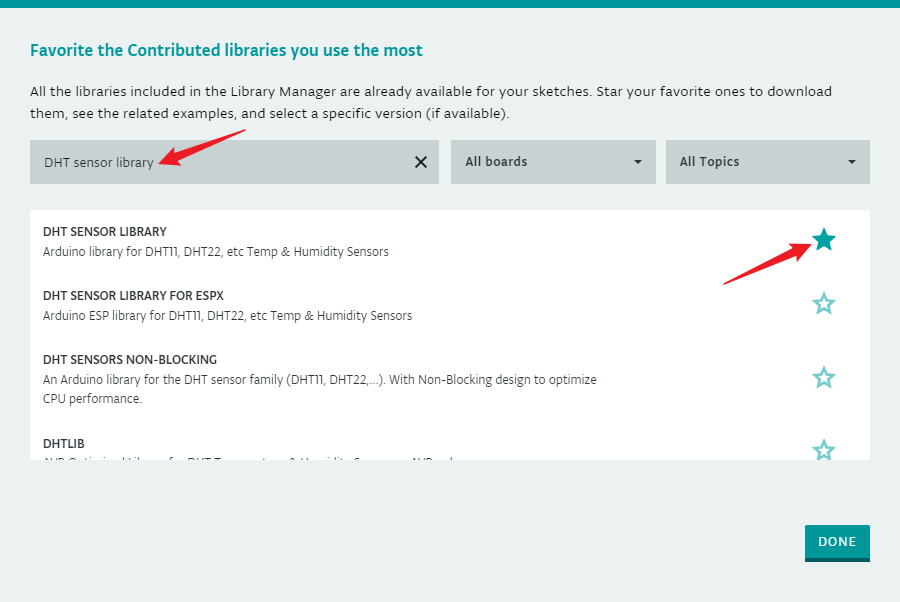
Click on Libraries on the right side, then Library Manager.
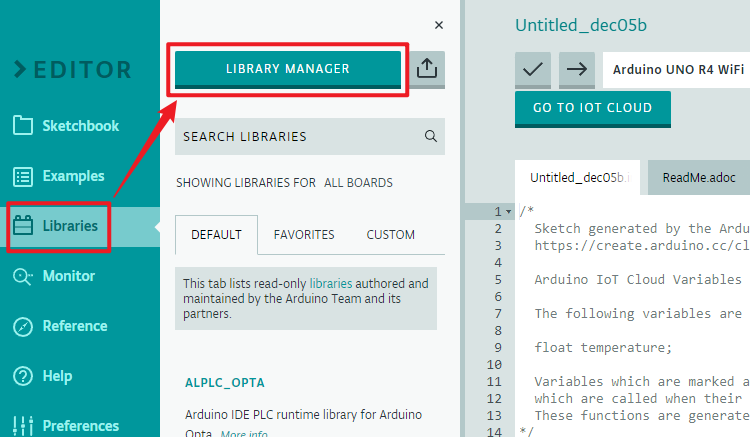
Search for the DHT sensor library and check it.
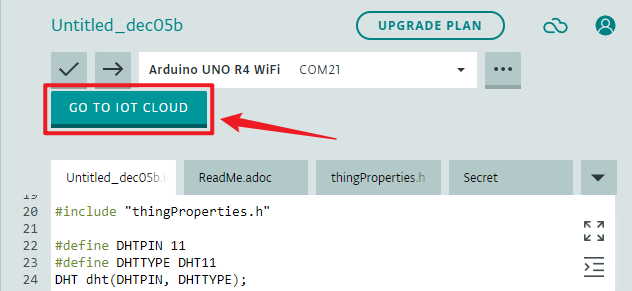
Now, we need to edit the code. You can see that the editor has already prepared the IoT Cloud-related code for you. You just need to add the specific functionality you need. In this example, we added code to read the temperature using the DHT11 sensor.
// DHT sensor library - Version: Latest
#include <DHT.h>
#include <DHT_U.h>

/*
Sketch generated by the Arduino IoT Cloud Thing "Untitled"
https://create.arduino.cc/cloud/things/260edac8-34f9-4e2e-9214-ba0c20994220

Arduino IoT Cloud Variables description

The following variables are automatically generated and updated when changes are made to the Thing

float temperature;

Variables which are marked as READ/WRITE in the Cloud Thing will also have functions
which are called when their values are changed from the Dashboard.
These functions are generated with the Thing and added at the end of this sketch.
*/

#include "thingProperties.h"

#define DHTPIN 11
#define DHTTYPE DHT11
DHT dht(DHTPIN, DHTTYPE);

void setup() {
    // Initialize serial and wait for port to open:
    Serial.begin(9600);
    // This delay gives the chance to wait for a Serial Monitor without blocking if none is found
    delay(1500);

    dht.begin();

    // Defined in thingProperties.h
    initProperties();

    // Connect to Arduino IoT Cloud
    ArduinoCloud.begin(ArduinoIoTPreferredConnection);

    /*
        The following function allows you to obtain more information
        related to the state of network and IoT Cloud connection and errors
        the higher number the more granular information you’ll get.
        The default is 0 (only errors).
        Maximum is 4
    */
    setDebugMessageLevel(2);
    ArduinoCloud.printDebugInfo();
}

void loop() {
    ArduinoCloud.update();
    // Your code here

    float temp = dht.readTemperature();
    temperature = temp;

}
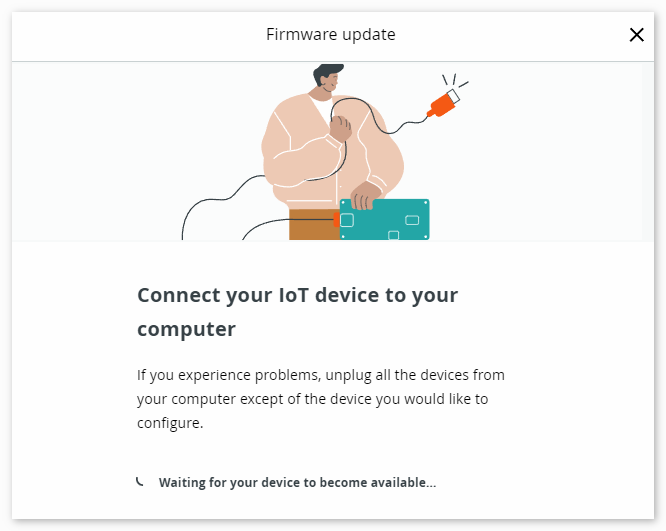
Upload the code. You may be prompted to update; follow the prompts to complete.
Return to IoT CLOUD.
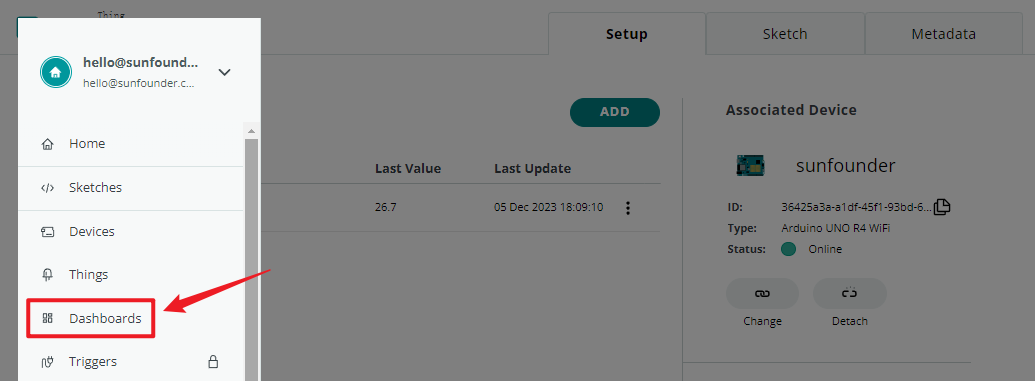
Click on the menu in the top left corner.
Click on the dashboard.
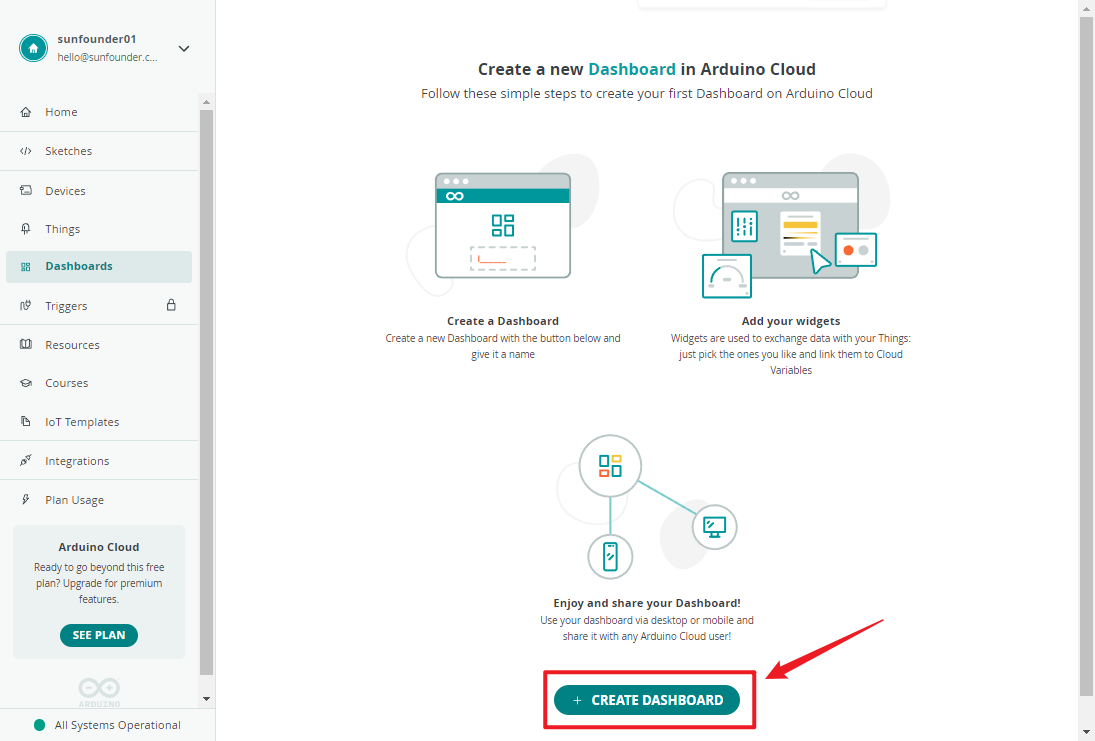
Create dashboard.
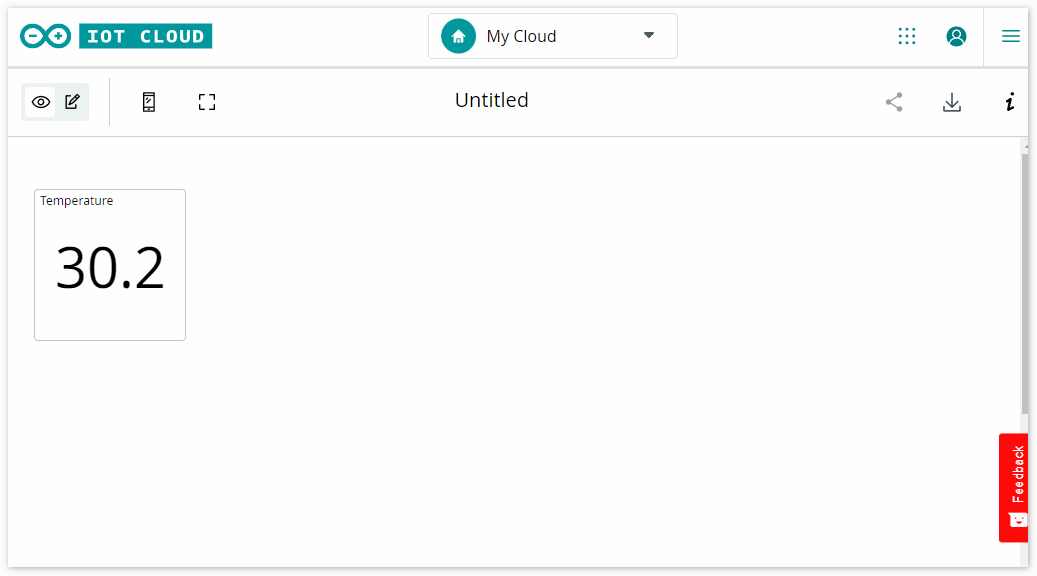
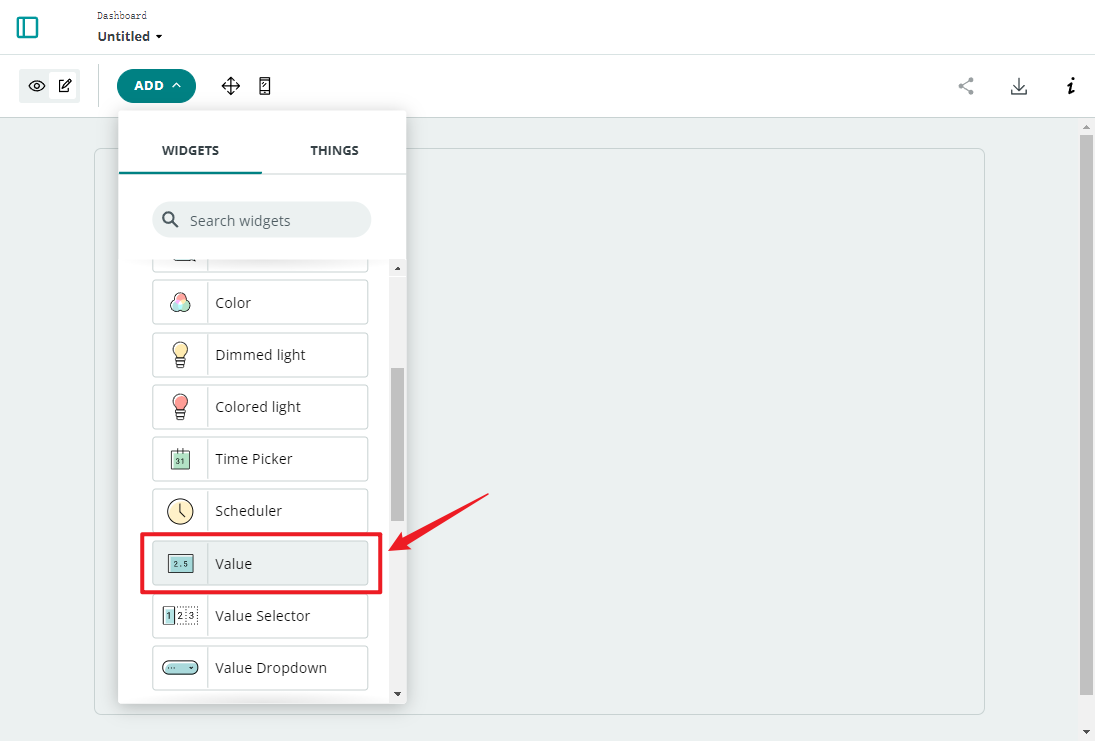
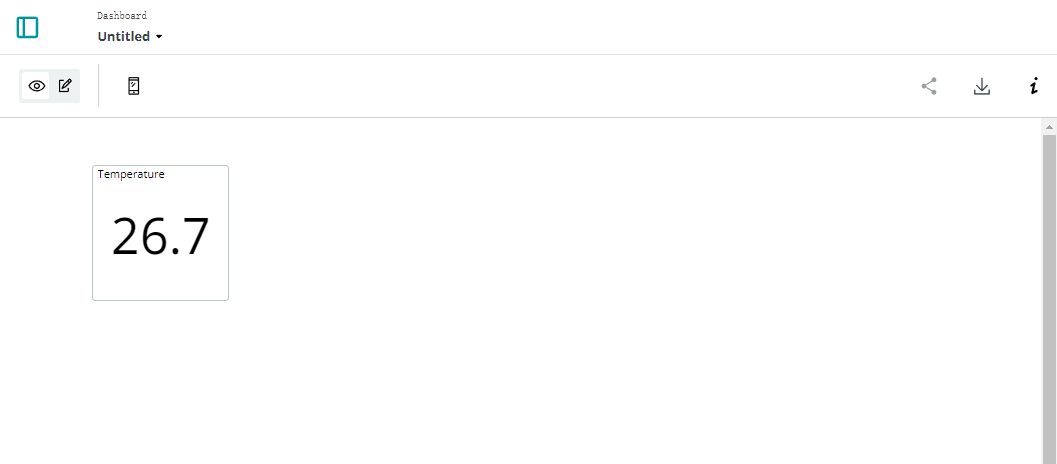
There are many widgets available; here, we choose a value widget for displaying the temperature.
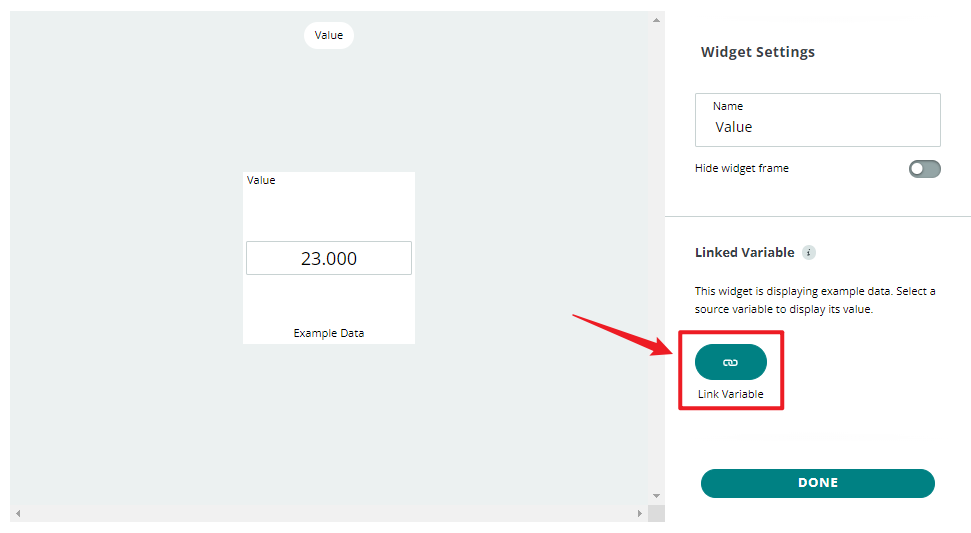
After clicking, a widget settings interface will appear, where you can connect the widget to the cloud variable you created earlier.
Now, you can view the sensor readings on Arduino IoT Cloud.
How it works?
After configuring the IoT Cloud (device setup, network setup, creating cloud variables), you will notice that the sketch on the cloud updates automatically. So, most of the code is already written for you.
Open the editor, and you will see that this sketch contains four files:
main.ino: Used to initialize the Arduino and perform the main loop tasks. Additionally, it includes logic for connecting and communicating with the Arduino IoT Cloud.
thingProperties.h: This file is used to define variables and functions in the Arduino IoT Cloud. It contains declarations of cloud variables and their associated callback functions. In the provided code, it is used to initialize cloud properties (e.g., the temperature variable) and connect to the Arduino IoT Cloud.
Secret: Used to store sensitive or private information, such as WiFi passwords or API keys. This sensitive information is typically not exposed directly in the code but is stored in the Secret file to enhance security.
ReadMe.adoc: Contains project documentation or other relevant information for easier understanding and use of the project. This file usually does not contain executable code but rather documents and descriptive information.
We need to add some code for the DHT11 sensor. This code is identical to what you would use on your local IDE. The only difference is that you need to assign the value read from the DHT11 to the cloud variable temperature.
(Note: You should never modify thingProperties.h and Secret. They will be modified when you make changes using the Thing editor.)