Note
Hello, welcome to the SunFounder Raspberry Pi & Arduino & ESP32 Enthusiasts Community on Facebook! Dive deeper into Raspberry Pi, Arduino, and ESP32 with fellow enthusiasts.
Why Join?
Expert Support: Solve post-sale issues and technical challenges with help from our community and team.
Learn & Share: Exchange tips and tutorials to enhance your skills.
Exclusive Previews: Get early access to new product announcements and sneak peeks.
Special Discounts: Enjoy exclusive discounts on our newest products.
Festive Promotions and Giveaways: Take part in giveaways and holiday promotions.
👉 Ready to explore and create with us? Click [here] and join today!
Tilt Switch
This is a ball tilt-switch with a metal ball inside. It is used to detect inclinations of a small angle.
Wiring
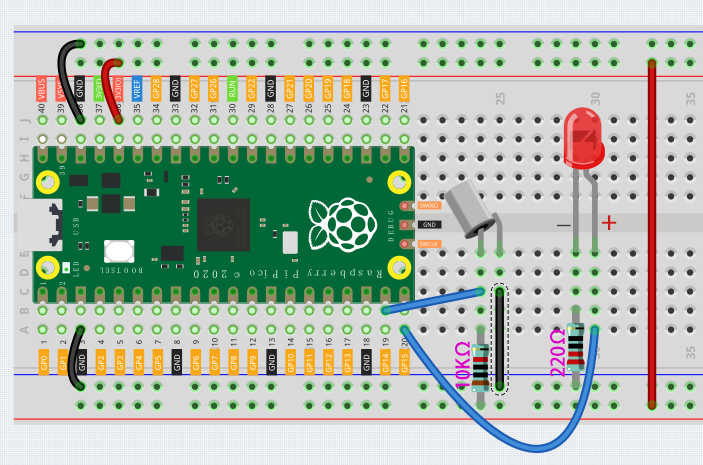
The tilt switch has an iron ball inside, when you put it upright, the iron ball falls down, which can make the 2 pins connected together; tilt it to a horizontal angle, the iron ball rolls towards the end, so the 2 pins of the tilt switch are disconnected.
Again, you need to connect 10K pull-up resistor to get a stable level.
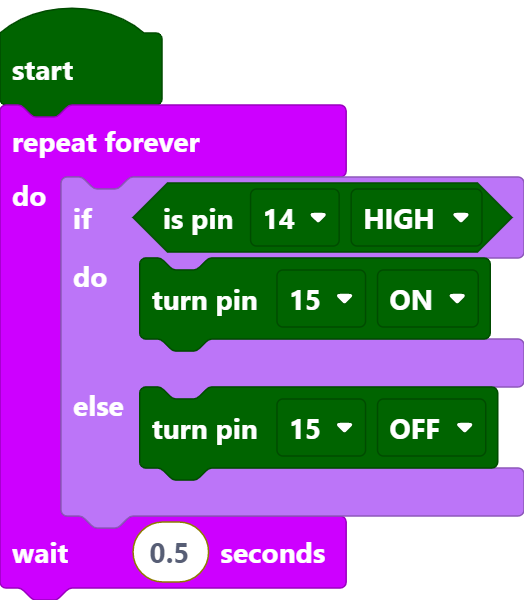
Code
After connecting Pico, click the Start button and the code starts to run. When the tilt switch is placed horizontally, the LED will turn on; and when placed vertically, the LED will turn off.
Note
This project code is exactly the same as the previous project Button.