Note
Hello, welcome to the SunFounder Raspberry Pi & Arduino & ESP32 Enthusiasts Community on Facebook! Dive deeper into Raspberry Pi, Arduino, and ESP32 with fellow enthusiasts.
Why Join?
Expert Support: Solve post-sale issues and technical challenges with help from our community and team.
Learn & Share: Exchange tips and tutorials to enhance your skills.
Exclusive Previews: Get early access to new product announcements and sneak peeks.
Special Discounts: Enjoy exclusive discounts on our newest products.
Festive Promotions and Giveaways: Take part in giveaways and holiday promotions.
👉 Ready to explore and create with us? Click [here] and join today!
Quick Guide on Piper Make
Piper Make is a super easy and fun way to make projects using Raspberry Pi Pico. It uses blocks like Scratch, so you don’t need any programming experience to use it. The underlying principle is to use CircuitPython with auxiliary libraries.
Set up the Pico
First, visit Piper Make through the following link:
In the pop-up page, if you don’t need to subscribe for more tutorials, you can just click Let’s Go! or the x button.

Note
If you see a different pop-up window, your browser version is not supported, please update your browser and try again.
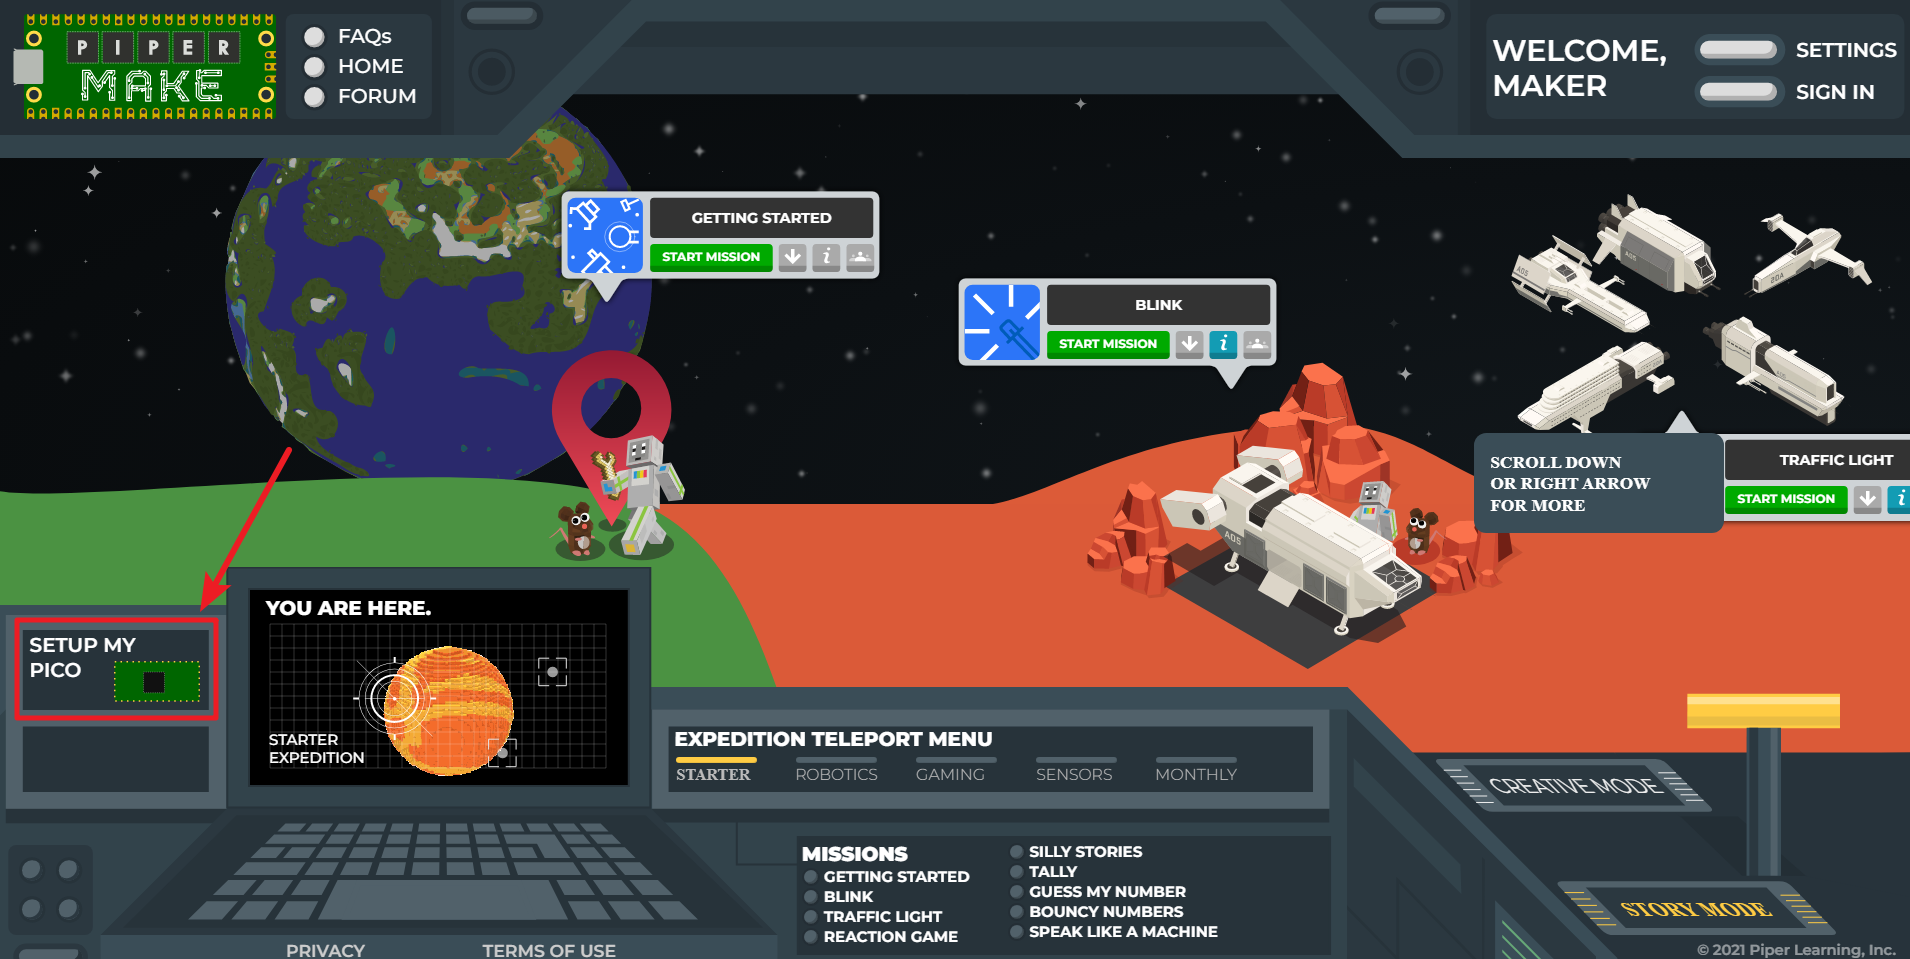
Scroll to the bottom of this page and click on the Set up my Pico under the Tools section and follow the prompts to configure it.
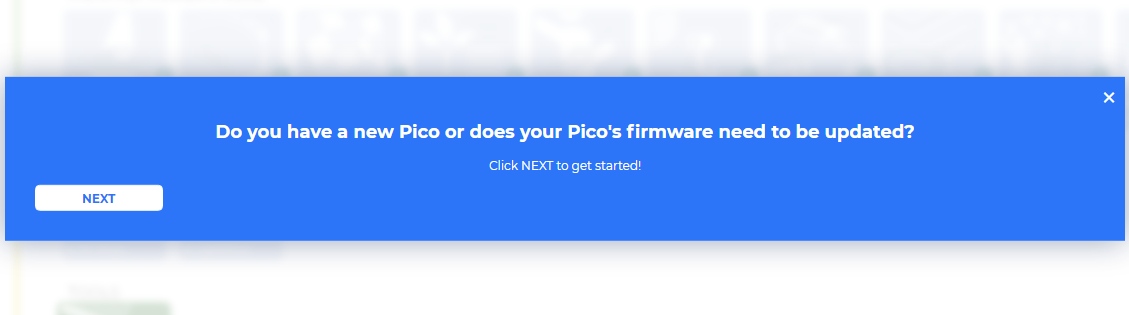
Click Next to start configuring your Pico, even if you have set it up before, these are the same steps you will use to update your Pico firmware.
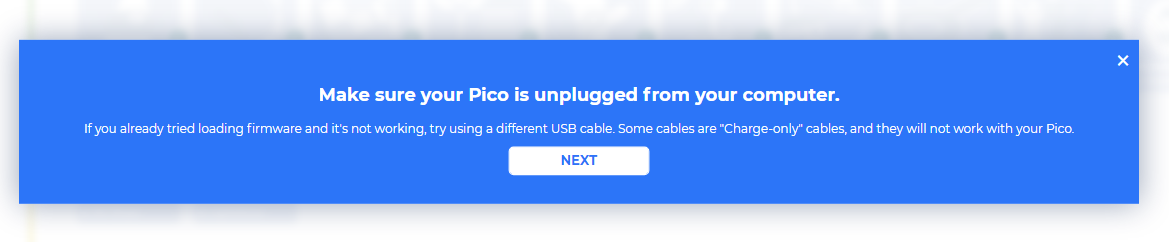
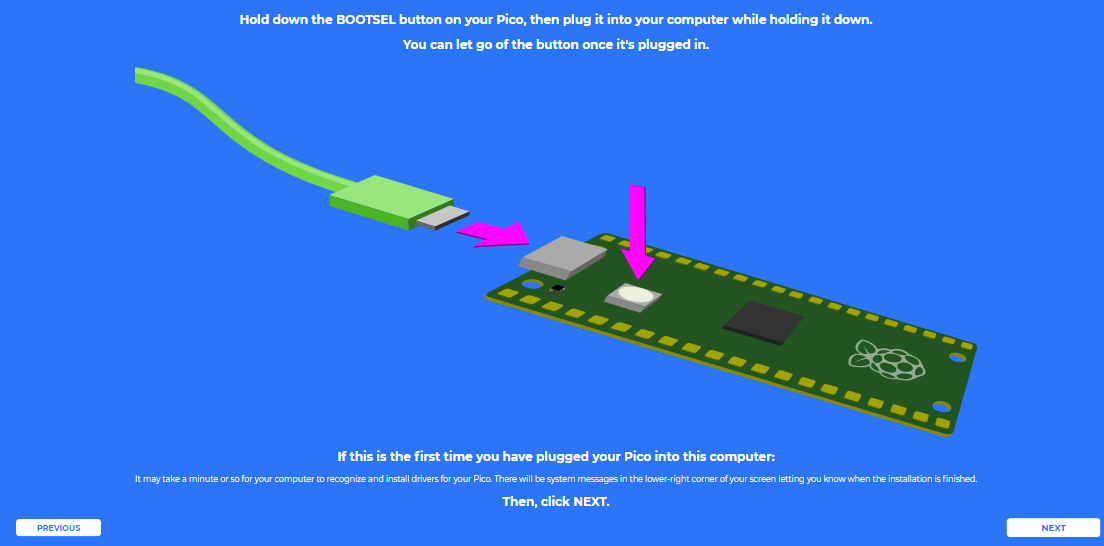
In this step, you need to make sure that your Pico is unplugged from your computer, as it needs to be plugged in in a specific way in the next step. Make sure your cable can handle power and data, as many micro USB cables only have power.
Now, press and hold the RST (white) button on the Pico and plug the Pico into your computer. Once plugged in, you can release the button.
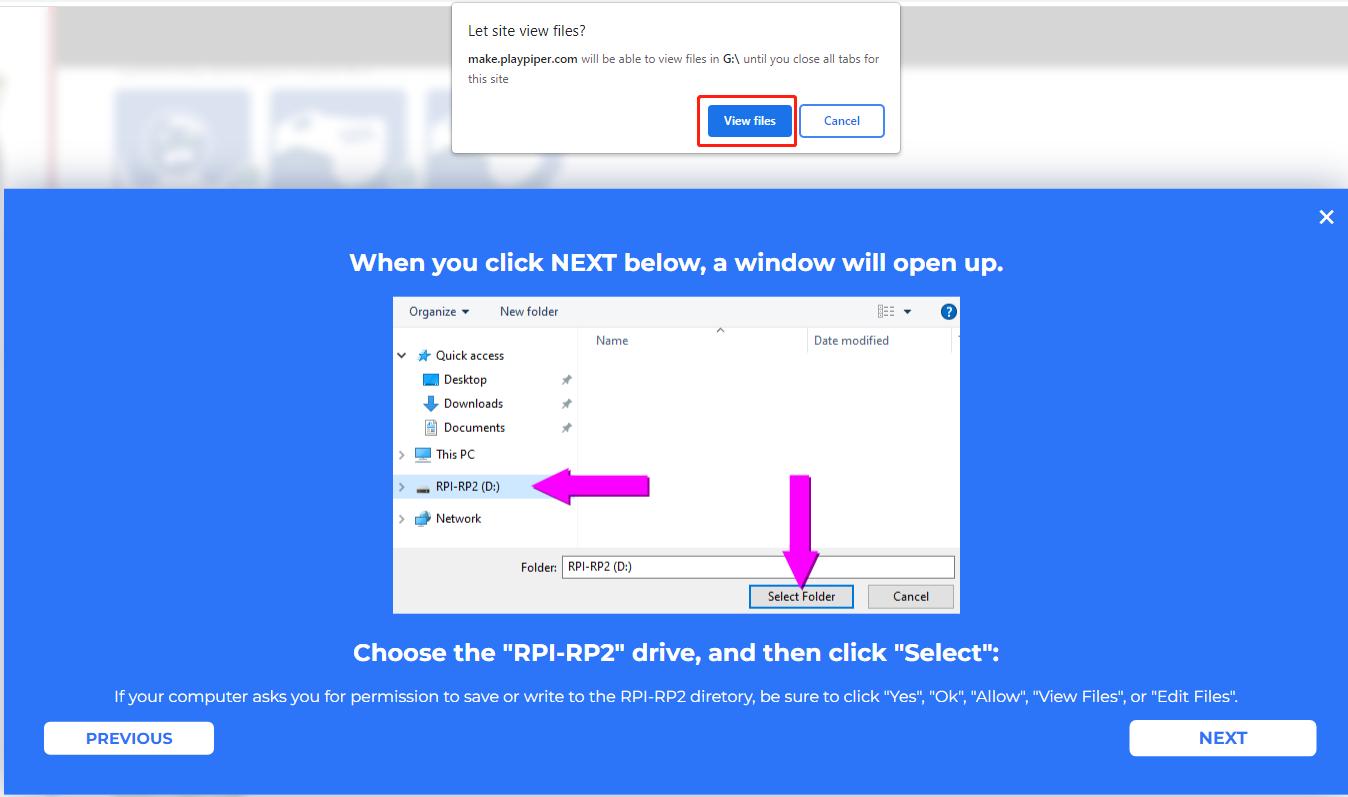
Your Pico will appear as a USB drive, click Next after that select RPI-RP2 drive.
Note
After select RPI-RP2 drive, there will be a pop up window at the top that you need to allow the web page to view files.
Now Piper Make will load the firmware to your Pico, again you need to allow save changes to the hard drive where the Pico is located.
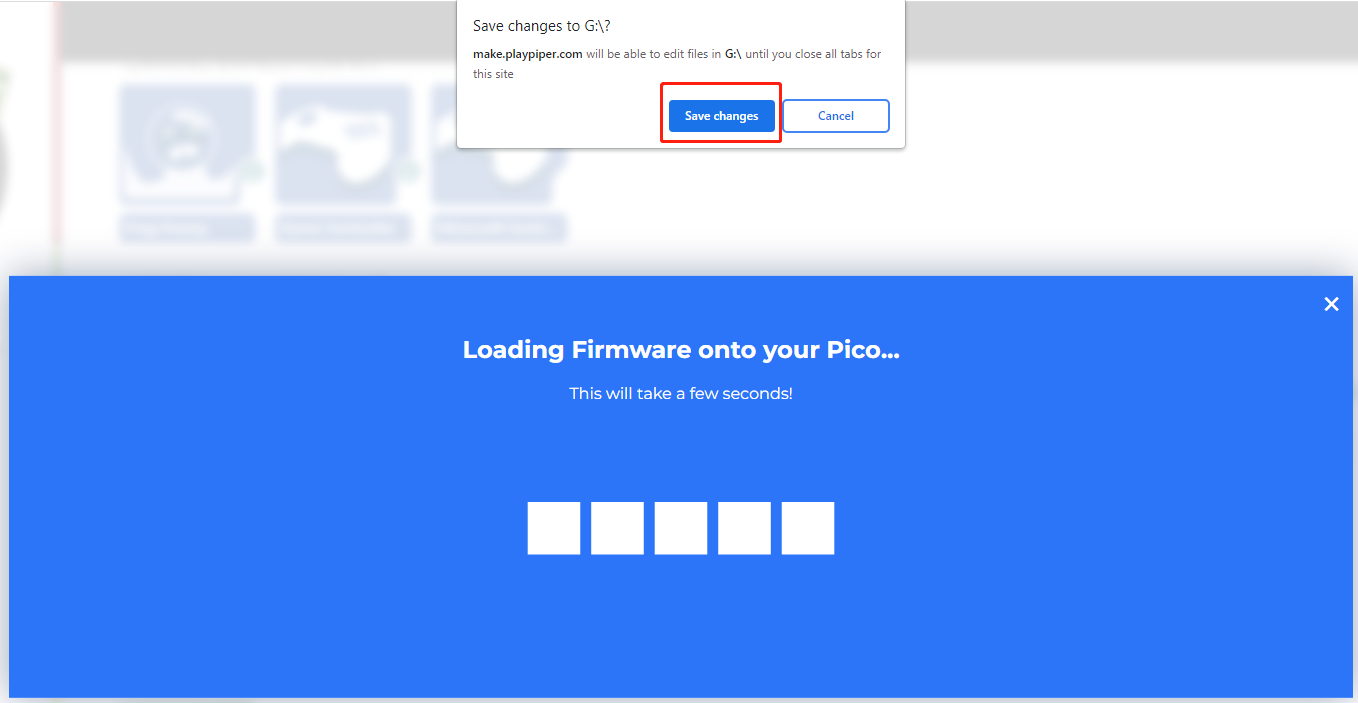
When this prompt appears, it means your Pico is set up and you can start using it.

How to use Piper Make
Now that you have set up Pico, it is time to learn how to program it. Now let’s light up the onboard LED.
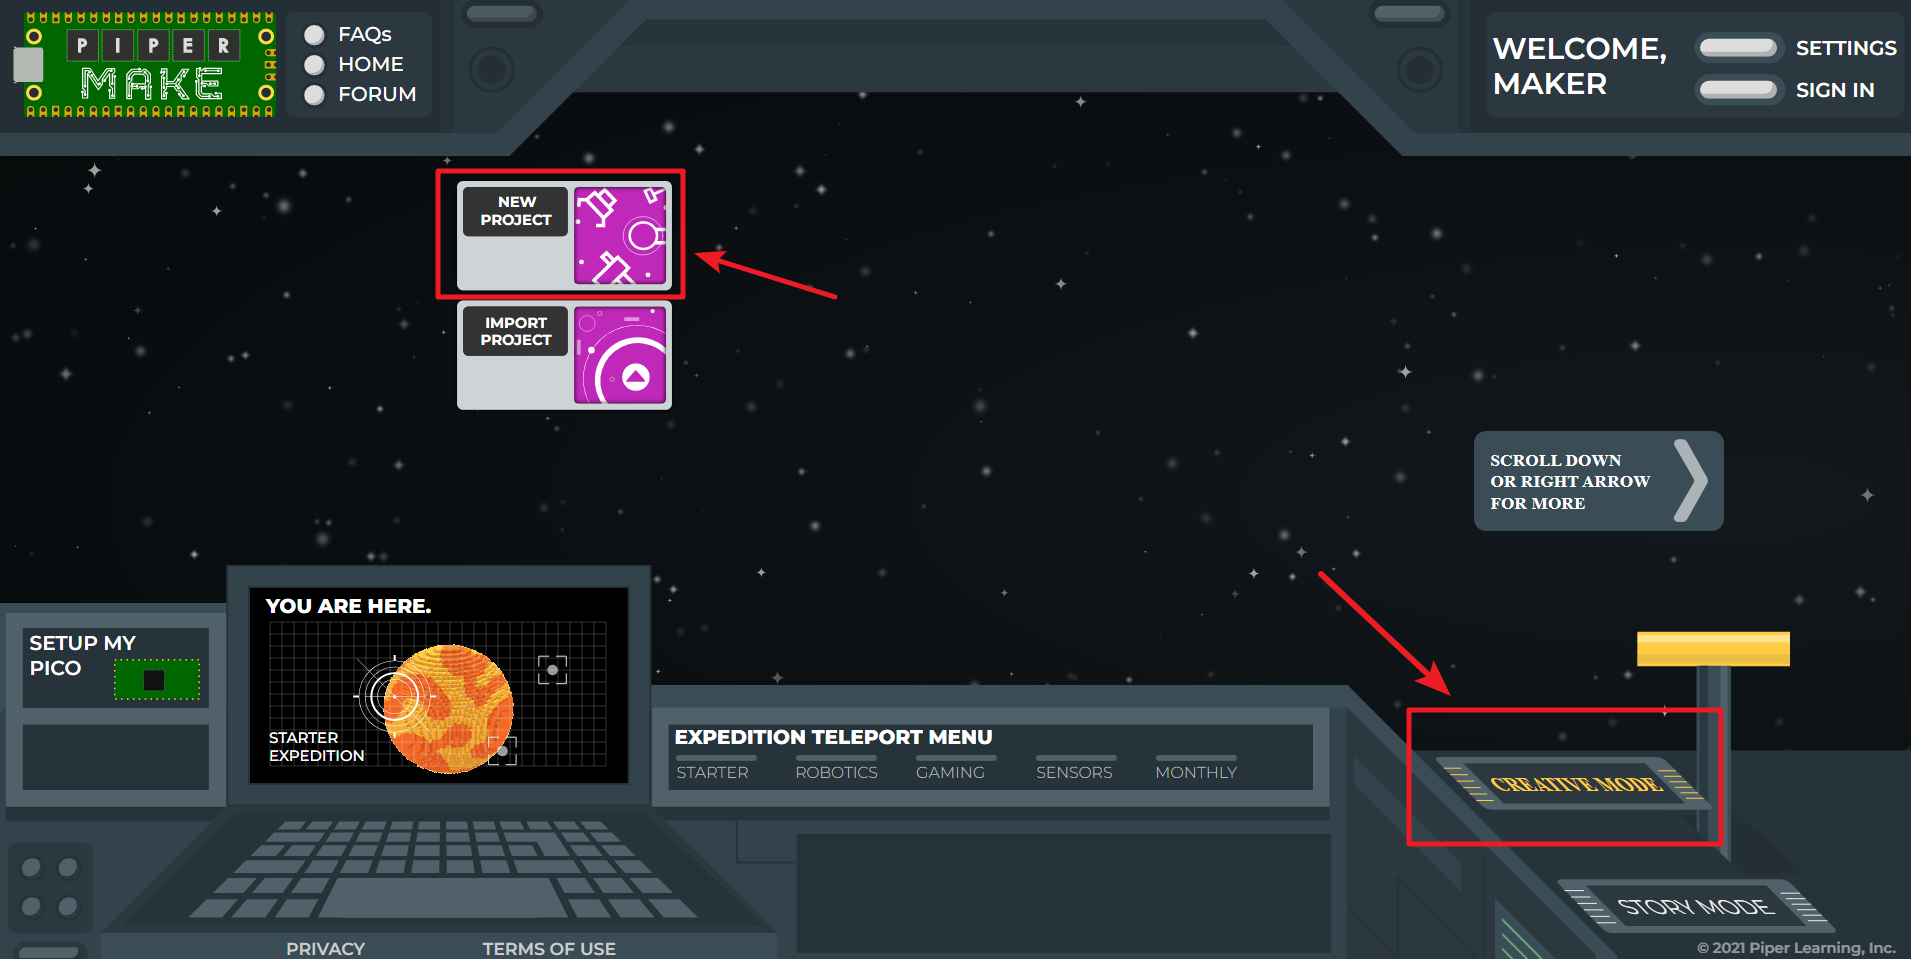
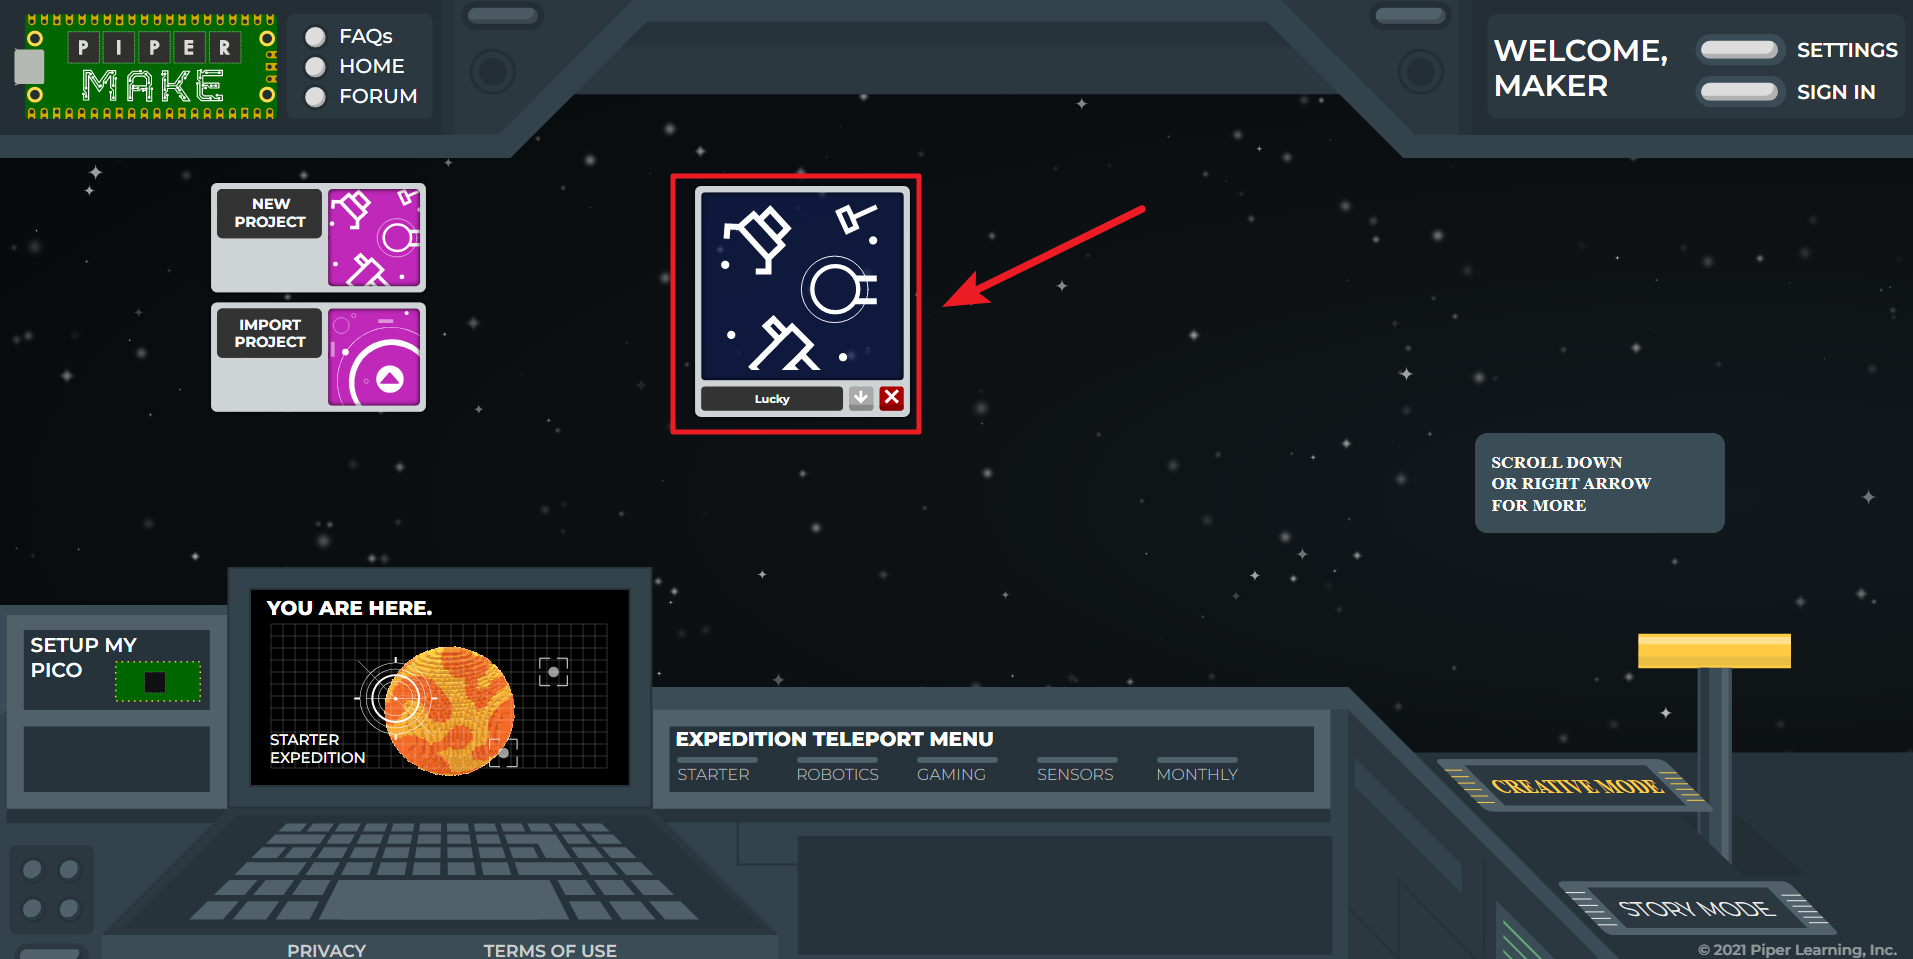
Switch to CREATIVE MODE and click on the New Project button,
and a new project will appear in the MY PROJECTS section and
will be assigned a random name that can be changed from the programming page.
Then open the new project just created.
Now go to the Piper Make programming page.
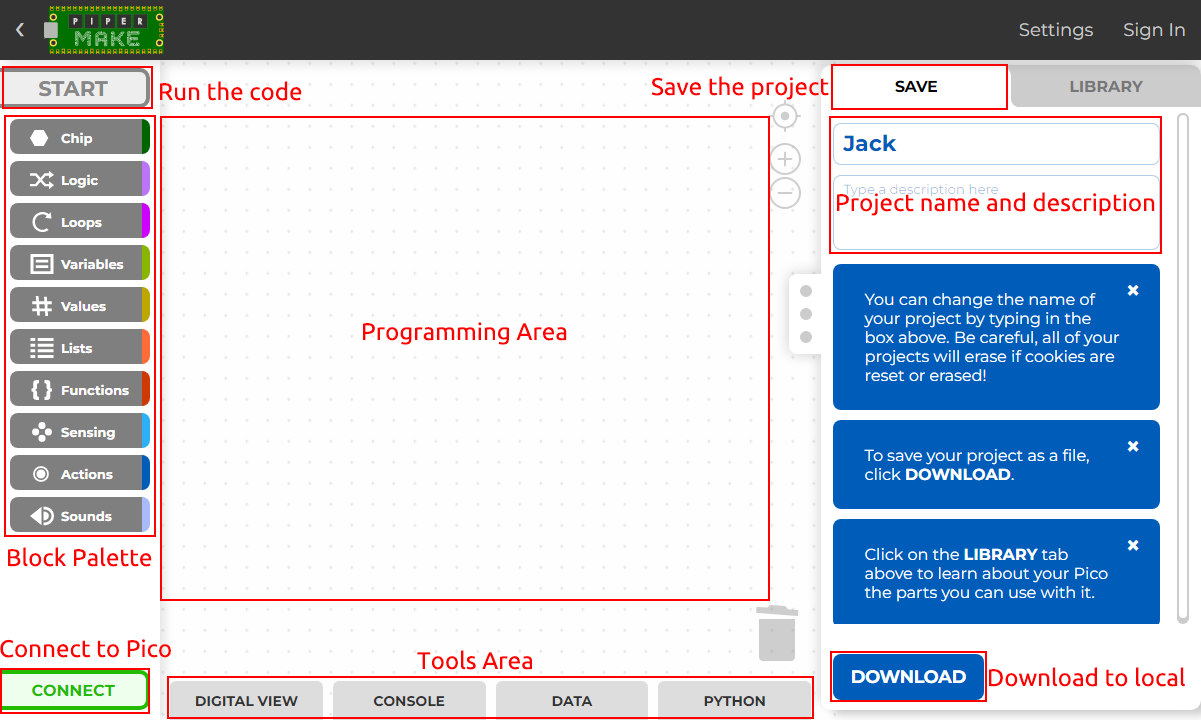
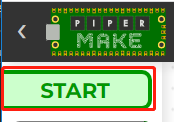
START: Used to run the code, if it’s gray, it’s not connected to Pico at this time.
Block palette: contains different types of blocks.
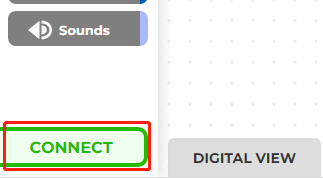
CONNECT: Used to connect to Pico, it is green when not connected to Pico, when connected it will become DISCONNECT(red).
Programming Area: Drag blocks here to finish programming by stacking them.
Tools Area: You can click DIGITAL VIEW to see the pin distribution of Pico; you can view the print information in CONSOLE; you can read data from DATA, and you can click Python to view the Python source code.
Project name and description: You can change the project name and description.
DOWNLOAD: You can click the DOWNLOAD button to save it locally, usually in .png format. Next time you can import it via the Import Project button on the home page.
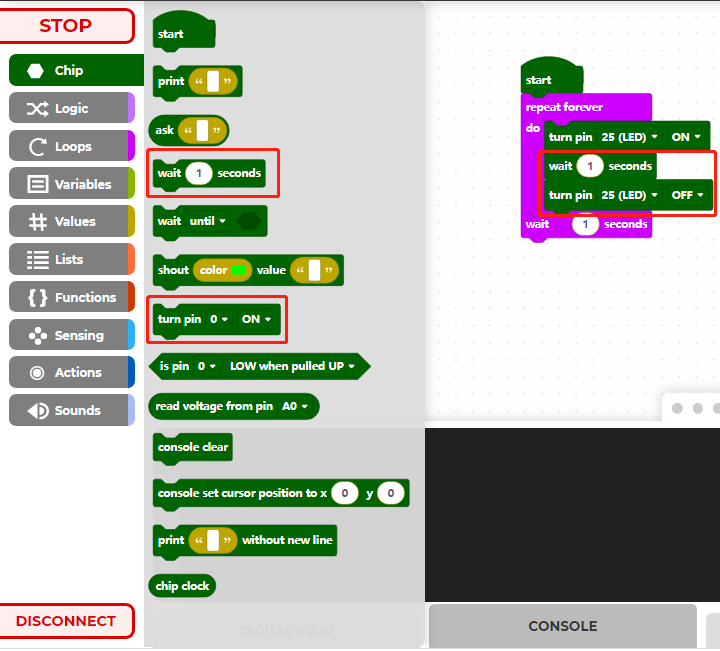
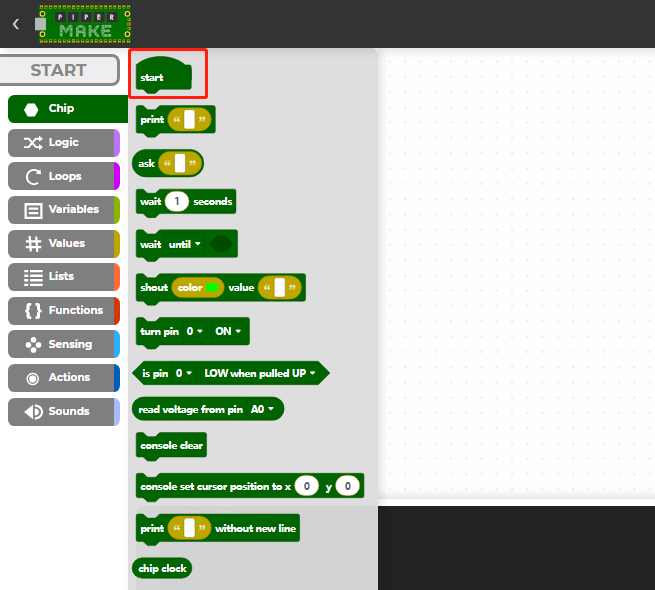
Click on the Chip palette and drag the [start] block to the Programming Area.
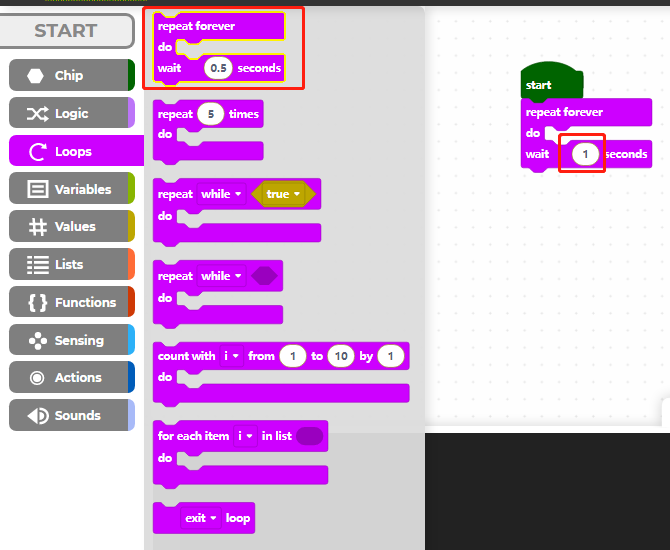
Then drag the [loop] block in loops palette to the bottom of the [start] block, and set the loop interval to 1 second.
The Raspberry Pi Pico’s onboard LED is at pin25, so we use the [turn pin () ON/OFF] block on the Chip palette to control it.

Now click on the CONNECT button to connect to pico, after clicking on it a new popup will appear, select the recognized CircuitPython CDC control (COMXX) port, then click on Connect. When the connection is successful, the green CONNECT in the bottom left corner will change to a red DISCONNECT.
Now click on the START button to run this code and you will see the LED on the Pico lit up. If yours is gray, it means that the Pico is not connected, please reconnect it.
Then turn off pin25 every second in the cycle, and click START on the upper left again, so that you can see the onboard LED lights flashing.