Note
Hello, welcome to the SunFounder Raspberry Pi & Arduino & ESP32 Enthusiasts Community on Facebook! Dive deeper into Raspberry Pi, Arduino, and ESP32 with fellow enthusiasts.
Why Join?
Expert Support: Solve post-sale issues and technical challenges with help from our community and team.
Learn & Share: Exchange tips and tutorials to enhance your skills.
Exclusive Previews: Get early access to new product announcements and sneak peeks.
Special Discounts: Enjoy exclusive discounts on our newest products.
Festive Promotions and Giveaways: Take part in giveaways and holiday promotions.
👉 Ready to explore and create with us? Click [here] and join today!
Blink LED
For this project, we intend to make the extended LED light blink. To use extended electronic components, a solderless breadboard will be the most powerful partner for novice users.
The breadboard is a rectangular plastic plate with a bunch of small holes in it. These holes allow us to easily insert electronic components and build electronic circuits. The breadboard does not permanently fix the electronic components, which makes it easy for us to repair the circuit and start over when we make a mistake.
Wiring
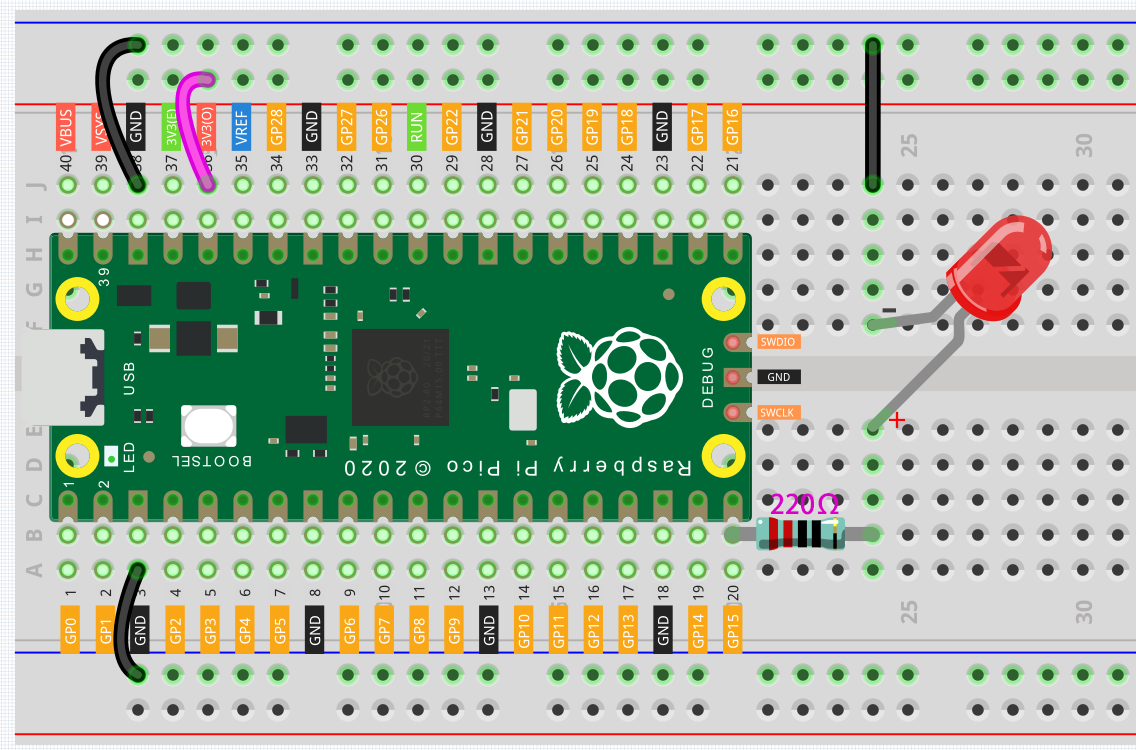
The color ring of the 220 ohm resistor is red, red, black, black and brown.
The longer lead of the LED is known as the anode (+), the shorter lead is the cathode (-).
Code
After connecting Pico, click the Start button and you will see the LED blinking. For more details, you can refer to How to use Piper Make.

Code Explanation
This is the body of the loop: turn the pin15 on to light up the LED, wait one second, then turn the pin15 off to make the LED go off. Wait 1 second and then re-run the previous cycle, so you can see the LED has been in the state of alternating between light and off.
[start]: This block is the basic framework of the program and represents the beginning of the program.
[repeat forever do() wait()seconds]: Means that the blocks in it will be executed repeatedly, and the execution time interval is defined by yourself.
[turn pin () ON/OFF]: Indicates that a certain pin is placed in a high level (ON) or a low level (OFF).
[wait () seconds]: Set the execution interval between blocks.