Button
In this project, we will learn how to turn on or off the LED by using a button.
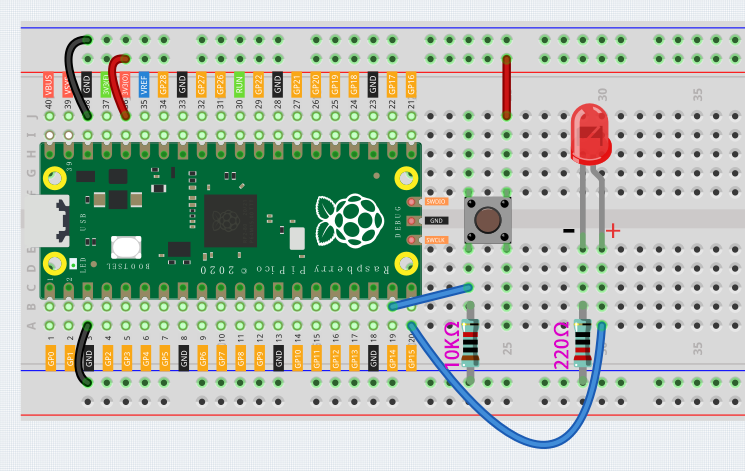
Wiring

We can think of the four-legged button as an H-shaped button. Its left (right) two feet are connected, which means that after it straddles the central dividing line, it will connect the two half rows of the same row number together. (For example, in my circuit, E23 and F23 have been connected, as are E25 and F25). Before the button is pressed, the left and right sides are independent of each other, and current cannot flow from one side to the other.
Buttons require pull-up resistors or pull-down resistors. If there is no pull-up or pull-down resistor, the main controller may receive a ‘noisy’ signal which can trigger even when you’re not pushing the button.
The color ring of the 10kΩ resistor is brown, black, black, red, brown.
Code
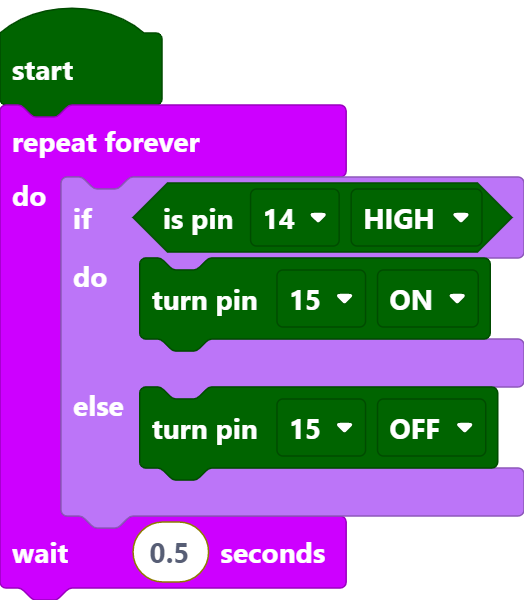
After connecting Pico, click the Start button and the code starts to run. When the button is pressed, the LED will be lit. When the button is released, the LED will go out.

Code Explanation
When the button is pressed, pin14 is high. So if the read pin14 is high, turn the pin15 on (LED is lit); else, turn off the pin15 (LED is off).
[if () do () else ()]: This is a judgment block, depending on the condition after the [if] block to determine whether to run the blocks inside the [do] block, or the blocks inside the [else] block.
[is pin () HIGH]: This is used to read the level of a specific pin, if the level read is the same as the set HIGH/LOW, then execute the blocks inside [do] block, otherwise execute the blocks inside [else].