Note
Hello, welcome to the SunFounder Raspberry Pi & Arduino & ESP32 Enthusiasts Community on Facebook! Dive deeper into Raspberry Pi, Arduino, and ESP32 with fellow enthusiasts.
Why Join?
Expert Support: Solve post-sale issues and technical challenges with help from our community and team.
Learn & Share: Exchange tips and tutorials to enhance your skills.
Exclusive Previews: Get early access to new product announcements and sneak peeks.
Special Discounts: Enjoy exclusive discounts on our newest products.
Festive Promotions and Giveaways: Take part in giveaways and holiday promotions.
👉 Ready to explore and create with us? Click [here] and join today!
Slide Switch
In this project, we will learn how to use a slide switch. Usually,the slide switch is soldered on PCB as a power switch, but here we need to insert it into the breadboard, thus it may not be tightened. And we use it on the breadboard to show its function.
Wiring
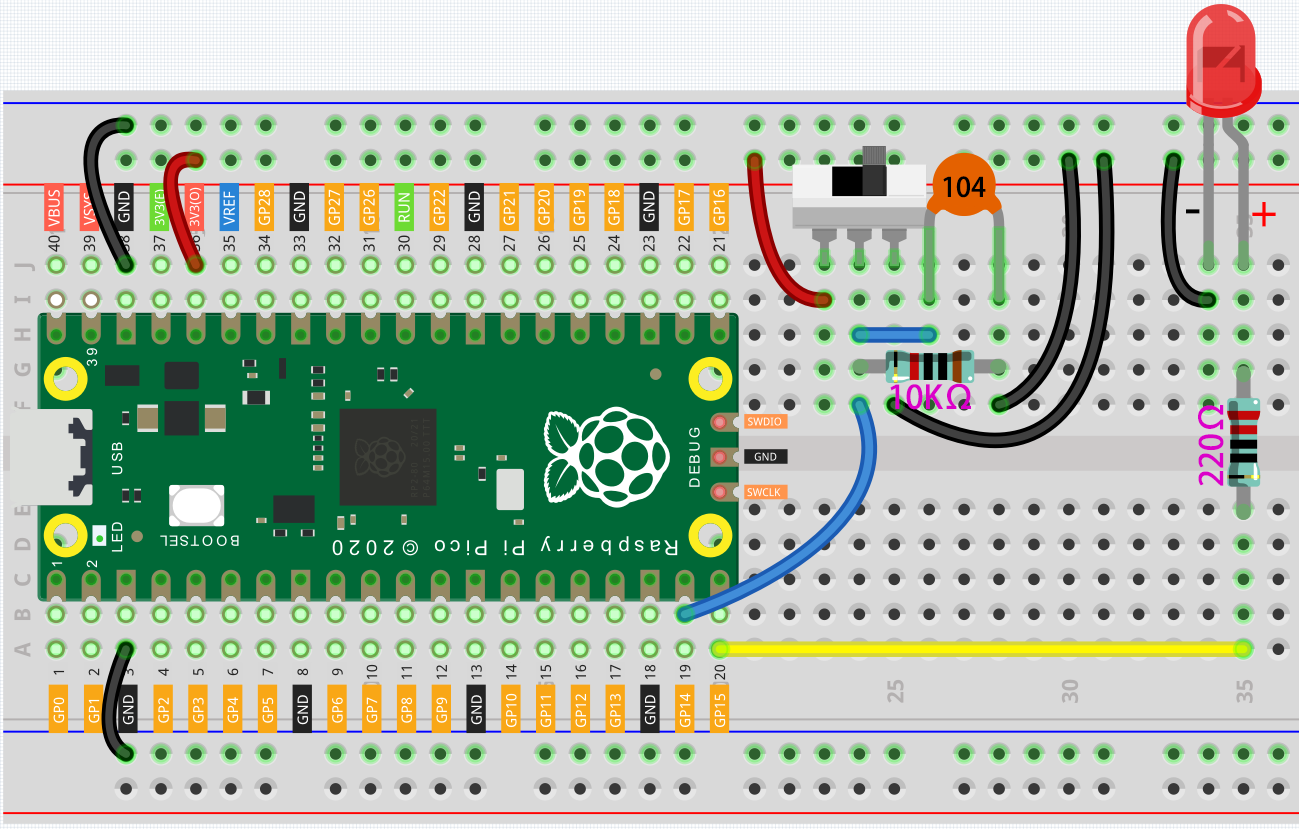
If the switch is toggled to the left, the 2 pins on the left are connected together; if it is toggled to the right, the 2 pins on the right are connected together.
The purpose of connecting 10K resistor and capacitor on the toggle switch is to de-jitter and get a stable level.
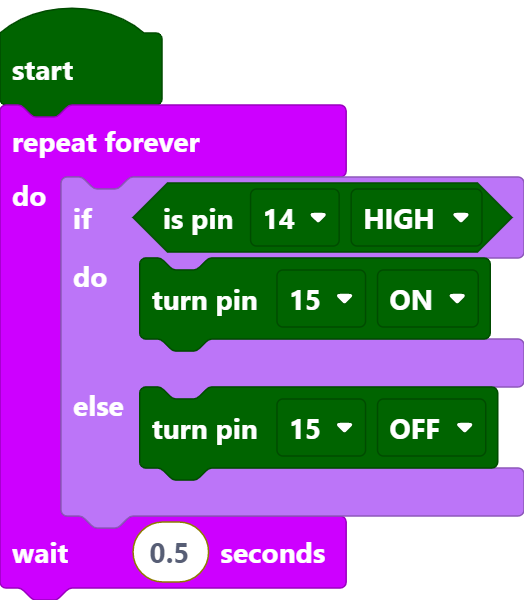
Code
After connecting Pico, click the Start button and the code starts to run. Toggle the slide switch to the left and the LED will light up; otherwise, the LED will turn off.
Note
This project code is exactly the same as the previous project Button.