Note
Hello, welcome to the SunFounder Raspberry Pi & Arduino & ESP32 Enthusiasts Community on Facebook! Dive deeper into Raspberry Pi, Arduino, and ESP32 with fellow enthusiasts.
Why Join?
Expert Support: Solve post-sale issues and technical challenges with help from our community and team.
Learn & Share: Exchange tips and tutorials to enhance your skills.
Exclusive Previews: Get early access to new product announcements and sneak peeks.
Special Discounts: Enjoy exclusive discounts on our newest products.
Festive Promotions and Giveaways: Take part in giveaways and holiday promotions.
👉 Ready to explore and create with us? Click [here] and join today!
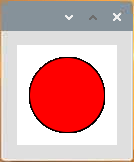
Clickable Dot
We’ve tried drawing motion graphic, responding to mouse event, and controlling LED. So, we might as well combine these functions, draw a clickable dot, to control the LED!
Required Components
In this project, we need the following components.
It’s definitely convenient to buy a whole kit, here’s the link:
Name |
ITEMS IN THIS KIT |
LINK |
|---|---|---|
Raphael Kit |
337 |
You can also buy them separately from the links below.
COMPONENT INTRODUCTION |
PURCHASE LINK |
|---|---|
Wiring

Sketch
import processing.io.*;
boolean state = false;
int ledPin = 17;

void setup() {
    GPIO.pinMode(ledPin, GPIO.OUTPUT);
    background(255);
}

void draw() {
    if (state == true) {
        GPIO.digitalWrite(ledPin, GPIO.LOW);
        fill(255, 0, 0);
    }else {
        GPIO.digitalWrite(ledPin, GPIO.HIGH);
        fill(155);
    }
    ellipse(width/2, height/2, width*0.75, height*0.75);
}

void mouseClicked() {
    //  toggles state:
    if (2*dist(mouseX,mouseY,width/2, height/2)<=width*0.75)
        {state = !state;}
}
How it works?
This project has a lot in common with Blinking Dot, the difference is that it puts the toggle state in the mouse event. This causes the LED to not blink automatically, but to light up and go off with a mouse click.
And in the mouseClicked() event, the dist() function is used to determine the position of the mouse at the time of the click, and the dot is considered clicked only if the distance between the mouse and the center of the dot is less than the radius.