Note
Hello, welcome to the SunFounder Raspberry Pi & Arduino & ESP32 Enthusiasts Community on Facebook! Dive deeper into Raspberry Pi, Arduino, and ESP32 with fellow enthusiasts.
Why Join?
Expert Support: Solve post-sale issues and technical challenges with help from our community and team.
Learn & Share: Exchange tips and tutorials to enhance your skills.
Exclusive Previews: Get early access to new product announcements and sneak peeks.
Special Discounts: Enjoy exclusive discounts on our newest products.
Festive Promotions and Giveaways: Take part in giveaways and holiday promotions.
👉 Ready to explore and create with us? Click [here] and join today!
Test 3 EoATs
This is the first program and the one you must see.
In this project, you will learn how to assemble and use PiArm’s 3 End of Arm Tooling (EoAT, replaced by this abbreviation later.).
Before programming, you need to learn the basic usage of Ezblock Studio from here.
Tips on basic blocks
This is the basic structure of the program, the [Start] block is used to do some initialization (even if no block is placed, it cannot be deleted) and the [Forever] block is, as the name suggests, a continuous loop that allows your program to change and respond.

This block is used to set an interval time in milliseconds.

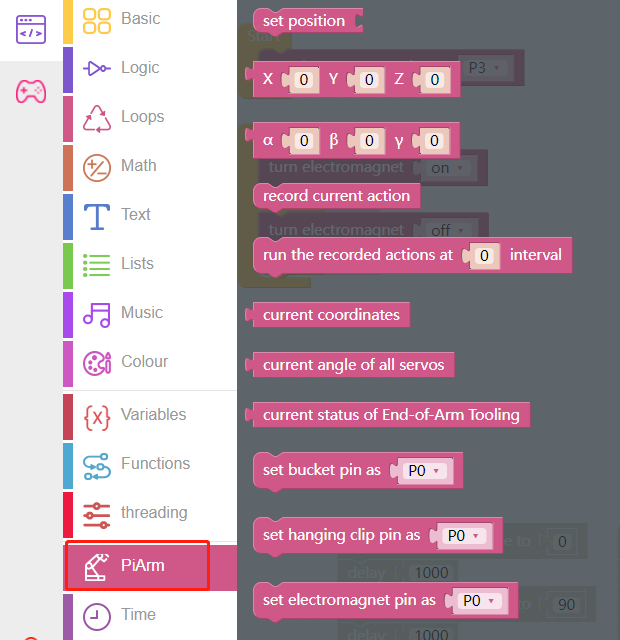
Tips on PiArm blocks
Here you can find some blocks needed to make PiArm work.
Shovel Bucket
Step 1
Assemble the Shovel Bucket to the end of PiArm.
Step 2
Now start writing the code to make Shovel Bucket work.
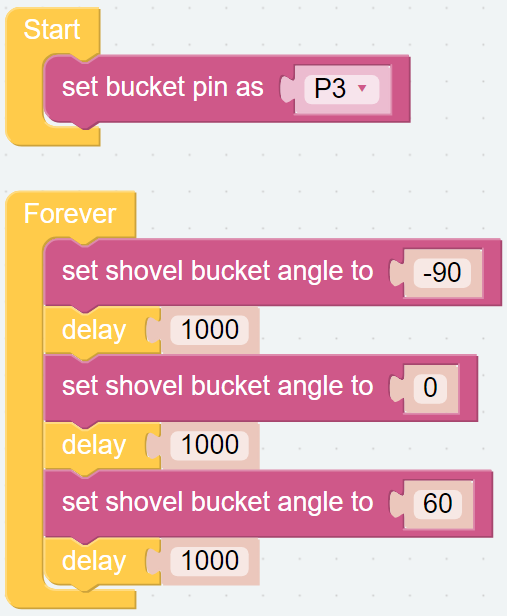
Put [set bucket pin as ()] in the [Start] block to initialize the bucket pin as P3.
Note
Because in the assembly diagram above, it is connected to the Transfer Module, which is already connected to P3 during the PiArm assembly. Of course you can also connect it to other spare pins.

Step 3
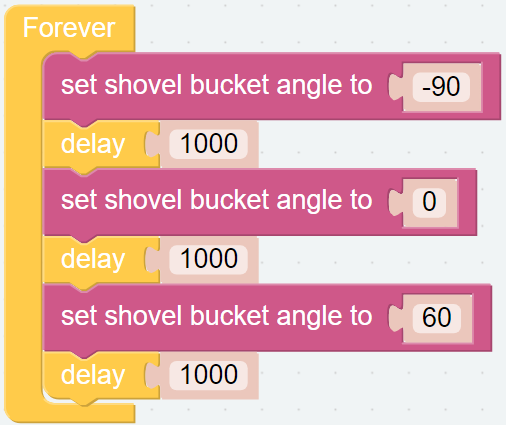
Toggles the angle of the Shovel Bucket between 0° and 90° with an interval of 1s.
[set shovel bucket angle to ()]: Used to set the angle of Shovel Bucket, the range is 0-90.
[delay ()]: From the Basic category, used to set the time interval between 2 block runs, in: ms.
Step 4
Once the code is written, click the Download button in the bottom right corner to download it to the PiArm.
Now you will see the Shovel Bucket moving back and forth, and you can click the Run button to stop the code from running.
Hanging Clip
Step 1
Assemble Hanging Clip to the end of PiArm.
Step 2
Now start writing the code to make Shovel Bucket work.
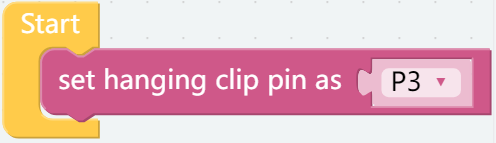
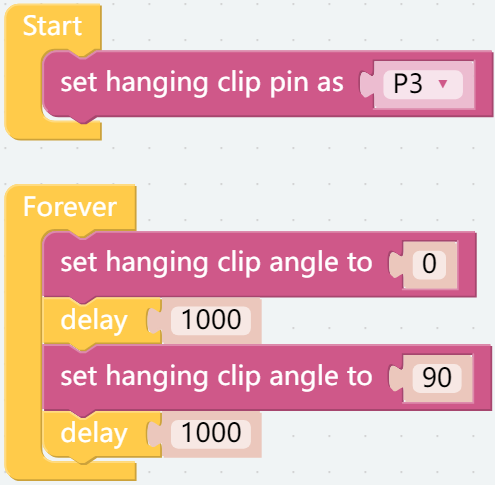
Put [set hanging clip pin as ()] in the [Start] block to initialize the hanging clip pin as P3.
Note
Because in the assembly diagram above, it is connected to the Transfer Module, which is already connected to P3 during the PiArm assembly. Of course you can also connect it to other spare pins.
Step 3
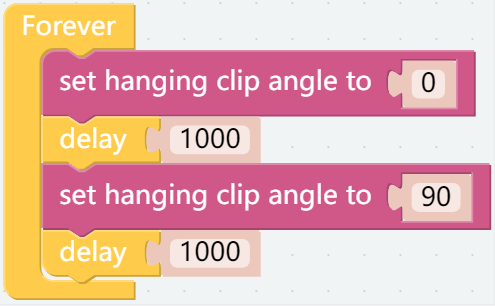
Toggles the angle of the Hanging Clip between 0° and 90° with an interval of 1s.
[set hanging clip angle to ()]: Used to set the angle of Hanging Clip, the range is 0-90.
[delay ()]: From the Basic category, used to set the time interval between 2 block runs, in: ms.
Step 4
Once the code is written, click the Download button in the bottom right corner to download it to the PiArm.
Now you will see the Hanging Clip repeatedly open/close, and you can click the Run button to stop the code from running.
Electromagnet
Step 1
Assemble Electromagnet to the end of PiArm.
Step 2
Now start writing the code to make Shovel Bucket work.
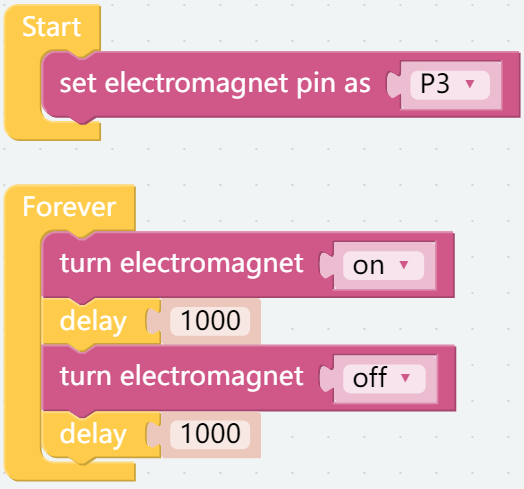
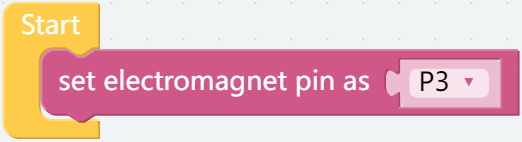
Put [set electromagnet pin as ()] in the [Start] block to initialize the electromagnet pin as P3.
Note
Because in the assembly diagram above, it is connected to the Transfer Module, which is already connected to P3 during the PiArm assembly. Of course you can also connect it to other spare pins.
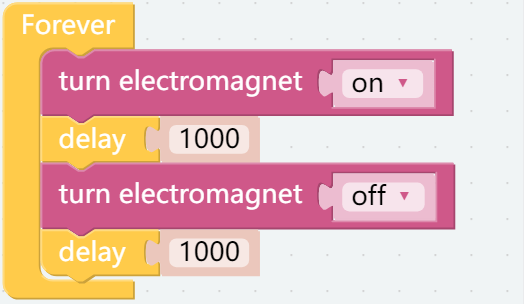
Step 3
Let the electromagnet be repeatedly energized and de-energized at 1 second intervals.
[turn electromagnet (on/off)]: Used to energize (on) or de-energize (off) the Electromagnet.
[delay ()]: From the Basic category, used to set the time interval between 2 block runs, in: ms.
Step 4
Once the code is written, click the Download button in the bottom right corner to download it to the PiArm.
Now you will find that the Electromagnet is energized every second (the LED (D2) on the electromagnet lights up, indicating that it is energized, at which time it can be used to adsorb some materials with iron.).