Note
Hello, welcome to the SunFounder Raspberry Pi & Arduino & ESP32 Enthusiasts Community on Facebook! Dive deeper into Raspberry Pi, Arduino, and ESP32 with fellow enthusiasts.
Why Join?
Expert Support: Solve post-sale issues and technical challenges with help from our community and team.
Learn & Share: Exchange tips and tutorials to enhance your skills.
Exclusive Previews: Get early access to new product announcements and sneak peeks.
Special Discounts: Enjoy exclusive discounts on our newest products.
Festive Promotions and Giveaways: Take part in giveaways and holiday promotions.
👉 Ready to explore and create with us? Click [here] and join today!
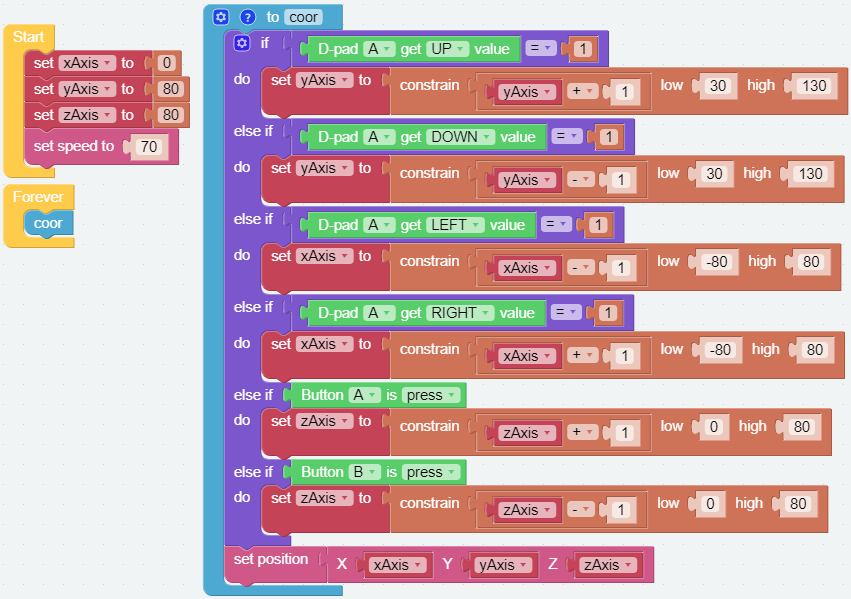
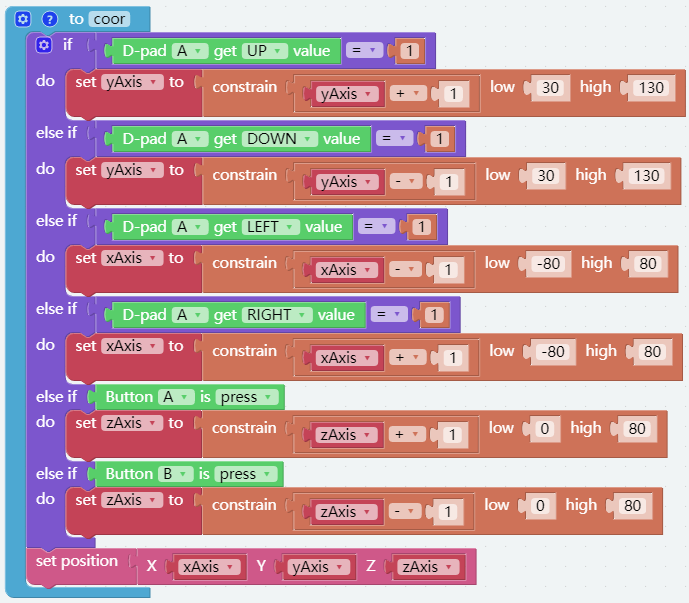
Coordinate Mode
PiArm’s arm can be controlled in two ways: Angle Mode and Coordinate Mode.
Angle Mode: Writes a certain angle to the three servos on the arm, thus rotating the arm to a specific position.
Coordinate Mode: Create a spatial right-angle coordinate system for the arm and set the control point. Set the coordinates of the control point so that the arm can reach a specific position.
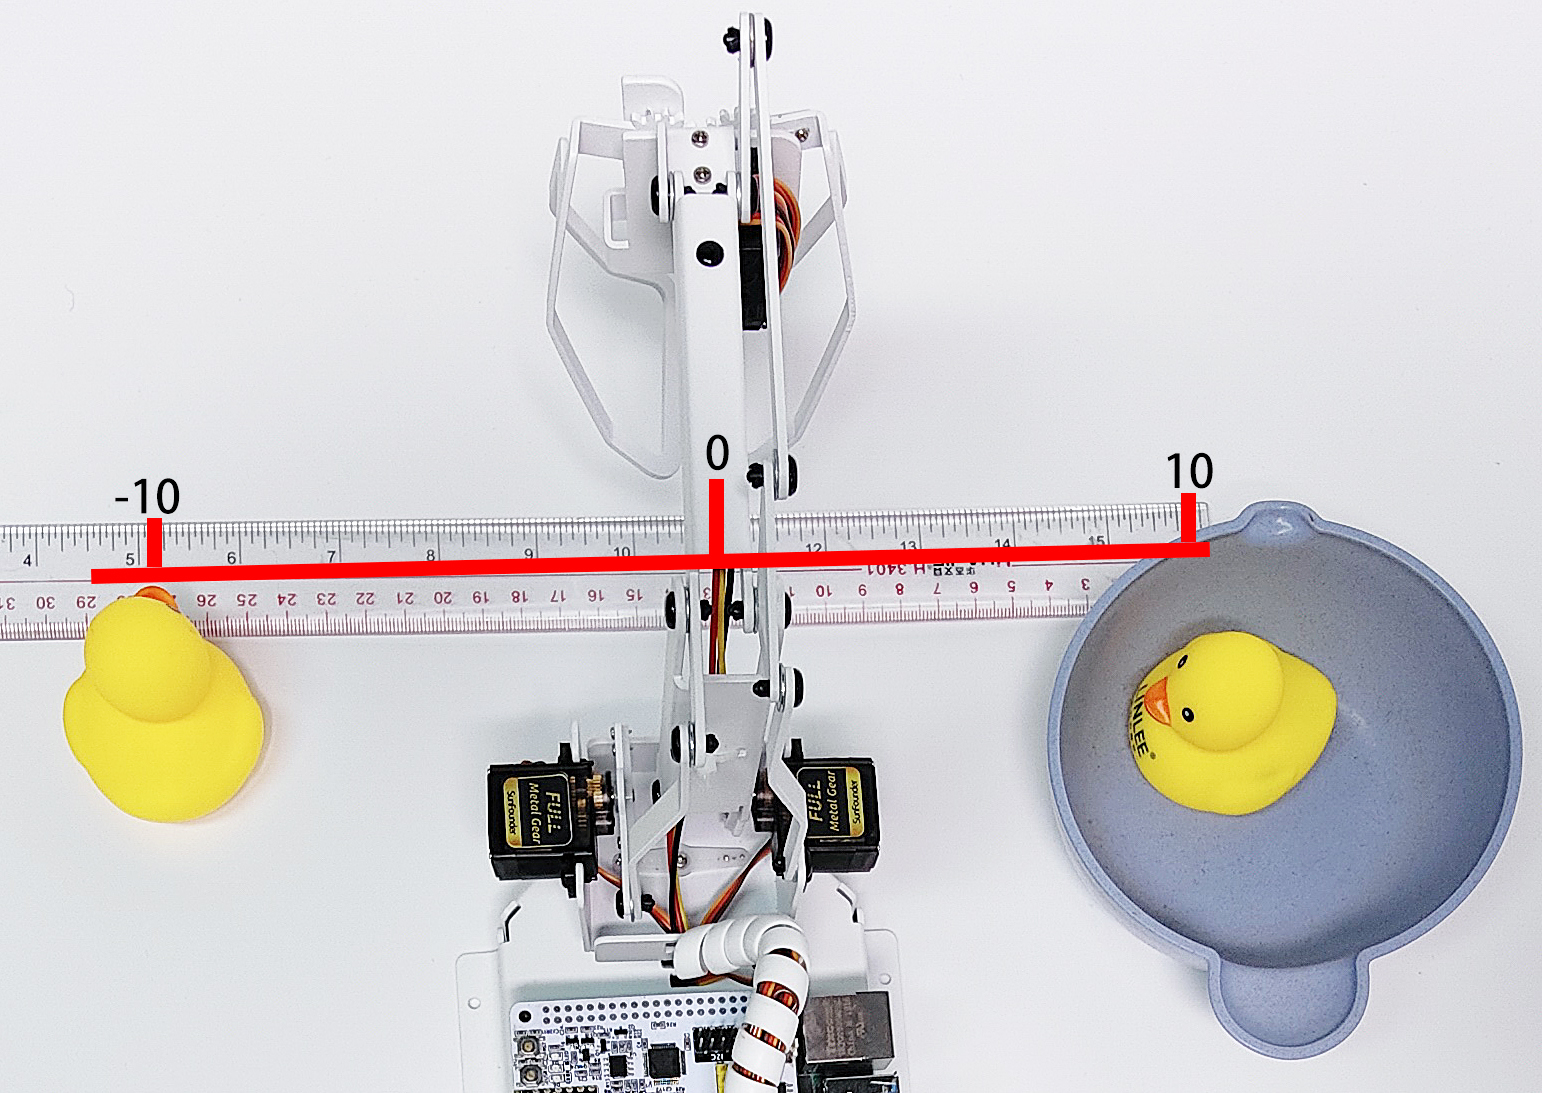
This project sets 2 coordinate points by coordinate mode, and let the PiArm clip the rubber duck on the left to the bowl on the right. But you need to mount Hanging Clip to the PiArm first.
Programming
Step 1
Initialize the pin of the Hanging Clip and set the speed of the robot arm to 60%.

Step 2
Set the coordinates of the 2 points. Since the rubber duck on the left and the bowl on the right are on the same line, you will find that their Y coordinate values are the same.
[start_coord]: The coordinates of the left rubber duck.
[start_coord_up]: The coordinate of straight above the left rubber duck.
[end_coord]: The coordinates of the bowl.
[end_coord_up]: The coordinates straight above the bowl.
Note
All coordinates here refer to the coordinates of the control points, but the actual distance between the X and Y coordinates is a little larger when the end-of-arm tool is mounted.
The tolerance distance is different for each end of arm tool. For example, 3-4cm for Hanging Clip and Electromagnet, 6-7cm for Shovel Bucket.
For example, here the X coordinate is written as 100, but the actual distance is 13-14cm.
It is generally recommended that the X coordinate is -80 ~ 80, but since the Y coordinate value here is small (the recommended range is 30~130), it is possible to reach to 100. However, if you increase the Y coordinate value, the X coordinate value needs to be reduced according to the actual situation due to the linkage action.

Step 3
In the [loop] block, let PiArm do the following.
PiArm opens the Hanging Clip (20°), then rotates to the left rubber duck position (start_coord), then closes the Hanging Clip (90°).
PiArm raises his head (start_coord_up) and then turns to the right side above the bowl (end_coord_up).
PiArm lowers his head (end_coord_up), then opens the Hanging Clip (20°) to let the rubber duck fall into the bowl, and finally raises his head again (end_coord_up).
Step 4
Click on the Download button in the bottom right corner and you will see PiArm repeating the actions described above.
Note
You can also find the code with the same name on the Examples page of Ezblock Studio and click Run or Edit directly to view the code.