2.2.2 Thermistor
Introduction
Just like photoresistor can sense light, thermistor is a temperature sensitive electronic device that can be used for realizing functions of temperature control, such as making a heat alarm.
Required Components
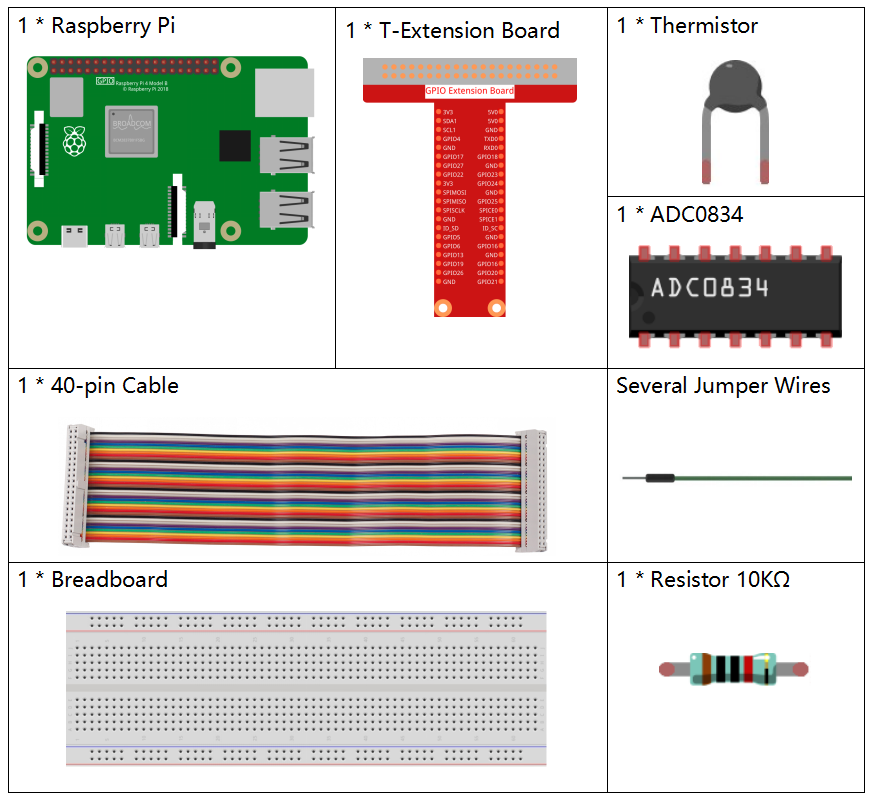
In this project, we need the following components.

It’s definitely convenient to buy a whole kit, here’s the link:
Name |
ITEMS IN THIS KIT |
LINK |
|---|---|---|
Raphael Kit |
337 |
You can also buy them separately from the links below.
COMPONENT INTRODUCTION |
PURCHASE LINK |
|---|---|
- |
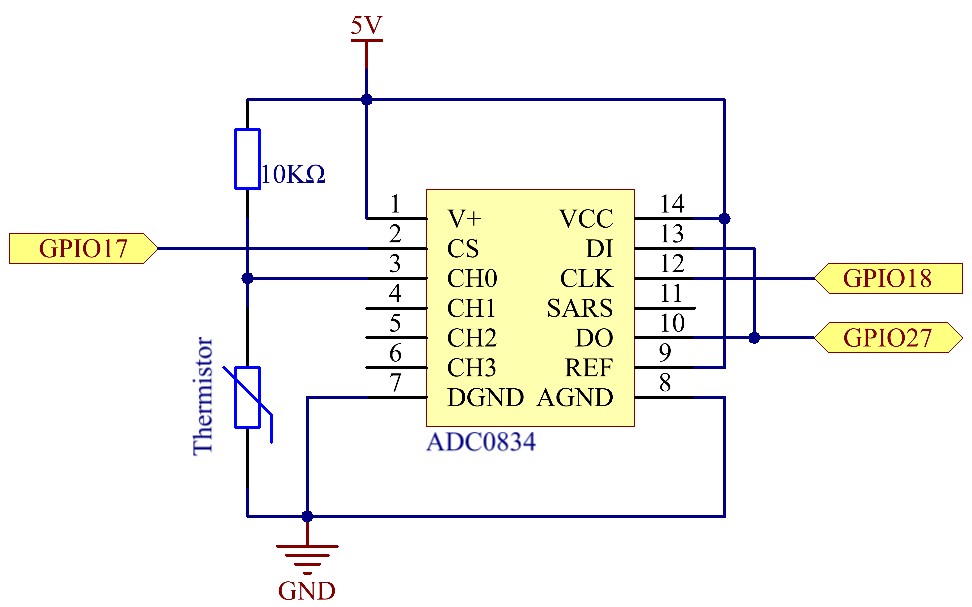
Schematic Diagram


Experimental Procedures
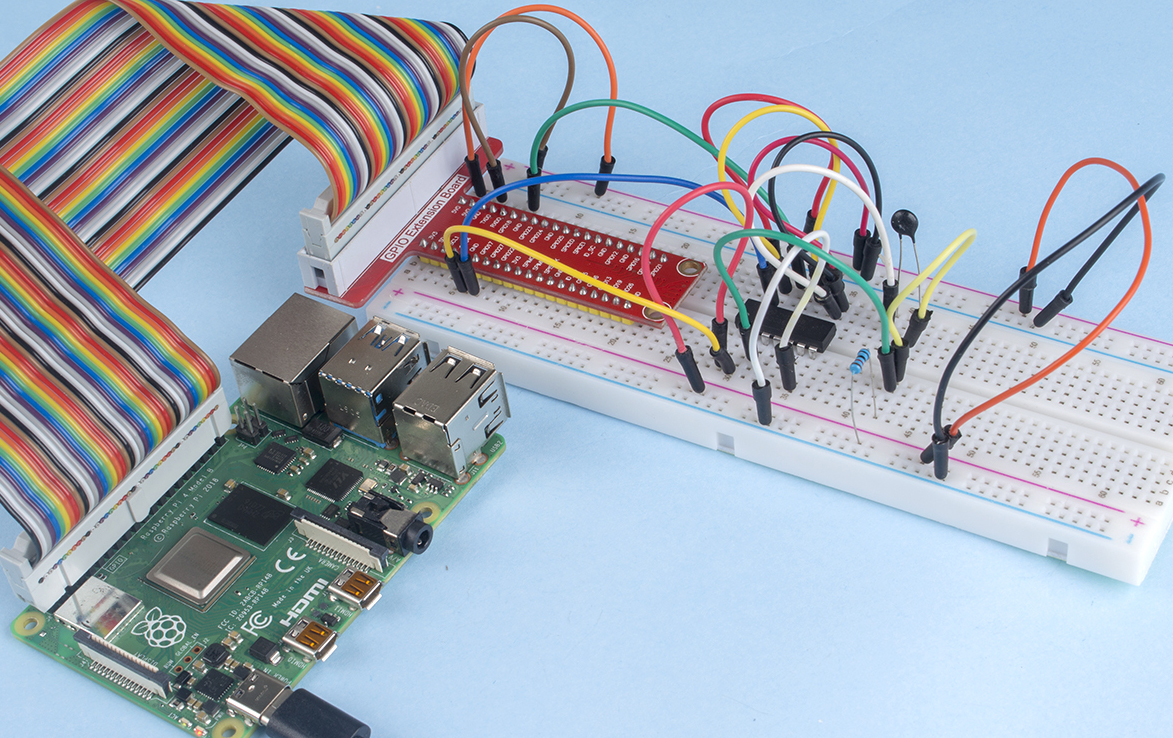
Step 1: Build the circuit.

Step 2: Go to the folder of the code.
cd ~/raphael-kit/nodejs/
Step 3: Run the code.
sudo node thermistor.js
With the code run, the thermistor detects ambient temperature which will be printed on the screen once it finishes the program calculation.
Code
const Gpio = require('pigpio').Gpio;
const ADC0834 = require('./adc0834.js').ADC0834;

exports.ADC0834 = ADC0834;

const adc = new ADC0834(17, 18, 27);

setInterval(() => {
  adc.read(0).then((value) => {
    var Vr = 5 * value / 255;
    var Rt = 10000 * Vr / (5 - Vr);
    var temp = 1 / ((Math.log(Rt/10000) / 3950)+(1 / (273.15 + 25)));
    var cel = (temp - 273.15).toFixed(2);
    var Fah = (cel * 1.8 + 32).toFixed(2);
    console.log(`Celsius: ${cel} C  Fahrenheit: ${Fah} F\n`);
  }, (error)=>{
    console.log("Error: " + error);
  });
}, 1000);
Code Explanation
setInterval(() => {
  adc.read(0).then((value) => {
    var Vr = 5 * value / 255;
    var Rt = 10000 * Vr / (5 - Vr);
    var temp = 1 / ((Math.log(Rt/10000) / 3950)+(1 / (273.15 + 25)));
    var cel = (temp - 273.15).toFixed(2);
    var Fah = (cel * 1.8 + 32).toFixed(2);
    console.log(`Celsius: ${cel} C  Fahrenheit: ${Fah} F\n`);
  }, (error)=>{
    console.log("Error: " + error);
  });
}, 1000);
We can read the value of the thermistor through the statement adc.read(0).then((value) => {...})
var Vr = 5 * value / 255;
var Rt = 10000 * Vr / (5 - Vr);
var temp = 1 / ((Math.log(Rt/10000) / 3950)+(1 / (273.15 + 25)));
var cel = (temp - 273.15).toFixed(2);
var Fah = (cel * 1.8 + 32).toFixed(2);
console.log(`Celsius: ${cel} C  Fahrenheit: ${Fah} F\n`);
These operations convert the thermistor value to a Celsius temperature value.
var Vr = 5 * value / 255;
var Rt = 10000 * Vr / (5 - Vr);
These two lines of code are used to calculate the voltage distribution from the read values, resulting in Rt (resistance of the thermistor).
var temp = 1 / ((Math.log(Rt/10000) / 3950)+(1 / (273.15 + 25)));
This code refers to substituting Rt into the formula TK=1/(ln(RT/RN)/B+1/TN) to get the temperature in Kelvin.
var cel = (temp - 273.15).toFixed(2);
This paragraph is to convert the Kelvin temperature to Celsius with two decimal places.
var Fah = (cel * 1.8 + 32).toFixed(2);
This paragraph converts Celsius to Fahrenheit with two decimal places.
console.log(`Celsius: ${cel} C Fahrenheit: ${Fah} F\n`);
Print Celsius, Fahrenheit and their units on the terminal.
Phenomenon Picture
