Note
Hello, welcome to the SunFounder Raspberry Pi & Arduino & ESP32 Enthusiasts Community on Facebook! Dive deeper into Raspberry Pi, Arduino, and ESP32 with fellow enthusiasts.
Why Join?
Expert Support: Solve post-sale issues and technical challenges with help from our community and team.
Learn & Share: Exchange tips and tutorials to enhance your skills.
Exclusive Previews: Get early access to new product announcements and sneak peeks.
Special Discounts: Enjoy exclusive discounts on our newest products.
Festive Promotions and Giveaways: Take part in giveaways and holiday promotions.
👉 Ready to explore and create with us? Click [here] and join today!
Set Up Your Raspberry Pi
To begin programming and controlling your Raspberry Pi, you first need to access it. This guide describes two common methods:
Using a monitor, keyboard, and mouse
Setting up a headless (no-screen) connection for remote access
Note
The Raspberry Pi Zero 2W installed on the robot is not easy to connect to a screen. We recommend using the headless setup method.
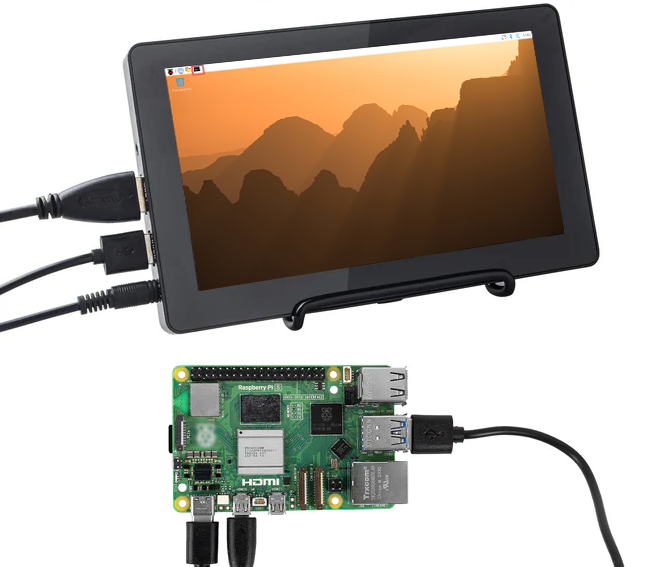
If You Have a Screen
Required Components
Raspberry Pi
Official Power Supply
MicroSD Card
HDMI Cable (For Raspberry Pi 4/5, use HDMI0, the port nearest the power connector.)
Monitor
Keyboard and Mouse
Steps
Insert the microSD card into your Raspberry Pi.
Connect the keyboard, mouse, and monitor.
Power on your Raspberry Pi.
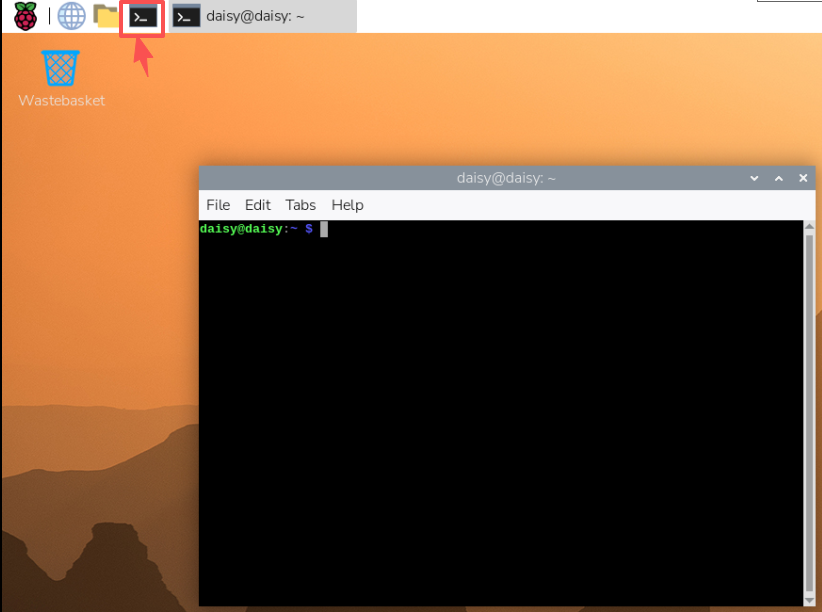
After booting, the Raspberry Pi OS desktop will appear.
Open a Terminal to enter commands.
If You Have No Screen (Headless)
Without a monitor, you can configure and log in to your Raspberry Pi remotely. This is the most convenient method for most users.
Required Components
Raspberry Pi
Official Power Supply
MicroSD Card
A computer on the same network
Tips
Make sure you have completed all settings described in OS Customization Settings when installing the system with Raspberry Pi Imager.
Ensure that your Raspberry Pi and your computer are on the same local network.
For best stability, use Ethernet if available.
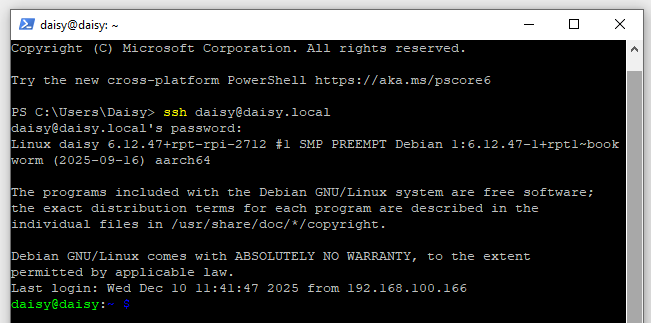
Connect via SSH
Open a terminal on your computer (Windows: PowerShell; macOS/Linux: Terminal) and connect to your Raspberry Pi:
ssh <username>@<hostname>.local
# Example:
ssh daisy@pi.local
Alternatively, locate your Pi’s IP address from your router’s DHCP list and connect with:
ssh <username>@<IP address>
# Example:
ssh daisy@192.168.1.42
On first login, type
yesto confirm the SSH certificate.Enter the password you configured in Raspberry Pi Imager. (Nothing appears while typing—this is normal.)
After login, you now have full command-line access.
Troubleshooting
ssh: Could not resolve hostname …
Make sure the hostname is correct.
Try connecting using the Pi’s IP address.
The term ‘ssh’ is not recognized… (Windows)
OpenSSH is not installed. Install it manually or use a third-party SSH client.
See Install OpenSSH via PowerShell or PuTTY.
Permission denied (publickey,password)
Ensure you are using the username and password created in Raspberry Pi Imager.
Connection refused
Wait 1–2 minutes after powering on.
Confirm that SSH was enabled in Raspberry Pi Imager.
Graphical Remote Access Options
If you prefer a graphical interface:
Remote Desktop: Enable VNC (Virtual Network Computing) for a full desktop experience on your Pi.
Raspberry Pi Connect: Use Raspberry Pi Connect for secure remote access from anywhere, directly in a browser.
Now you can control your Raspberry Pi without a monitor, either through SSH for command-line operations, or with VNC / Raspberry Pi Connect for a graphical desktop experience.