注釈
こんにちは、SunFounderのRaspberry Pi & Arduino & ESP32 Enthusiasts Communityへようこそ!Facebookで他のエンスージアストたちと一緒に、Raspberry Pi、Arduino、ESP32をさらに深く探求しましょう。
参加する理由
専門家によるサポート: コミュニティとチームの助けを借りて、購入後の問題や技術的な課題を解決しましょう。
学びと共有: スキルを向上させるためのヒントやチュートリアルを交換しましょう。
限定プレビュー: 新製品の発表やプレビューにいち早くアクセスしましょう。
特別割引: 最新の製品を特別割引価格でお楽しみいただけます。
フェスティブプロモーションとプレゼント: プレゼントやホリデープロモーションに参加しましょう。
👉 私たちと一緒に探求と創造を始める準備はできていますか?今すぐ[ここ]をクリックして参加しましょう!
24. ポモドーロタイマー
このレッスンでは、時間管理と技術の交差点を探求し、Arduinoとアクティブブザーを使用してポモドーロタイマーを作成します。Arduinoの内部タイミング機能を活用して、25分間の集中作業と5分間の休憩を交互に行うタイマーを作り、ポモドーロテクニックを実践します。この方法は、生産性と集中力を高める効果があります。コース全体を通して、電子タイミングの基礎をしっかりと学び、プログラミングや回路組み立ての実践的な経験を積み、最終的には機能的なポモドーロタイマーを作成します。時間管理をマスターし、日々の活動の効率を向上させましょう!

このレッスンの終了時には、次のことができるようになります:
音が時間管理において歴史的に果たした役割を理解する。
電子タイマー回路を構築するために必要な部品を特定する。
delay()とmillis()関数を使用して、時間管理のためにブザーを制御するArduinoプログラムを作成する。実際のコンテキストでポモドーロテクニックを適用し、作業と休憩の期間を交互に設定するタイマーを作成する。
時計と音
古代の世界では、大規模な鐘の音で時間や特定の社会的イベントを知らせていました。 例えば、中世のヨーロッパの都市では、教会の鐘の音が祈りの時間や作業の開始と終了を知らせる役割を果たしていました。 これらの鐘の音は単なる時間の指標ではなく、社会の秩序を維持するための道具として機能し、コミュニティの日常生活がその周りで展開されていました。
機械式時計と音

機械式時計の発展、特にビッグベンの設計により、時計にはより複雑な鐘とタイミング機構が備えられるようになりました。 ビッグベンの音はその大きな青銅の鐘によって伝えられ、音の伝播範囲と時間の正確な通知が向上しました。 多くの町や都市では、ビッグベンの音が住民の活動を調整するための基準となり、航海のタイムスケジュールや鉄道の運行表など、より正確な時間管理に重要な役割を果たしていました。
電子時代における音のタイミング
電子時代に入ると、音のタイマーは新たに進化しました。電子ブザーの導入、特にArduinoのようなマイクロコントローラの助けを借りて、 時間の通知は大規模な機械装置に依存せずに行われるようになりました。これらの小型装置は、さまざまな周波数や音程の音を出すことができ、 シンプルなキッチンタイマーから複雑な産業プロセス制御システムまで、さまざまなタイミングアプリケーションに使用されます。 現代の病院のナースコールシステム、学校のチャイム、個人用電子機器のリマインダーなど、すべてが電子ブザーを利用して時間管理を行っています。
回路の構築
必要な部品
1 * Arduino Uno R3 |
1 * ブレッドボード |
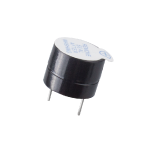
1 * アクティブブザー |
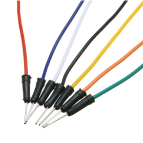
ジャンパーワイヤー |
|
|
|
|
1 * USBケーブル |
|||
|


ステップバイステップの構築
このレッスンでは、10. モールス信号 と同じ回路を使用します。

コーディングの作成 - チクタク
Arduinoでは、 delay() は最も簡単でよく使用されるタイミング関数です。
プログラムを一時停止するために頻繁に使用され、ループと組み合わせてLEDの点滅効果を作成できます。ここでは、 delay() 関数を使用して、ブザーが毎秒一度鳴るようにします。
Arduino IDEを開き、「ファイル」メニューから「新規スケッチ」を選択して、新しいプロジェクトを開始します。
スケッチを
Lesson24_Timer_Tick_Tickとして保存するには、Ctrl + Sを押すか、「保存」をクリックします。次のようにコードを書きます:
const int buzzerPin = 9;   // Assigns the pin 9 to the constant for the buzzer

void setup() {
  // put your setup code here, to run once:
  pinMode(buzzerPin, OUTPUT);  // Set pin 9 as output
}

void loop() {
  // put your main code here, to run repeatedly:
  digitalWrite(buzzerPin, HIGH);  // Turn buzzer ON
  delay(100);                     // Beep duration: 100 milliseconds
  digitalWrite(buzzerPin, LOW);   // Turn buzzer OFF
  delay(1000);                     // Interval between signals: 1000 milliseconds
}
この設定では、最初の delay() 関数がArduino Uno R3を100ミリ秒間一時停止し、その間にブザーが鳴り続けます。次の delay() 関数がArduinoを1000ミリ秒(1秒)一時停止し、その間ブザーは静かになります。
4. コードをArduino Uno R3にアップロードすると、ブザーが1秒ごとに一度鳴るのが聞こえます。
コーディング作成 - millis() の使用
------------------------------
delay() を使用するとコードが一時停止するため、不便な場合があります。
例えば、電子レンジでピザを温めながら重要なメールを待っているとします。
ピザを電子レンジに入れて10分セットします。 delay() を使用することは、この10分間、電子レンジの前に座ってタイマーがゼロになるのを見ているようなものです。この間に重要なメールが届いても、見逃してしまいます。
通常はピザを電子レンジに入れた後、メールをチェックしたり、他のことをしたりしながら、タイマーがゼロになってピザができるのを時々確認します。
Arduinoには、プログラムを一時停止せずにタイミングを測定できる millis() というツールがあります。
millis() は、Arduinoプログラミングにおいて非常に重要な関数です。この関数は、Arduinoボードが電源オンまたは最後にリセットされてから経過したミリ秒を返します。
time = millis(): Arduinoボードが現在のプログラムを開始してから経過したミリ秒を返します。この値は約50日後にオーバーフローし(ゼロに戻る)、再びカウントが始まります。
- パラメータ
なし
- 返り値
プログラム開始から経過したミリ秒数。データ型: unsigned long。
ここでも、ブザーが1秒ごとに一度鳴るようにしてみましょう。
Arduino IDEを開き、「ファイル」メニューから「新規スケッチ」を選択して、新しいプロジェクトを開始します。
スケッチを
Lesson24_Timer_Millisとして保存するには、Ctrl + Sを押すか、「保存」をクリックします。まず、
buzzerPinという定数を作成し、ピン9に設定します。
const int buzzerPin = 9;   // Assigns the pin 9 to the constant for the buzzer

void setup() {
  // put your setup code here, to run once:
}
2つのlong型変数を作成します。
previousMillisは最後にブザーが鳴った時刻のタイムスタンプを保存し、intervalはブザーが鳴る頻度をミリ秒単位で設定します。ここでは、毎1000ミリ秒(1秒ごと)に鳴るように設定されています。
const int buzzerPin = 9;  // Assigns the pin 9 to the constant for the buzzer

unsigned long previousMillis = 0;  // Store the timestamp of the last time the buzzer beeped
long interval = 1000;              // Interval at which to beep (milliseconds)
void setup()関数では、ブザーピンを出力モードに設定します。
const int buzzerPin = 9;  // Assigns the pin 9 to the constant for the buzzer

unsigned long previousMillis = 0;  // Store the timestamp of the last time the buzzer beeped
long interval = 1000;              // Interval at which to beep (milliseconds)

void setup() {
  // put your setup code here, to run once:
  pinMode(buzzerPin, OUTPUT);  // Set pin 9 as output
}
void loop()関数内で、現在の時刻を格納するためにcurrentMillisという名前のunsigned long型変数を作成します。
void loop() {
  // put your main code here, to run repeatedly:
  unsigned long currentMillis = millis();
}
現在の動作時間から最後の更新時間を引いた結果が1000msを超えたときに、いくつかの関数をトリガーします。また、次のトリガーが1秒後に発生するように
previousMillisを現在の時刻に更新します。
void loop() {
  // put your main code here, to run repeatedly:
  unsigned long currentMillis = millis();

  if (currentMillis - previousMillis >= interval) {
    previousMillis = currentMillis;  // Save the last time the buzzer beeped
  }
}
定期的に実行する必要のあるメイン関数を追加します。この場合、ブザーを鳴らします。
void loop() {
  // put your main code here, to run repeatedly:
  unsigned long currentMillis = millis();

  if (currentMillis - previousMillis >= interval) {
    previousMillis = currentMillis;  // Save the last time the buzzer beeped
    digitalWrite(buzzerPin, HIGH);   // Make a voice
    delay(100);
    digitalWrite(buzzerPin, LOW);  // silence
  }
}
完成したコードは次のようになります。このコードをArduino Uno R3にアップロードすると、ブザーが1秒ごとに一度鳴ることが確認できます。
const int buzzerPin = 9;  // Assigns the pin 9 to the constant for the buzzer

unsigned long previousMillis = 0;  // Store the timestamp of the last time the buzzer beeped
long interval = 1000;              // Interval at which to beep (milliseconds)

void setup() {
  // put your setup code here, to run once:
  pinMode(buzzerPin, OUTPUT);  // Set pin 9 as output
}

void loop() {
  // put your main code here, to run repeatedly:
  unsigned long currentMillis = millis();

  if (currentMillis - previousMillis >= interval) {
    previousMillis = currentMillis;  // Save the last time the buzzer beeped
    digitalWrite(buzzerPin, HIGH);   // Make a voice
    delay(100);
    digitalWrite(buzzerPin, LOW);  // silence
  }
}
質問
delay(100); を delay(1000); に変更すると、プログラムにどのような影響がありますか?その理由は?
コーディング作成 - ポモドーロタイマー
ポモドーロテクニック(トマトテクニックとも呼ばれる)は、1980年代後半にフランチェスコ・シリロによって開発された時間管理法です。 この方法では、タイマーを使用して作業を25分のインターバルに分割し、その後短い休憩を取ります。 各作業インターバルは、シリロが大学時代に使用していたトマト形のキッチンタイマーにちなんで「ポモドーロ」と呼ばれます。
ポモドーロテクニックの基本的なステップは以下の通りです。
タスクの定義: 作業を始める前に、完了する必要のあるタスクを決めます。
ポモドーロタイマーのセット: 作業時間として25分間のタイマーをセットします。
集中して作業する: この25分間は完全にタスクに集中し、あらゆる形の気を散らすものを避けます。
短い休憩を取る: 作業時間が終了したら、5分間の休憩を取ります。この間に、歩き回ったり、ストレッチをしたり、水を飲んだりしますが、仕事に関連する活動には従事しないようにします。
ポモドーロテクニックの利点には、集中力の向上、疲労の軽減、仕事と休憩時間の明確な区切りがあり、気を散らすものを管理するのに役立ちます。また、タスクの完了から得られる動機付けと満足感も増加します。さらに、ポモドーロテクニックは複雑なツールや技術を必要とせず、シンプルなタイマーがあれば十分です。
次に、25分ごとにブザーが鳴り、作業終了を知らせると同時に5分間の休憩を促すタイマーをプログラムしましょう。
Arduino IDEを開き、「ファイル」メニューから「新規スケッチ」を選択して、新しいプロジェクトを開始します。
スケッチを
Lesson24_Timer_Millis_Pomodoroとして保存するには、Ctrl + Sを押すか、「保存」をクリックします。void setup()の前にいくつかの定数と変数を定義します。
buzzerPinはブザーが接続されているピンを識別します。startMillisはタイマーが開始された時刻を記録します。workPeriodとbreakPeriodはそれぞれの期間がどれくらい続くかを定義します。isWorkPeriodは現在が作業時間か休憩時間かを追跡するために使用されるブール変数です。
const int buzzerPin = 9;          // Assigns the pin 9 to the constant for the buzzer
unsigned long startMillis;        // Stores the time when the timer starts
const long workPeriod = 1500000;  // Work period of 25 minutes
const long breakPeriod = 300000;  // Break period of 5 minutes
static bool isWorkPeriod = true;  // Track whether it is a work or break period
ブザーピンを出力として初期化し、
millis()で開始時刻を記録します。
void setup() {
  pinMode(buzzerPin, OUTPUT); // Initialize buzzer pin as an output
  startMillis = millis(); // Record the start time
}
void loop()内で、現在の時刻を格納するためにcurrentMillisというunsigned long型変数を作成します。
void loop() {
  unsigned long currentMillis = millis(); // Update the current time
}
if else if条件文を使用して、現在が作業時間かどうかを判断します。
void loop() {
  unsigned long currentMillis = millis(); // Update the current time

  if (isWorkPeriod){
  } else if (!isWorkPeriod){
  }
}
作業時間の場合、現在の時刻が
workPeriodを超えたかどうかを確認します。超えている場合は、タイマーをリセットし、休憩時間に切り替え、ブザーを長い時間で2回鳴らします。
void loop() {
  unsigned long currentMillis = millis();  // 現在の時刻を更新

  if (isWorkPeriod) {
    if (currentMillis - startMillis >= workPeriod) {
      startMillis = currentMillis;  // Reset the timer
      isWorkPeriod = false;         // Switch to break period
      digitalWrite(buzzerPin, HIGH);  // Turn buzzer on
      delay(500);                     // Buzzer on for 500 milliseconds
      digitalWrite(buzzerPin, LOW);   // Turn buzzer off
      delay(200);                     // Buzzer off for 200 milliseconds
      digitalWrite(buzzerPin, HIGH);  // Turn buzzer on
      delay(500);                     // Buzzer on for 500 milliseconds
      digitalWrite(buzzerPin, LOW);   // Turn buzzer off
      delay(200);                     // Buzzer off for 200 milliseconds
    }
  } else if (!isWorkPeriod) {
  }
}
else if条件文を使用して、現在が休憩時間かどうかを判断し、同様に現在の時刻がbreakPeriodを超えたかどうかを確認します。超えている場合は、タイマーをリセットし、作業時間に戻して、ブザーを短時間で2回鳴らします。
} else if (!isWorkPeriod) {
  if (currentMillis - startMillis >= breakPeriod) {
    startMillis = currentMillis;  // Reset the timer
    isWorkPeriod = true;          // Switch to work period
    digitalWrite(buzzerPin, HIGH);  // Turn buzzer on
    delay(200);                     // Buzzer on for 200 milliseconds
    digitalWrite(buzzerPin, LOW);   // Turn buzzer off
    delay(200);                     // Buzzer off for 200 milliseconds
    digitalWrite(buzzerPin, HIGH);  // Turn buzzer on
    delay(200);                     // Buzzer on for 200 milliseconds
    digitalWrite(buzzerPin, LOW);   // Turn buzzer off
    delay(200);                     // Buzzer off for 200 milliseconds
  }
}
完成したコードは次のようになります。これをArduino Uno R3にアップロードして、効果を確認してください。
注釈
デバッグ中に作業時間25分と休憩時間5分が長すぎると感じた場合は、
workPeriod を15000ミリ秒、 breakPeriod を3000ミリ秒に短縮することができます。
その場合、15秒ごとに長いブザーが2回鳴り、その後3秒後に短いブザーが2回鳴るのを聞くことができます。
const int buzzerPin = 9;          // Assigns the pin 9 to the constant for the buzzer
unsigned long startMillis;        // Stores the time when the timer starts
const long workPeriod = 1500000;  // Work period of 25 minutes
const long breakPeriod = 300000;  // Break period of 5 minutes
static bool isWorkPeriod = true;  // Track whether it is a work or break period

void setup() {
  pinMode(buzzerPin, OUTPUT); // Initialize buzzer pin as an output
  startMillis = millis(); // Record the start time
}

void loop() {
  unsigned long currentMillis = millis(); // Update the current time

  if (isWorkPeriod){
    if(currentMillis - startMillis >= workPeriod) {
      startMillis = currentMillis; // Reset the timer
      isWorkPeriod = false; // Switch to break period
      digitalWrite(buzzerPin, HIGH);  // Turn buzzer on
      delay(500);                     // Buzzer on for 500 milliseconds
      digitalWrite(buzzerPin, LOW);   // Turn buzzer off
      delay(200);                     // Buzzer off for 200 milliseconds
      digitalWrite(buzzerPin, HIGH);  // Turn buzzer on
      delay(500);                     // Buzzer on for 500 milliseconds
      digitalWrite(buzzerPin, LOW);   // Turn buzzer off
      delay(200);                     // Buzzer off for 200 milliseconds
    }
  } else if (!isWorkPeriod)
    if(currentMillis - startMillis >= breakPeriod) {
      startMillis = currentMillis; // Reset the timer
      isWorkPeriod = true; // Switch to work period
      digitalWrite(buzzerPin, HIGH);  // Turn buzzer on
      delay(200);                     // Buzzer on for 200 milliseconds
      digitalWrite(buzzerPin, LOW);   // Turn buzzer off
      delay(200);                     // Buzzer off for 200 milliseconds
      digitalWrite(buzzerPin, HIGH);  // Turn buzzer on
      delay(200);                     // Buzzer on for 200 milliseconds
      digitalWrite(buzzerPin, LOW);   // Turn buzzer off
      delay(200);                     // Buzzer off for 200 milliseconds
    }
  }
}
最後に、コードを保存して作業スペースを整理することを忘れないでください。
質問
あなたの生活の中で「時間を聞く」ことができる他の場面を考えてみてください。いくつかの例を挙げて、それを手帳に書き留めてください!
まとめ
今日の授業では、構造化された作業と休憩時間を通じて生産性を向上させるための貴重なツールであるポモドーロタイマーの電子版を無事に作成しました。このプロジェクトを通じて、学生は時間管理におけるブザーの役割と、 millis() 関数を用いてArduinoでブロックしないタイマーコードを作成する実際の応用について学びました。このアプローチにより、マイクロコントローラアプリケーションでのマルチタスクが可能となり、技術や産業におけるより複雑なシステムを反映するものとなります。