Note
Hello, welcome to the SunFounder Raspberry Pi & Arduino & ESP32 Enthusiasts Community on Facebook! Dive deeper into Raspberry Pi, Arduino, and ESP32 with fellow enthusiasts.
Why Join?
Expert Support: Solve post-sale issues and technical challenges with help from our community and team.
Learn & Share: Exchange tips and tutorials to enhance your skills.
Exclusive Previews: Get early access to new product announcements and sneak peeks.
Special Discounts: Enjoy exclusive discounts on our newest products.
Festive Promotions and Giveaways: Take part in giveaways and holiday promotions.
👉 Ready to explore and create with us? Click [here] and join today!
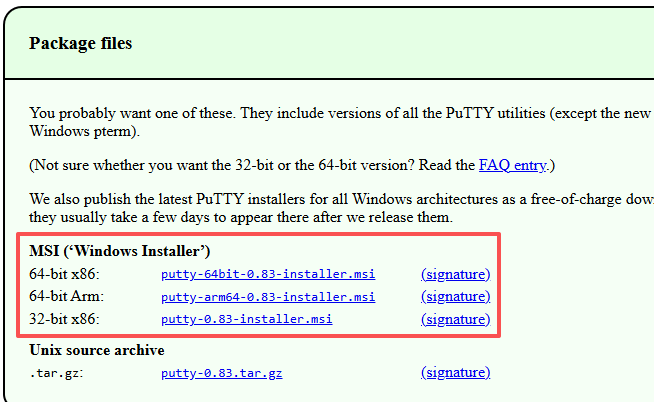
PuTTY
PuTTY is a simple and reliable SSH client for Windows users to remotely access the Raspberry Pi.
Download PuTTY from PuTTY and install it on your computer.
Open PuTTY and prepare the connection:
Enter your Raspberry Pi’s hostname or IP address in Host Name.
Set the Port to
22.Click Open to connect.
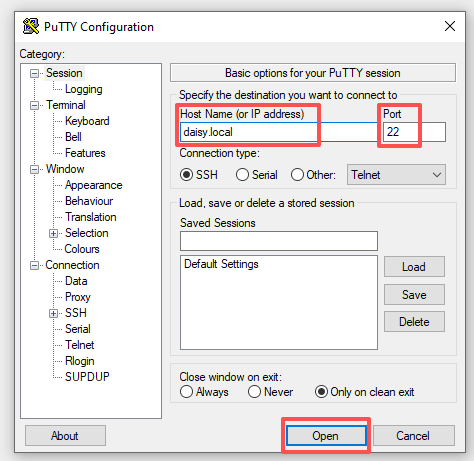
If a security warning appears on first use, click Accept to continue.

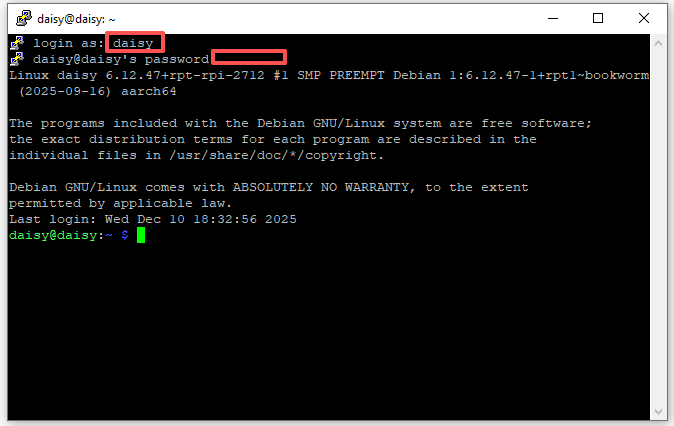
Log in to the Raspberry Pi:
When you see login as:, enter the username you set in Raspberry Pi Imager.
Enter your password (it will not appear while typing—this is normal).
After logging in, the terminal is ready for you to enter commands and operate your Raspberry Pi remotely.
Note
If PuTTY shows inactive, the connection was lost and needs to be reconnected.