Calibrate the MPU9250
The InvenSense MPU9250 is a System in Package (SiP) that combines two chips: the MPU-6500 three-axis Accelerometer and three-axis Gyroscope; and the AK8963 three-axis Magnetometer.
Before using the MPU9250 chip, we need to calibrate different chips.
TIPS
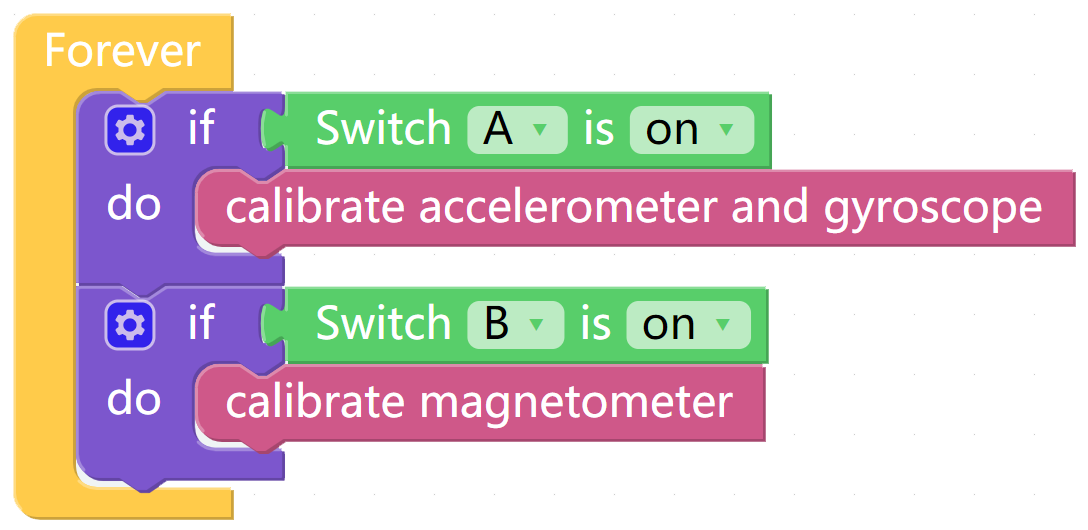
Here we drag a Switch from the Bluetooth Control page to start the Mpu9250 calibration.

The block reads the status of the Switch.

This block is used to calibrate Gyroscope and Accelerometer.

Use the following block to calibrate the Magnetometer.

EXAMPLE
Calibrate Accelerometer and Gyroscope
After running the code, place the X Sense HAT horizontally, turn the A switch on and turn it off after 2 seconds, then the calibration is complete.
The X Sense HAT records the current horizontal position as a 0 degree point on the different axes of the Accelerometer and Gyroscope.
Once calibration is complete, press the Joystick on the X Sense HAT to confirm.
Calibrate Magnetometer
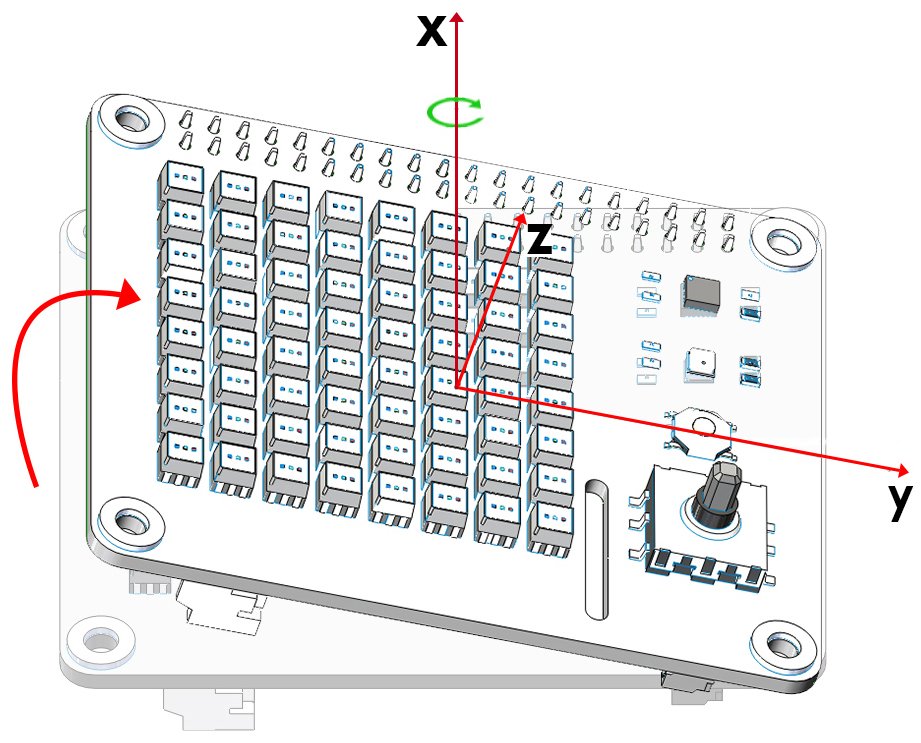
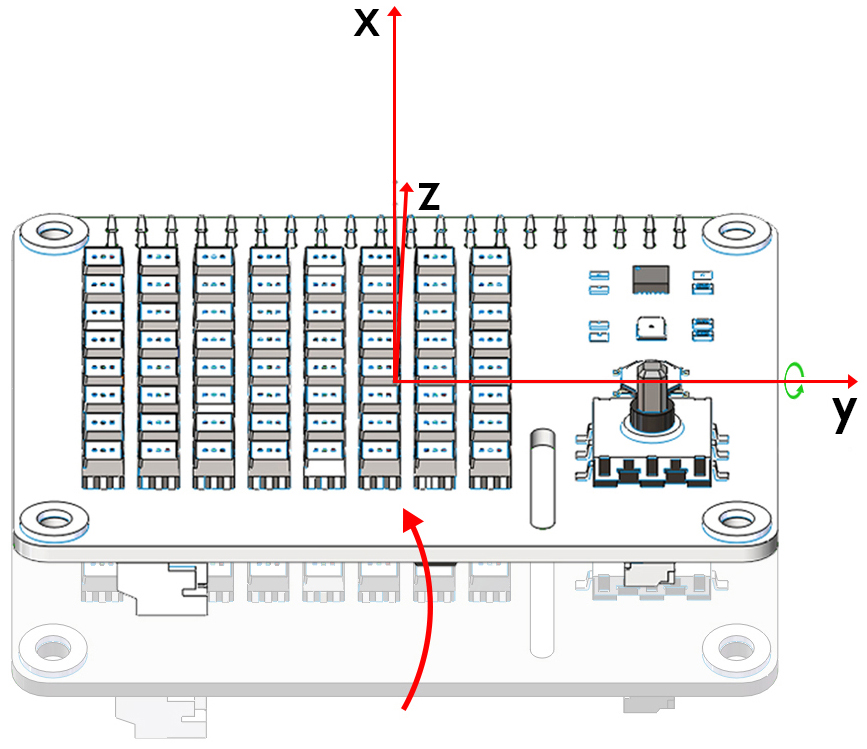
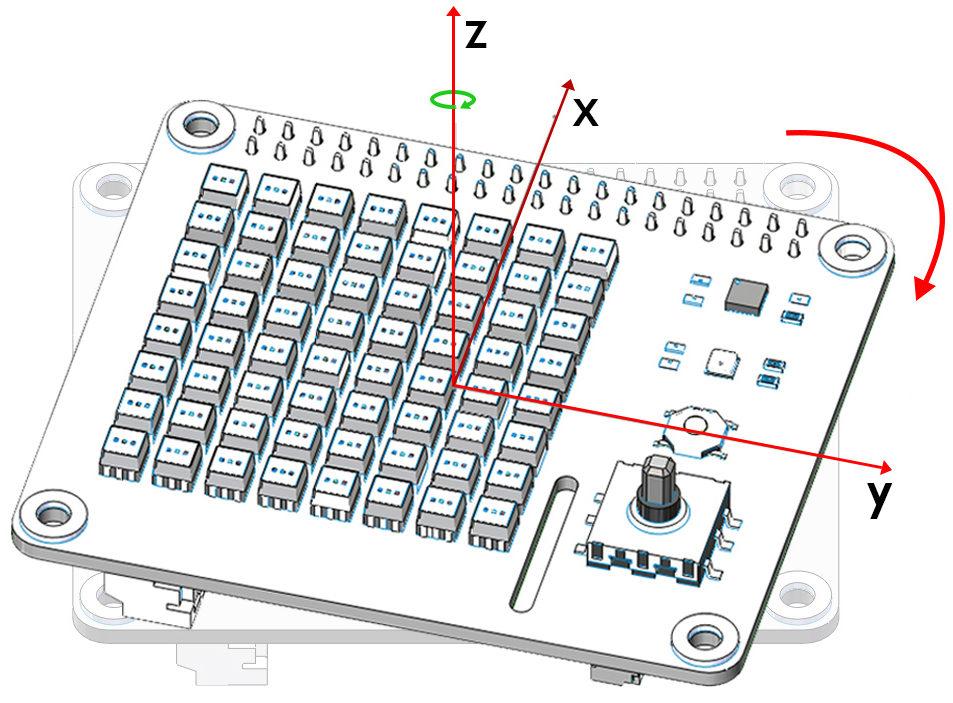
The figure below is the coordinate system that will be used to calibrate the magnetometer.

Turn the B switch on(keep switch A off), rotate the X Sense HAT clockwise around the y-axis by 720° and then rotate it back (also 720°), please control the speed so that the process takes about 15s.
Similarly, rotate the X Sense HAT clockwise around the x-axis by 720° and then rotate it back (also 720°), please control the speed so that the process takes about 15s.
Finally, rotate the X Sense HAT clockwise around the z-axis by 720° and then rotate it back (also 720°), please control the speed so that the process takes about 15s.
Turn off switch B to complete the calibration.
Once calibration is complete, press the Joystick on the X Sense HAT to confirm.