Note
Hello, welcome to the SunFounder Raspberry Pi & Arduino & ESP32 Enthusiasts Community on Facebook! Dive deeper into Raspberry Pi, Arduino, and ESP32 with fellow enthusiasts.
Why Join?
Expert Support: Solve post-sale issues and technical challenges with help from our community and team.
Learn & Share: Exchange tips and tutorials to enhance your skills.
Exclusive Previews: Get early access to new product announcements and sneak peeks.
Special Discounts: Enjoy exclusive discounts on our newest products.
Festive Promotions and Giveaways: Take part in giveaways and holiday promotions.
👉 Ready to explore and create with us? Click [here] and join today!
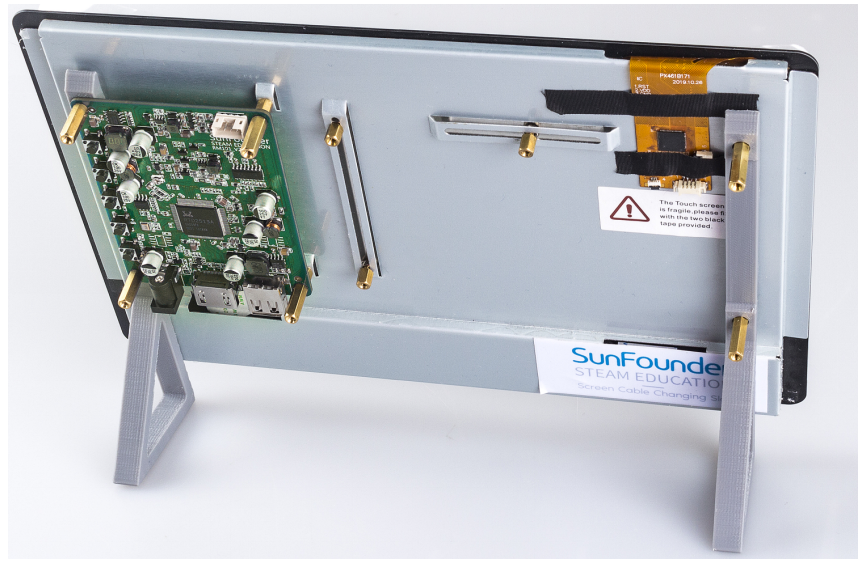
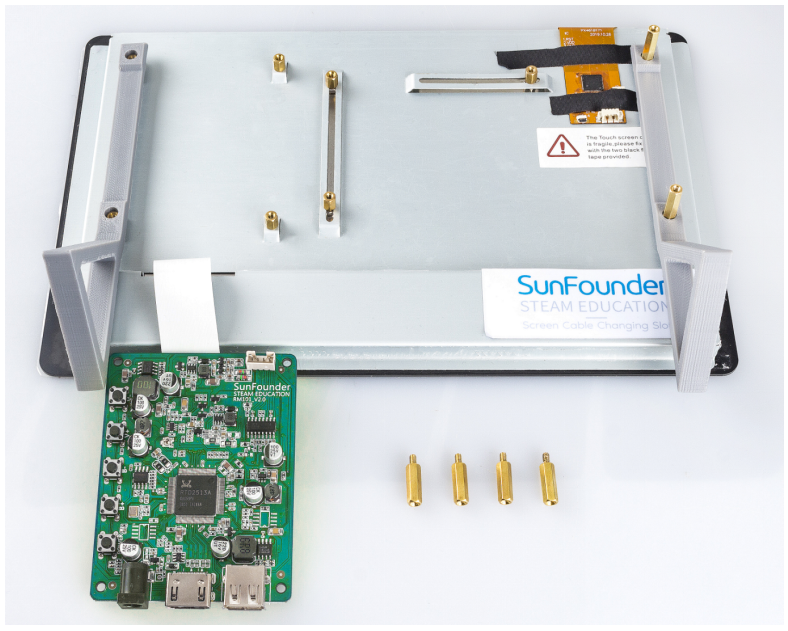
3D-PRINTED SUPPORT
If you need to place the touch screen more conveniently, you can use a 3D printer to print a support.
The 3D printer file: Stand
Installation process are shown as follow.
Step 1
Get ready for 3D printing.

Step 2
Remove the touch screen main board and let the standoff thread the holes of holders.
Step 3
Assemble the extension board again, now you can get a stand-up touch screen.