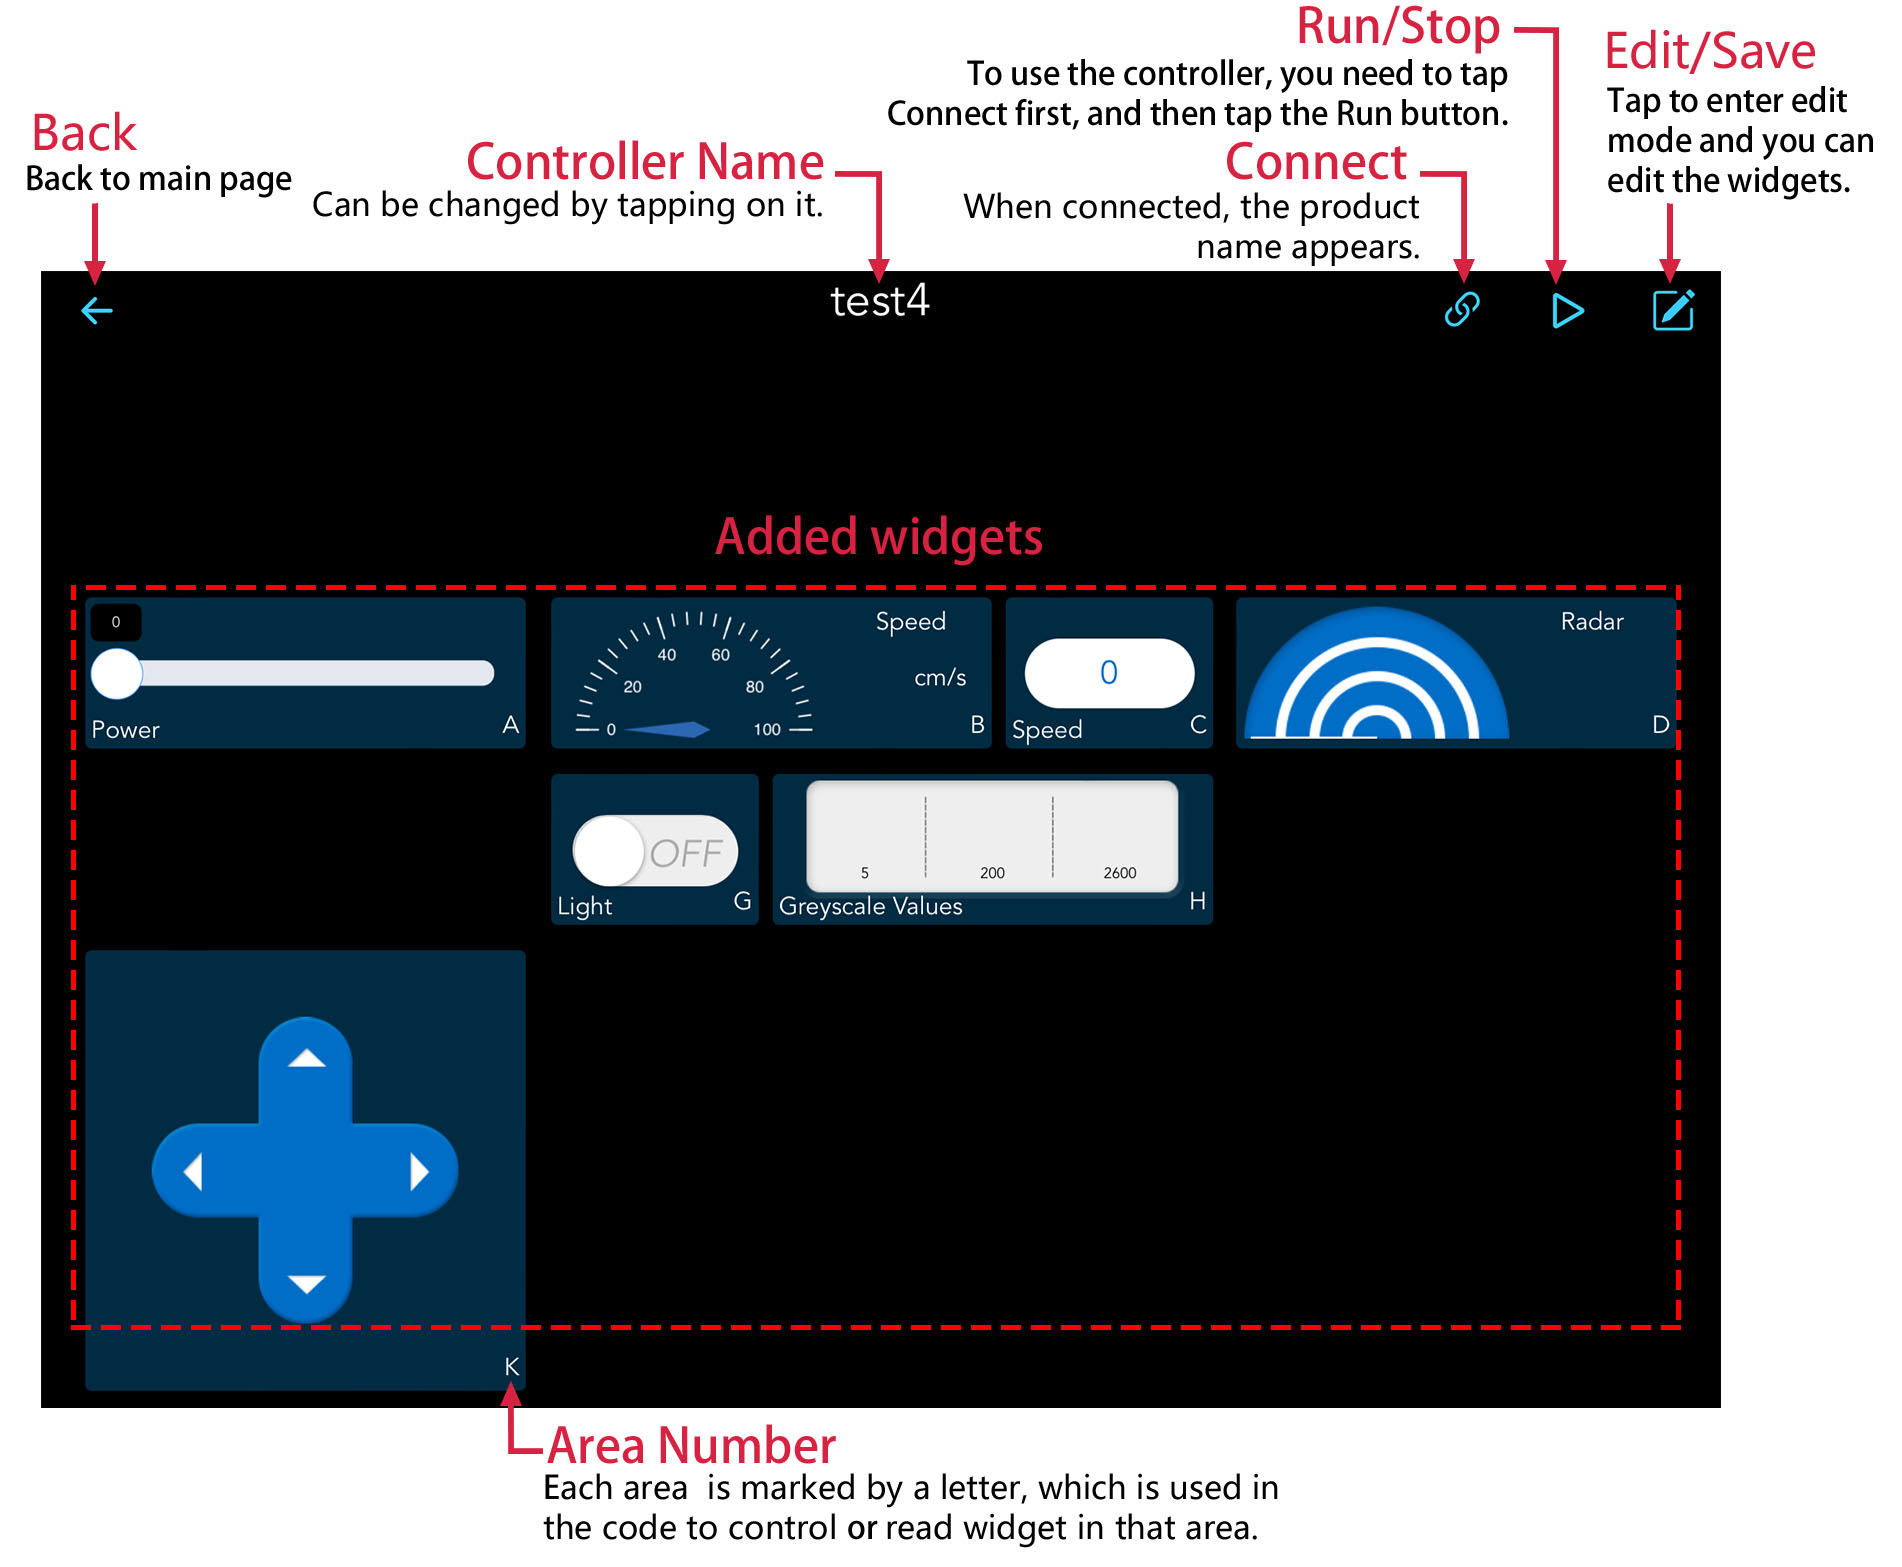
Controller Page
Controller Name
Tap the
 button in the upper right corner of the controller page to enter edit mode.
Change the name of the controller at the location shown.
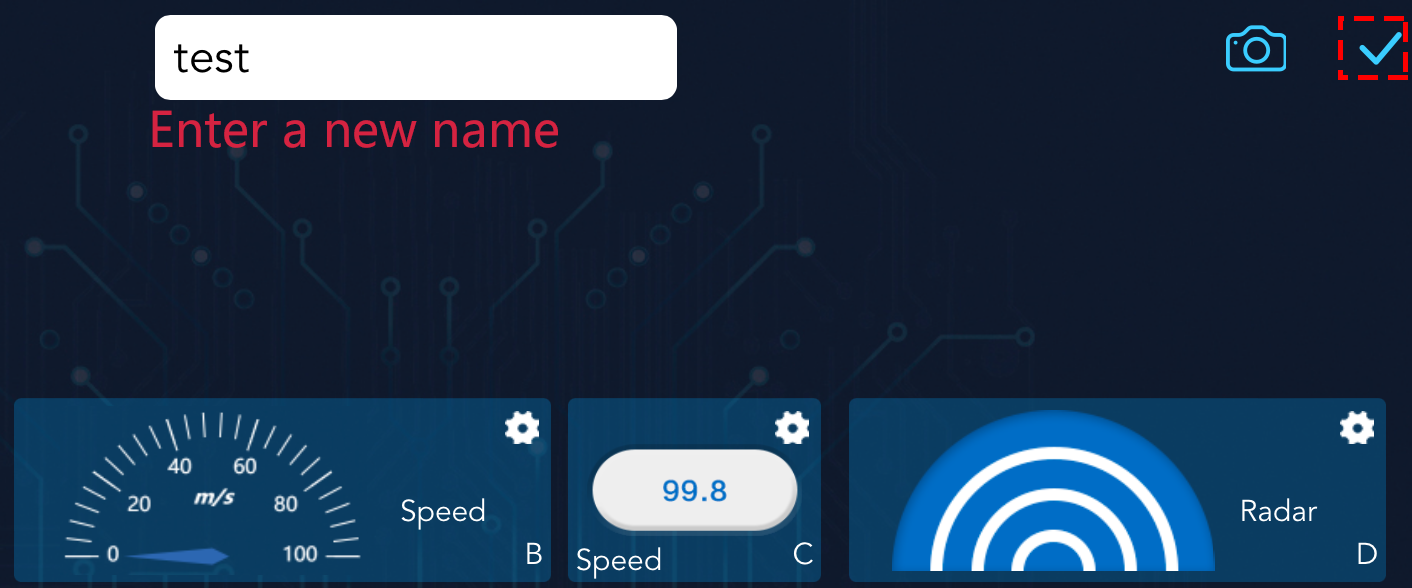
Tap the
 button to save the changes.
Connect
Note
This  button is available on both the home page and the controller page, and its function and usage are the same.
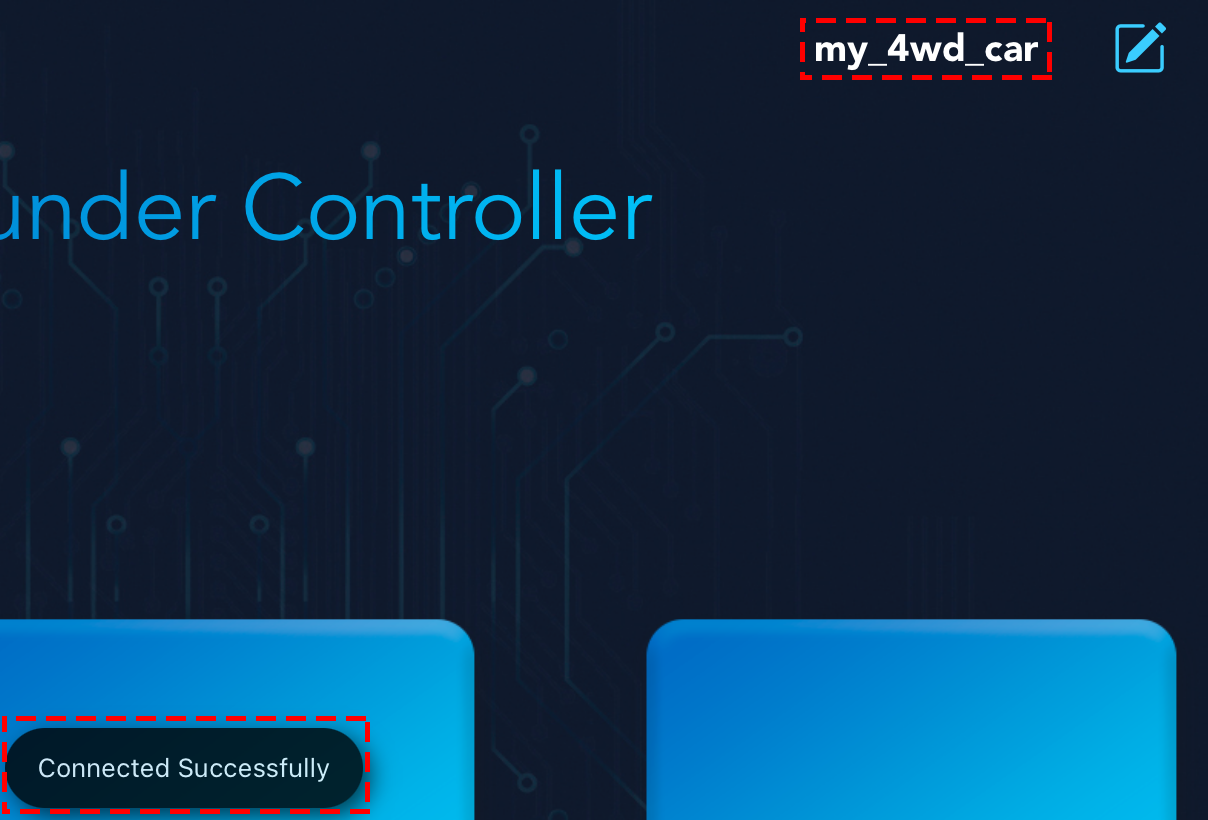
When you tap on the
icon, if your product has run the code, the product name + IP will appear and you need to tap this to connect.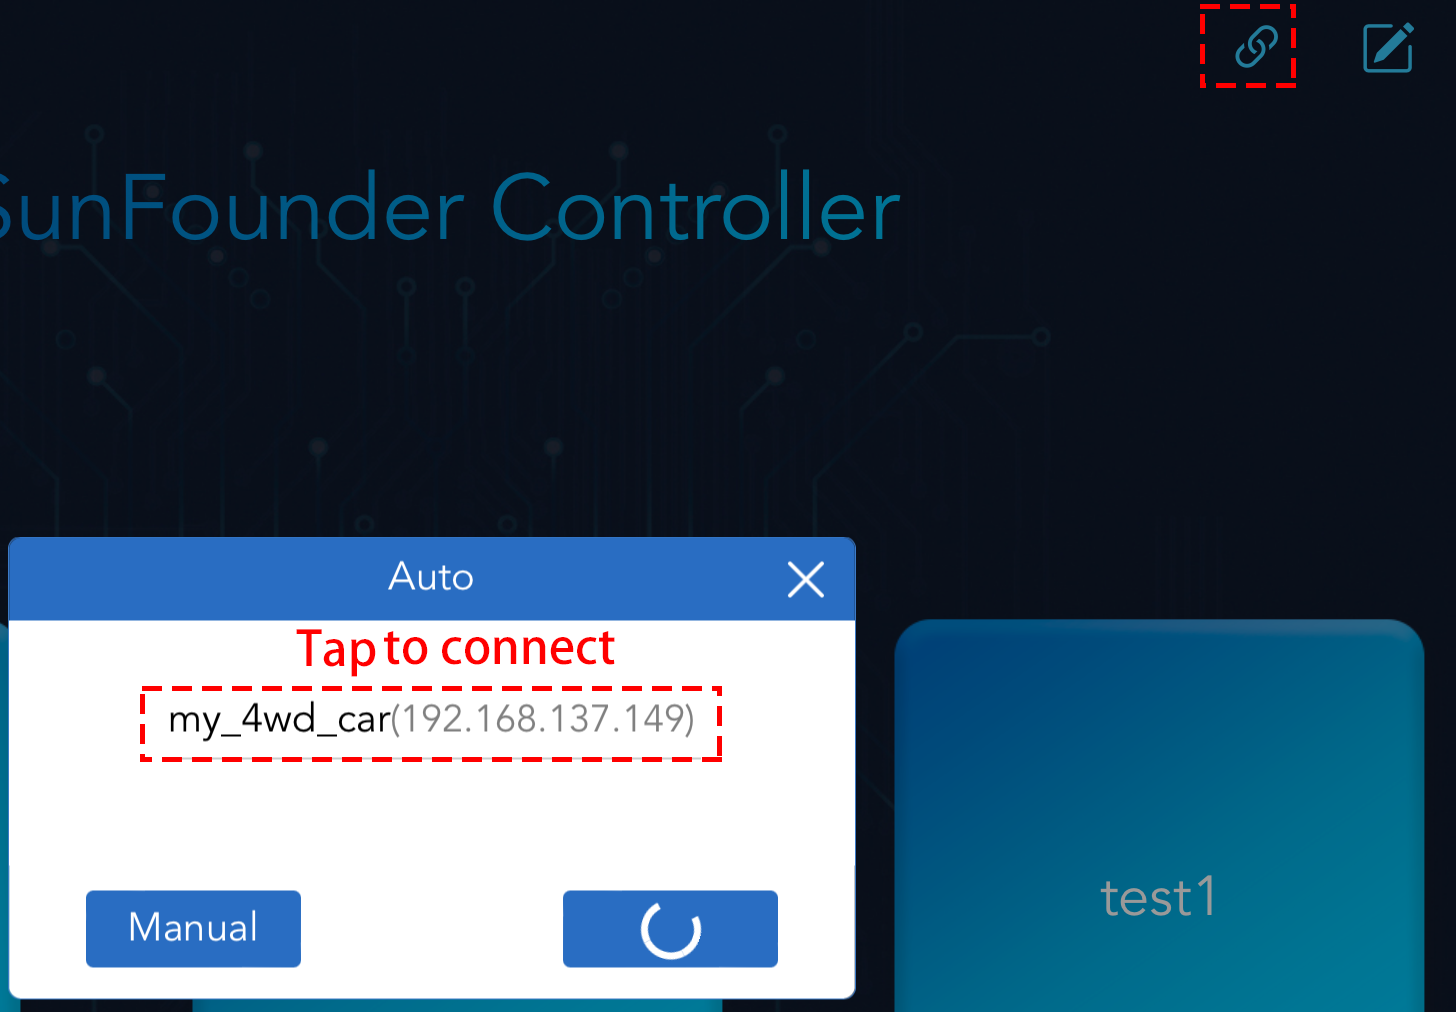
If the “Connected successfully” prompt appears, the product name will appear in the upper right corner.
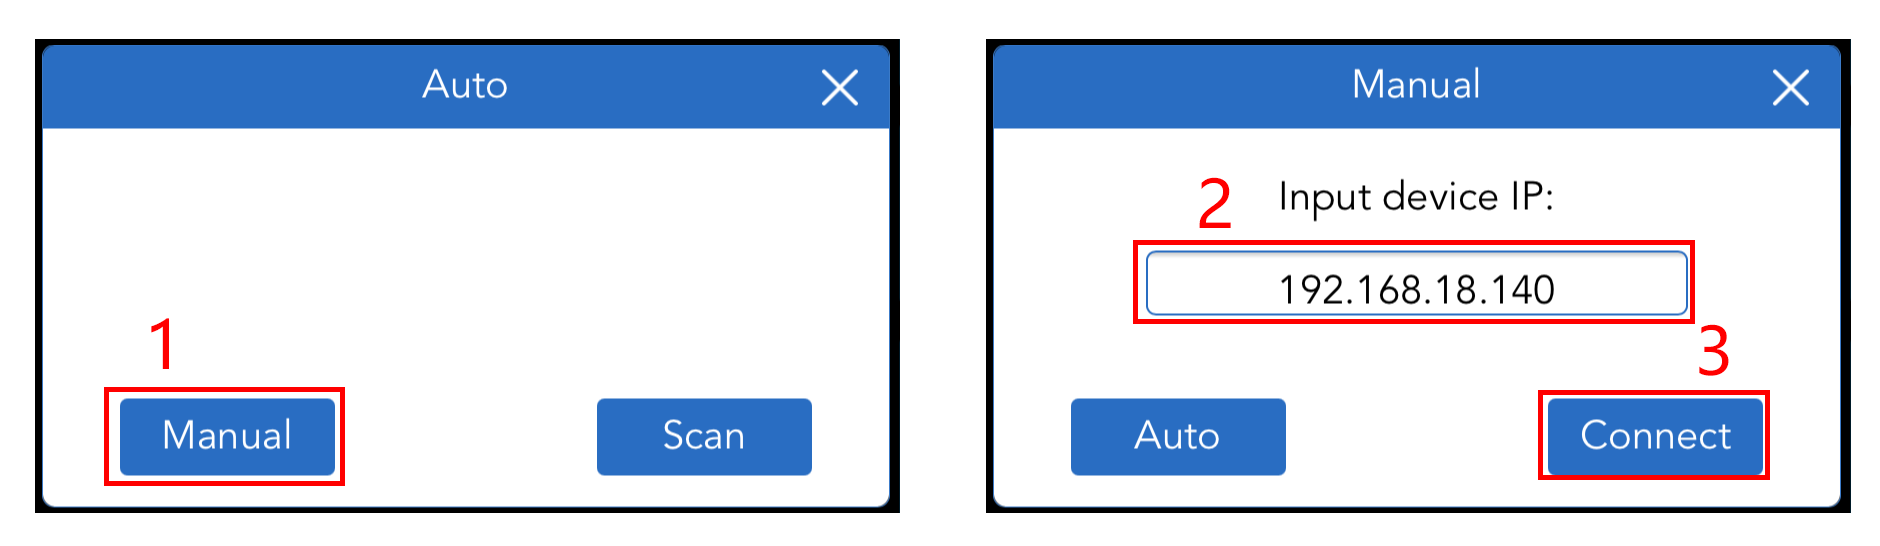
If it doesn’t search automatically, you can also manually enter the IP to connect.
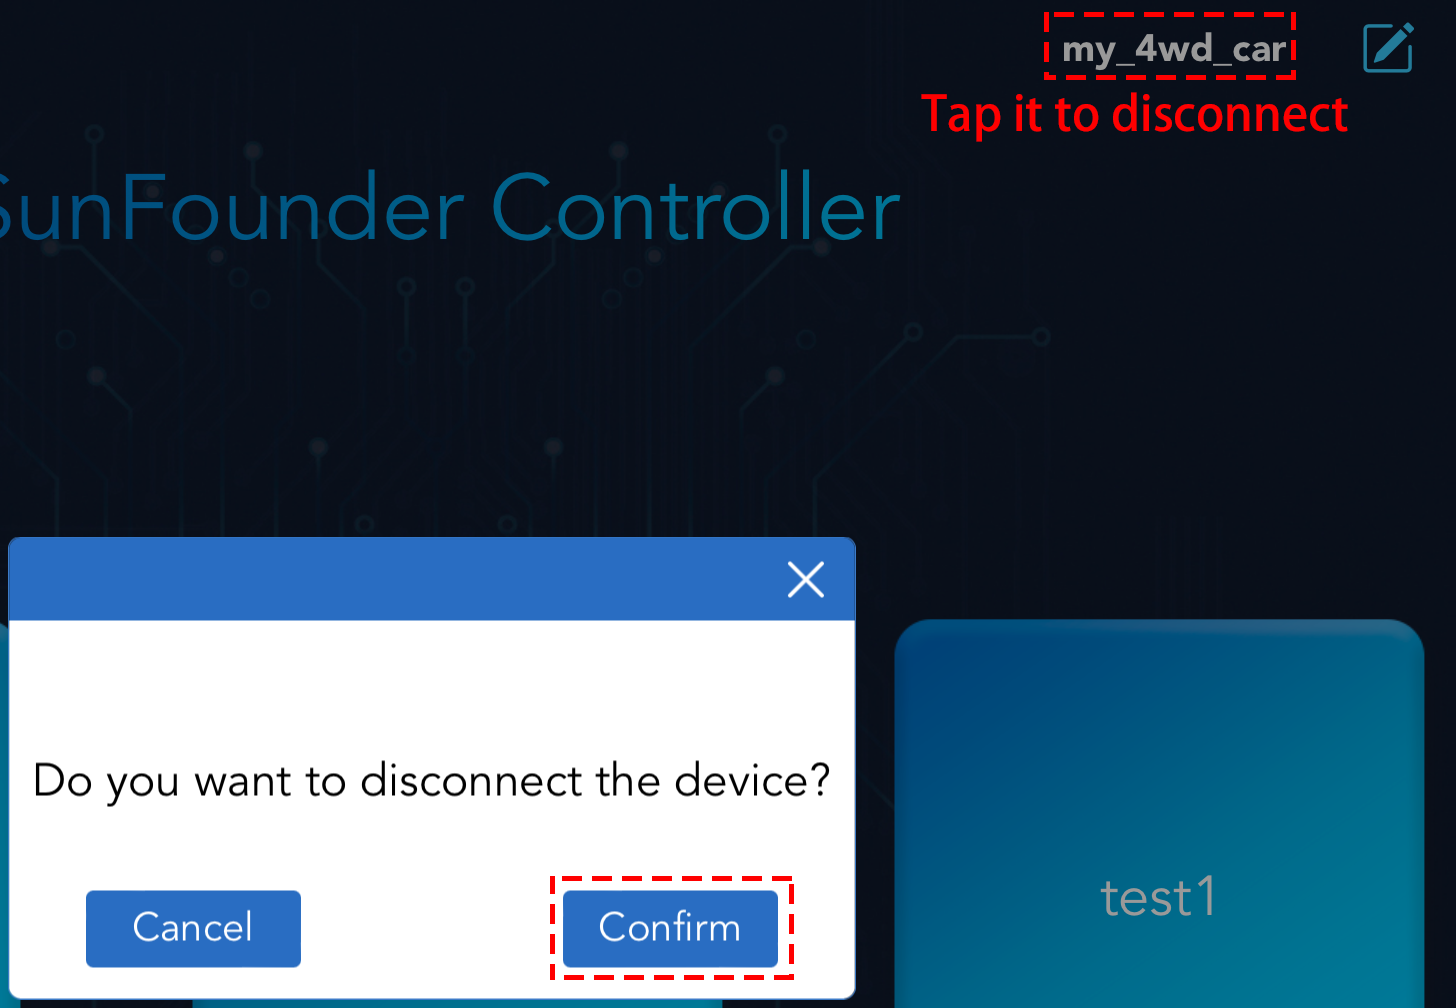
You can disconnect from this product by tapping on the product name and choosing Confirm in the pop-up window.
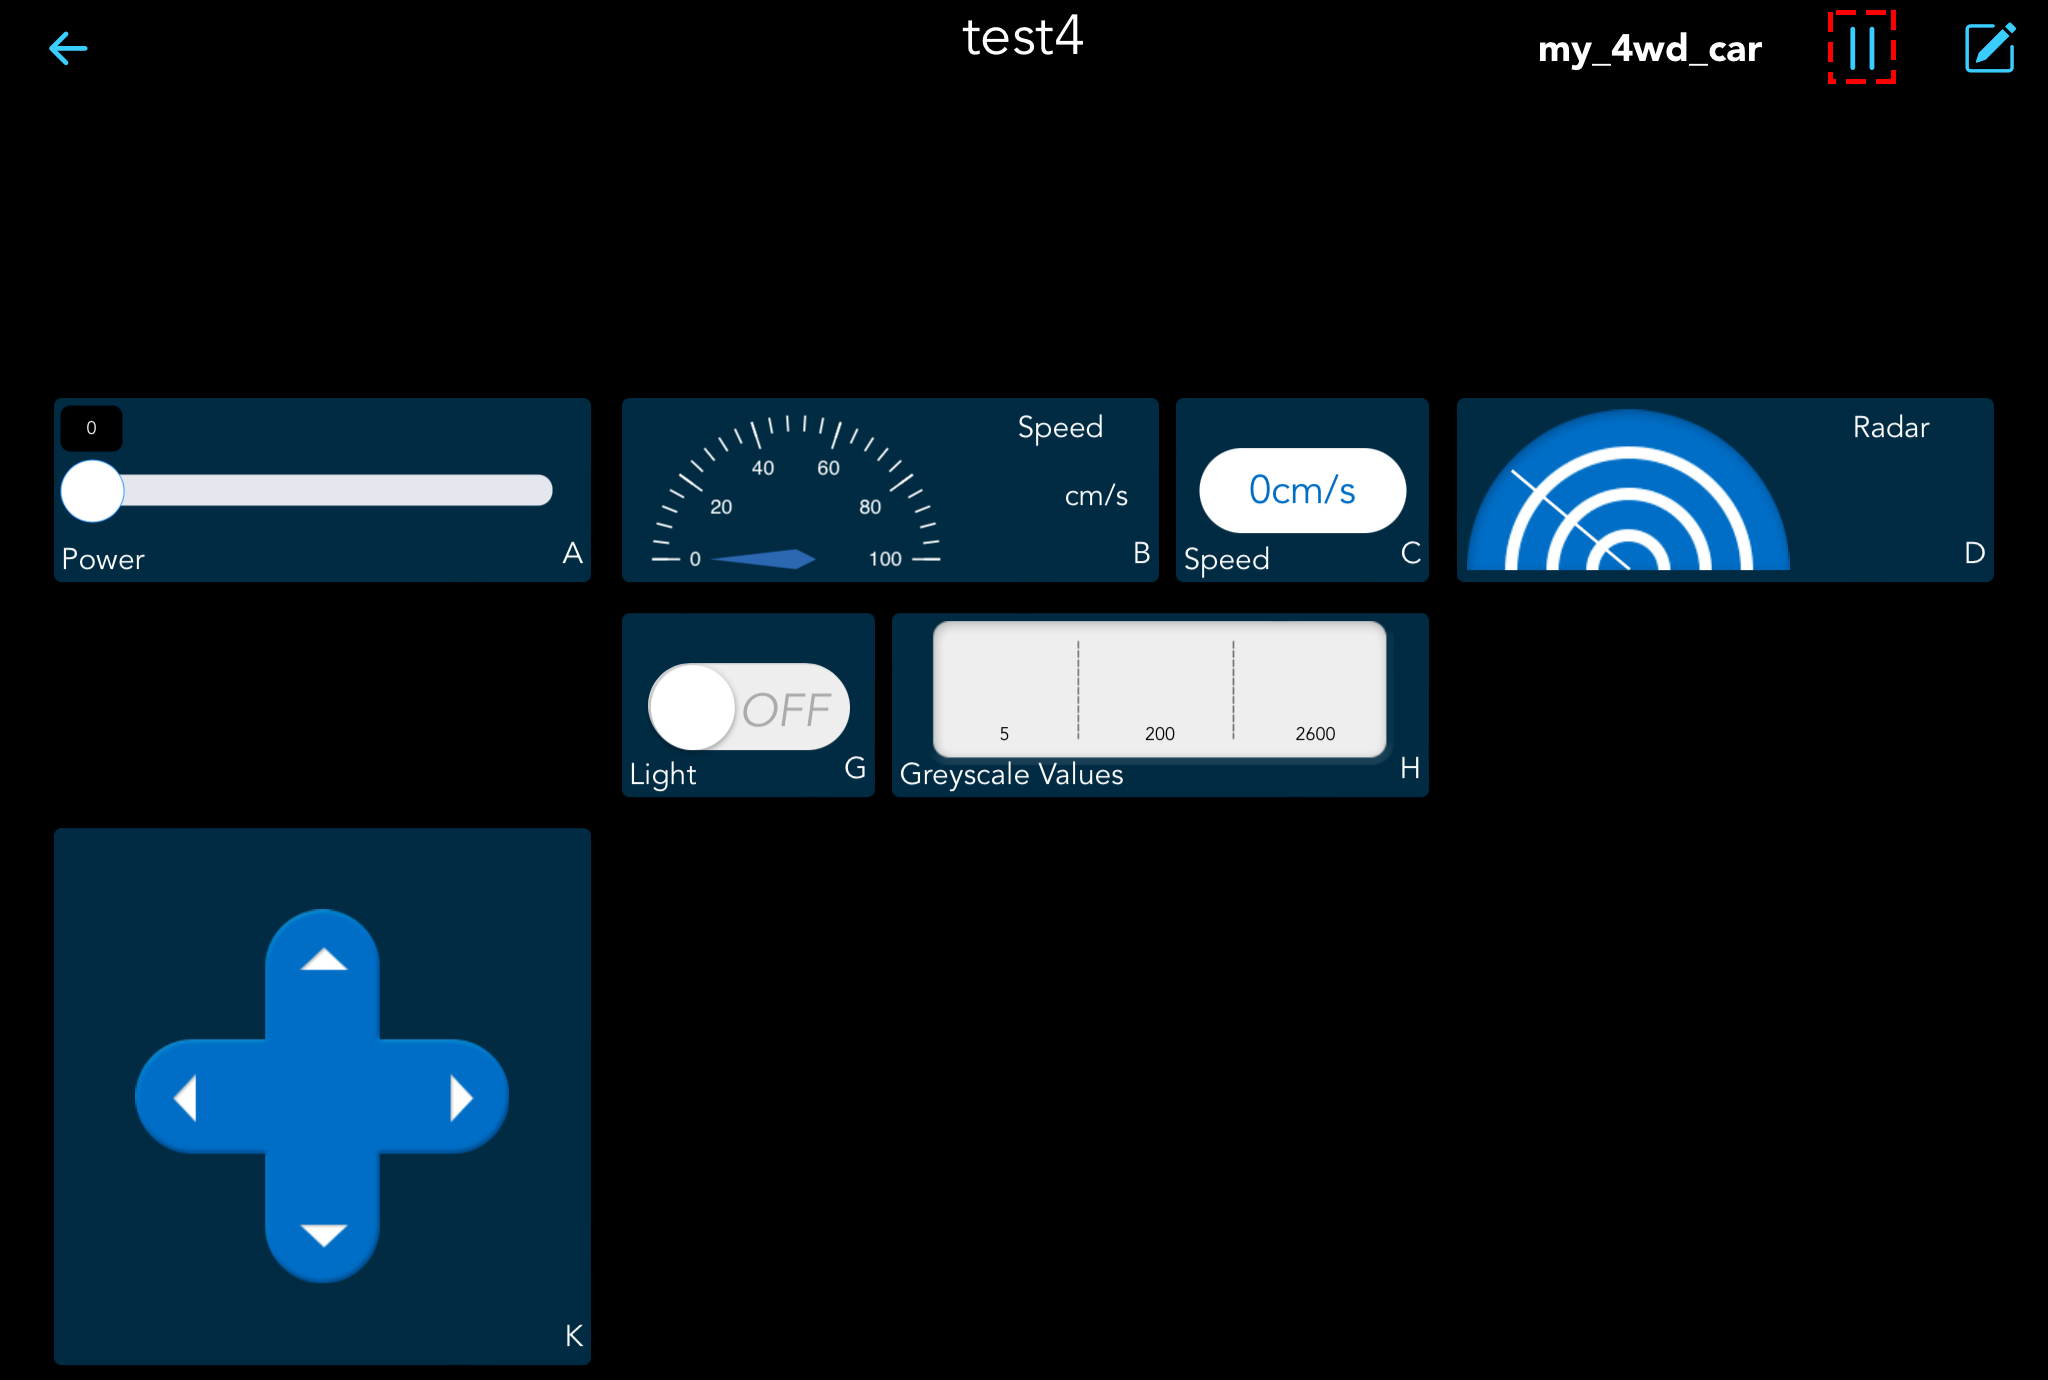
Run/Stop
If you have successfully connected your product, tap the  button to turn on the controller, then you can use it to control your product.
Edit/Save
Note
This button is available on both the home page and the controller page, but the functions are not the same.
On the home page, after tapping it, you can delete the existing controller.
In the controller page, you can edit each widget after tapping it.
Tap the
icon to enter the editing mode.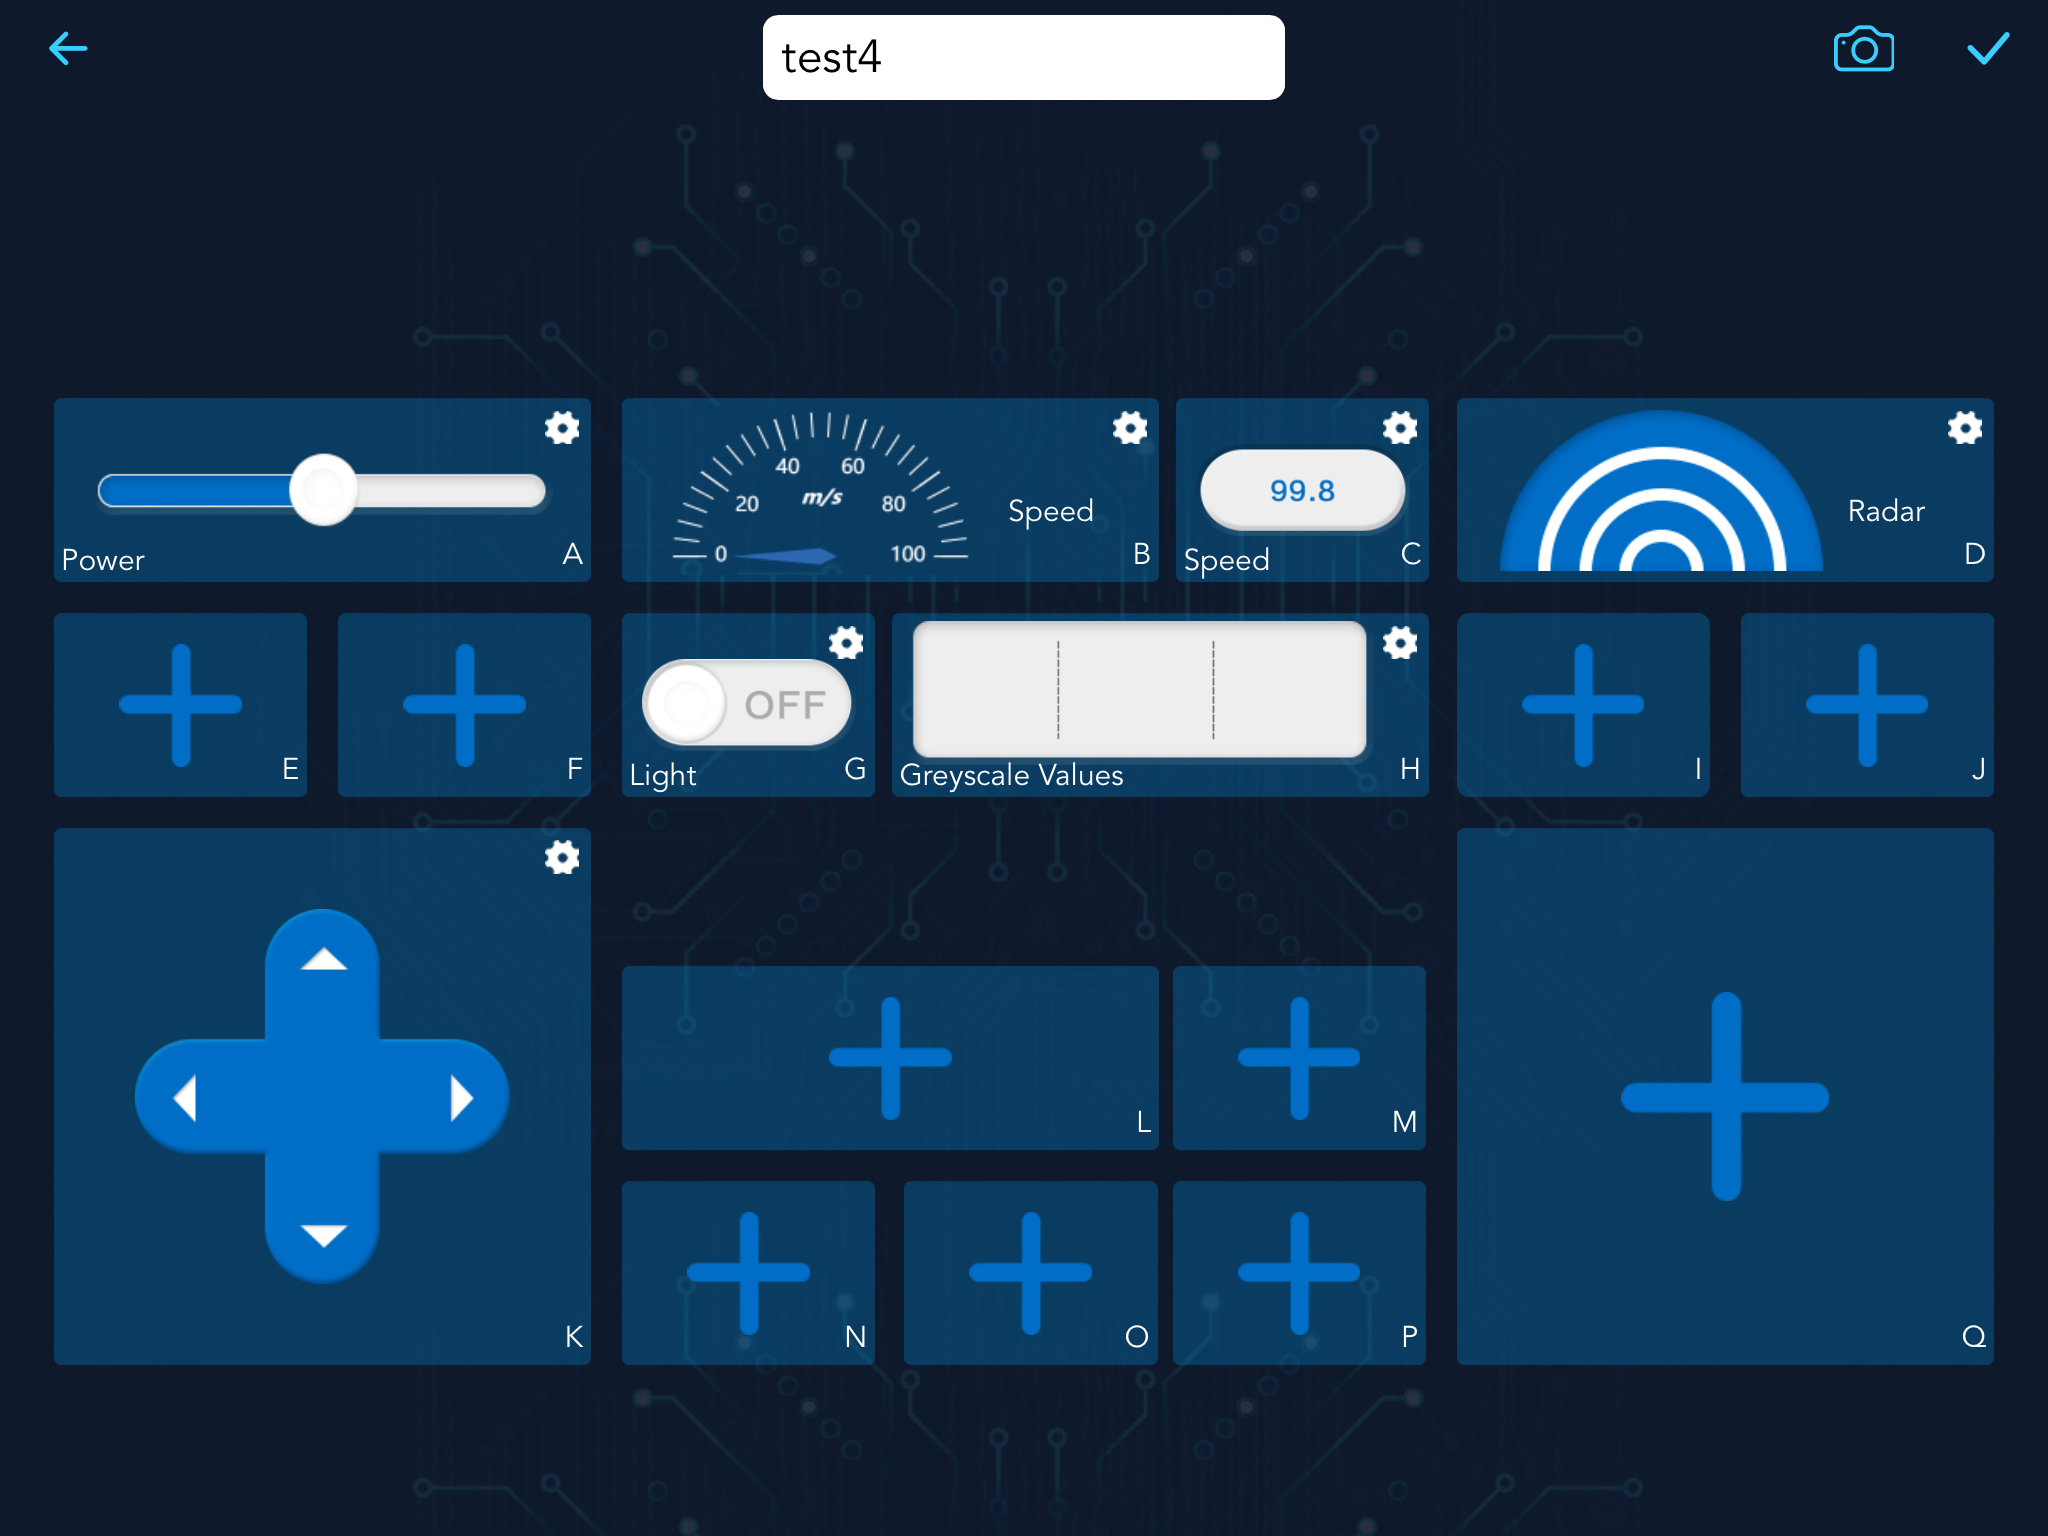
At this point you can do the following with the controller, and when you’re done tap the
button to save the changes.
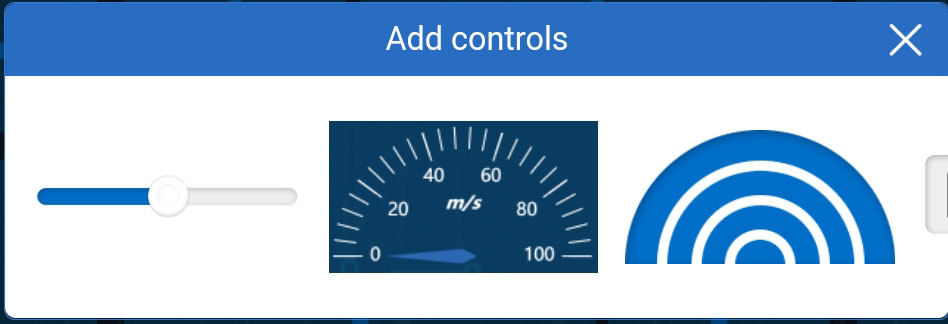
Add/Replace Widgets
Tap the
button in the upper right corner of the controller page to enter edit mode.Tap the plus sign in any area or the widget already added, and select the widget you need in the pop-up widget list.
Note
Each controller has A~Q, 17 areas, there are 3 different shapes of areas and different widgets for each shape, refer to: Widgets List for details.
Additional widgets can be selected by swiping left and right.
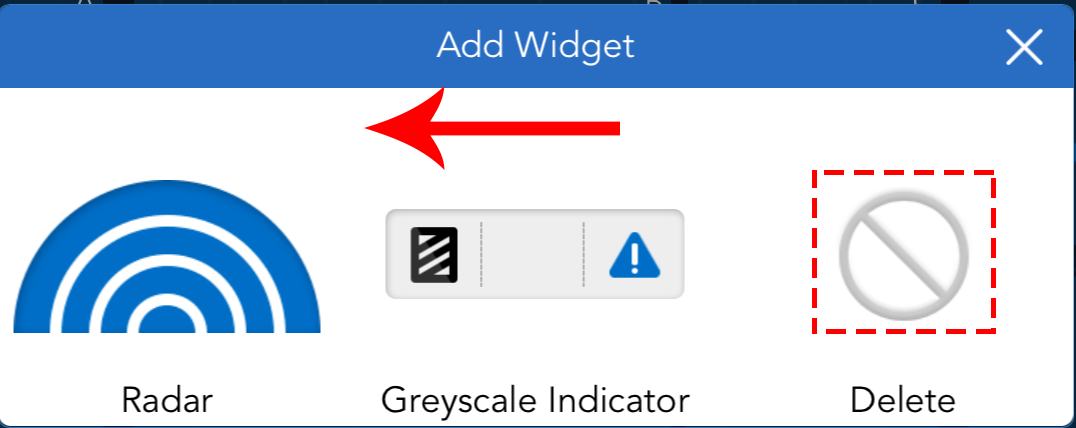
Delete Widgets
Tap the
button in the upper right corner of the controller page to enter editing mode.Tap the widget you need to delete, swipe left in the pop-up window to the end, and tap the Delete button.
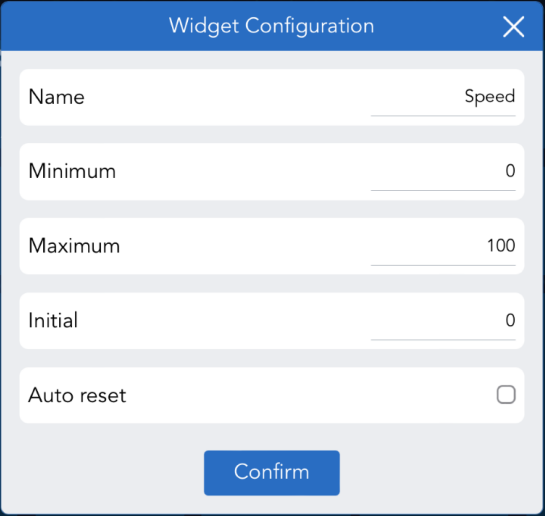
Edit Widgets
Tap the
button in the upper right corner of the controller page to enter editing mode.You will see the
 icon in the top right corner of each widget, use this icon to set the name, value range, initial value and units for the widget.
Note
Different widgets need different settings, please refer to: Widgets List.