Note
Bonjour et bienvenue dans la Communauté Facebook des passionnés de Raspberry Pi, Arduino et ESP32 de SunFounder ! Plongez plus profondément dans l’univers des Raspberry Pi, Arduino et ESP32 avec d’autres passionnés.
Pourquoi rejoindre ?
Support d’experts : Résolvez les problèmes après-vente et les défis techniques avec l’aide de notre communauté et de notre équipe.
Apprendre et partager : Échangez des astuces et des tutoriels pour améliorer vos compétences.
Aperçus exclusifs : Accédez en avant-première aux annonces de nouveaux produits et aux aperçus.
Réductions spéciales : Profitez de réductions exclusives sur nos produits les plus récents.
Promotions festives et cadeaux : Participez à des cadeaux et des promotions de vacances.
👉 Prêt à explorer et à créer avec nous ? Cliquez [Ici] et rejoignez-nous aujourd’hui !
1.1.5 Afficheur 7 segments à 4 chiffres
Introduction
Ensuite, suivez-moi pour essayer de contrôler l’afficheur 7 segments à 4 chiffres.
Composants requis
Dans ce projet, nous avons besoin des composants suivants.
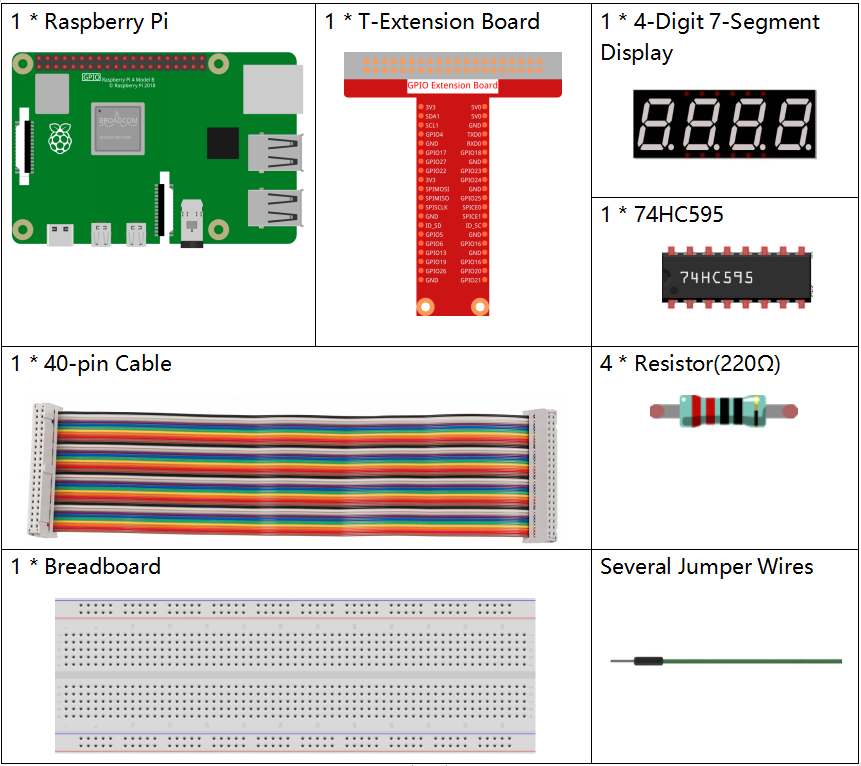
Il est très pratique d’acheter un kit complet, voici le lien :
Nom |
ARTICLES DANS CE KIT |
LIEN |
|---|---|---|
Kit Raphael |
337 |
Vous pouvez également les acheter séparément à partir des liens ci-dessous.
INTRODUCTION DES COMPOSANTS |
LIEN D’ACHAT |
|---|---|
- |
|
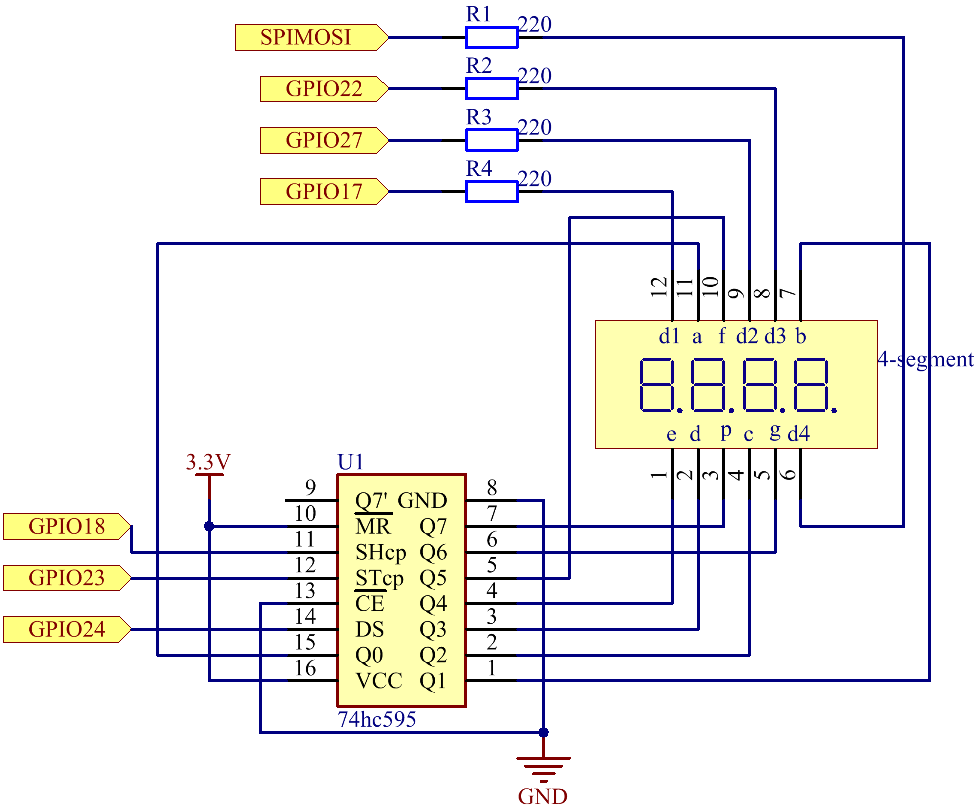
Schéma de câblage
Nom T-Board |
physique |
wiringPi |
BCM |
GPIO17 |
Pin 11 |
0 |
17 |
GPIO27 |
Pin 13 |
2 |
27 |
GPIO22 |
Pin 15 |
3 |
22 |
SPIMOSI |
Pin 19 |
12 |
10 |
GPIO18 |
Pin 12 |
1 |
18 |
GPIO23 |
Pin 16 |
4 |
23 |
GPIO24 |
Pin 18 |
5 |
24 |
Procédures expérimentales
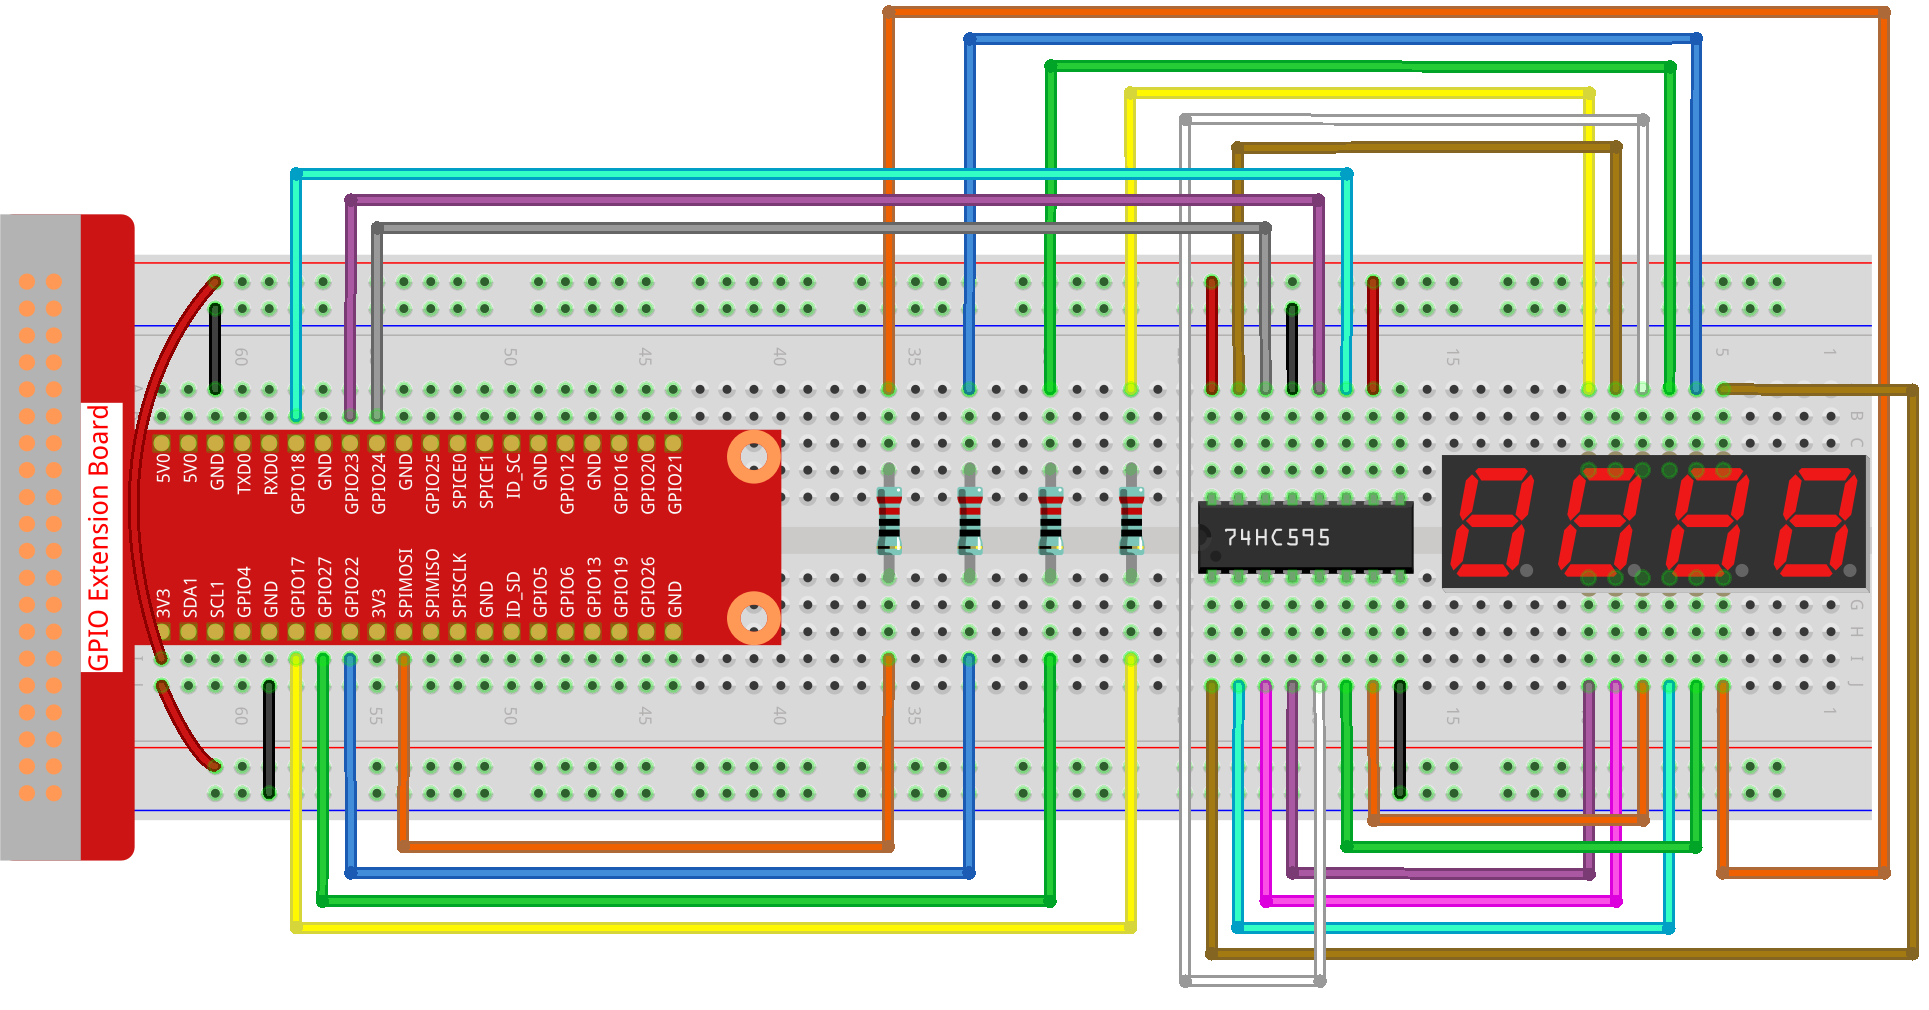
Étape 1 : Construisez le circuit.
Étape 2 : Allez dans le dossier du code.
cd ~/raphael-kit/python-pi5
Étape 3 : Exécutez le fichier exécutable.
sudo python3 1.1.5_4-Digit_zero.py
Après l’exécution du code, le programme effectue un comptage, augmentant de 1 par seconde, et l’afficheur à 4 chiffres affiche le comptage.
Avertissement
Si vous recevez le message d’erreur RuntimeError: Cannot determine SOC peripheral base address, veuillez consulter Si « gpiozero » ne fonctionne pas.
Code
Note
Vous pouvez Modifier/Réinitialiser/Copier/Exécuter/Arrêter le code ci-dessous. Mais avant cela, vous devez aller dans le chemin source du code comme raphael-kit/python-pi5. Après avoir modifié le code, vous pouvez l’exécuter directement pour voir l’effet.
#!/usr/bin/env python3
from gpiozero import OutputDevice
import time
import threading

# Define GPIO pins for the 74HC595 shift register
SDI = OutputDevice(24)   # Serial Data Input
RCLK = OutputDevice(23)  # Register Clock
SRCLK = OutputDevice(18) # Shift Register Clock

# Define GPIO pins for digit selection on the 7-segment display
placePin = [OutputDevice(pin) for pin in (10, 22, 27, 17)]

# Define segment codes for numbers 0-9 for the 7-segment display
number = (0xc0, 0xf9, 0xa4, 0xb0, 0x99, 0x92, 0x82, 0xf8, 0x80, 0x90)

counter = 0  # Initialize counter for display
timer1 = 0   # Initialize timer for counter increment

def clearDisplay():
    """ Clear the 7-segment display. """
    for _ in range(8):
        SDI.on()
        SRCLK.on()
        SRCLK.off()
    RCLK.on()
    RCLK.off()

def hc595_shift(data):
    """ Shift a byte of data to the 74HC595 shift register. """
    for i in range(8):
        SDI.value = 0x80 & (data << i)  # Set SDI high/low based on data bit
        SRCLK.on()  # Pulse the Shift Register Clock
        SRCLK.off()
    RCLK.on()  # Latch data on the output by pulsing Register Clock
    RCLK.off()

def pickDigit(digit):
    """ Select a digit for display on the 7-segment display. """
    for pin in placePin:
        pin.off()  # Turn off all digit selection pins
    placePin[digit].on()  # Turn on the selected digit

def timer():
    """ Timer function to increment the counter every second. """
    global counter, timer1
    timer1 = threading.Timer(1.0, timer)  # Reset timer for next increment
    timer1.start()
    counter += 1  # Increment counter
    print("%d" % counter)  # Print current counter value

def setup():
    """ Setup initial state and start the timer. """
    global timer1
    timer1 = threading.Timer(1.0, timer)  # Initialize and start the timer
    timer1.start()

def loop():
    """ Main loop to update the 7-segment display with counter value. """
    global counter
    while True:
        for i in range(4):  # Loop through each digit
            clearDisplay()  # Clear display before setting new digit
            pickDigit(i)    # Select digit for display

            # Choose the digit of counter to display
            digit = (counter // (10 ** i)) % 10

            hc595_shift(number[digit])  # Shift digit value to 74HC595
            time.sleep(0.001)  # Short delay for display stability

def destroy():
    """ Cleanup GPIO resources and stop timer on exit. """
    global timer1
    timer1.cancel()  # Stop the timer
    for device in [SDI, RCLK, SRCLK] + placePin:
        device.close()  # Close GPIO devices

try:
    setup()  # Initialize the setup
    while True:
        loop()  # Start the main loop

except KeyboardInterrupt:
    # Handle script interruption (e.g., Ctrl+C)
    destroy()  # Cleanup resources on exit
Explication du Code
Ces quatre broches contrôlent les broches de l’anode commune des afficheurs 7 segments à quatre chiffres.
# Define GPIO pins for digit selection on the 7-segment display
placePin = [OutputDevice(pin) for pin in (10, 22, 27, 17)]
Un tableau de codes de segments de 0 à 9 en hexadécimal (anode commune).
# Define segment codes for numbers 0-9 for the 7-segment display
number = (0xc0, 0xf9, 0xa4, 0xb0, 0x99, 0x92, 0x82, 0xf8, 0x80, 0x90)
Initialise un minuteur qui déclenche la fonction
timertoutes les secondes. Cela configure l’incrément récurrent du compteur.def setup(): """ Setup initial state and start the timer. """ global timer1 timer1 = threading.Timer(1.0, timer) # Initialize and start the timer timer1.start()
Après que le minuteur atteint 1,0 seconde, la fonction Timer est appelée ; ajouter 1 au compteur, et le minuteur est utilisé à nouveau pour s’exécuter toutes les secondes.
def timer():
    """ Timer function to increment the counter every second. """
    global counter, timer1
    timer1 = threading.Timer(1.0, timer)  # Reset timer for next increment
    timer1.start()
    counter += 1  # Increment counter
    print("%d" % counter)  # Print current counter value
Déplace un octet de données dans le registre à décalage 74HC595, contrôlant les segments de l’affichage.
def hc595_shift(data):
    """ Shift a byte of data to the 74HC595 shift register. """
    for i in range(8):
        SDI.value = 0x80 & (data << i)  # Set SDI high/low based on data bit
        SRCLK.on()  # Pulse the Shift Register Clock
        SRCLK.off()
    RCLK.on()  # Latch data on the output by pulsing Register Clock
    RCLK.off()
Met continuellement à jour l’affichage avec la valeur actuelle du compteur, en affichant chaque chiffre séquentiellement.
def loop():
    """ Main loop to update the 7-segment display with counter value. """
    global counter
    while True:
        for i in range(4):  # Loop through each digit
            clearDisplay()  # Clear display before setting new digit
            pickDigit(i)    # Select digit for display
            digit = (counter // (10 ** i)) % 10
            hc595_shift(number[digit])  # Shift digit value to 74HC595
            time.sleep(0.001)  # Short delay for display stability
Efface l’afficheur 7 segments en éteignant tous les segments avant d’afficher le chiffre suivant.
def clearDisplay():
    """ Clear the 7-segment display. """
    for _ in range(8):
        SDI.on()
        SRCLK.on()
        SRCLK.off()
    RCLK.on()
    RCLK.off()
Sélectionne quel chiffre de l’afficheur 7 segments activer. Chaque chiffre est contrôlé par une broche GPIO séparée.
def pickDigit(digit):
    """ Select a digit for display on the 7-segment display. """
    for pin in placePin:
        pin.off()  # Turn off all digit selection pins
    placePin[digit].on()  # Turn on the selected digit
Libère correctement les ressources GPIO et arrête le minuteur lorsque le programme est interrompu.
except KeyboardInterrupt:
    # Handle script interruption (e.g., Ctrl+C)
    destroy()  # Cleanup resources on exit